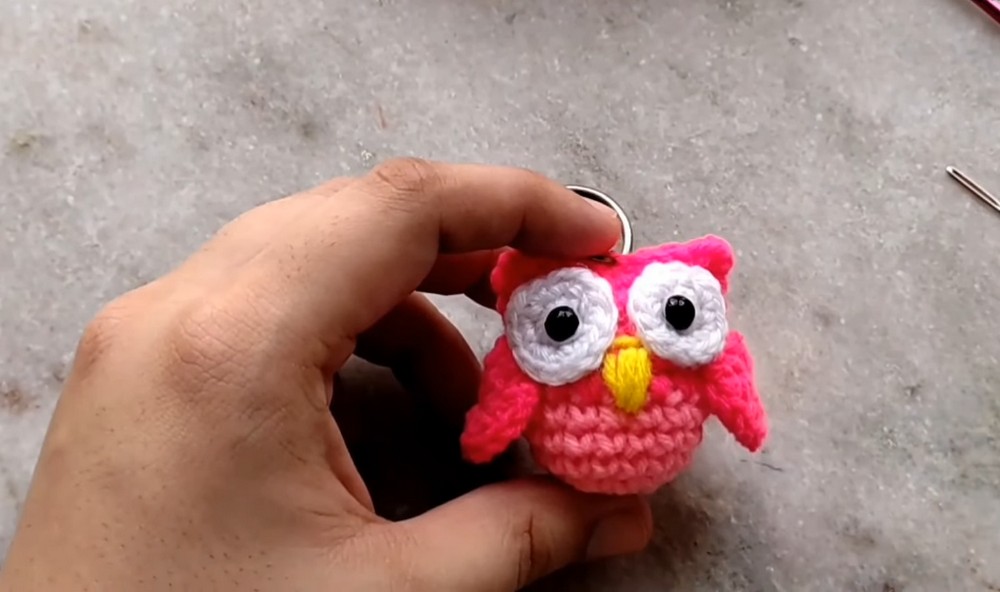
Spark fun into your day with this Free Crochet Mini Owl Amigurumi Pattern that’s perfect for playful gifts, desk buddies, or animated keepsakes anyone will adore.
Perched on a windowsill of a quiet country cottage, a tiny handmade owl once brought joy to every passerby. Its round eyes, soft feathers, and pocket-sized charm caught the attention of neighbors and visitors alike, proof that even the smallest makes can leave a lasting impression. A similar charm can now be brought to life through this Free Crochet Mini Owl Amigurumi Pattern, which helps you shape a delightful companion with just a few basic materials and a bit of focused time.
Pocket-Sized Crochet Mini Owl Amigurumi Pattern for Instant Joy


These mini owls serve not only as adorable decorative accents but also make thoughtful gifts, playful keychains, or even desk buddies to keep you smiling through busy days. Their lightweight size and appealing form make them ideal for personalizing backpacks, nursery shelves, or festive displays. Whether you want to make a handful of them in different colors or add them to themed sets, these owls adapt easily to your ideas.
The Free Crochet Mini Owl Amigurumi Pattern offers an excellent project for calming evenings, and the result is a soft, palm-sized friend filled with charm and warmth. It’s a perfect fit for handmade markets, heartfelt gifts, or simply adding joy to everyday spaces.
Materials Needed
- Two different colors of yarn (one for the face and wings, the other for the belly)
- A small amount of white yarn for the eyes
- Yellow yarn for embroidering the beak
- Pins, a needle for sewing, and embroidering
- A stitch marker
- A pair of scissors
- A crochet hook (a couple of sizes smaller than recommended for your yarn)
- Black beads (can be painted with black nail polish) for eyes
- Fabric glue
- Pillow fluff for stuffing
- Optional: Keychain findings if you wish to turn your owl into a keychain
Step-by-Step Instructions
1. Create the Body and Belly
- Magic Circle Start: Use the yarn intended for the belly. Create a magic circle and chain one.
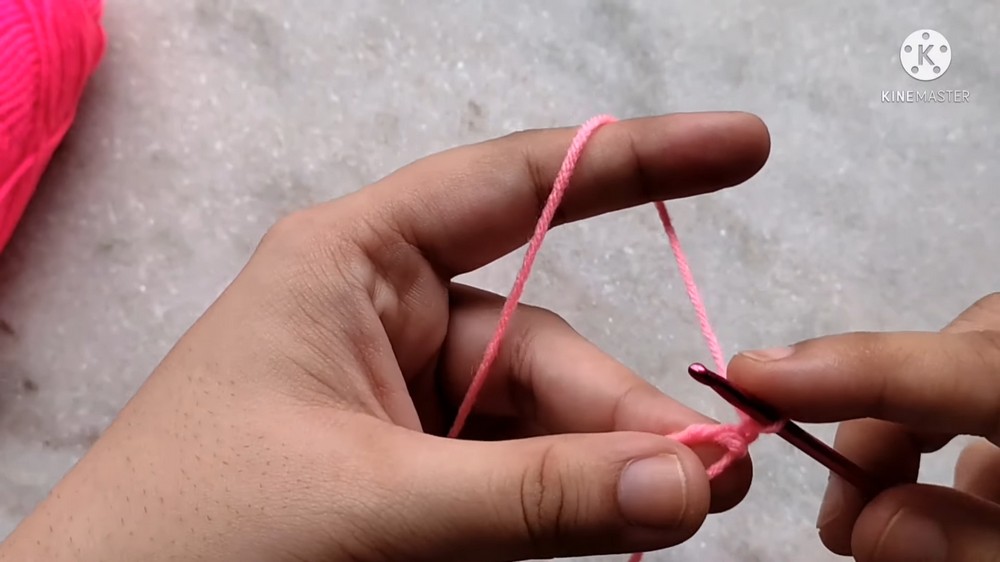
- Round 1: Make six single crochets into the magic circle.
- Round 2: Increase by making two single crochets in each of the six stitches (12 stitches total).
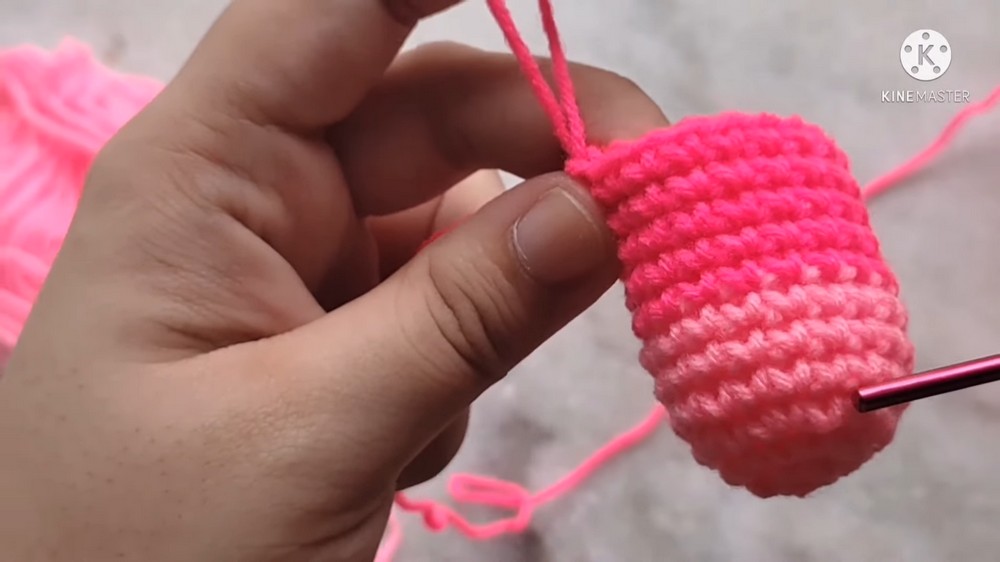
- Round 3: Alternating between one single crochet and two single crochets in the next stitch, ending with 18 stitches.
- Round 4 to 6: Make one single crochet in each stitch with no increases (18 stitches per round).
- Color Change: At the end of Round 6, switch to the second yarn color and continue with single crochet rounds (7 to 11).
2. Stuff and Close the Body
- Stuffing: Stuff the body with pillow fluff.
- Closing: Use slip stitches to close the opening.
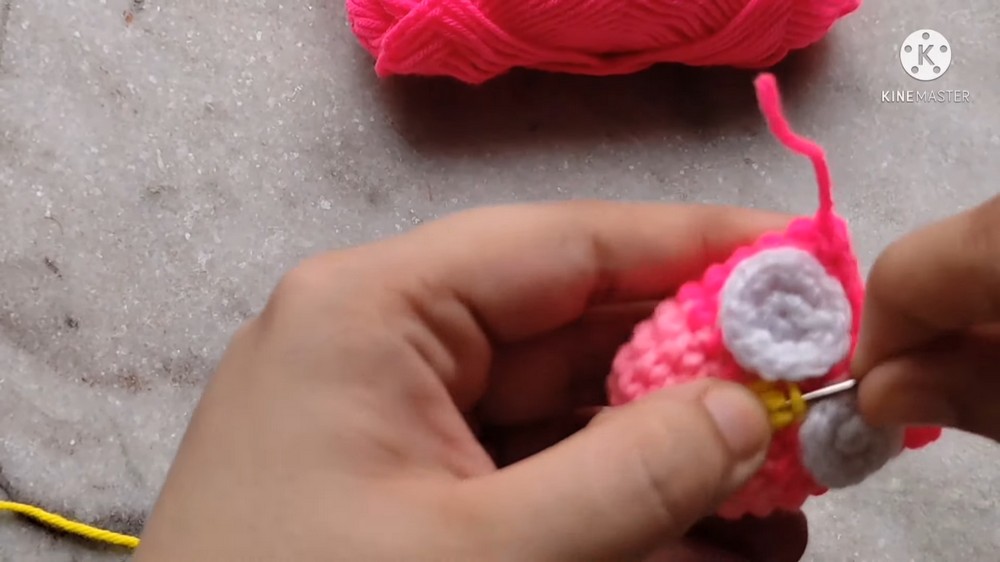
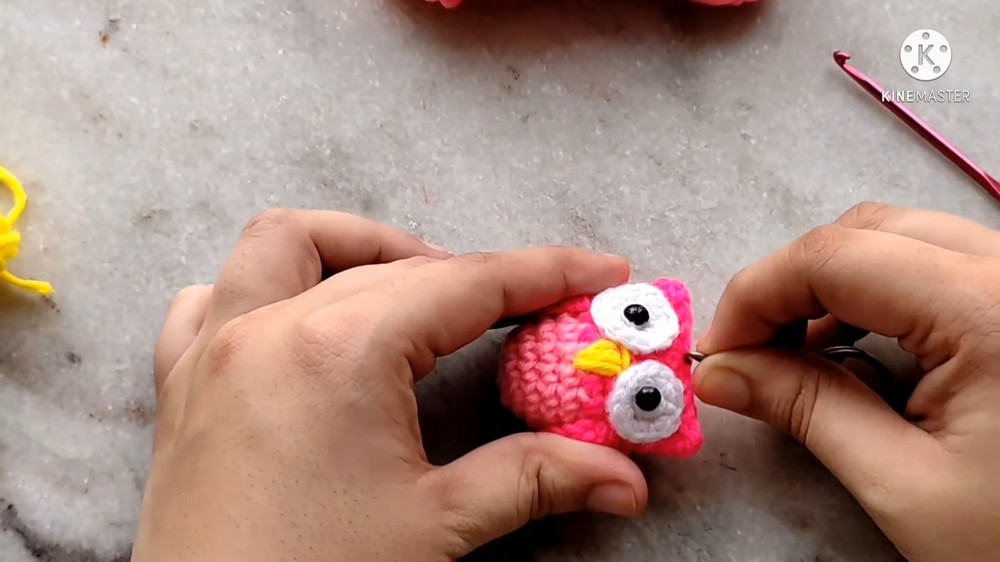
3. Create the Eyes
- White Yarn Magic Circle: Create with white yarn.
- Round 1: Six single crochets in the magic circle.
- Round 2: Join with the starting stitch, then place two single crochets in each stitch (12 stitches).
4. Attach Eyes and Beak
- Sew Eyes: Use black beads for pupils, securing with fabric glue.
- Embroider Beak: Use yellow yarn to embroider the shape of the beak.
5. Make the Wings
- Magic Circle Start: Create with chosen yarn.
- Double Crochets: Six double crochets in the circle, chain one, and turn.
- Single Crochets: Two single crochets in each stitch across.
6. Attach Wings
- Stitch Wings: Sew wings onto either side of the body.
7. Finishing Touches
- Keychain Option: Attach a keychain if desired.
Special Features
- Adorability: The end product is an extremely cute mini owl that can also serve as a keychain.
- Customization: You can experiment with different yarn colors for unique variations.
Difficulty Level
- This project is suitable for beginners who have a basic understanding of crochet techniques.
Tutor’s Suggestions
- For a more seamless color change, work over the yarn tails as you switch colors.
Conclusion
This mini owl amigurumi project is a delightful way to practice crocheting while creating something fun. Whether you’re making these as gifts or to add a whimsical touch to your keyrings, the process is straightforward and enjoyable.
Tip
- Using a crochet hook slightly smaller than recommended creates a tighter stitch, which helps the stuffing stay inside better.