Hook a fun, adorable hat with this free crochet cat hat pattern featuring cat ears, star details, and clear steps for a cozy, stylish accessory or thoughtful gift.
The Cutest Free Crochet Cat Hat Pattern You’ll Ever Need
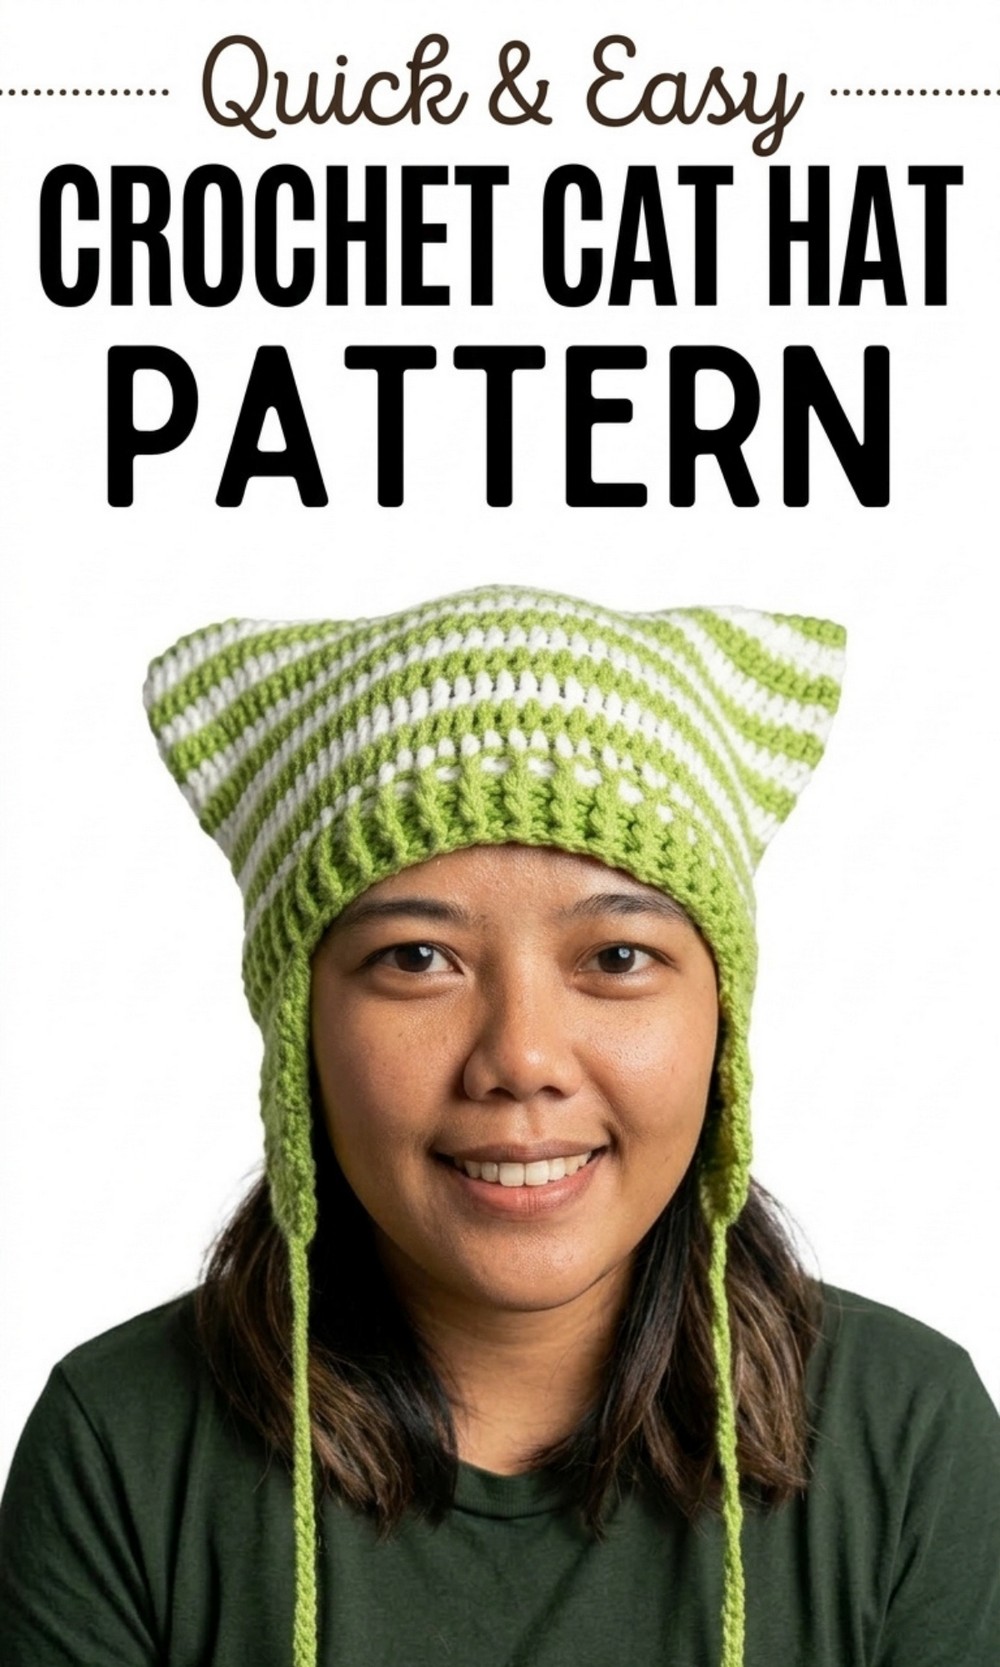
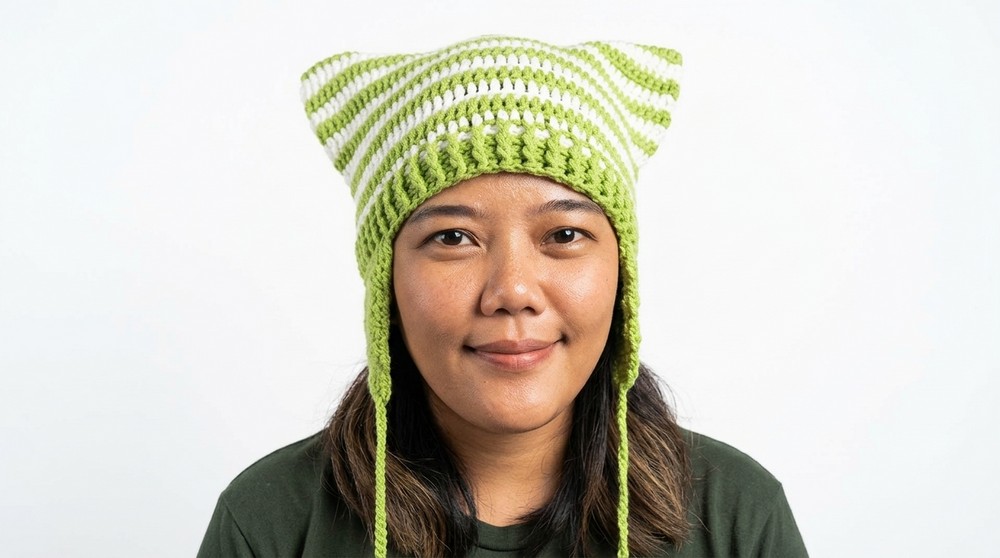
This handmade hat is designed with adorable cat features and is perfect for chilly days to keep you cozy. The hat has a soft and stretchy texture, made with 5 ply milk cotton yarn, which feels gentle on the skin and looks amazing in two colors. The ribbed pattern around the edges adds a nice finishing touch, making it neat and trendy.
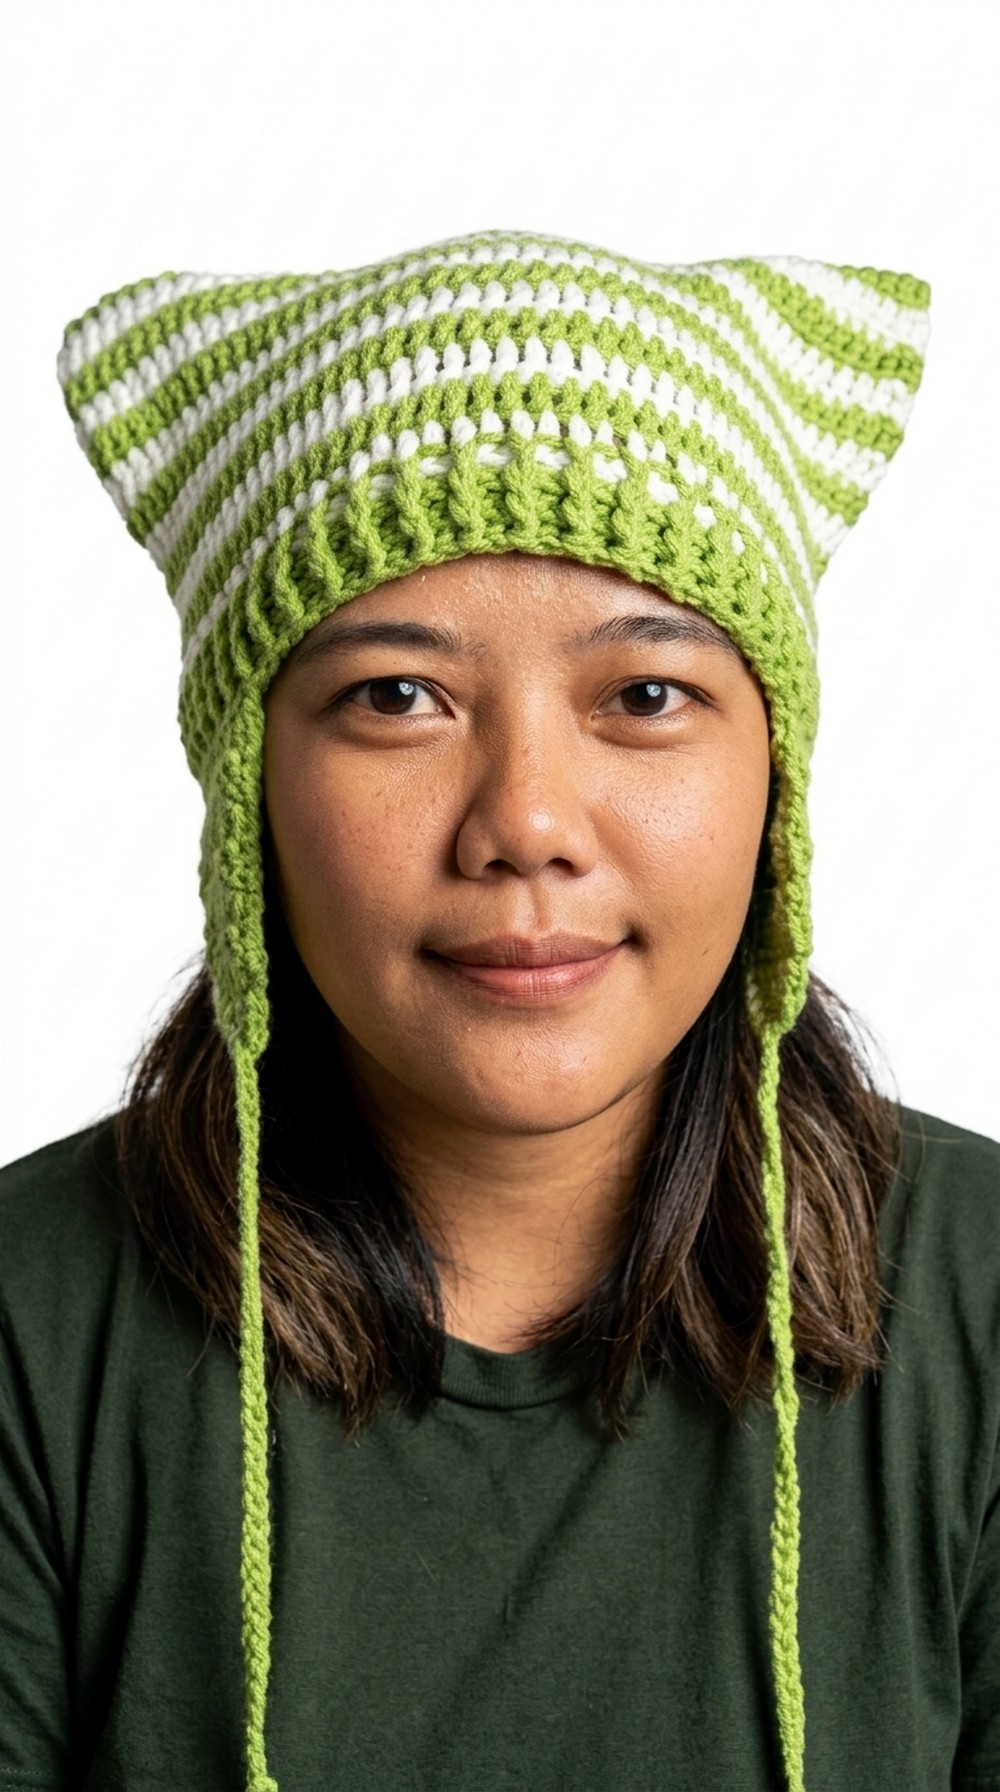
What makes this Free Crochet Cat Hat Pattern unique is its cute ear flaps with star decorations, perfect for adding a playful vibe to your outfit. It’s easy to follow the steps even if you’re new to crochet, starting from making a chain to adding decorative stars. This hat is great for teens and adults who enjoy fun fashion, and it’s an ideal gift made with love.
Cute Crochet Cat Hat Pattern
Materials You’ll Need:
- Yarn: 5 ply milk cotton yarn or any category 4 medium weight yarn in two colors (main color and contrast color)
- Example: Green yarn for the base hat and white yarn for the star.
- Crochet Hook: 3.25 mm crochet hook
- Yarn Needle: For weaving in ends
- Stitch Markers: Essential for keeping track of stitches
- Scissors: For trimming the yarn
Crochet Abbreviations:
- ch – Chain
- sc – Single Crochet
- dc – Double Crochet
- hdc – Half Double Crochet
- sl st – Slip Stitch
- st(s) – Stitch(es)
- rep – Repeat
- RS – Right Side
- WS – Wrong Side
- YO – Yarn Over
Gauge:
- Use a sample of your yarn to ensure a 1″ x 1″ square is about 4 single crochets x 4 rows. Make adjustments to hook size if necessary.
Step 1: Measuring Your Head
- Begin by measuring the circumference of your head using a soft measuring tape. (In the video, the creator’s measurement is 21.5″).
- Divide your measurement by 2.
- Example: 21.5 ÷ 2 = 10.75. Round it slightly to 11 to account for stretch.
- The starting chain will need to correspond to half the circumference.
Step 2: Starting the Hat Base
Foundation Chains
- Create a slip knot.
- Chain the required number of stitches to meet your measurement when slightly stretched.
- Example: For 11 inches, chain 44 stitches.
Round 1: Double Crochet Row
- Once the foundation chain is complete, chain 2 more stitches (this will act as a turning chain and does not count as a stitch).

- Work 1 double crochet (dc) in the 3rd chain from the hook.
- Tip: Use a stitch marker to mark the top of your first double crochet stitch to ensure smooth rounds later.
- Continue placing 1 dc in each chain across the row.
- When you reach the last chain, work 3 double crochets in the last chain. This will help curve the work, creating the bottom round edge of the hat.
- Turn to work on the other side of the foundation chain and continue working 1 dc in each chain.
- At the other end, work 2 dc in the last chain to complete the row.
- Join with a slip stitch to the top of the first double crochet. Ensure that your work forms a neat oval.
Step 3: Rounds 2–12 (Main Body of the Hat)
- Chain 2 (does not count as a stitch).
- Work 1 dc per stitch around, joining with a slip stitch at the end of each round. Mark the last stitch of each round to avoid confusion.
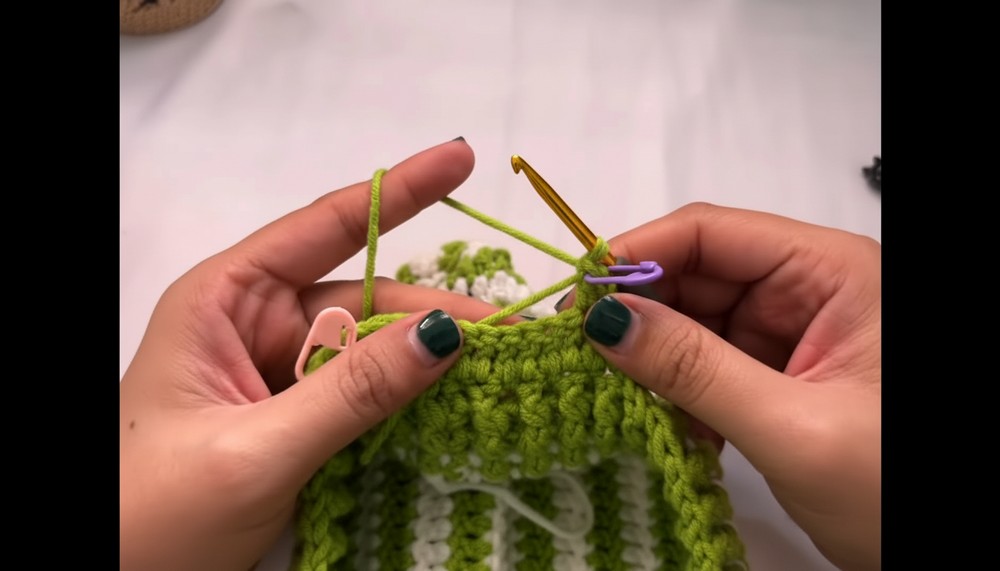
- Alternate colors as desired: If changing colors, drop the working yarn before finishing the last loop of the double crochet, loop in the new yarn, and then finish the stitch.
- Continue this process until you reach row 12 or until the desired length of the hat’s body (the example hat measures 6 inches in length including the ribbing).
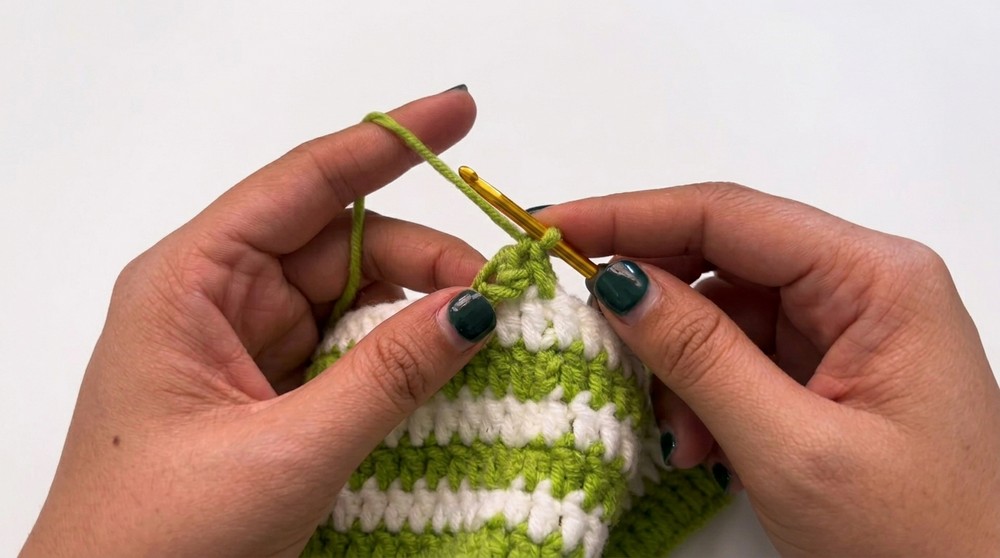
Step 4: Creating the Ribbing
- Use only your last chosen color for the ribbing section.
- Rows 13–15 will alternate front post double crochets (FPdc) and back post double crochets (BPdc) for a ribbed texture.
Ribbing Technique:
- Front Post Double Crochet (FPdc):
- YO, insert your hook from front to back and then to front around the post of the previous dc.
- YO and draw the loop through, then YO and complete as a normal dc.
- Back Post Double Crochet (BPdc):
- YO, insert your hook from back to front and then to back around the post of the previous dc.
- YO and draw the loop through, then YO and complete as a normal dc.
- Repeat this sequence around for each round.
- Once the ribbing is done, finish with a slip stitch and cut the yarn.
Step 5: Adding the Ear Flaps
You’ll create two ear flaps, on opposite sides of the hat.
- Divide the total number of stitches in half and mark the midpoint.
- Place stitch markers for the ear flaps:
- Count 8 stitches on either side of the midpoint for each ear flap (16 stitches total per ear flap).
- For the first ear flap:
- Join your yarn at the first marked stitch and chain 2.
- Work 1 dc in each of the 16 marked stitches, stopping at the other marker.
- Continue working rows for ear flaps, decreasing at the start and end of each row.
- To decrease: Skip the first stitch, then dc across, stopping two stitches short of the row’s end, and use dc2tog for the last two stitches.
- Repeat this for each row until only 2 stitches remain.
- For the last row, chain 30 to create a tie string and fasten off.
- Repeat the same process for the second ear flap on the opposite side.
Step 6: Making the Stars
Use a contrast color yarn to make decorative stars.
- Magic Circle: Wrap yarn around your finger to create a loop. Insert the hook under the loop and pull through a strand to create a circle.
- Chain 1 and work 5 single crochets into the circle.
- Chain 3, and into the next stitch work:
- 1 sc, 1 hdc, 1 dc, 1 hdc, 1 sc (this creates a “point”).
- Slip stitch to the next stitch. Repeat steps to create a total of five points for the star shape.
- Close the star, weave in ends, and attach to the base of each ear flap.

Finishing the Hat
- Weave in all loose ends with a yarn needle to give the hat a polished look.
- Attach the stars securely to the ear flap strings using the long tail from the stars.
- Check the entire piece for any excess yarns sticking out and trim as necessary.
Final Words and Tips:
- Customization: Use different colors or add embellishments like buttons for a personal touch.
- Washing: Gently hand wash the hat using mild soap and let it dry flat to maintain its shape.
- Sizing: Adjust the starting chain to fit larger or smaller head circumferences.
- For beginners, practice the front post and back post techniques separately to get confident.
By following the step by step instructions above, you’ll have a cozy crochet cat hat that’s both functional and stylish.