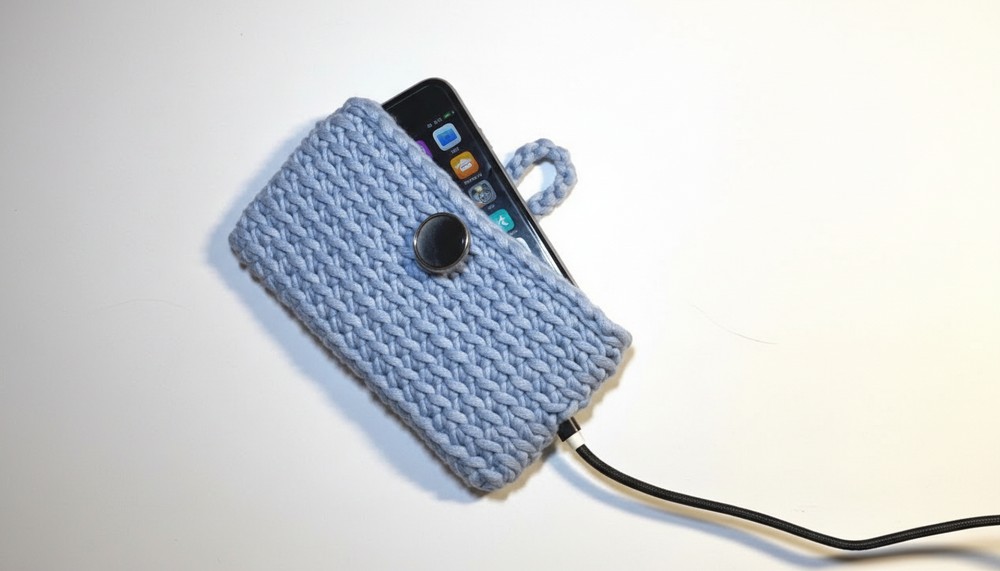
Protect your phone in style with this Free Crochet Smartphone Pouch Pattern, a charming and practical accessory perfect for everyday use.
A handmade puch becomes the perfect blend of practicality and charm when you give your phone a snug, decorative home. The Free Crochet Smart phone Pouch Pattern offers a fun way to protect your device while expressing your personal style. With just a few simple stitches you can turn yarn into a cozy sleeve that shields your smartphone from scrapes, scratches and everyday tumble‑drops.
Chic Crochet Smartphone Pouch Pattern to Match Your Outfit
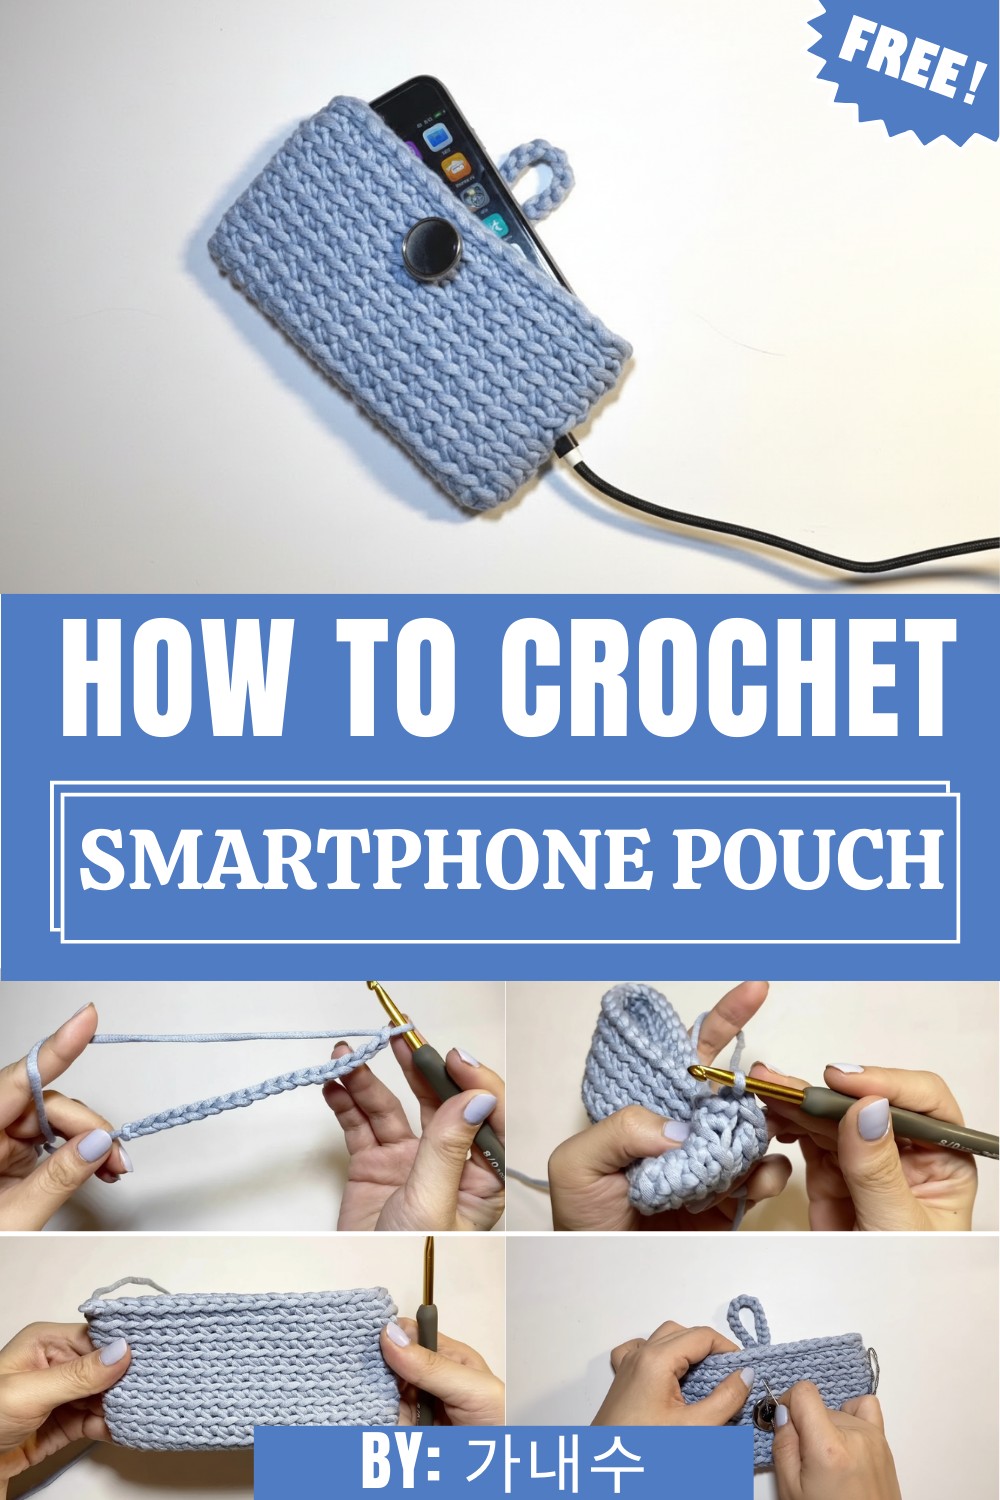
The pattern highlights the benefits of portability, strap it cross‑body, attach it to a bag or slip it into a pocket and the beauty of customized colour, texture and button details makes it an accessory you’ll genuinely love.
Suitable for beginners yet versatile enough for creative knitters, this pouch allows you to play with sizes and embellishments while delivering a functional form.
Whether you’re gifting a phone‑friendly hand‑stitched cozy or treating yourself to a stylish gadget cover, this pattern brings together form and function.
You’ll appreciate the ease of switching out yarn colours to match your outfit or mood, and you’ll value how it keeps your smartphone safe and looking good wherever you carry it.
Crochet Smartphone Pouch Pattern
Materials and Tools
To begin this project, gather the following materials:
-
Yarn: Secure a ball of Bridge yarn (브릿지 의 실).
-
Crochet Hook: Use a size 8 (Korean size) crochet hook.
-
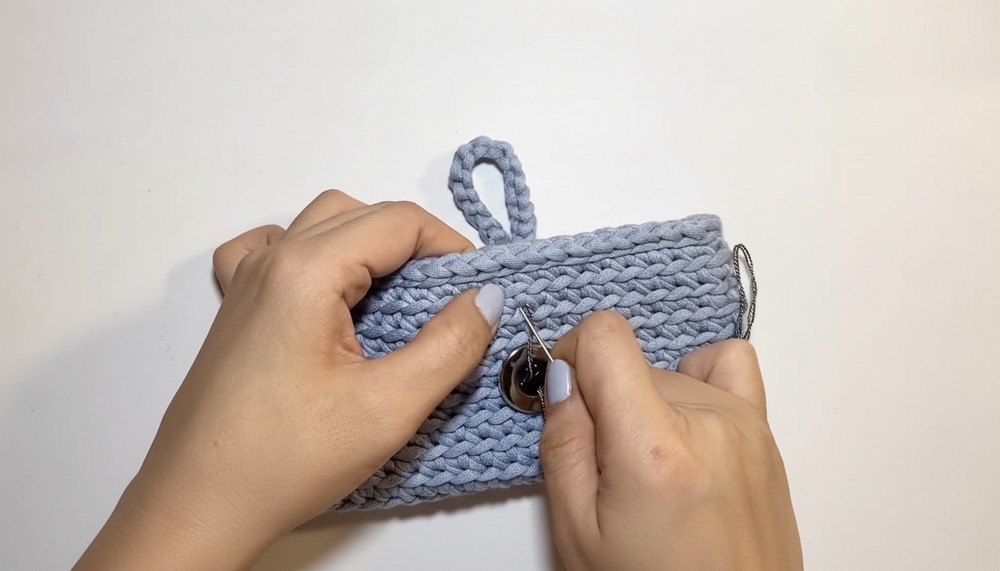
Accessories: Obtain one button for the closure, and a separate needle and thread to attach the button securely.
Special Features
This smartphone pouch design incorporates two special features that enhance both its utility and appearance:
-
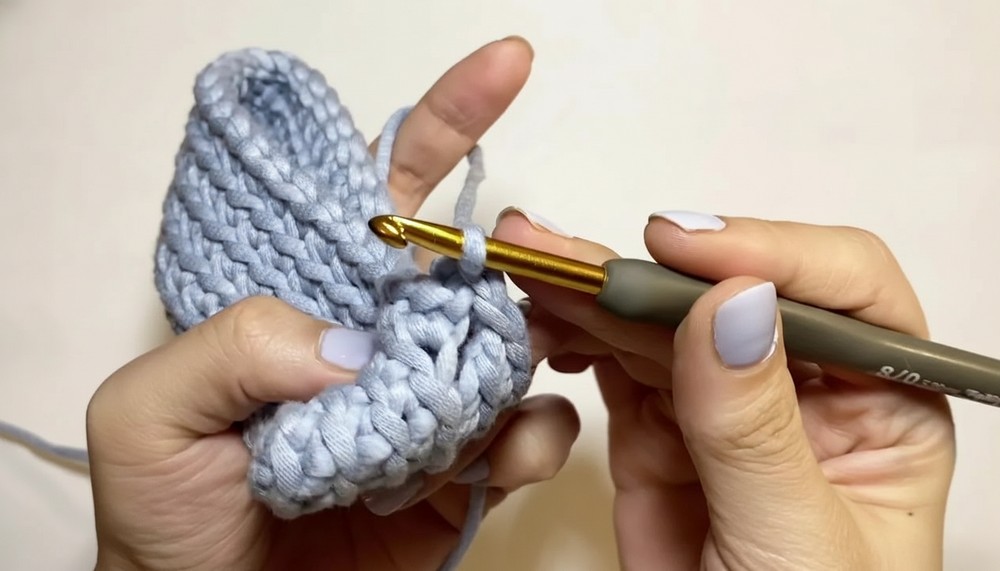
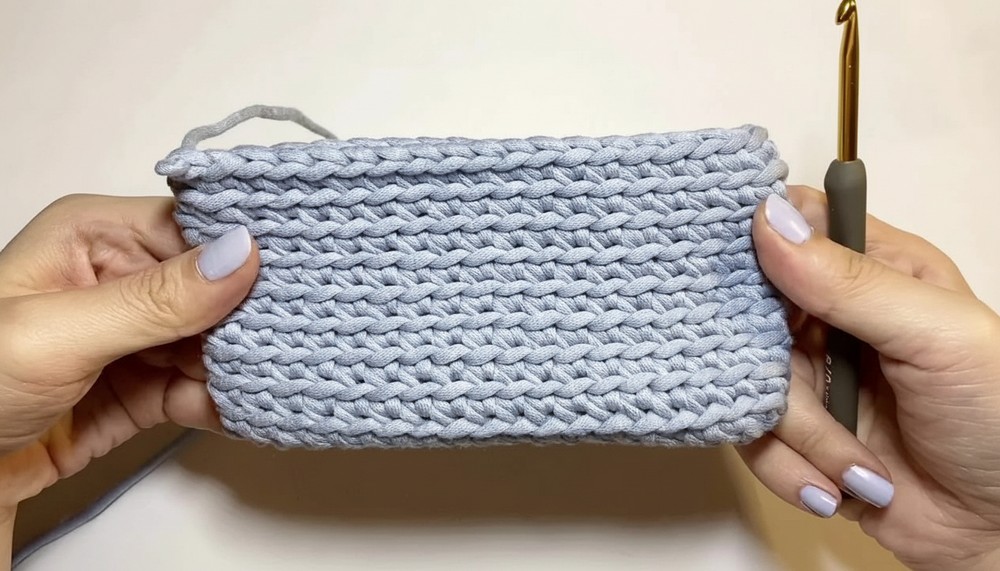
Ribbed Texture: The main body of the pouch utilizes the Back Loop Single Crochet (BLSC) stitch. You insert your hook only into the back loop of the stitch, which pushes the unused front loop forward to create horizontal ridges, resulting in a unique, cozy, ribbed fabric.
-
Closure System: The pouch closes with a decorative button secured by a simple, custom-sized chain loop. The pattern also allows for an optional small chain space near the corner to act as a lanyard or strap hole.
Level of Difficulty
The instructor confirms this project uses a very easy technique, making it perfect for beginners who are just starting out with crochet.
Tutor’s Suggestions
The tutor offers several key pieces of advice to ensure your project is successful and polished:
-
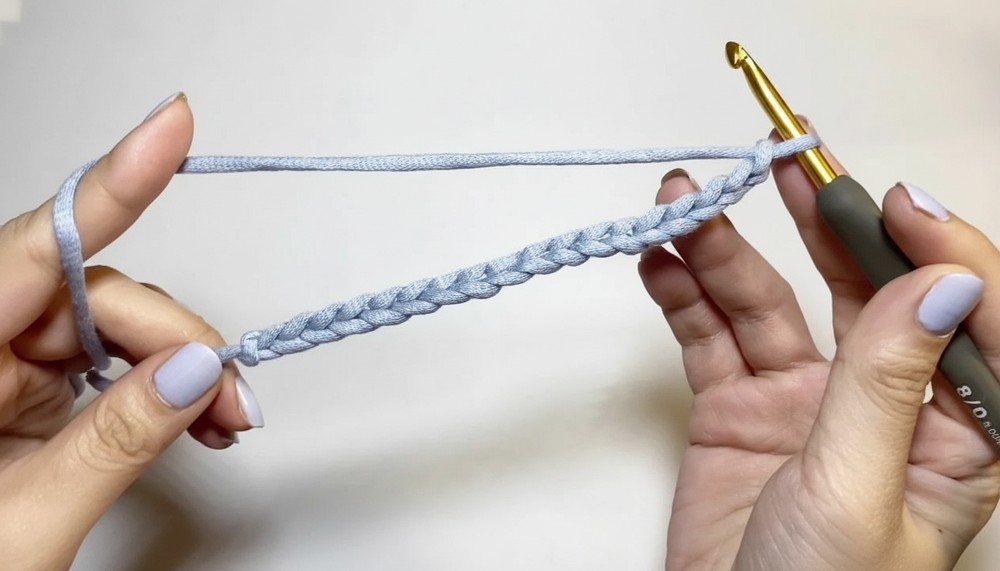
Customize the Size: Start the project by chaining the foundation stitches. Adjust this initial number of chain stitches to match the width of your specific phone, ensuring a proper fit for the pouch.
-
Mark the First Stitch: Place a stitch marker into the first stitch of each round after you complete the base. This helps you keep track of the beginning and end of your spiral rounds, preventing confusion during the final stages of the project.
-
Hide the Tail: As you work the first round of single crochet stitches along the foundation chain, ensure you crochet over the initial yarn tail. This neatly tucks the tail inside the stitches, securing and hiding it without requiring an extra step later.
Uses
This crocheted item is designed primarily as a protective pouch intended to securely hold and carry a smartphone.
Step-by-Step Instructions
You will learn how to create a sleek smartphone pouch using the fundamental techniques of crochet. This pattern features the Back Loop Single Crochet (BLSC) stitch, which is a simple modification that produces a beautiful, durable, and distinctive ribbed texture. We will build the base of the pouch and then work up the sides in a continuous spiral, finishing with a neat slip stitch edge and a chain loop closure.
Conclusion
You have successfully completed a durable and stylish smartphone pouch using the Back Loop Single Crochet technique. This project is not only easy to master but results in a beautiful, textured accessory you can use daily.
Tip
When you work the final slip stitch edging round, do not work into the back loop only. For the best result, always insert your hook under both loops of the stitch. Working under both loops ensures the top edge of the pouch is sturdy, holds its shape well, and provides a much cleaner, finished look.