Make your own stylish tote with this free crochet Spring Bag Pattern, perfect for sunny days, casual outings, and quick fun.
This spring bag has a way of making any outfit feel brighter and more cheerful. Its soft texture and airy crochet design give it a light, effortless charm that’s perfect for sunny days. You can easily toss in your phone, wallet, keys, or a few little essentials, and the bag keeps everything secure without feeling heavy or bulky.
Charming Crochet Spring Bag Pattern for Light Carrying
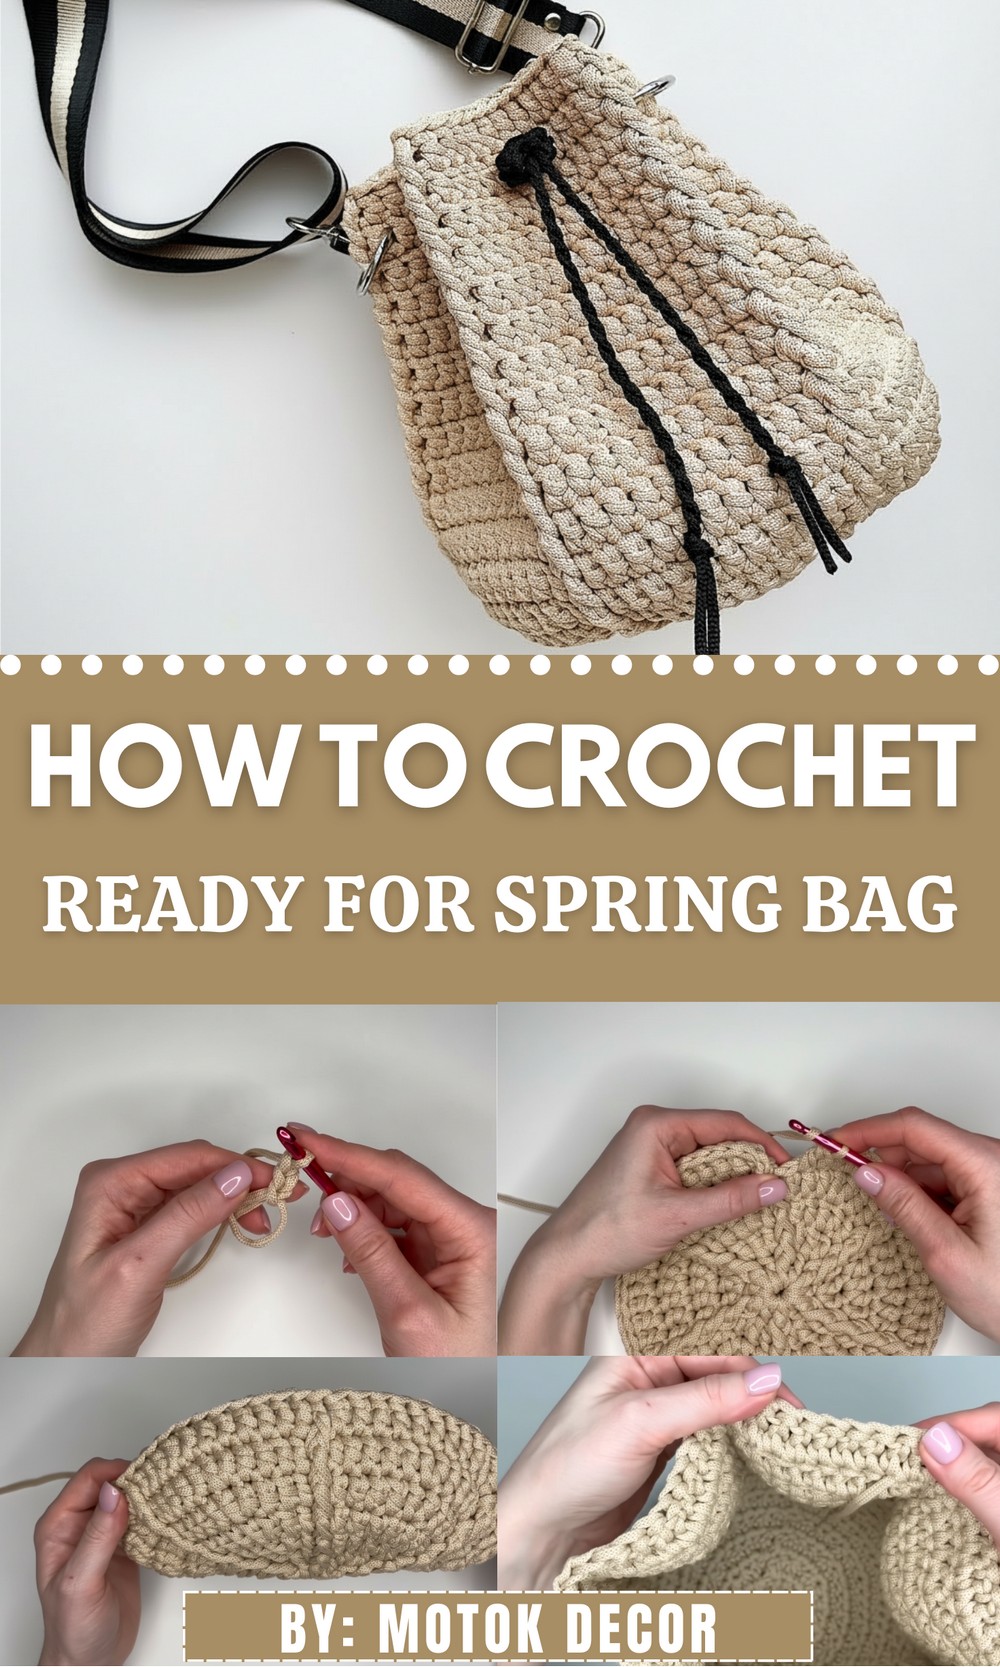
What really stands out is the craftsmanship. The clever use of stitches, like single and double crochet combined with openwork patterns—creates a strong yet flexible structure that holds its shape beautifully.
Crochet Sack Bag with Embossed Columns Pattern
Materials Needed
- Yarn: Polyester cord, 5mm without a core (Cocoa color or any preferred shade) – approximately 180 meters.
- Hook: 6mm crochet hook.
- Accessories:
- 2 detachable rings (35mm diameter)
- Adjustable strap or bag handles
- 2 meters of contrasting-color polyester cord for the drawstring.
- Tools:
- Tapestry needle with a large eye
- Scissors
- Stitch markers (optional, but highly recommended)
Finished Size
- Diameter of the Base: ~22 cm
- Bag Height: ~22 cm
Skill Level
Intermediate – involves working in the round, using post stitches, increasing in circular crochet, and creating a twisted cord for the drawstring.
Key Abbreviations (US Terminology)
- CH: Chain
- SC: Single Crochet
- DC: Double Crochet
- INC: Increase (2 DC in the same stitch)
- FPDC: Front Post Double Crochet (relief double crochet stitch)
- SS: Slip Stitch
- YO: Yarn Over
Special Notes
- Relief Columns (FPDC): This post stitch worked in front of the fabric gives the sack bag its texture.
- Seamless Row Connections: Each row ends by pulling a loop to the wrong side, seamlessly transitioning to the next row to create a neat finish.
- Customized Size: To make a larger bag, continue increasing the base following the incremental pattern before starting the walls.
Pattern Instructions
Step 1: Foundation – Bottom of the Bag
Row 1 – Magic Ring:
- Create a magic ring:
- Wrap the cord around your fingers, with the short tail over your working yarn. Use the hook to pull up a loop under the first wrap of cord, YO, and pull through to secure.
- Work 12 DC into the magic ring, hiding the tail as you go.
- CH 3 at the start of the row counts as the first DC.
- Pull the tail to tighten the ring.
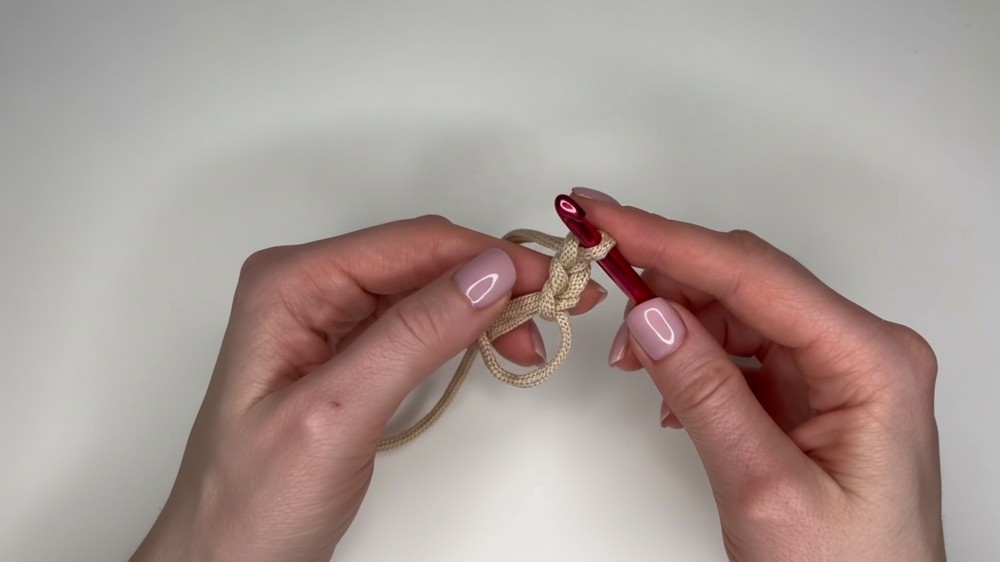
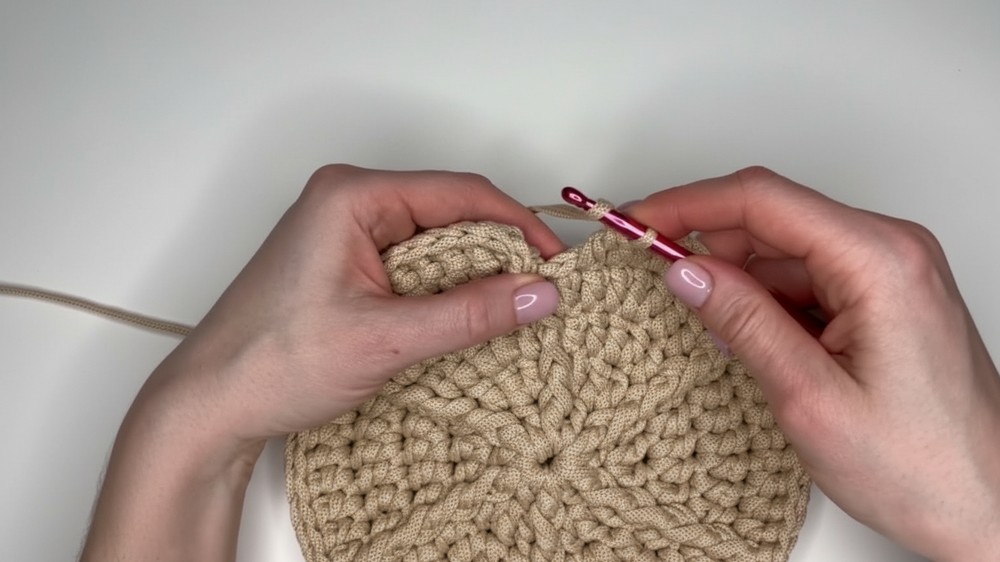
- Connect the row: Insert the hook under both loops of the first DC, pull the working loop through to the wrong side, and tighten to secure.
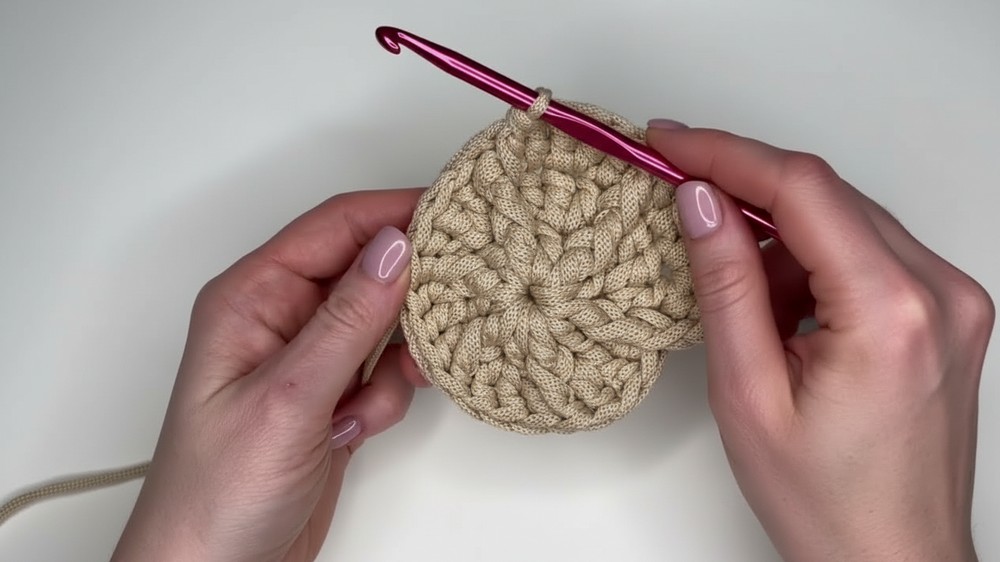
Row 2 – Increasing to 24 Stitches:
- CH 3 (counts as the first DC). Work 1 FPDC (Front Post Double Crochet) around the first DC of Row 1.
- Work 2 DC in each stitch around until you’ve made 24 stitches total.
- Seamless Connection: Pull the end loop to the wrong side using the method described above.
Row 3 – Increasing to 36 Stitches:
- Start with FPDC around the first FPDC of the previous row.
- Continue the pattern: 1 DC in the next stitch, 2 DC in the next stitch (INC).
- Repeat FPDC → 1 DC → INC around the row. Total: 36 stitches.
- Seamless Connection as before.
Row 4 – Increasing to 48 Stitches:
- FPDC around the first FPDC.
- Repeat the pattern: 1 DC, 1 DC, INC (2 DC in one stitch).
- Continue around the row. Total: 48 stitches.
Row 5 – Increasing to 60 Stitches:
- FPDC around the first FPDC.
- Repeat the pattern: 1 DC, 1 DC, 1 DC, INC around the row.
- Total: 60 stitches.
Row 6 – Increasing to 72 Stitches:
- FPDC around the first FPDC.
- Repeat the pattern: 1 DC, 1 DC, 1 DC, 1 DC, INC around the row.
- Total: 72 stitches.
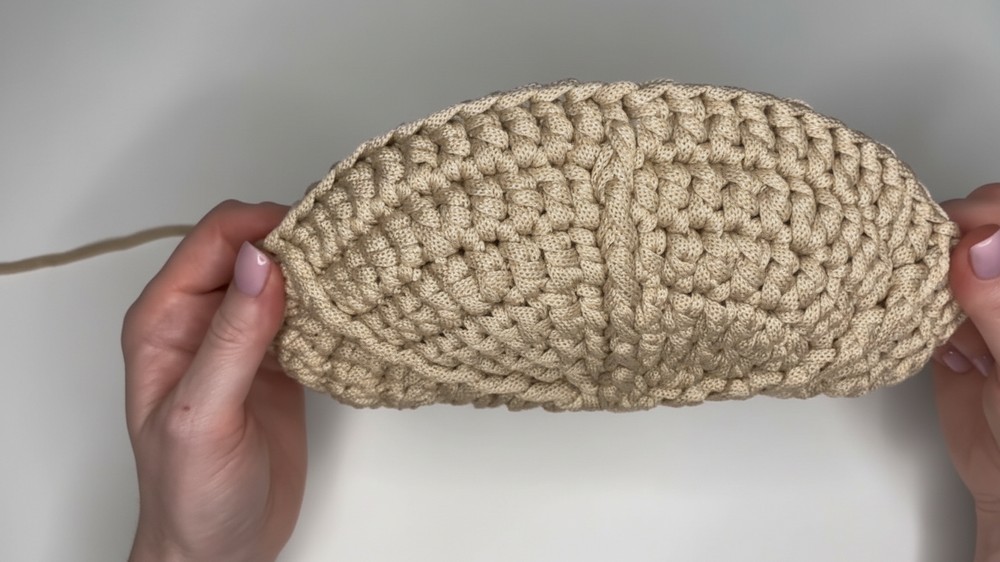
Step 2: Building the Bag Walls
Now that the base is complete, begin creating the height of the bag by working 12 rounds of 72 stitches without increasing.
Wall Instructions:
- Each row starts with FPDC around the first FPDC of the previous row.
- Continue working DC in all other stitches for the rest of the round.
- Use the seamless connection technique after every row to maintain a clean, uninterrupted design.
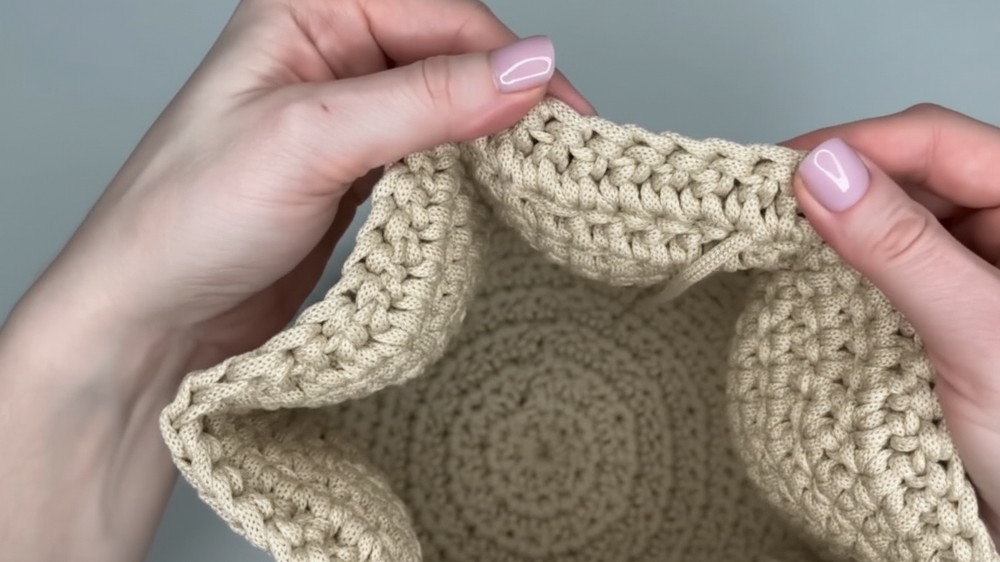
Step 3: Finishing the Bag’s Top
- To finish, work one last round of SC stitches in each stitch around. This provides a stable edge for the drawstring.
- Cut the cord, pull through, and weave the end through the SC stitches using the tapestry needle.
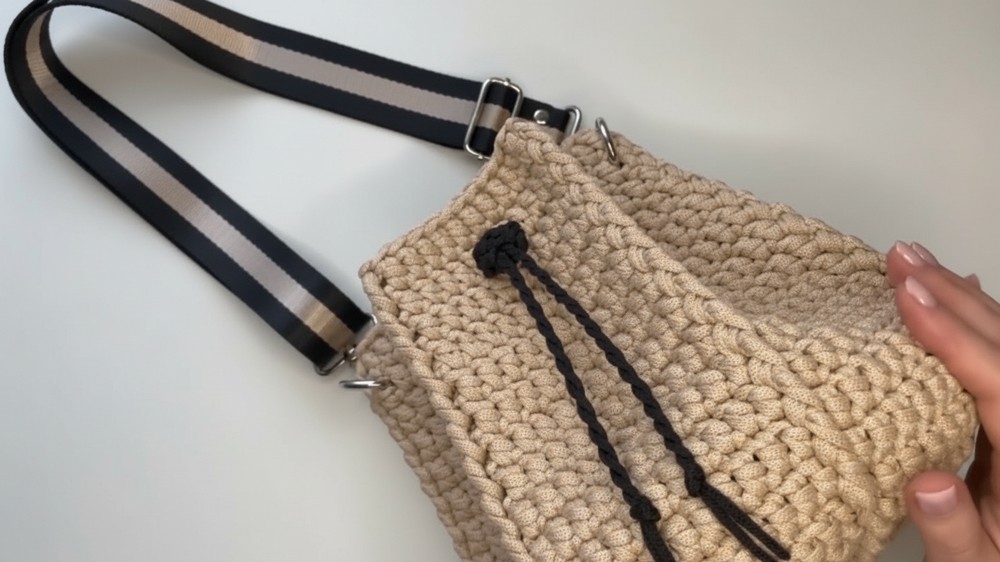
Step 4: Adding the Drawstring
Making the Twisted Cord:
- Cut two cords, each 80–90 cm long, in a contrasting color.
- Tie the ends of the two cords together in a knot.
- Hold the knot steady and twist the cords tightly in one direction. Once twisted, fold the cords in half and allow them to twist back on themselves naturally. Fix the ends with another knot.
Inserting the Cord:
- Insert the twisted cord into the second row from the top.
- Use your hook to weave it in and out, skipping 2 DC stitches at a time. Adjust the length and ensure both ends of the cord come out at the marked central bag front.
Making the Drawstring Runner:
- CH 8 and work a SC in the third chain from the hook and in each remaining CH stitch.
- Roll the short fabric into a small tube and stitch the ends together to form a loop.
- Slide the loop onto the drawstring, ensuring tightening and loosening is easy.
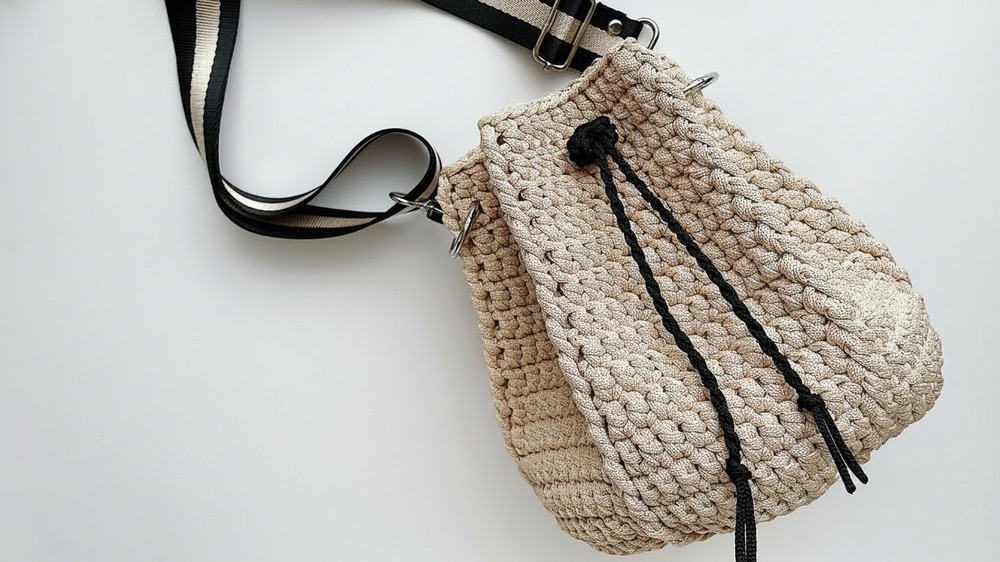
Step 5: Attaching Detachable Rings and Straps
- Find the sides of the bag where the embossed vertical columns align. Attach one detachable ring at either side, hooking it under an FPDC and the nearest DC.
- Add adjustable straps or a handle to the rings.
Finishing the Pattern
- Steam the bag lightly (if using polyester cord) to relax the material and even out its shape.
- Inspect and strengthen handle and ring attachments if necessary.
Final Words and Tips
Congratulations on completing your sack bag with embossed columns! Its textured design and functionality make it not only stylish but also practical for everyday use.
Tips for Maintenance:
- Spot clean with mild soap and water.
- Avoid prolonged exposure to heavy weights to maintain shape.
- Adjust the drawstring length over time as needed.
Customization Ideas:
- Use leather straps for a sophisticated look.
- Change the cord colors for striking contrast or a monochromatic style.
- Add tassels or beads to the ends of the drawstring for embellishment.