Unlock the beauty of a crochet motif pattern that brings charm and timeless elegance to your projects while being simple, fun, and perfect for everyone.
Nothing adds charm to your creations like the intricate and eye-catching beauty of a crochet motif pattern, which is a small, detailed design often used to decorate or piece together larger projects. A crochet motif pattern is not just versatile but also perfect for adding elegance to home decor, clothing, bags, or even table runners.

-Step-by-Step-Guide-9.jpg)
Each motif can take on various shapes like flowers, stars, squares, or circles, offering endless possibilities for creativity.
FREE Crochet Motif Pattern That Inspire Creativity
What makes it unique is its ability to stand out as an individual piece or combine beautifully to form stunning blankets, shawls, or decorative accents. The detailed texture and delicate appearance make it look professional and sophisticated, even with simple designs.
You can experiment with endless color combinations to create a unique pattern that truly reflects your personal style. Whether you’re a beginner or an expert, a motif pattern makes every creation stylish, timeless, and full of life.
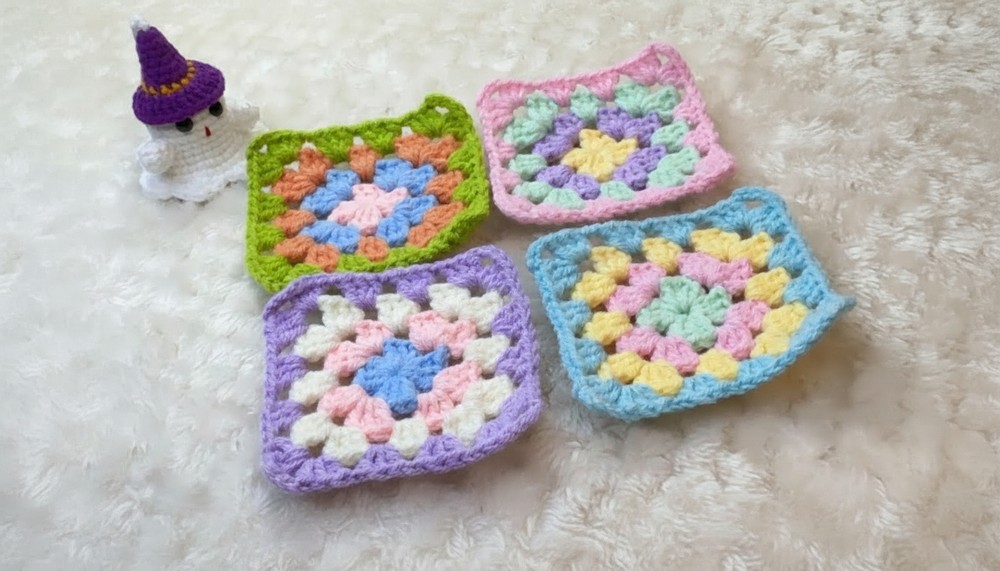
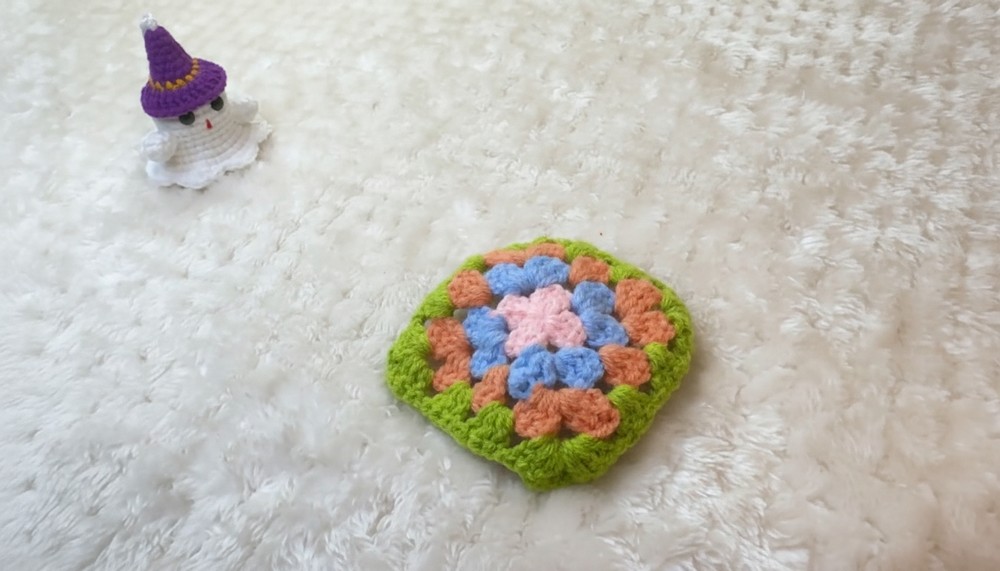
Crochet Granny Square Pattern
Materials Needed
- Yarn: Use any type of yarn, such as cotton or acrylic, in any color of your choice. For the size demonstrated in the video, worsted weight (medium #4) yarn works well.
- Hook: The hook size recommended for your chosen yarn (typically 5mm or H/8 hook for worsted weight yarn).
- Scissors: To trim the yarn at the end.
- Yarn Needle: For weaving in the ends.
Pattern Instructions
Abbreviations (US Terms):
- ch: Chain
- ss: Slip Stitch
- dc: Double Crochet
- sp: Space
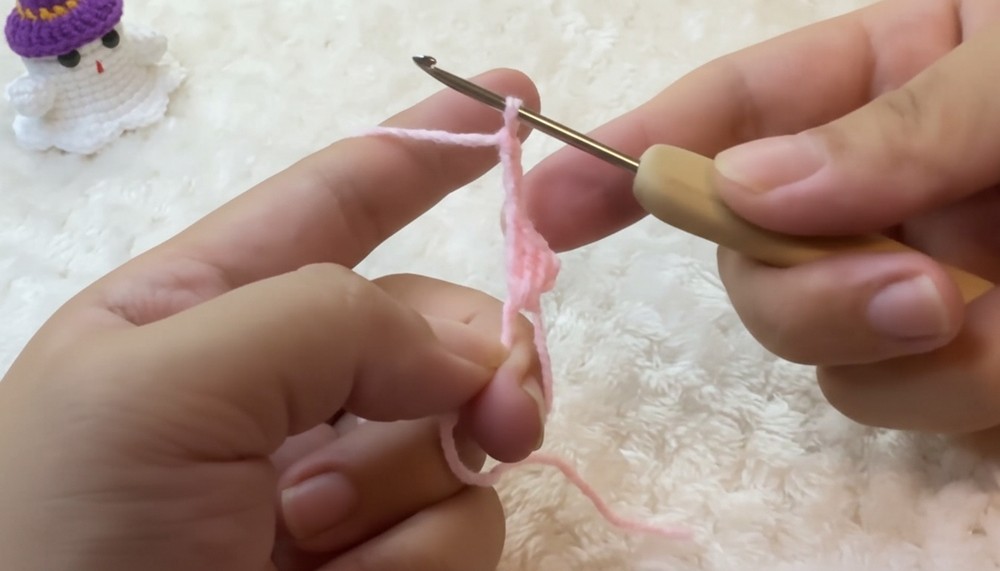
Step 1: Round 1 (The Center of the Square)
- Start with a magic ring: This forms the center of the square. Create a loop with your yarn, insert the hook, yarn over, and pull through.
- Work 3 chains (counts as the first dc): This chain will serve as the first double crochet.
- Work 2 dc into the magic ring. This forms the first corner of the square.
- Chain 3: This creates the corner space.
- Work 3 dc into the magic ring: This forms the second group.
- Chain 3 and repeat the previous two steps twice more to create a total of 4 groups of 3 dc clusters.
- Pull the magic ring to tighten the center.
- Join the round with a slip stitch into the top of the 3 chain stitches from the beginning.
- Chain 1 to secure.

- Round 1 complete.
Step 2: Round 2
- Insert your hook into any corner space (the chain-3 space from the previous round).
- Change yarn color if desired.
- Start with 3 chains (counts as the first dc).
- Work 2 dc into the same corner space.
- Chain 3, then work 3 dc into the same corner space. You’ve now completed the first corner.
- Chain 1 to move to the next corner.
- Repeat the pattern: 3 dc, chain 3, 3 dc in the next corner, and chain 1 to move to the next corner space.
- Continue until all 4 corners are complete.
- Join the round with a slip stitch to the top of the 3-chain stitch from the beginning.
- Chain 1 to secure.
- Round 2 complete.
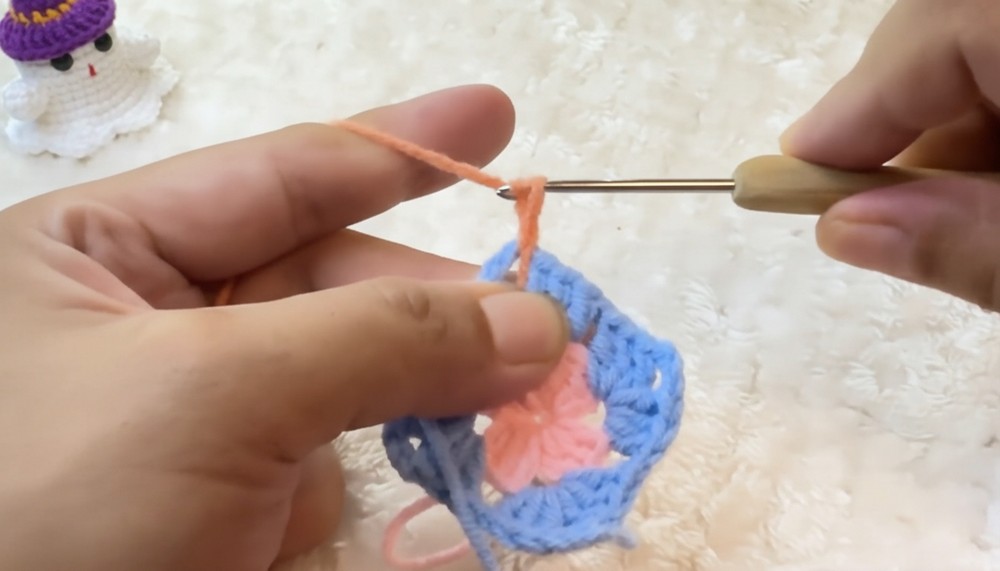
Step 3: Round 3
- Insert the hook into any corner space.
- Work 3 chains, then 2 dc into the same corner space.
- Chain 4, then work 3 dc into the same corner space. This creates the first corner.
- Chain 1, then work 3 dc into the next chain-1 space (the space between corners from the previous round).
- Chain 1 and repeat the pattern: Work 3 dc, chain 4, 3 dc in each corner, and 3 dc in each space between corners.
- Join the round with a slip stitch at the top of the first stitch.
- Chain 1 to secure.
- Round 3 complete.
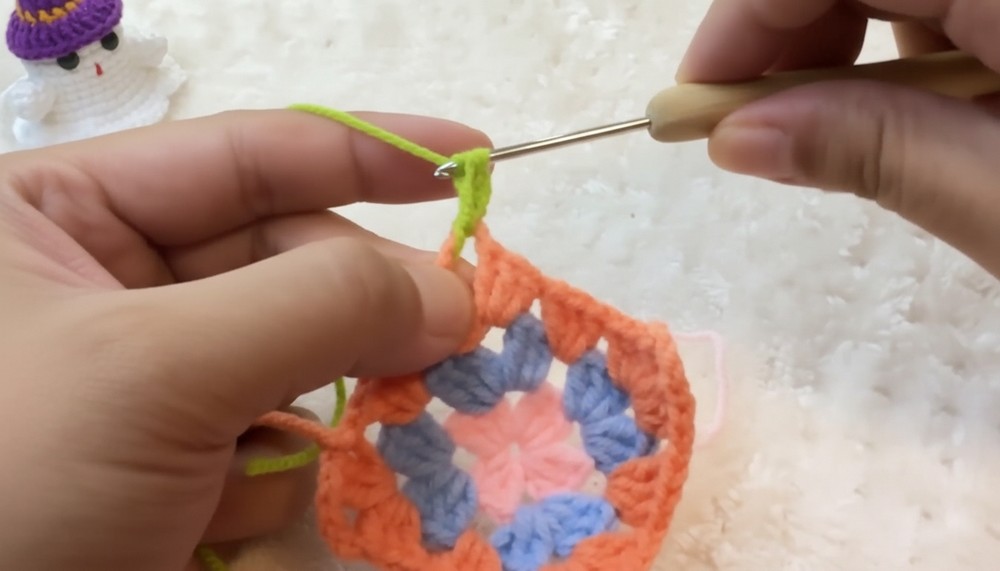
Step 4: Round 4
- Insert the hook into any corner space.
- Work 3 chains, then 2 dc into the same corner space.
- Chain 4, then work 3 dc into the same corner space. The first corner is now complete.
- Chain 1, then work 3 dc into each chain-1 space on each side of the square. This includes the spaces between corners.
- Keep repeating the pattern: Work 3 dc, chain 4, 3 dc in the corners, and 3 dc in each side space.
- Join the round with a slip stitch at the top of the first stitch.
- Cut the yarn and pull it through to secure.
- Round 4 complete.
Finishing the Piece
- Flatten the square piece: Use your hands to ensure it lays flat.
- Weave in the ends: Use a yarn needle to secure and hide all loose yarn tails.
- Trim excess yarn: Carefully cut off any leftover ends.
Tips for Success
- Tension Matters: Maintain consistent tension as you crochet to ensure an even square shape.
- Practice the Magic Ring: If you’re new to the magic ring, practice until you achieve a neat and tight center.
- Use Markers: Mark the beginning of each corner for easy stitch placement, especially as your square grows larger.
- Blocking: For a polished finish, gently block the square to ensure perfectly straight edges.
Customization Ideas
- Color Variations:
- Use different colors for each round to create a vibrant and eye-catching square.
- Create an ombré effect by choosing shades of the same color family.
- Alternate between contrasting colors for a bold look.
- Size Adjustments:
- To make the square larger, continue adding additional rounds following the same pattern logic (3 dc clusters on sides and corners with chain spaces).
- For a smaller square, stop after two or three rounds.
- Use for Projects:
- Combine multiple squares to make blankets, table runners, or pillow covers.
- Use a single square as a coaster, small trivet, or decorative piece.
Final Look
Your crochet square piece will look intricate yet modern, with neat corner spaces and delicate stitches forming a symmetrical design. This pattern can be used alone or in projects that require multiple connected squares, making it both versatile and beautiful.
Conclusion
This simple yet elegant crochet square pattern is perfect for crafters of all levels, from beginners to advanced. Whether you use it as a standalone piece or as part of a larger creation, the possibilities are endless. Experiment with colors, sizes, and textures to make the design uniquely yours.