Spark your creativity and make a sweet bag with this Crochet Turtle Pouch Pattern to build a soft pouch that is perfect for carrying coins and small treasures.
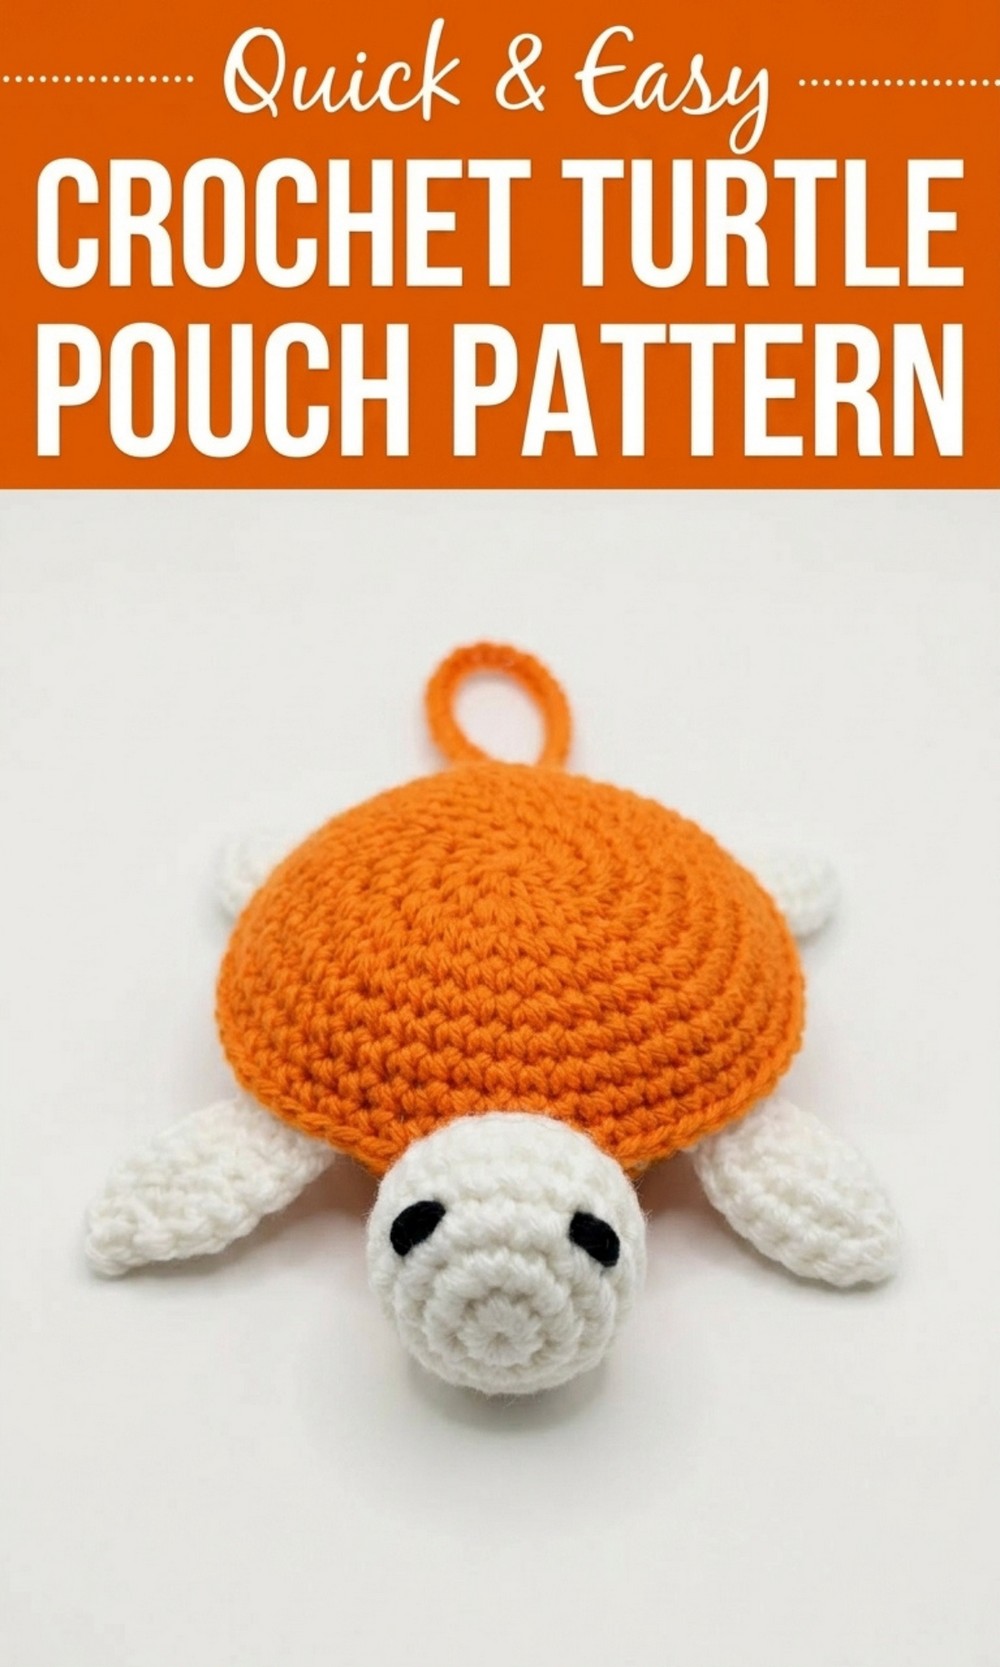
Charming Crochet Turtle Pouch Pattern That’s Oh So Adorable
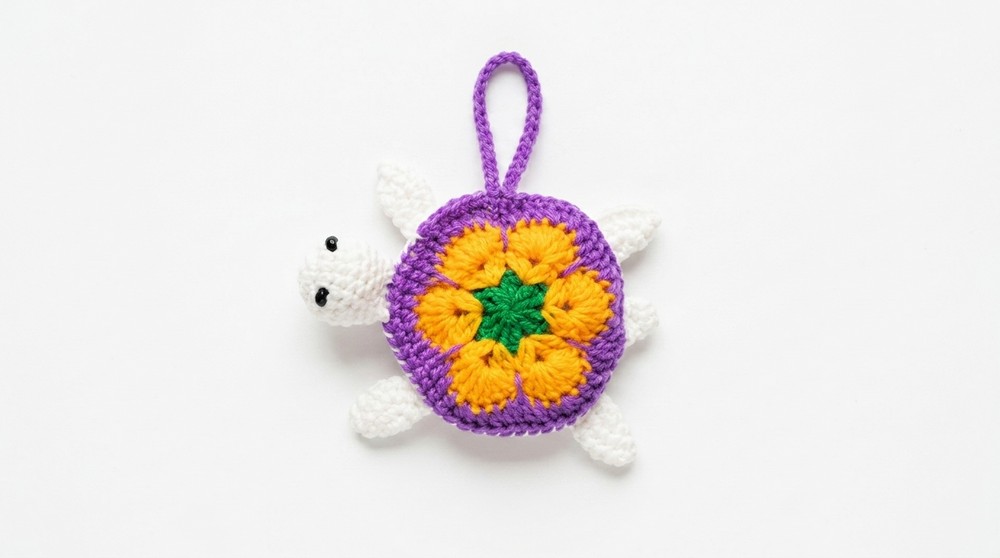
Keep your tiny treasures safe with this Charming Free Crochet Turtle Pouch Pattern, your adorable new ocean friend. This sweet little turtle is soft, friendly, and fits perfectly in your hand or pocket. Its beauty shines through its round shell, cozy yarn, and clever hidden pocket under the shell. There’s even a small loop so you can hang it on your school bag as the cutest decoration.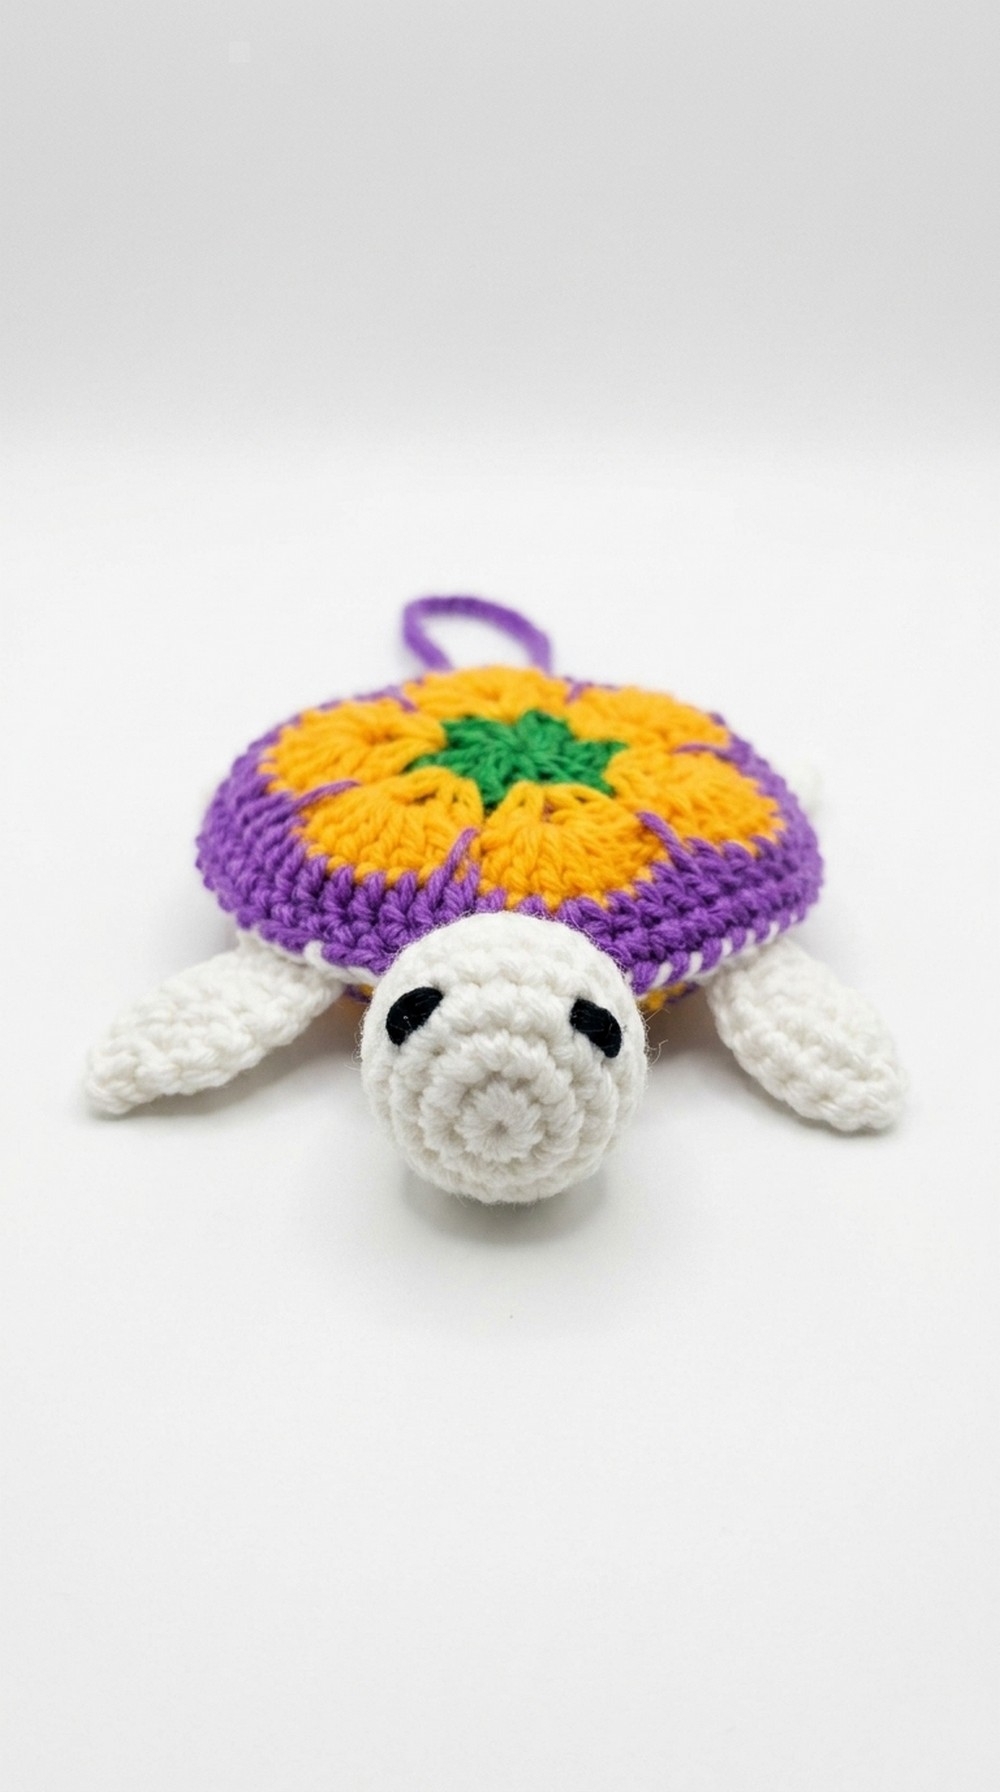 With tiny flippers and a cheerful head peeking out, this turtle pouch is as unique as it is fun. It’s perfect for holding spare coins, little trinkets, or even as a special handmade gift for your best friend.
Crochet Turtle Pouch Pattern
Finished Size
The completed turtle pouch is approximately 9 cm in diameter for the shell and 15 cm from head to tail after assembly.
Materials Required
- Yarn:
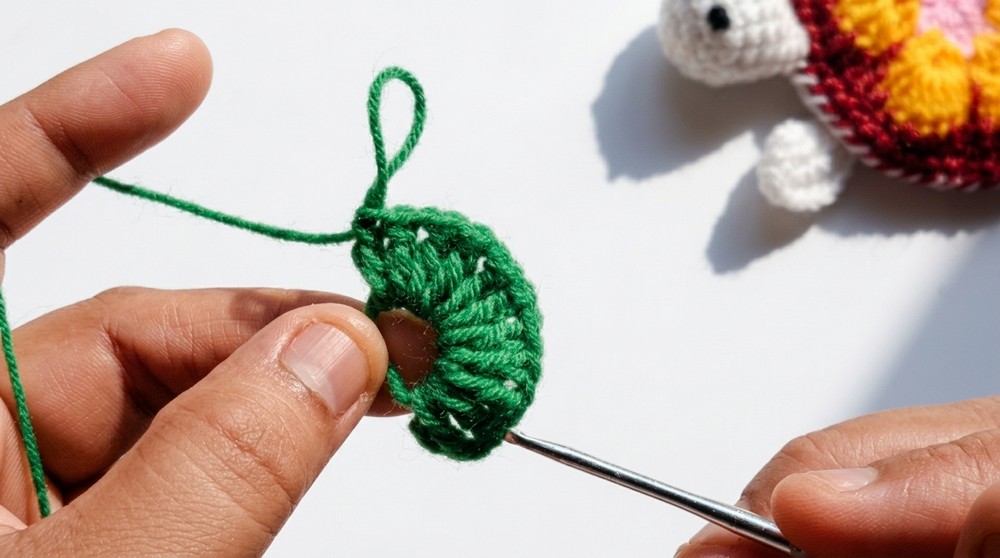
- Green yarn (4 ply) – for the shell’s magic ring and first round.
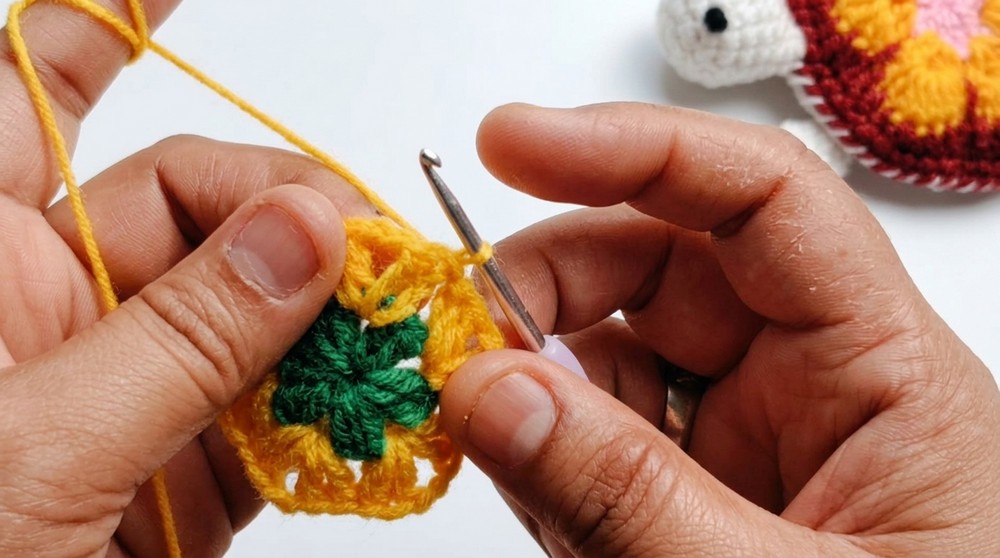
- Yellow yarn (4 ply) – for the shell’s second round.
- Purple yarn (4 ply) – for the shell’s third and fourth round.
- White yarn (4 ply) – for the underside of the pouch, legs, tail, and head.
- Black yarn (4 ply) – for embroidering the eyes.
- Hook:
- 2.5 mm crochet hook (adjust size based on your yarn thickness).
- Additional Materials:
- Cotton filler (for stuffing the turtle’s head).
- Scissors.
- Yarn needle for sewing and weaving in ends.
- Stitch markers (optional for accurate placements).
Gauge
Use the same yarn and hook size to maintain uniform texture and size:
- Gauge: 8 stitches x 6 rows = 2 cm with single crochet.
Tips for Crocheting
- Maintain Tension: Check gauge periodically to avoid tightly woven or loose stitches.
- Use Markers: If needed, mark starting points and skipped stitches for accuracy while assembling.
- Choosing Colors: Select colors that complement each other; earthy tones or vibrant combinations ensure the turtle stands out.
Pattern Instructions
1. Turtle Shell (Top Layer)
- Round 1:
- Create a magic ring.
- Work 6 double crochets in the ring.
- Tighten the ring and join with a slip stitch at the top of the initial chain.
- Round 2:
- Join yellow yarn with a slip knot into any gap of the previous round.
- In each gap: Work 2 double crochets – chain 2 – 2 double crochets. Repeat this pattern around the shell and join with a slip stitch.
- Round 3:
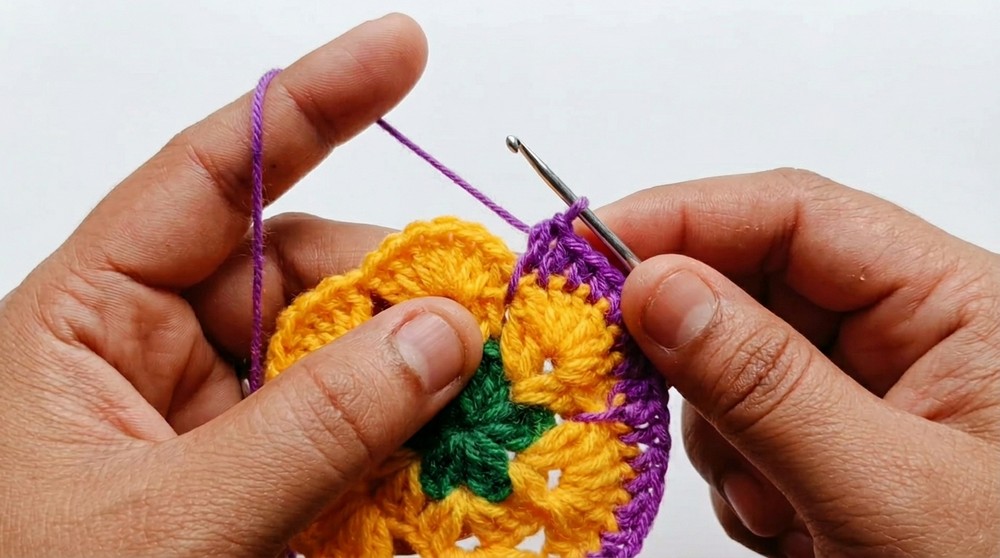
- Join purple yarn with a slip knot into any gap from the previous round.
- Skip 2 stitches and work 7 double crochets in the gap, skip another 4 stitches, and repeat in the next gap. Continue to the end and join with a slip stitch.
- Round 4:
- Stitch the last round of the shell using purple yarn to create textures. Follow the pattern of increasing half double crochets along the edges.
- Stitch the last round of the shell using purple yarn to create textures. Follow the pattern of increasing half double crochets along the edges.
2. Turtle Underside (Bottom Layer)
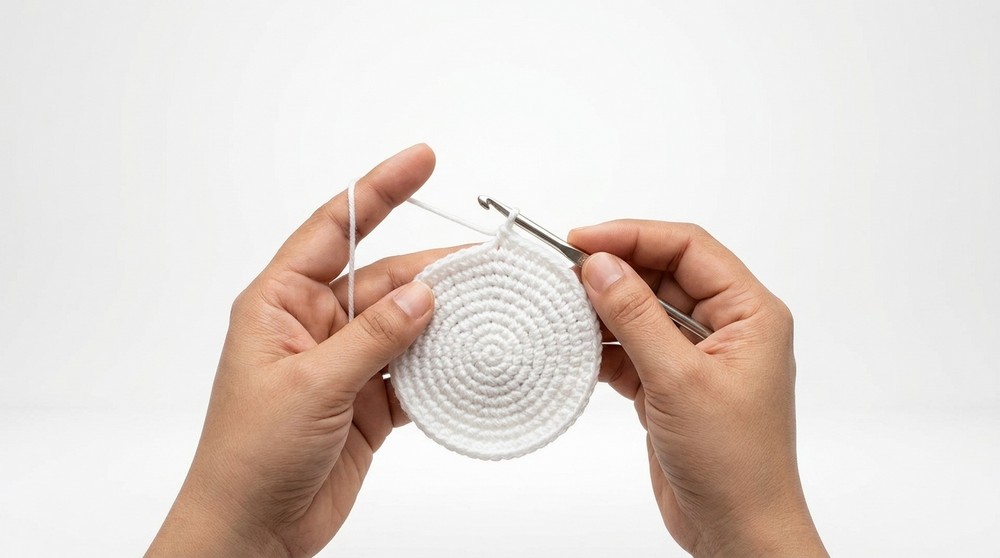
- Round 1:
- Create a magic ring with white yarn.
- Work 6 single crochets in the ring, tighten it, and join with a slip stitch.
- Rounds 2–10:
- Continue expanding the underside following an increase pattern:
- Round 2: 2 single crochets in each stitch (12 total).
- Round 3: 1 single crochet, increase in the next stitch (18 total).
- Progressively add 1 single crochet between increases per round until Round 9 (54 total).
- Round 10: Work 1 single crochet in each stitch without increasing (giving the top edge structure).
- Continue expanding the underside following an increase pattern:
3. Turtle Head
- Round 1–3:
- Create a magic ring and work in single crochets following the pattern of increasing as done in the base layer.
- Round 4–8: Stabilize and shape with single crochets without increasing further.
- Fill with cotton fibre before sealing.
4. Turtle Legs (Make 4)
- Base: Use the same three round expansion technique: magic ring -> increase.
- Assemble: Fold each leg in half and single crochet to join two edges, creating a solid shape; no filling is required.
5. Tail
- Create a magic ring and work 6 half double crochets in the ring.
- Seal by folding and joining as done for the legs.
Assembly
- Sewing the Shell: Attach the shell to the underside by aligning the edges and stitching through the final stitch line of both the layers. Leave a gap of 6 stitches for the pouch opening.
- Attaching the Head: Position the head at the center front of the shell; stitch securely through the base part.
- Legs: Sew each leg evenly around the edges using stitch markers for accurate alignment. Ensure the legs are spread in equal gaps.
- Tail: Center the tail at the back between hind legs; sew tightly to fix.
- Eyes: Embroider the eyes on the head using black yarn on the third row of the circular head structure with four stitches spacing between them.
Special Techniques
- Magic Ring: Wrap yarn twice around two fingers, cross behind, and pull through with a hook to secure.
- Slip Stitch: Join rounds seamlessly without adding height.
- Increasing Stitches: Add more stitches in existing ones to create expansions.
- Decreasing Stitches: Combine front loops of two stitches to create reductions, helping with shaping.
Conclusion and Final Look
Your crochet turtle pouch is now complete, Its charming design and functionality make it a delightful gift or accessory for daily use. Whether hung on a bag or used to hold small items, this project highlights creativity and warmth.
Important Notes
- Customization Ideas:
- Personalize with embroidered patterns or beads around the shell.
- Use vibrant yarn colors to match festive themes.
- Care: Wash gently in cold water; avoid harsh detergents for prolonged vibrancy.