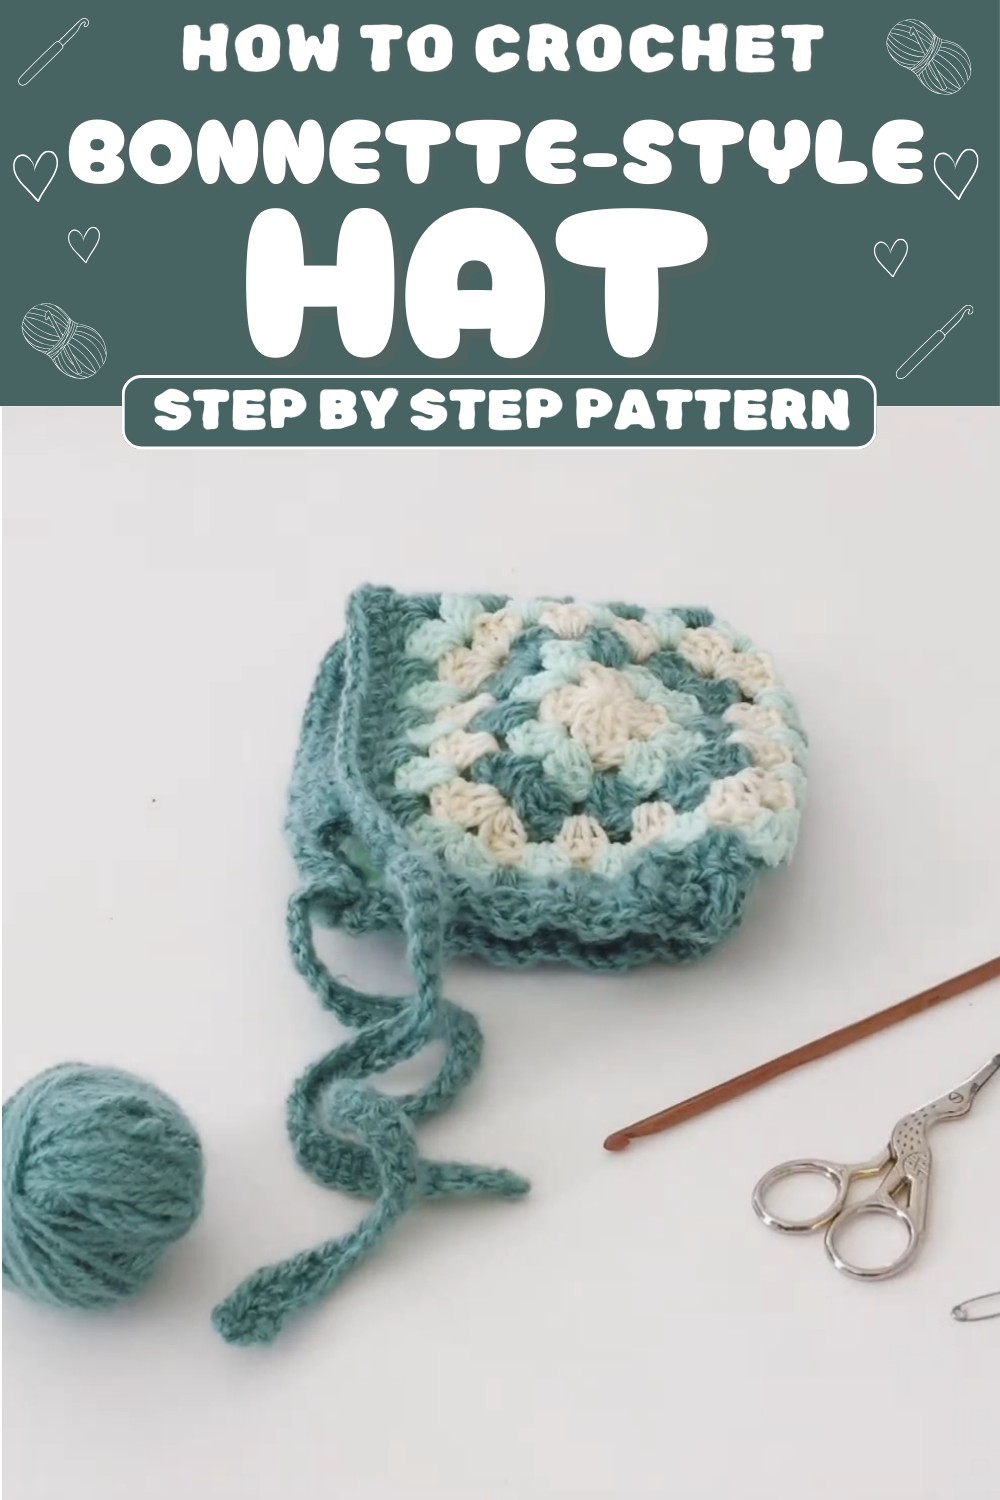
Experience the charm of a bonnet-inspired crochet hat, offering warmth and timeless style while letting you customize colors and textures to suit any look.
A chilly morning calls for a cozy hat that pairs functionality with charm. This bonnet-inspired crochet accessory provides comfort while framing the face in a timeless style. Perfect for brisk walks or casual gatherings on cold days, it’s a must-have addition to any wardrobe. Whether paired with a favorite coat, chunky knitwear, or classic boots, its versatility ensures it complements countless outfit combinations.

Unique Crochet Bonnette Hat for a Signature Winter Look
The process of making your own ensures the freedom to personalize colors and textures, allowing true individuality in every stitch. Not only does this project result in a practical winter accessory, but it also serves as a relaxing activity, giving you something unique to cherish or gift. Warmth, personality, and style come together in this handmade treasure.
Hood-Style Crochet Hat Pattern
Finished Size
- Approximate Size of Finished Hood:
- Width: 36 cm (14 inches)
- Length: 40 cm (16 inches)
- Neck circumference after drawstring is inserted: Adjustable
You can customize the size by altering the dimensions of the granny squares or the rows added for finishing.
Gauge
- Double Crochet (dc): 10 stitches x 4 rows = 4 inches (10 cm) with a 4.5 mm hook.
Ensure you check the gauge before starting to maintain accurate sizing.
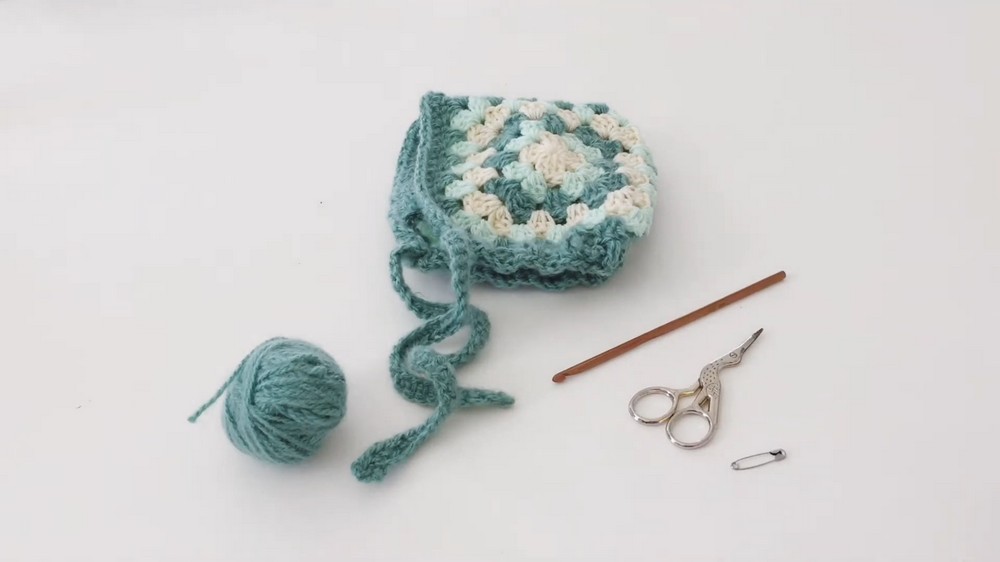
Necessary Materials
- Yarn: Worsted weight yarn in at least two to three colors of choice. Ensure the colors you use match or coordinate well with the granny square motifs.
- Hook Size: 4.5 mm crochet hook.
- Scissors
- Tapestry Needle: For sewing and weaving in loose ends.
- Safety Pin or Yarn Needle: To thread the drawstring through the hood’s neckline.
- Optional Add-ons: Pom-poms, tassels, or decorative buttons for a personalized touch.
Customization Tips
- Size Adjustments: Change the size of your granny squares to make the hood smaller or larger.
- Yarn Options: Use a soft, bulky-weight yarn for a more winter-appropriate hood.
- Color Play: Experiment with gradients or contrasting colors for a bold, modern design.
- Added Neck Layer: Add additional rows or a ribbed edge around the neckline for extra warmth and coverage.
Pattern Instructions
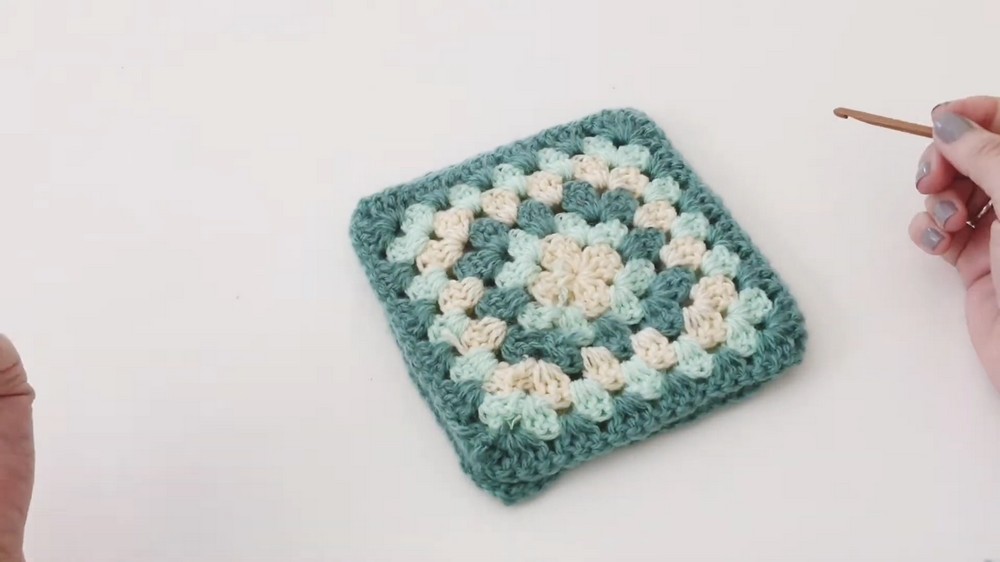
Step 1: Create Two Granny Squares
- If you haven’t already created the granny squares, refer to your preferred beginner-friendly granny square tutorial.
- Each square should be approximately 36 cm x 36 cm (14 x 14 inches) after blocking.
- Use a combination of three or more colors (or customize based on your preference).
Step 2: Join the Granny Squares
- Position the Squares: Place the two squares together, right sides facing each other.
- Begin at One Corner: Insert your hook midway through the stitches of both squares at the corner.
- Attach a contrasting or matching yarn color with a slip knot. Pull the yarn through to secure.
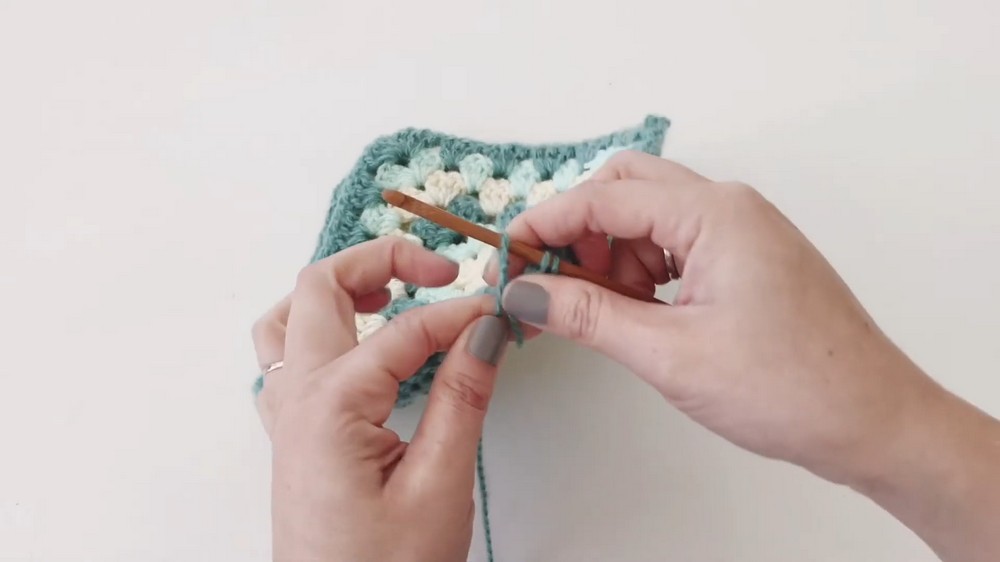
- Slip Stitch Seam: Hold the edges of the two squares together and join the stitches with slip stitches:
- Insert the hook through one stitch on each square, yarn over, and pull through both fabric layers and the loop on your hook.
- Continue until one side is fully joined (this creates the back of the hood).
Step 3: Turn the Hood
- Once the first seam is complete, tie off and cut the yarn securely.
- Flip the hood right-side out so the seam is now hidden inside.
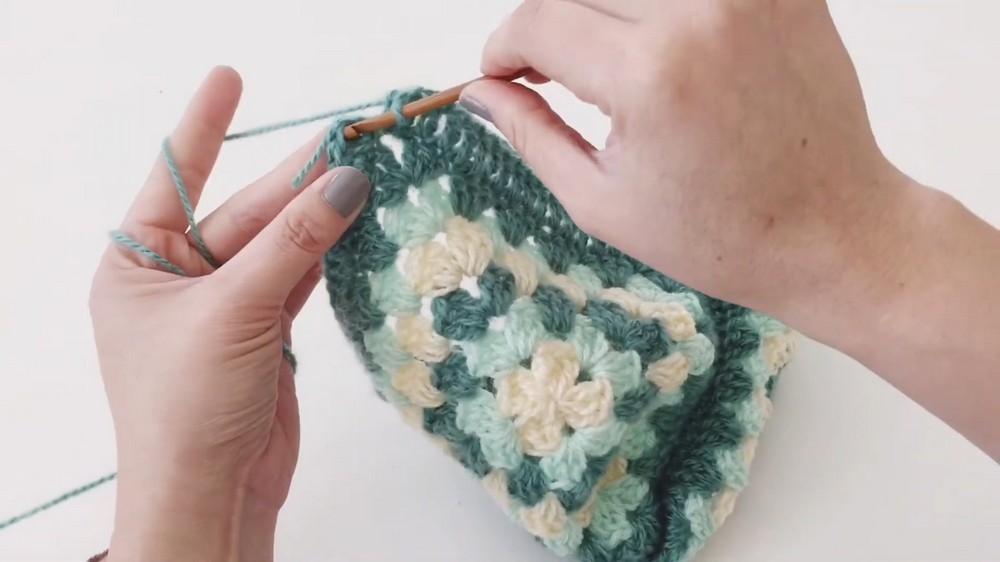
Step 4: Add an Outline to the Hood’s Face Opening
- Reattach the yarn to one of the open corners of the hood.
- Chain 2 (counts as the first half-double crochet (hdc) of the round).
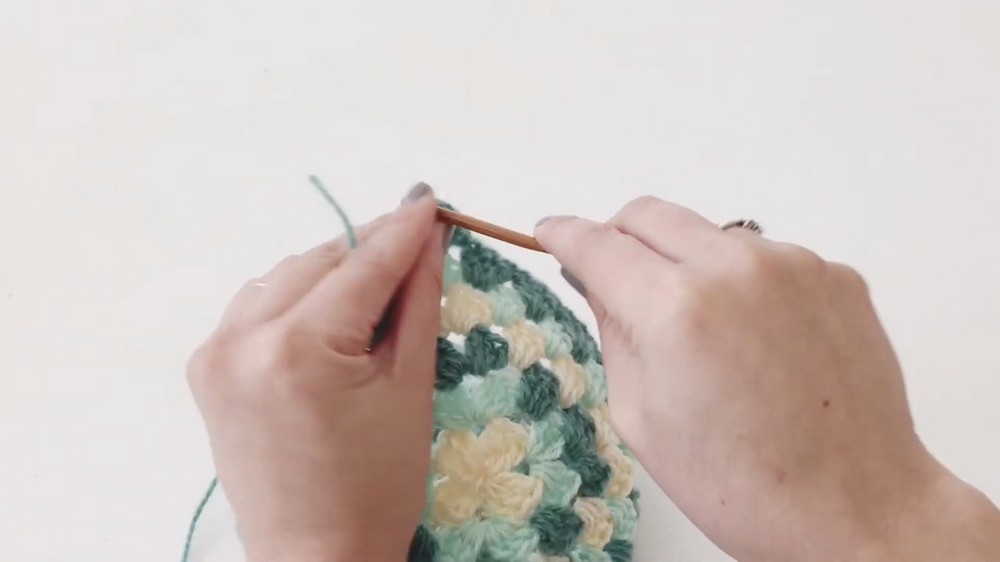
- Work hdc stitches evenly around the entire opening of the hood (face area).
- Place one hdc stitch into each stitch or gap created by the rows of the granny squares.
- At the corners, work 2 hdc stitches to ensure the fabric lies flat.
- Complete the round by slip-stitching into the initial chain-2.
Step 5: Add the Neckline Border
- Attach the yarn at the base of the hood where the neckline begins.
 Chain 2 and work half-double crochet stitches evenly around the bottom edges (neckline) of the hood.
- Do not leave any gaps between stitches.
- Finish with a slip stitch, tie off, and cut the yarn.
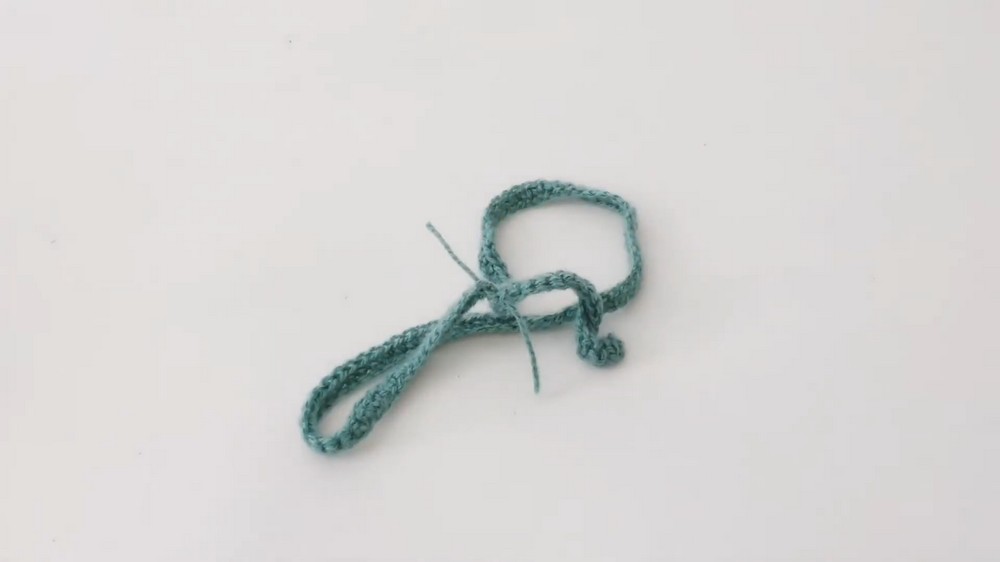
Step 6: Create the Drawstring
- Form a chain of approximately 120 stitches (adjust based on the wearer’s neck size and preference).
- This chain should measure about 70 cm (28 inches) when slightly stretched.
- Once the chain is complete, work 1 row of single crochet (sc) into each chain for a sturdier tie.
- Tie off the yarn and weave in the ends.
Step 7: Insert the Drawstring
- Attach a safety pin or yarn needle to one end of the drawstring.
- Insert the drawstring into the neckline at the back of the hood. Weave it through every two hdc stitches, skipping two stitches each time.
- Continue weaving the tie through the neckline until it comes out at both front corners.
Optional Add-ons
- Tassels or Pom-Poms: Add tassels or pom-poms to the ends of the drawstring for a playful touch.
- Decorative Edge: Add a contrasting single-crochet border to the hood for a pop of color.
- Embellishments: Stitch small appliqués, buttons, or patches to the back of the hood for personalization.
Special Techniques
- Slip Stitch Seam: Ensures a nearly invisible join while keeping the structure robust.
- Half-Double Crochet (hdc): A versatile stitch providing just the right amount of stretch for comfortable wear.
Conclusion and Final Remarks
Congratulations on completing your hood-style hat! This project is a versatile and enjoyable way to repurpose granny squares into a functional accessory. The finished hood is perfect for colder weather and makes a charming handmade gift for loved ones.
The bold geometric design of the granny squares, combined with the snug fit from the neck drawstring, ensures warmth and style. Experiment with colors and additional features to make each piece uniquely yours.