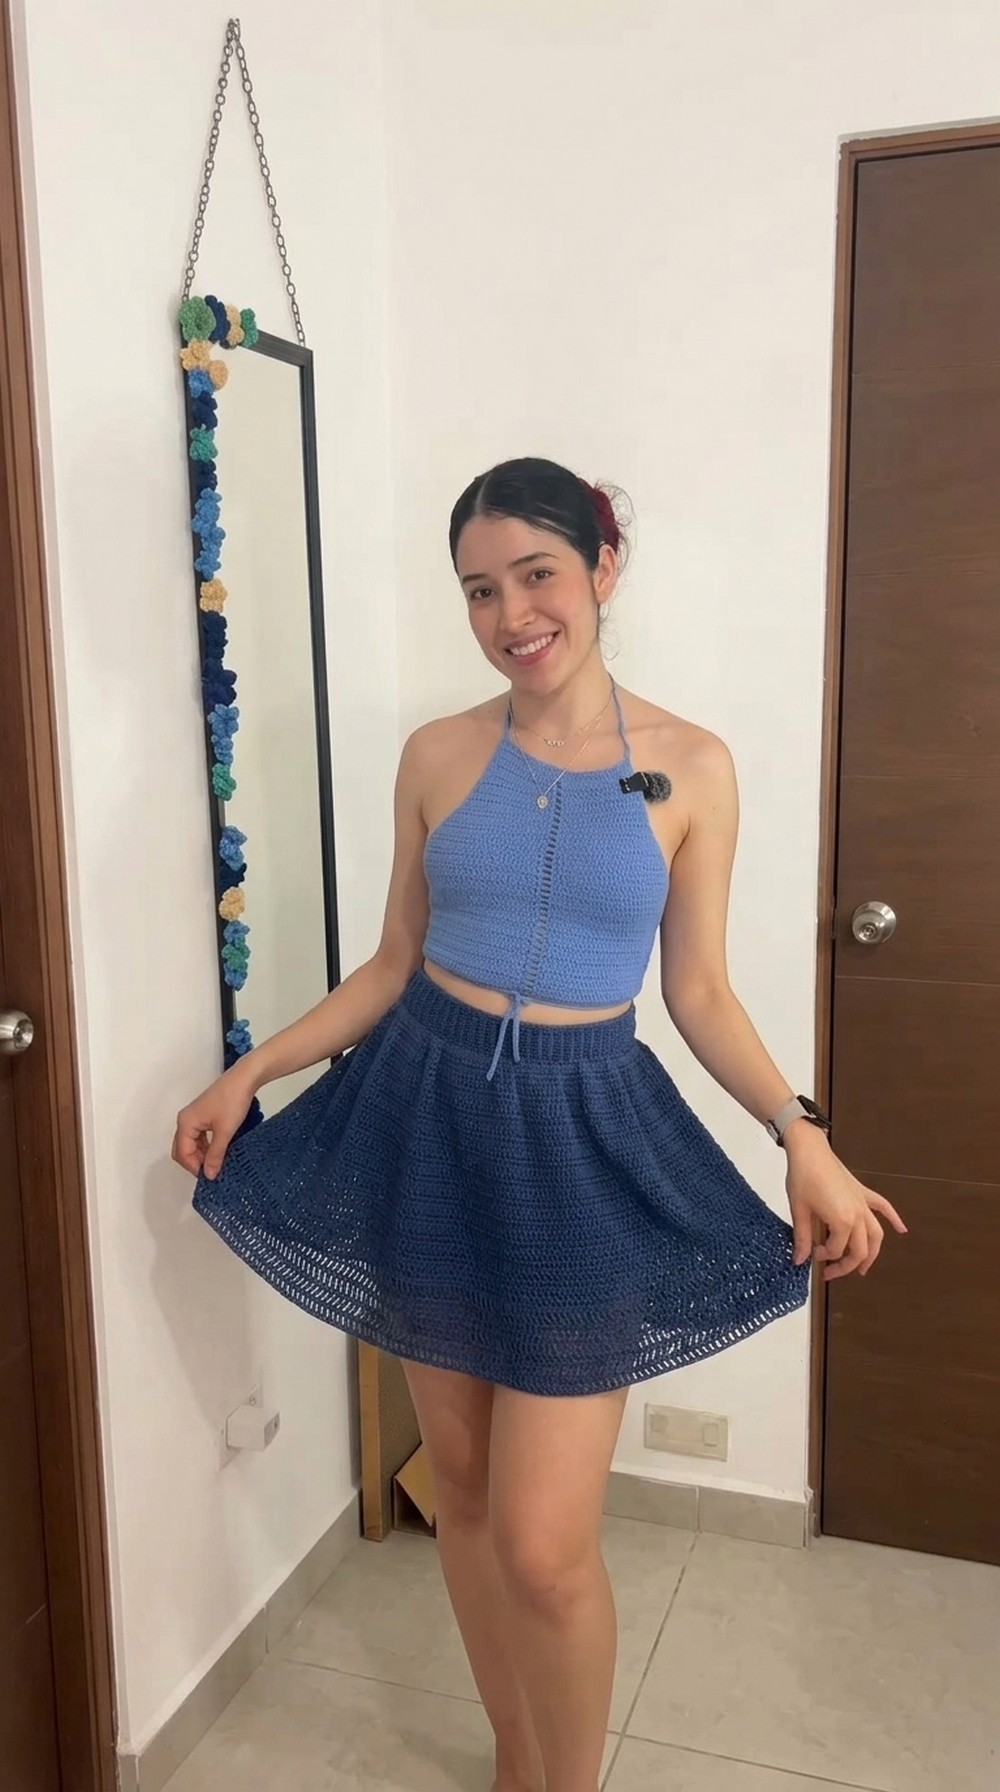
Get a free and easy crochet skater skirt pattern that’s fun to make, stylish to wear, and perfect for any casual or special occasion.
Having a skirt that’s not only stylish but also fun and playful. This crochet piece stands out with its soft fabric and flowing design that’s perfect for everyday wear or special moments. It fits comfortably at the waist and flares beautifully, giving it a modern and trendy look that’s hard to resist.
Perfect Summer Crochet Skater Skirt Pattern for Free
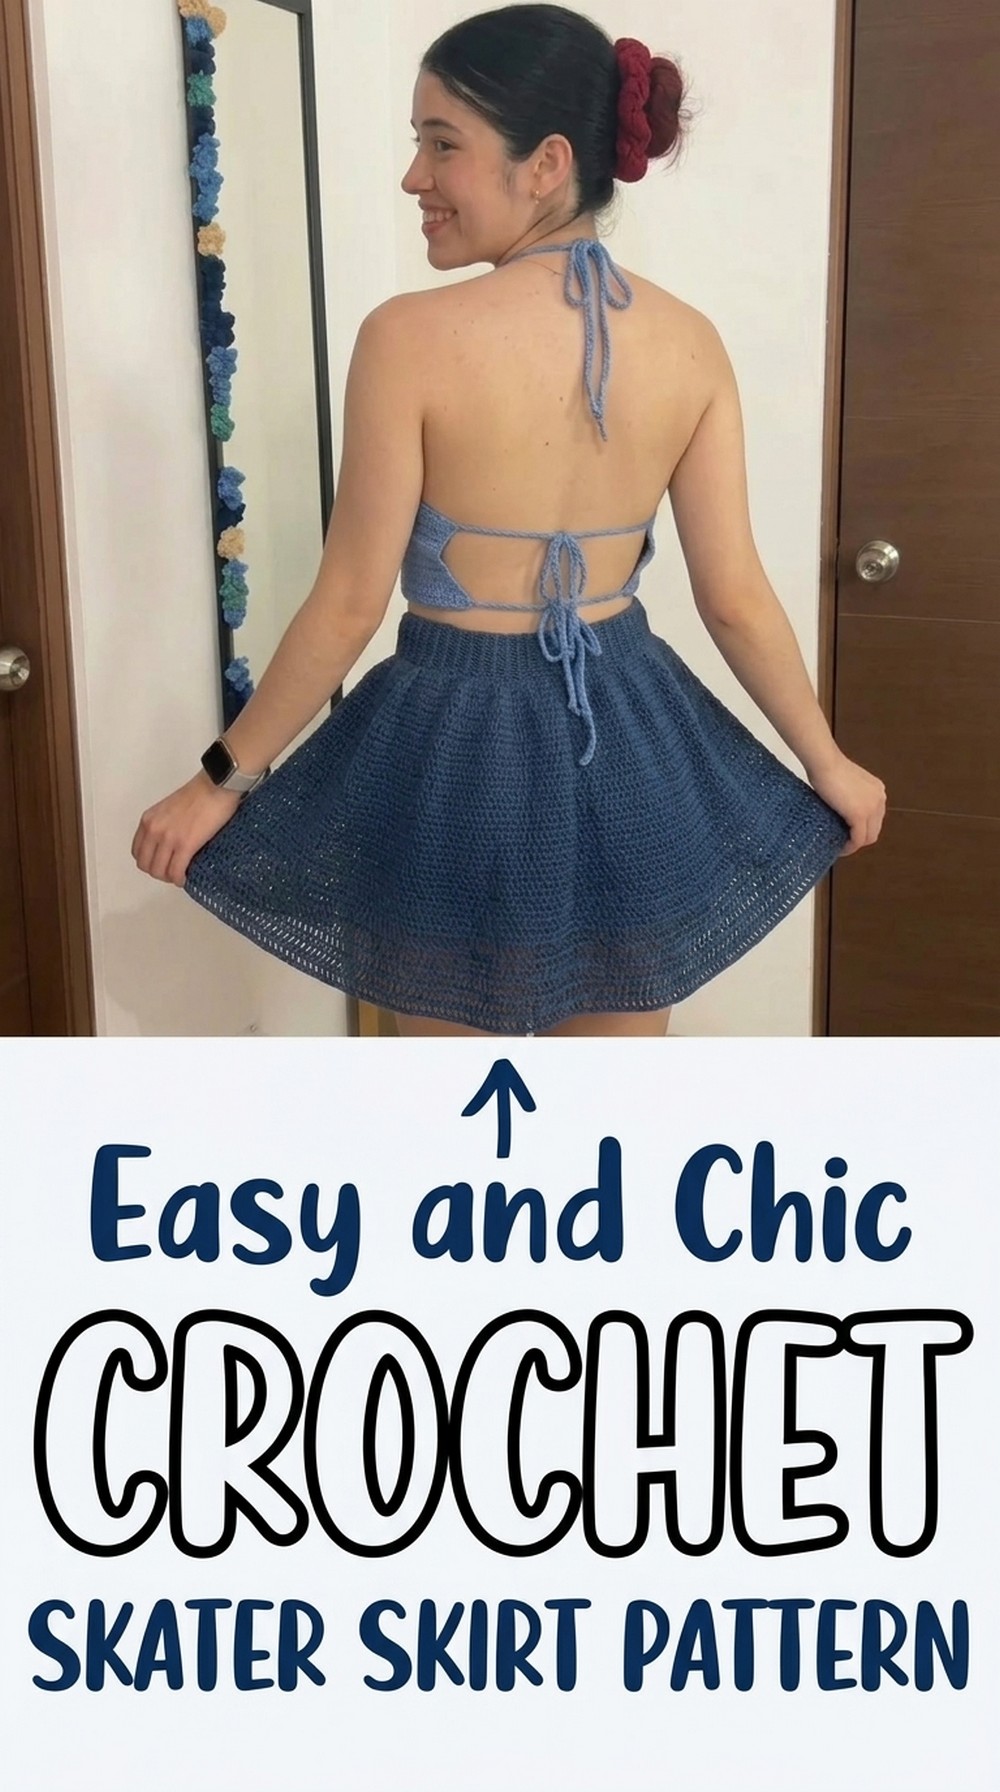
You can customize it with your favorite colors to match your personality, whether you love bright, bold shades or soft, elegant tones. This skirt is easy to create and works well for anyone who enjoys crafting and wants something unique in their wardrobe. The beauty of its simplicity and the charm of its handmade feel make it a must-have for those who want something special and personal.
Crocheted Skirt Pattern with Elastic Waistband
Materials Needed:
- Yarn:
- 300 grams of yarn consisting of:
- 60% rayon bamboo.
- 40% cotton.
- Approx. 2mm thickness, labeled as #3 Light.
- 300 grams of yarn consisting of:
- Hook:
- 4 mm crochet hook (recommended size for the yarn).
- Elastic Band:
- A thin, flexible elastic suitable for waistbands (optional length; adjust based on personal waist measurement).
- Additional Supplies:
- Scissors.
- Stitch marker (optional for tracking rows).
- Tapestry needle for weaving in ends.
Special Techniques Used:
- Slip Knot: For starting your project with ease.
- Single Crochet (SC): Basic crochet stitches used primarily for the waistband.
- Back Loop Single Crochet: Used for creating texture in the waistband.
- Double Crochet (DC): For the body of the skirt.
- Double Treble Crochet (DTC): (Optional) Used for creating more openness or flair at the hem.
- Slip Stitch (SS): Used for joining and finishing rounds.
- Increases: Adding stitches to widen the skirt.
- Optional Elastic Installation: Integrating an elastic band to enhance the waistband fit.
Step-by-Step Instructions
Step 1: Waistband
- Foundation Chains:
- Start with a slip knot and chain 10 stitches. This determines the thickness of the waistband.
- Add 1 extra chain to serve as the turning chain.
- Row 1 (Single Crochet):
- Begin in the second chain from the hook.
- Crochet 1 single crochet (SC) into each chain.
- Total stitches for this row: 10 SC.

- Row 2 onwards:
- Chain 1 (to turn).
- Work into the back loop of each SC from the previous row.
- Take the back loop (the furthest strand of the V-shape stitch) for a ribbed effect.
- Complete another row of 10 SC (in the back loop only).
- Continue Repeating Rows:
- Repeat this process and crochet 120 rows (or enough rows to match the wearer’s waist measurement, considering stretch).
- Make sure the fabric is stretchy enough to pass over the hips when putting on the skirt.
- Joining the Band:
- After finishing the rows, bring the two ends of the waistband together.
- Use single crochet or slip stitch to join, ensuring a seamless loop.
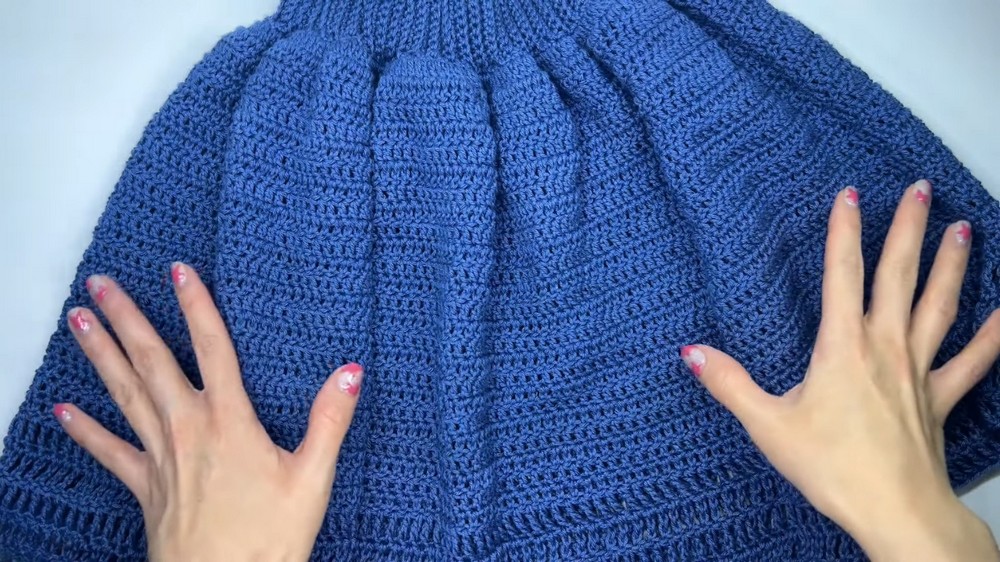
Step 2: Body of the Skirt
- Foundation for the Skirt:
- Once the waistband is joined, make 1 SC into the edge of each row around the waistband.
- This will create a base of 120 SC (assuming 120 rows in the waistband).
- Change to Double Crochet (DC):
- Work 1 DC into each SC around the edge of the waistband, joining with a slip stitch at the end of the round.
- Chain 2 at the beginning of each round, which counts as the first DC.
- Increasing Width:
- For the first round, make 2 DC in each SC to create an increase.
- At the end of this round, the stitch count will double (e.g., 240 stitches).
- For subsequent rounds, work 1 DC in each DC to maintain the width.

- For the first round, make 2 DC in each SC to create an increase.
- Determining Length:
- Continue crocheting rounds of DC until the desired length is achieved.
- To add flair:
- Every 5-6 rounds, create additional increases such as:
- 1 DC in the first 2 stitches, then 2 DC in the next (repeat around).
- Every 5-6 rounds, create additional increases such as:
- Optional: Switch to double treble crochet (DTC) to make the bottom more open and flowy.
Step 3: Finishing the Skirt
- Final Rounds:
- Add 4-5 rounds of double treble crochet (DTC) (optional) to give the hem a lightweight and decorative feel.
- Finish off by closing the end of the last round with a slip stitch, chain 1, and cut yarn.
- Weave in Ends:
- Use a tapestry needle to neatly weave in all loose ends.
Step 4: Adding the Elastic
- Optional Waistband Elastic:
- Turn the skirt inside-out to place the elastic band on the inner rows of the waistband.
- Insert the elastic band as follows:
- Use a slip stitch to secure the elastic around the back loop (or desired row) of the inner waistband.
- Continue stitching the elastic into place at consistent intervals for even tension.
- Once the entire waistband is covered, overlap and sew the elastic ends together.
- Final Adjustments:
- Ensure the elastic is snug enough to hold the garment securely at the waist, but not too tight to be uncomfortable.
Final Dimensions:
- Length: 41 cm (16 inches).
- Width (blouse edge before stretch): 67 cm (26 inches).
- Overall waist circumference: 162 cm (modified to fit your size).

Final Words & Tips
- Customize Fit:
- Adjust the width of the waistband and the length of the body to suit your measurements.
- Add more increases if you desire a fuller, flared skirt.
- Yarn Choice Matters:
- Bamboo and cotton provide a breathable and soft texture, making the skirt comfortable for various weather conditions.
- Stretch Testing:
- Test the stretchiness of the waistband and skirt periodically to ensure it fits comfortably.
- Care Instructions:
- Hand wash in cold water and lay flat to dry to preserve the fabric’s elasticity and avoid warping.