Snag instant charm with this Free Crochet Pouch Pattern that lets you make a stylish, handy bag to keep treasures, gifts, or everyday items perfectly organized.
Not every small item needs to be lost inside a big bag or pocket. The Free Crochet Pouch Pattern shows a simple way to make a neat little pouch that keeps things safe and easy to find. This pouch has a soft yarn feel and a clean crochet texture that gives it a lovely handmade look. Its small size makes it light to carry, yet it is very helpful for holding coins, earphones, makeup, or tiny tools.
Cozy Free Crochet Pouch Pattern Perfect for Small Keepsakes
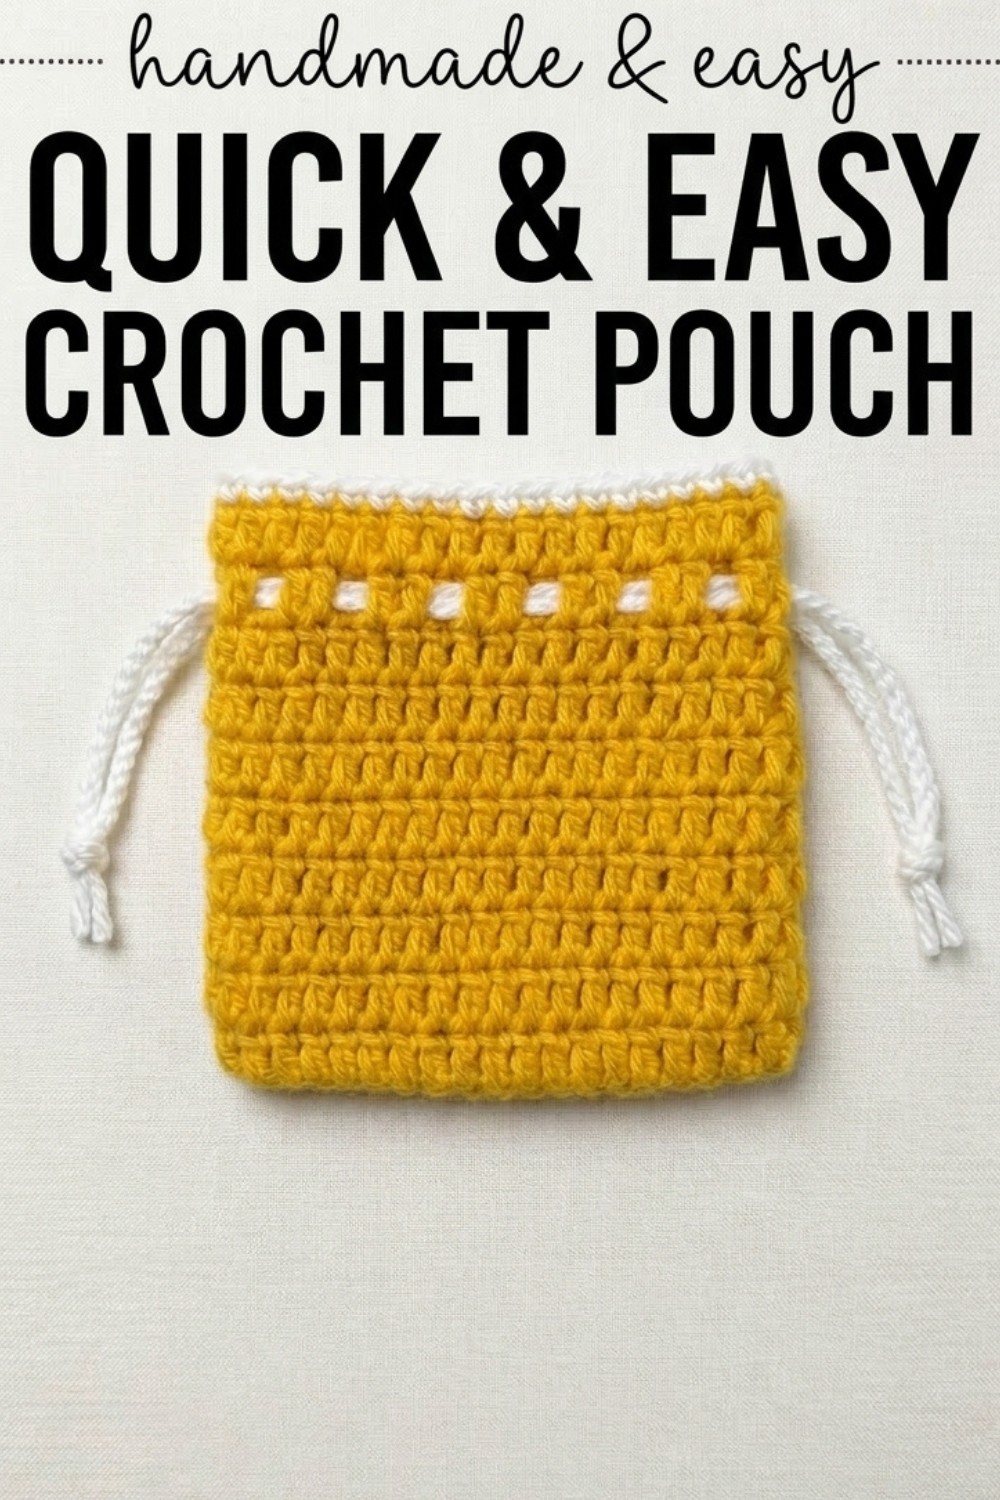
The gentle shape and colorful yarn can make it look cheerful and attractive. It can also sit nicely inside a larger bag to keep everything organized. The pattern usually follows easy steps with basic stitches, so even a beginner can try it without worry. By choosing different yarn shades, the pouch can look calm, bright, or playful. In the end, this crochet pouch is a useful little piece that mixes beauty, comfort, and everyday convenience.
Free Crochet Pouch Pattern
Finished Size
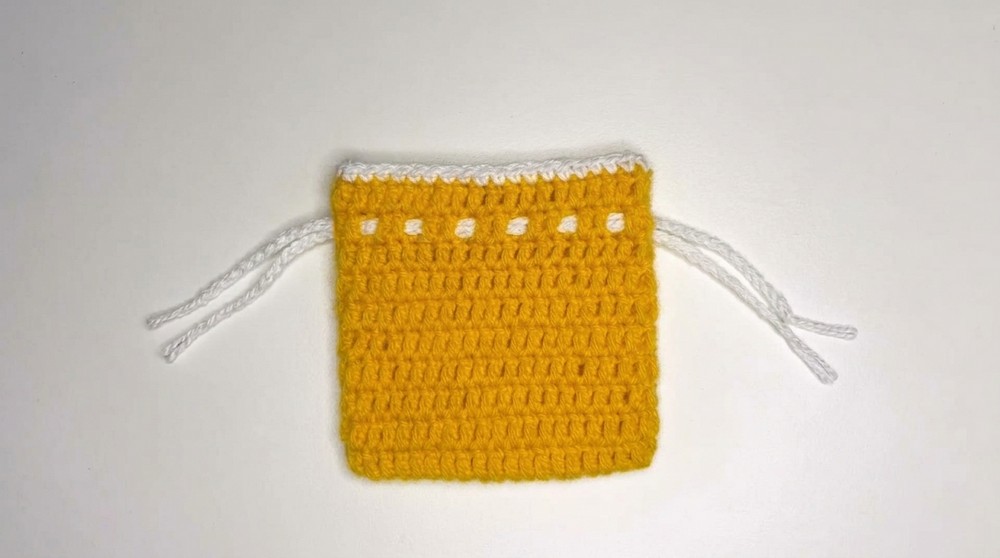
- The size shown in the video results in a compact potli bag suitable for holding small items.
- Approximate fully assembled size:
- Width: 4 inches (can be adjusted by increasing foundation chains).
- Height: 6 inches (can be adjusted by increasing rounds).
Materials Needed
- Yarn:
- Acrylic yarn (or any yarn of your choice).
- Recommended: 3mm thickness yarn for medium density.
- Colors: Main body + contrasting color for borders/drawstrings.
- Hook: 3mm crochet hook (adjust per yarn weight for gauge consistency).
- Needle: Tapestry needle for weaving ends and attaching drawstrings.
- Scissors: For cutting yarn.
- Marker Pins: For marking initial stitches to avoid confusion.
Gauge
Gauge isn’t crucial for this project. However:
- For acrylic yarn with a 3mm hook, work 10 double crochet stitches over 2 inches for consistent tension.
Key Abbreviations
- ch – Chain
- dc – Double Crochet
- sc – Single Crochet
- sl st – Slip Stitch
- st – Stitch(es)
Special Techniques
- Foundation Chain Adjustment:
- Increase/decrease chains for wider/narrower bags.
- Working in Rounds:
- The bag starts with a flat oval base, increasing stitches on both ends.
- Drawstring Insertion Pattern:
- Creates a secure closure while providing an elegant look.
Pattern Instructions
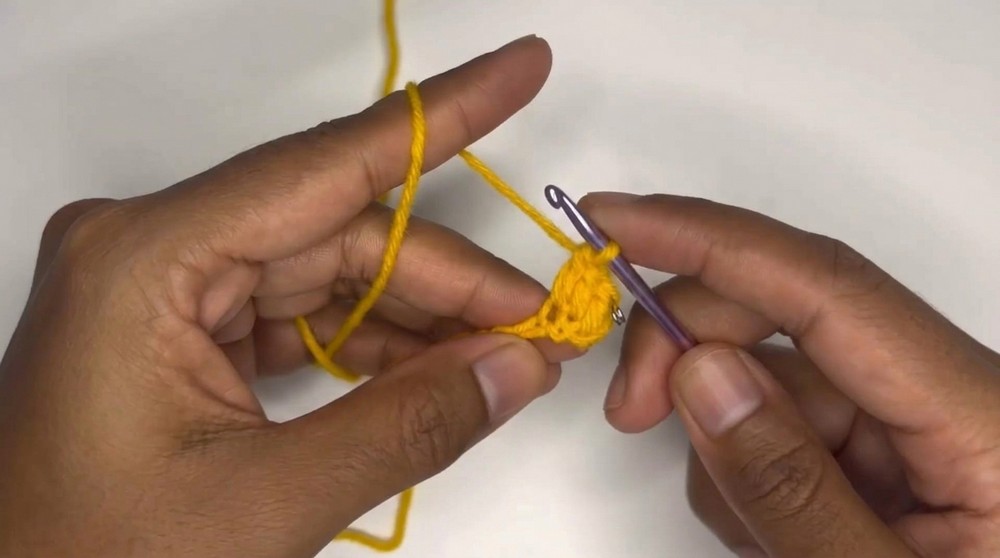
Step 1: Foundation Chain
- Create a slip knot and secure it on your hook.
- Ch 21 (adjust for a wider bag by chaining additional multiples).
- This forms the starting width of the bag.
- Make sure the chains are taut but not too tight to ensure smooth crochet stitches.
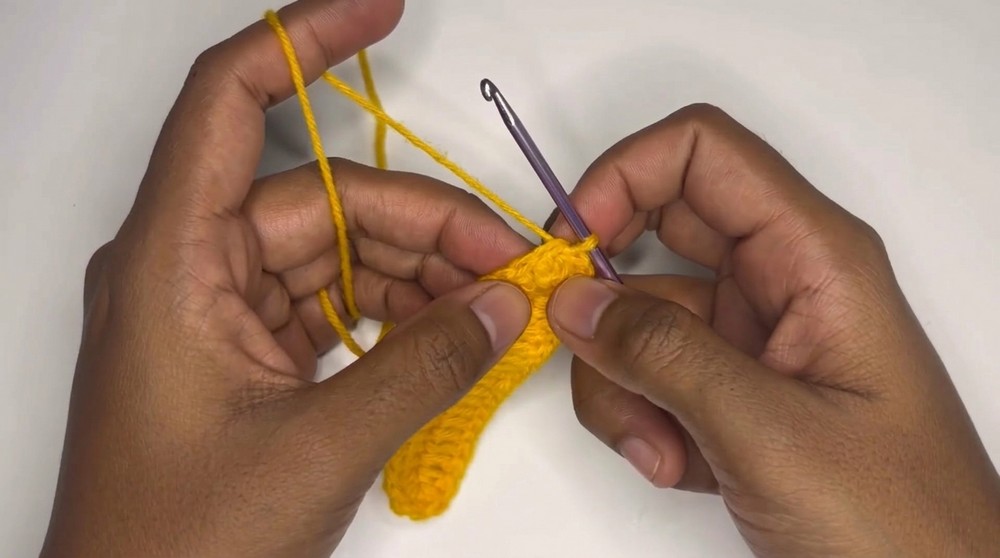
Step 2: Round 1 – Base
- Skip 2 chains (counts as the turning chain).
- Dc in the third chain from your hook.
- Mark this stitch with a pin/marker to identify the first stitch later.
- Dc in each of the next chains until you reach the final chain (19 dc total).
- In the last chain:
- Work 3 dc into the same stitch (to create a smooth corner for the oval).
- Turn work and continue along the opposite side of the foundation chain:
- Work dc in each stitch across the side.
- Insert stitches into any remaining loop from each foundation chain.
- At the end of the row:
- Add 2 dc into the last stitch (same stitch where you started the first dc).
- Total for this round: 40 dc stitches.
- Closing the round:
- Insert your hook into the marked first stitch and make a sl st to join the round.
Step 3: Round 2 – Building Height
- Ch 2 to start the round (counts as a turning chain – do not count as a stitch).
- Work one dc into every stitch around (40 dc total).
- Slip stitch to the first stitch of this round to close.
Step 4: Rounds 3–10
- Repeat Round 2 for rounds 3 to 10.
- Ensure 40 stitches per round with no increases.
- Periodically check stitch markers to avoid confusion between turning chains and starting stitches.
- As you work more rounds:
- The bag will begin to take its potli shape, folding up naturally.
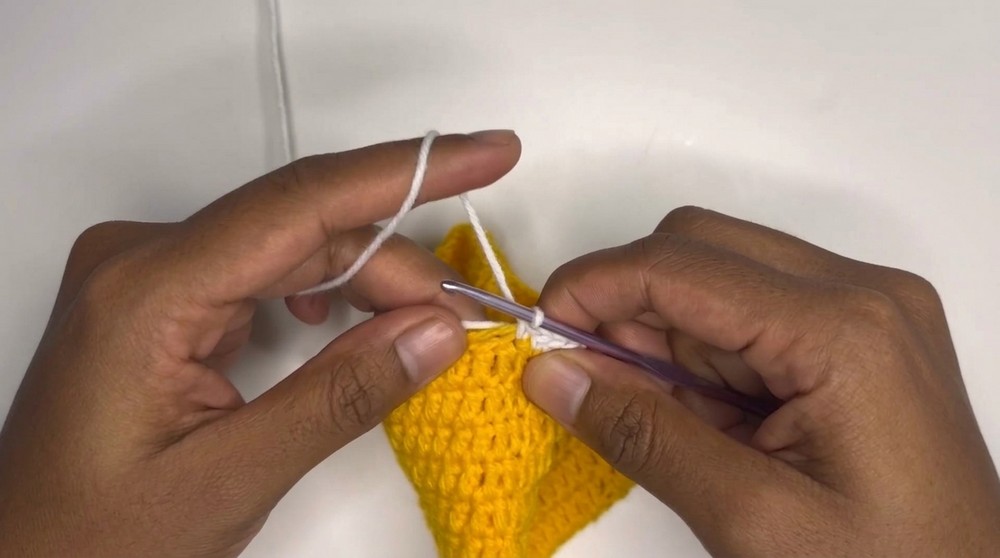
Step 5: Border (Optional)
- After completing 10 rounds, switch to a contrasting yarn color (optional).
- Attach the new yarn and create a border using single crochet stitches:
- Ch 1, sc into the first stitch.
- Sc into every stitch around.
- Slip stitch to the first sc to close the round.
Step 6: Drawstrings
Create the Drawstrings:
- Make a slip knot with the chosen yarn.
- Ch 70 (or the desired length for your drawstrings).
- At the end of the chain:
- Cut the yarn, leaving 2–3 inches of thread.
- Pull the cut end through the last chain and tighten.
- Repeat the process to create a second drawstring.
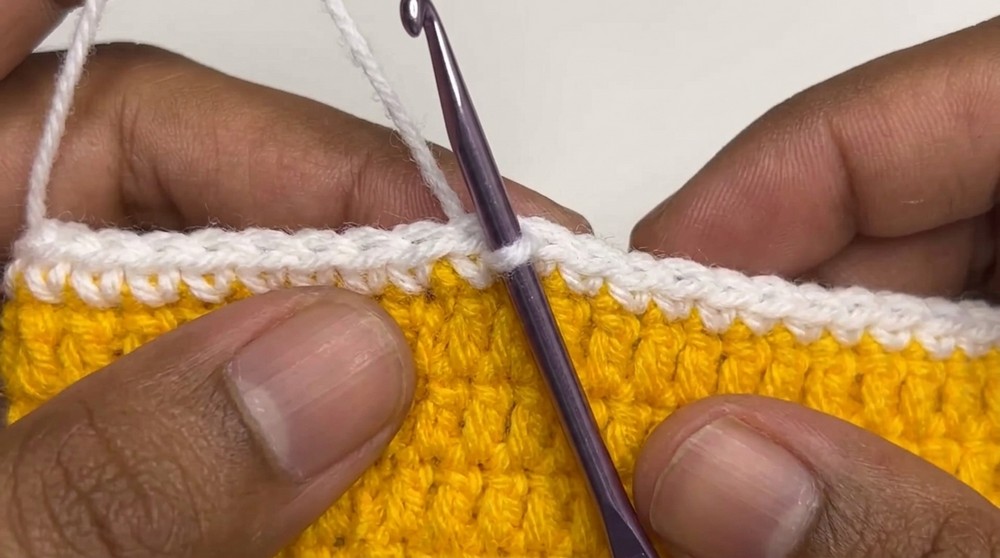
Insert the Drawstrings:
- Insert the crochet hook at Round 9 of your bag (leave Round 10 untouched for border visibility).
- Skip one stitch, then pull the drawstring through every second stitch around the bag.
- Ensure a skipping pattern for a complete loop.
- Ensure a skipping pattern for a complete loop.
- Insert the second drawstring starting from the opposite side, following the same method.
Finalizing:
- Once the drawstrings are positioned, tie the ends of each drawstring into simple knots to secure.
- Trim excess thread.
Customization Ideas
- Make Larger Bags:
- Add additional foundation chains for width.
- Work more repeat rounds for height.
- Colors: Use variegated yarns or alternate colors for stripes.
- Beads/Embellishments: Add decorative tassels or beads at the ends of the drawstrings.
- Handles: Sew small rope-like handles for added portability.
Conclusion
Congratulations! You’ve now completed your potli bag. This elegant, beginner-friendly project makes a useful accessory for storing personal items or gifting. The addition of drawstrings adds functionality while providing charm to the design.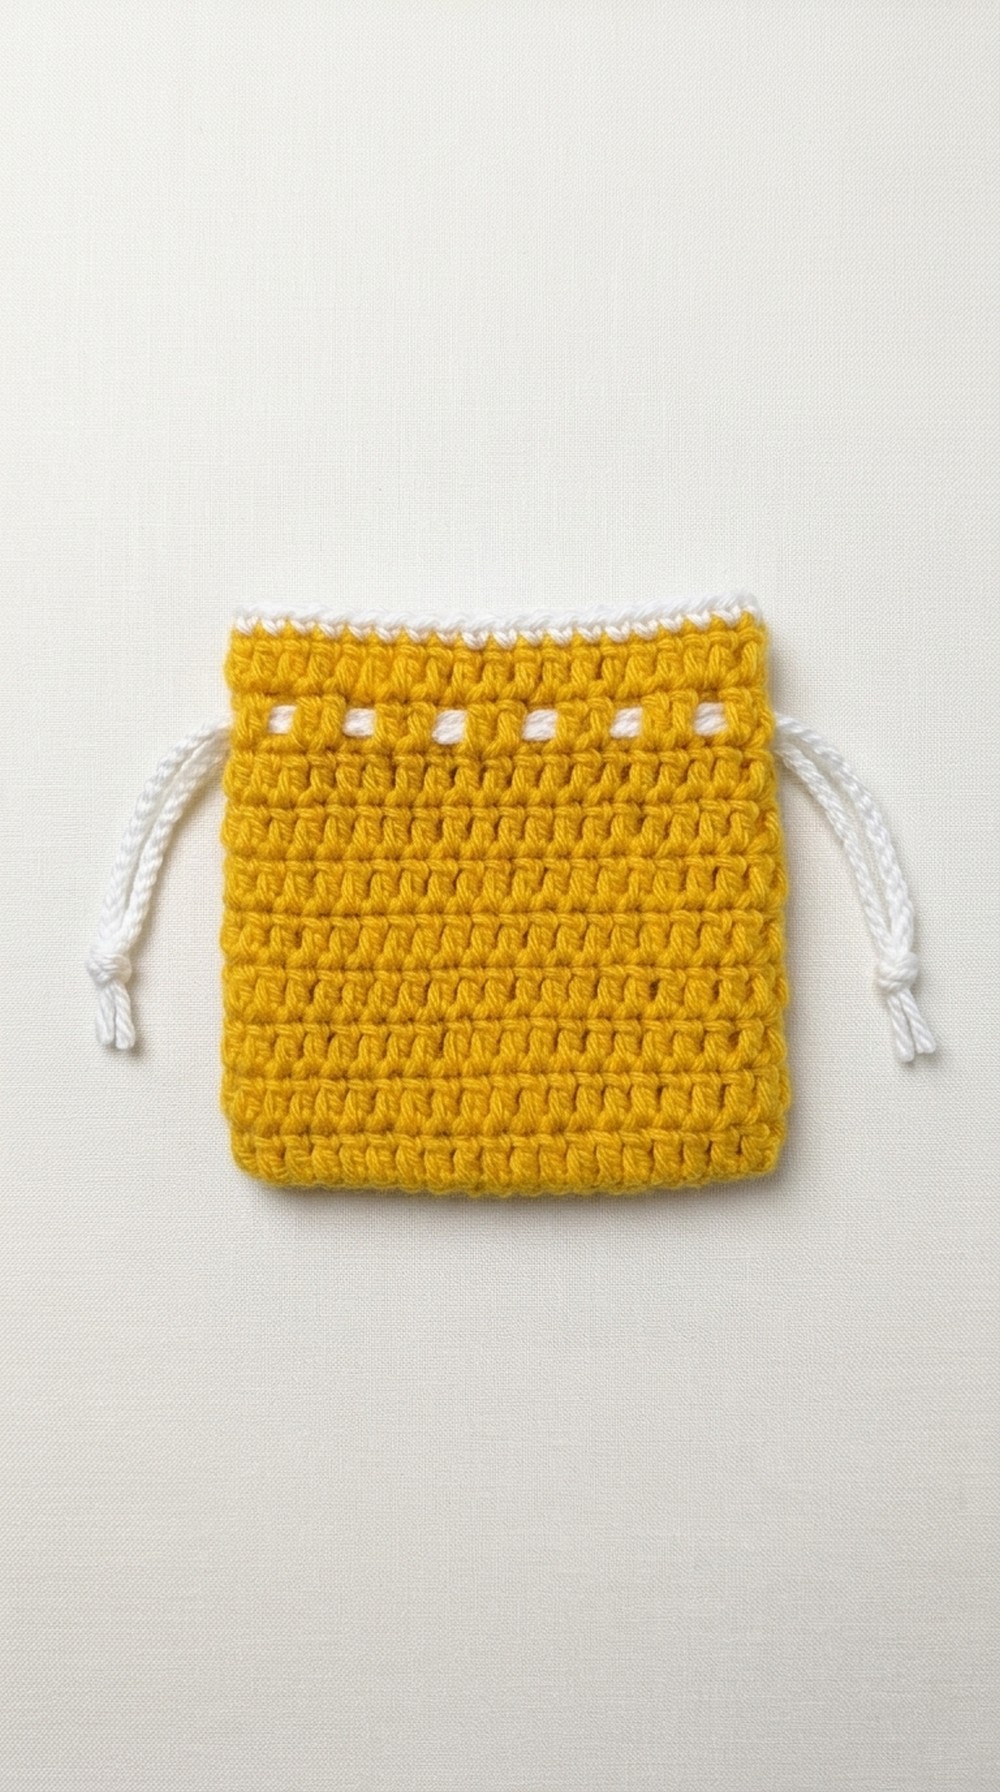
Important Remarks
- Ensure consistent tension while crocheting for a polished look.
- Use markers for the first stitch in every round to avoid stitch confusion.
- For larger items, adjust carefully to keep proportions.