Snag this trendy free crochet peplum crop top pattern for a stylish, airy design that’s perfect for warm days and easy to pair with your favorite outfits.
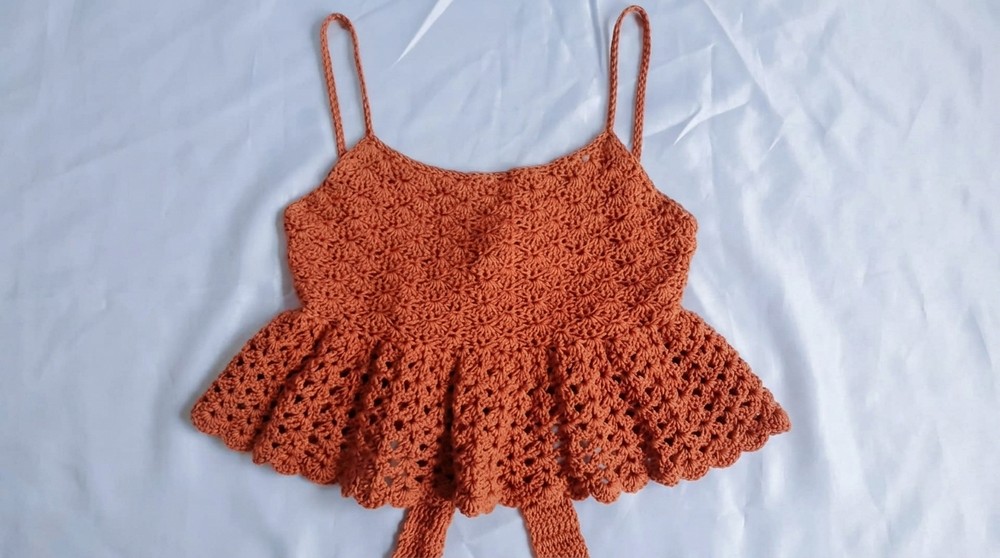
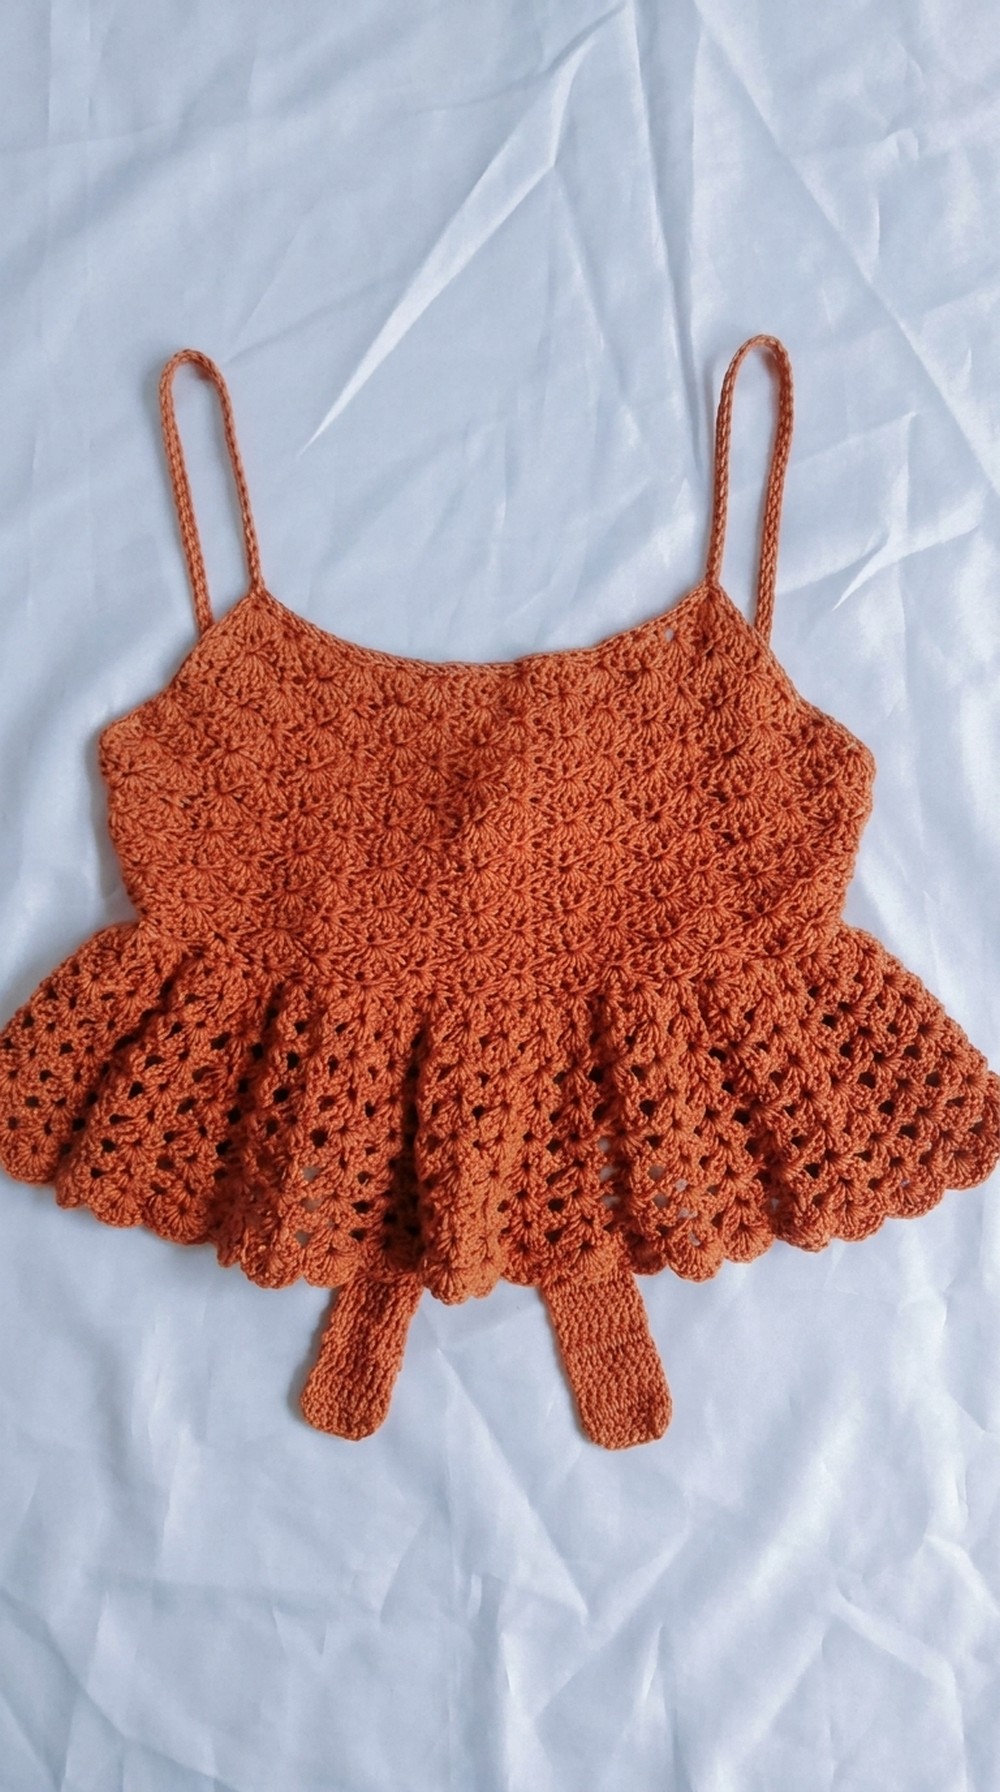
Nothing beats the charm of a handmade top that combines comfort and style effortlessly. A peplum crop top made with crochet is the perfect blend of elegance and fun, featuring a flared waistline that adds a flattering touch to its design. The free crochet pattern makes it easy to create something truly fashionable without complicated instructions.
Free Crochet Peplum Crop Top Pattern for Everyday Wear
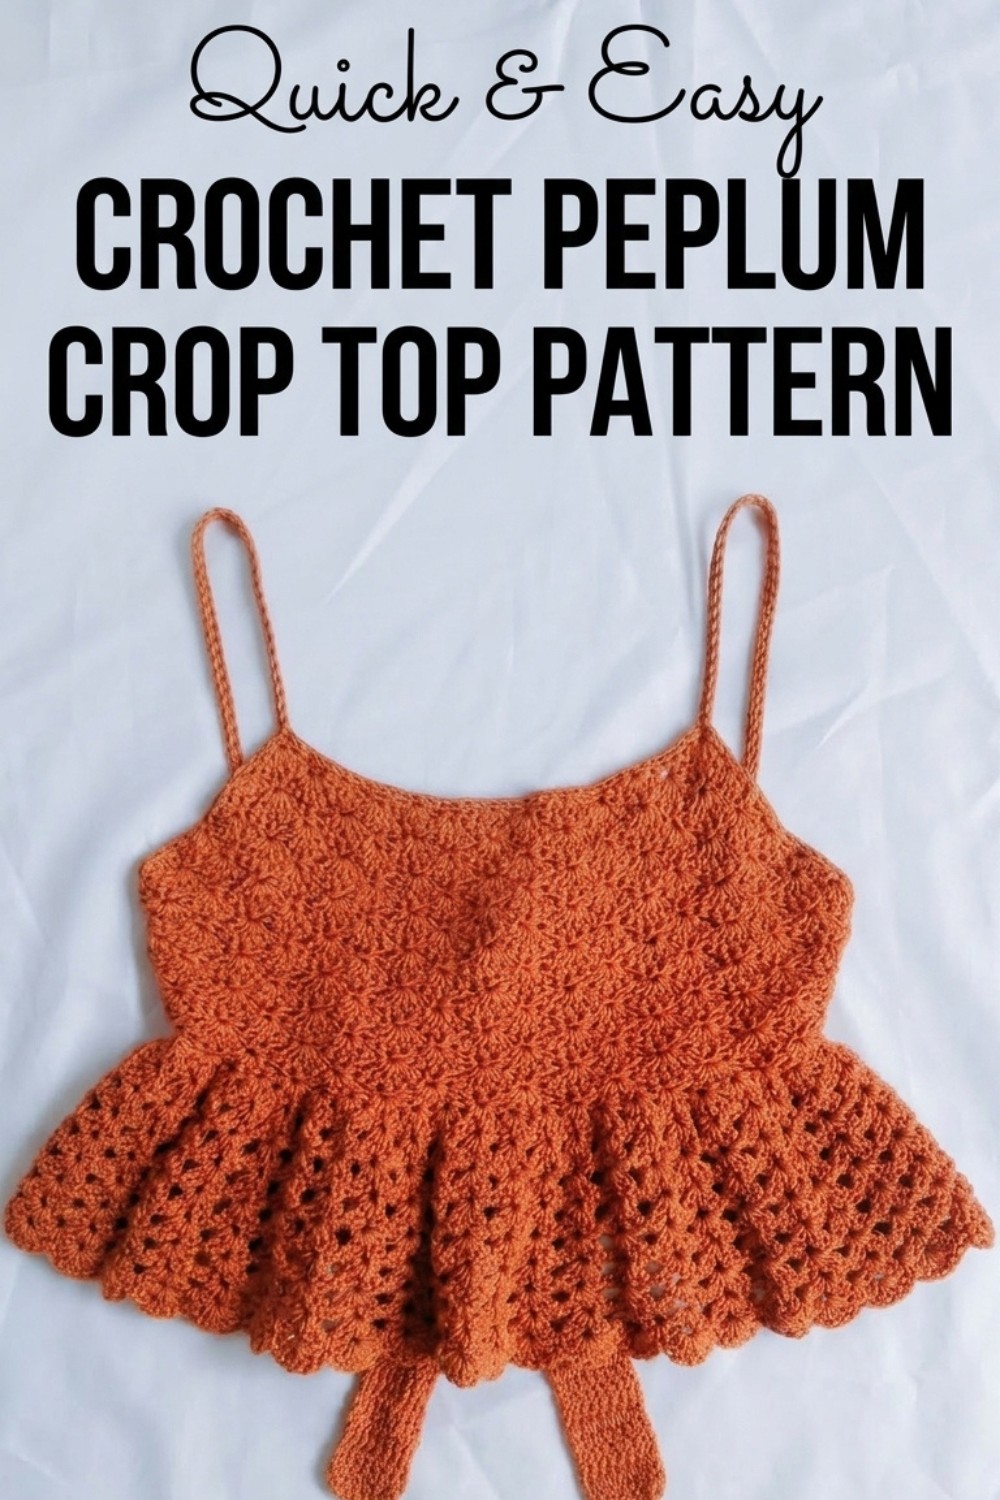
Its lightweight and airy texture make it a great choice for summer days or layering with jackets during cooler months. The beauty of this crop top lies in its playful yet chic look, making it an ideal outfit for casual outings, brunches, or even a walk by the beach. The soft, flowy peplum detail adds a graceful element, enhancing its overall appeal. Whether paired with high-waisted jeans, skirts, or shorts, this top never fails to make a statement. It’s a delightful and stylish piece that celebrates handmade creativity.
https://youtu.be/E_68elUM2Lw
Crochet Chlamy’s Top Pattern
Materials
- Yarn:
- 6-ply combed cotton yarn or any size 2 sports weight yarn.
- Approximate Yarn Amount: 100–150g (depends on size and ruffle customization).
- Hook:
- 3.5 mm crochet hook.
- Additional Tools:
- Darning Needle: For weaving in ends and finishing.
- Tape Measure: To check and customize dimensions.
- Stitch Markers: To keep track of beginning/end stitches.
Gauge
- 12 stitches x 6 rows = 2 inches in single crochet (sc).
- Meeting the exact gauge ensures a proper fit for the top.
Skill Level
Intermediate – Requires working with foundation chains, single crochet (sc), double crochet (dc), shell stitches, color changes, and ruffles.
Finished Size
- Example dimensions in this pattern:
- Front Length (Upper Bust to Underbust): ~6 inches (16 rows)
- Fully customizable for different bust sizes and desired lengths.
- Back Ribbon Strap Length: 44 rows.
- Ruffles: Made to desired length or approximately 8 rows.
Key Abbreviations
| Abbreviation | Meaning |
|---|---|
| ch | Chain |
| sc | Single Crochet |
| dc | Double Crochet |
| sl st | Slip Stitch |
| st(s) | Stitch(es) |
| shell st | Set of 5 double crochet stitches worked in one st |
Special Notes
- Row Construction: Each row builds on the previous shell placement, creating textured rows of shells.
- Custom Sizing: Add multiples of 6 stitches to the foundation chain (plus 2) for a larger size.
- Ruffle Expansion: Increase stitches in the ruffles for a fuller, more dramatic effect.
- Straps and Ribbon Length: Adjust the length of ribbon and straps based on individual body measurements.
Pattern Instructions
Main Body (Front Section)
Step 1: Foundation Chain
- Begin with a slipknot and chain 44 for an XS-S size.
- For larger sizes, increase the chain count in multiples of 6 and add 2 extra chains. Ensure the chain is divisible by 6 + 2.
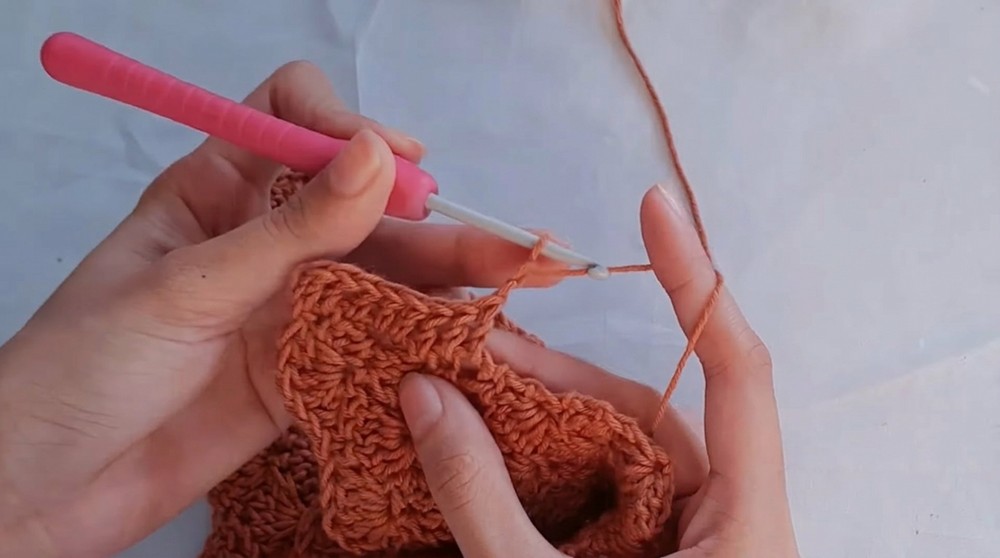
Step 2: Row 1 – Creating Shell Stitches
- Start Single Crochet:
- Work 1 sc into the second chain from the hook.
- Skip the next 2 chains.

- Shell Stitch:
- In the next chain, work 5 dc (this creates the first shell).
- Repeat Across the Row:
- Skip 2 chains, then work 1 sc into the next chain.
- Skip 2 chains, then work 5 dc into the next chain (forms the next shell).
- Continue this pattern (skip 2 chains → 5 dc → skip 2 chains → 1 sc) until you finish the row.
- End the Row:
- Finish with 1 sc in the final chain. The first row should now display alternating single crochet and shell stitches.
Step 3: Row 2
- Begin Row 2:
- Ch 2 (counts as the first dc), turn your work.
- Work 4 dc into the first stitch.
- Shell Alignment:
- Work 1 sc into the middle double crochet of the shell below (3rd dc of the shell stitch in Row 1).
- Work 5 dc into the next single crochet (this positions shells between the shells of the previous row).
- Continue Pattern:
- 1 sc into the center of the shell stitch below → 5 dc in the next sc.
- Repeat this pattern until the end.

- End Row 2:
- Finish by working 4 dc in the last stitch (sc from the previous row).
Step 4: Row 3
- Begin Row 3:
- Ch 2, turn your work.
- Work 2 dc in the first stitch.
- Follow the same stitch placement rules as Row 2:
- Position shell stitches (5 dc) between the shells of the previous row.
- Work 1 sc into the center dc of each shell stitch below.
- Finish Row 3:
- End the row with 2 dc in the final stitch.
Step 5: Row 4
- Begin Row 4:
- Chain 1, turn.
- Work 1 sc in the first stitch and 5 dc in the next sc (between the shells of the previous row).
- Continue the shell placement as in previous rows, ending the row with 1 sc in the last stitch.
Step 6: Repeat Rows 2, 3, and 4
- Continue this pattern repeat until the top measures from the upper bust to the underbust (or desired length).
- Example: For the tutorial, 16 rows (6 inches) were completed.
Back Ribbon
- Edge Double Crochet Foundation:
- Attach yarn to the edge of the front panel (underbust area).
- Ch 2, then work 8 dc across. Adjust ribbon width based on preference.
- Build Ribbon Rows:
- Ch 2, turn, and work 1 dc in each stitch across.
- Continue this pattern until 44 rows (or desired ribbon length for tying).

- Repeat for Other Side:
- Attach yarn on the opposite edge of the front panel and repeat the above steps for the second ribbon.
Ruffle Details
- Begin Ruffles:
- Start at the back edge (fourth row) with a slip knot and attach yarn.
- First Row of Ruffles:
- Ch 3, then work 2 dc, ch 2, and 2 dc into the same row.
- Skip 1 stitch and repeat: Work 2 dc, ch 2, 2 dc in the next stitch.
- Follow the Ruffle Pattern:
- Continue this until you reach the opposite edge.
- Additional Ruffle Rows:
- Turn and begin a new row by working the ruffle pattern into each chain space of the previous row (2 dc, ch 2, 2 dc).
- For fuller ruffles, increase the number of double crochets to 3 dc.
- Final Ruffle Row:
- On the final row, work 6 dc in each chain space and sl st between shell stitches.
Straps
- Mark Strap Positions:
- Fold the top in half, use stitch markers to evenly place strap positions.
- Chain Strap Length:
- Attach yarn, ch 50 (or to desired length), ensuring it aligns with the back panel’s ribbon placement.
- Work Straps:
- Single crochet back along the chain for additional thickness and durability.
Finishing
- Edging:
- Work a row of single crochet along the top’s edges to create a neat finish.
- Weave in Ends:
- Use a darning needle to weave in all ends securely.
- Strap Attachment:
- Ensure the straps are untwisted and firmly attached to the back ribbon for stability.
- Ensure the straps are untwisted and firmly attached to the back ribbon for stability.
Conclusion
The Chlamy’s Crochet Top is a beautiful and customizable garment, combining lightweight shell stitches with elegant ruffles and a tied back. Perfect for summer wear, it can be adjusted for any size or preference.
Tips
- Check Fit Frequently: Measure length and width as you go to ensure proper fit.
- Play with Colors: Use two or more colors for the shells, ruffles, or ribbon to add a unique touch.
- Increase Ruffle Volume: For dramatic flair, add an extra row or widen the stitches in the ruffles.