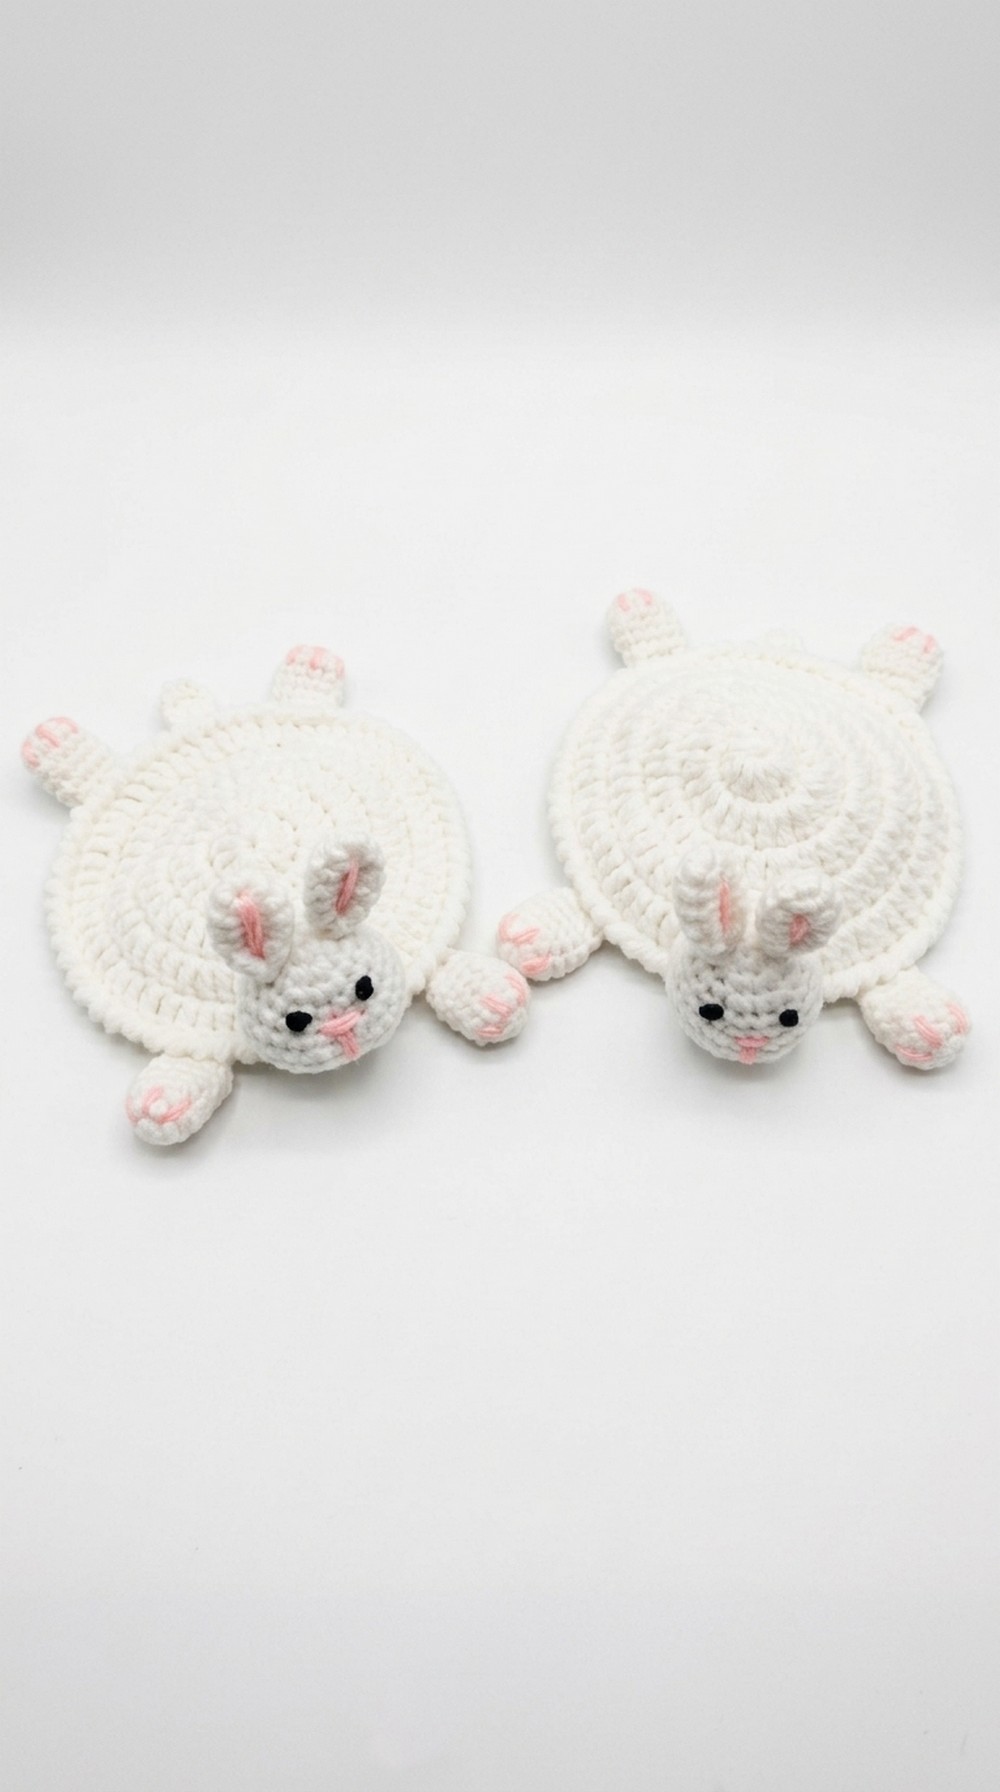
Give your table a fun and charming look with this free crochet bunny coaster pattern that helps you create a soft and useful piece for daily use.
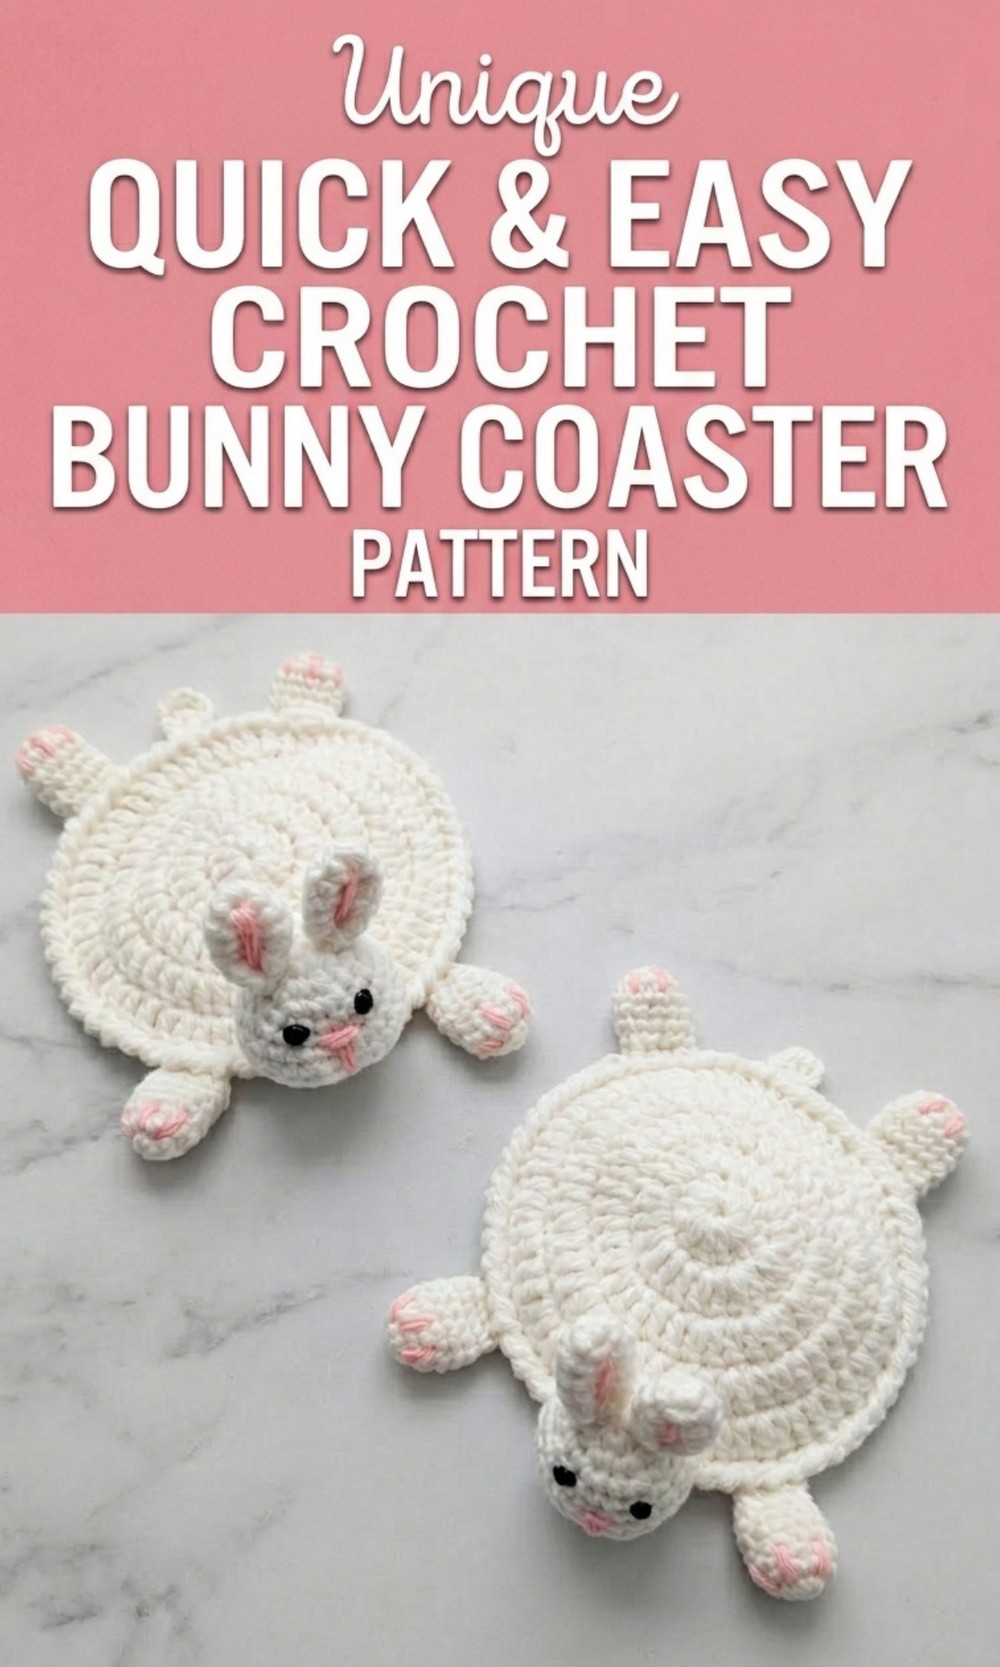
Amazing Free Crochet Bunny Coaster Pattern to Enhance Your Space
If you love cute and simple crochets, this Free Crochet Bunny Coaster Pattern is just perfect for you. The bunny coaster is not only adorable but also very useful. Its round body looks so beautiful, and the little bunny ears and tail make it extra special. This coaster will brighten up your home or workspace and can also be a lovely handmade gift for someone you care about. It keeps your tables clean and adds a fun touch to your décor.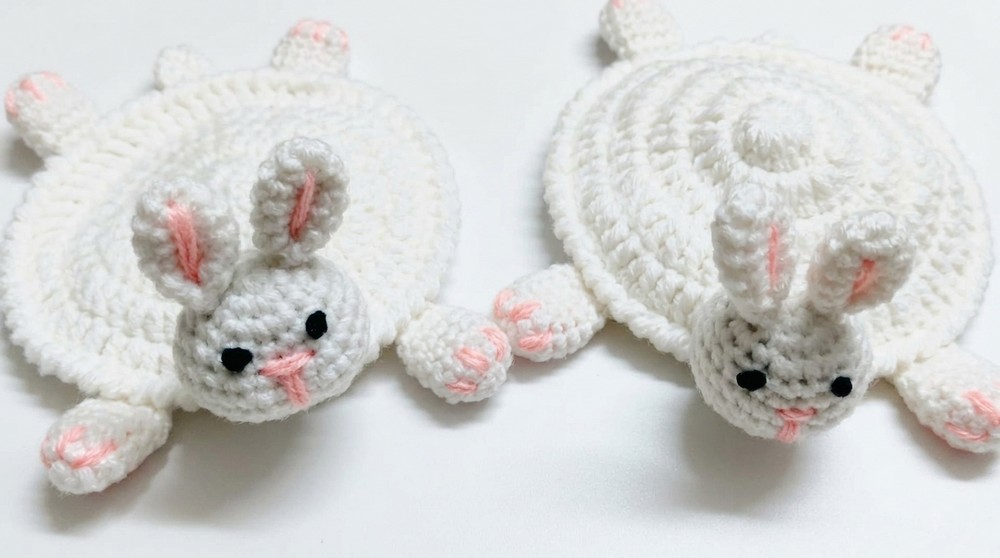 All you need is some yarn, a hook, and a little time. The bunny design is unique and will surely make everyone smile. It’s perfect for kids’ rooms, tea tables, or even as a small gift. Start crocheting today and enjoy making these cute little friends.
Lovely Crochet Bunny Coaster Pattern
Materials Needed
- Yarn:
- White (main bunny color; use two balls as yarn will be doubled for the body)
- Light pink (detailing for the nose, ears, and nails)
- Black (for embroidered eyes)
- Crochet Hook: 2.5 mm (or a size suitable for your chosen yarn)
- Yarn Type: 4 ply acrylic yarn
- Stuffing: A small amount of cotton or fiberfill to enhance the face detailing (optional).
- Scissors: For trimming yarn.
- Needle: For embroidery and assembly.
- Optional Adhesive: A high quality fabric glue (for quick assembly).
Special Techniques
- Magic Ring: Used for creating a neat circular start.
- Increase (Inc): Two single crochets or double crochets in the same stitch.
- Decrease (Dec): Combine two stitches into one (often used in shaping).
- Reverse Single Crochet (RSC): Crocheting in the opposite direction to add texture to the border.
Step by Step Instructions
Part 1: Bunny Body
This is the circular base of the coaster.
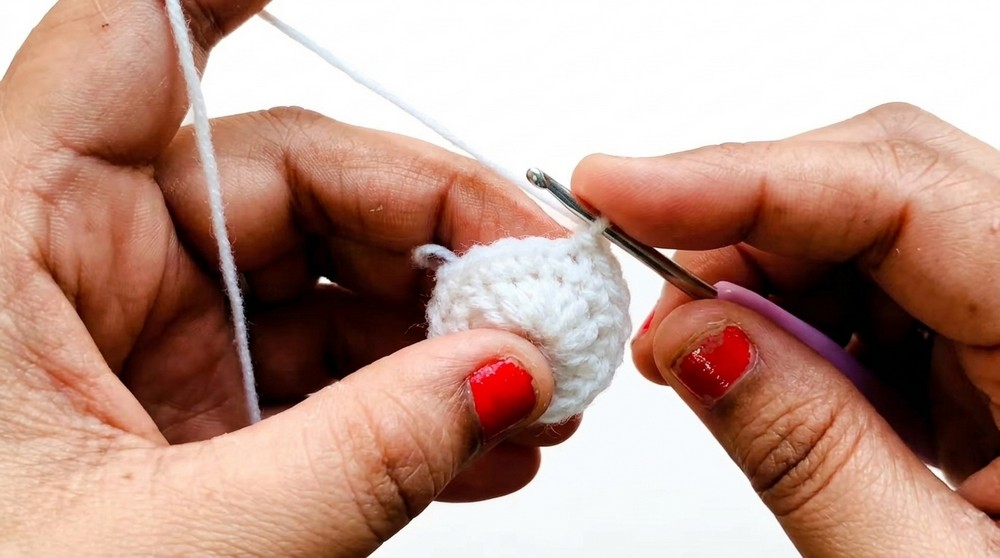
Round 1: Magic Ring
- Make a magic ring around two fingers.
- Secure the ring with one chain.
- Inside the ring, crochet 12 double crochets. (Do not count the chain as a stitch.)
- Pull the tail to close the magic ring.
- Close the round with a slip stitch into the first double crochet.
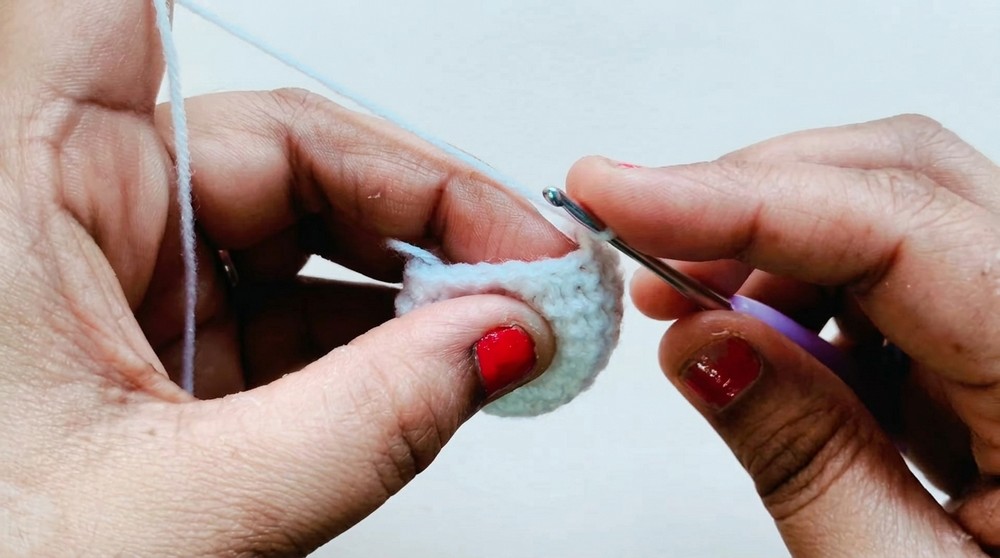
Round 2: Increases
- Chain 2 (does not count as a stitch).
- Work two double crochets in each stitch. This is called increase.
- Repeat for all 12 stitches, resulting in 24 double crochets.
- Slip stitch into the first double crochet to close the round.
Round 3: Alternate Increase
- Chain 2 (does not count as a stitch).
- Pattern: 1 double crochet, 1 increase (2 double crochets in one stitch).
- Repeat this pattern 12 times, resulting in 36 double crochets.
- Close with a slip stitch.
Round 4: Spacing Out the Increases
- Chain 2 (does not count as a stitch).
- Pattern: Double crochet in 2 stitches, then increase (2 double crochets in one stitch).
- Repeat this pattern 12 times, for a total of 48 double crochets.
- Close with a slip stitch.
Round 5: Final Round
- Chain 2 (does not count as a stitch).
- Pattern: Double crochet in 3 stitches, then increase (2 double crochets in one stitch).
- Repeat this pattern 12 times, resulting in 60 double crochets.
- Slip stitch to close the round.
Part 2: Bunny Body Border
Create a textured edge using Reverse Single Crochet (RSC).
Reverse Single Crochet
- Chain 1.
- Work reverse single crochet (RSC) in each stitch (crocheting backward instead of forward).
- Continue around the edge, adding texture. Total: 60 reverse single crochets.
- Slip stitch to close, and fasten off.
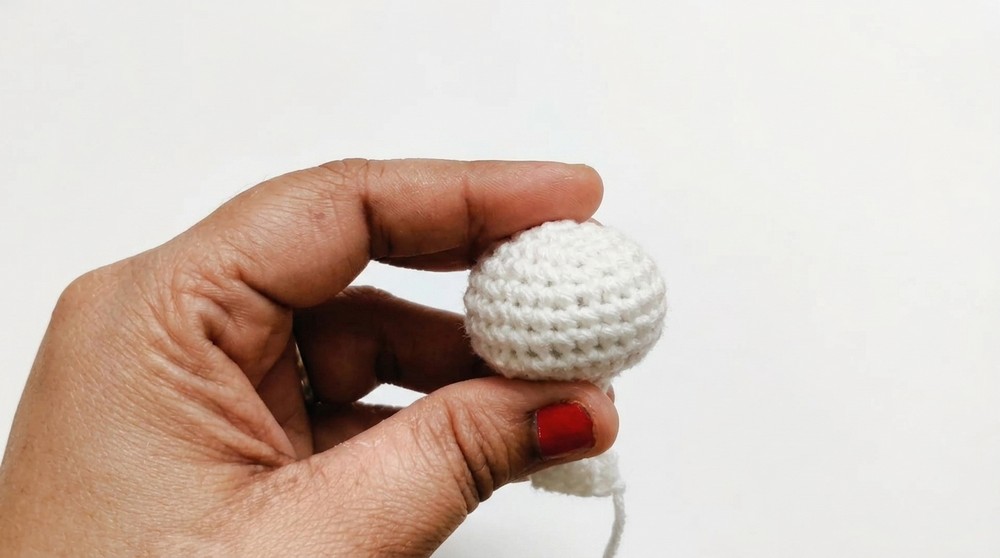
Part 3: Bunny Head
Round 1 to 8
- Use single yarn and a magic ring.
- Round 1: 6 single crochets in the magic ring.
- Close with a slip stitch.
- Round 2: Increase every stitch (2 single crochets per stitch) → Total: 12 STs.
- Round 3: 1 single crochet, then increase → Total: 18 STs.
- Round 4: Single crochet in each stitch → Maintain 18 STs.
- Round 5: 1 single crochet, then increase → Total: 27 STs.
- Rounds 6 to 8: Single crochet in each stitch → Maintain 27 STs.
Shaping the Head
- Round 9: 1 single crochet, decrease → Total: 18 STs.
- Round 10: Decrease every 2 stitches → Total: 9 STs.
- Rounds 11 to 12: Single crochet in each stitch → Maintain 9 STs.
Stuffing and Closing
- Insert cotton stuffing through the remaining opening for shaping.
- Fold the piece and close with single crochet joins. Total: 4 single crochets.
- Fasten off.
Part 4: Bunny Legs (Make 4)
Repeat the same process for chunky legs (details provided in transcription).
Part 5: Bunny Tail
Follow similar instructions for creating a small tail using a magic ring.
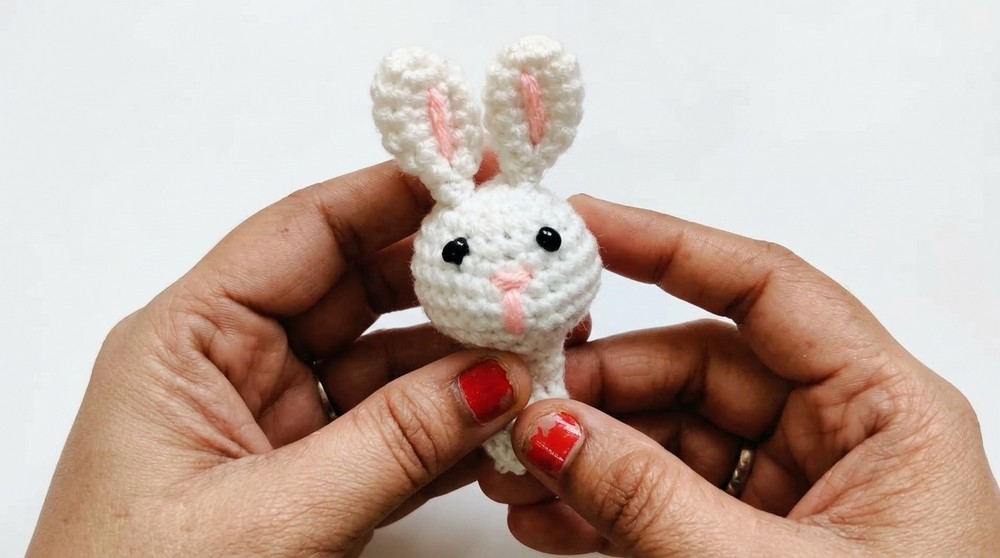
Part 6: Bunny Ears (Make 2)
- Use single yarn.
- Round 1: Create a magic ring with 5 single crochets.
- Round 2: Increase every stitch → Total 10 STs.
- Rounds 3 to 6: Single crochet in each stitch.
- Round 7: 1 single crochet, decrease → Total 7 STs.
- Attach detailing (pink yarn).
Part 7: Facial Detailing
- Embroider the nose using pink thread, placing it symmetrically on the head.
- Use black thread to create eyes, centralizing them above the nose.
Part 8: Assembly
- Attach each piece to the body using either fabric glue (optional) or sewing thread.
- Position the head, tail, legs, and ears symmetrically.
Final Words
Congratulations on completing your adorable Bunny Coasterm It’s perfect for gifting, home decoration, or even selling as part of your crochet business. For a professional finish:
- Weave and hide all ends neatly.
- Block the coaster using gentle steam or pressing.
Tips
- Ensure Tight Stitches: This helps make the bunny sturdy and elevated for a professional touch.
- Experiment with Colors: Use pastel shades for a whimsical look or vibrant colors for a playful style.
- Care Instructions: Hand wash gently to preserve detailing and structure.