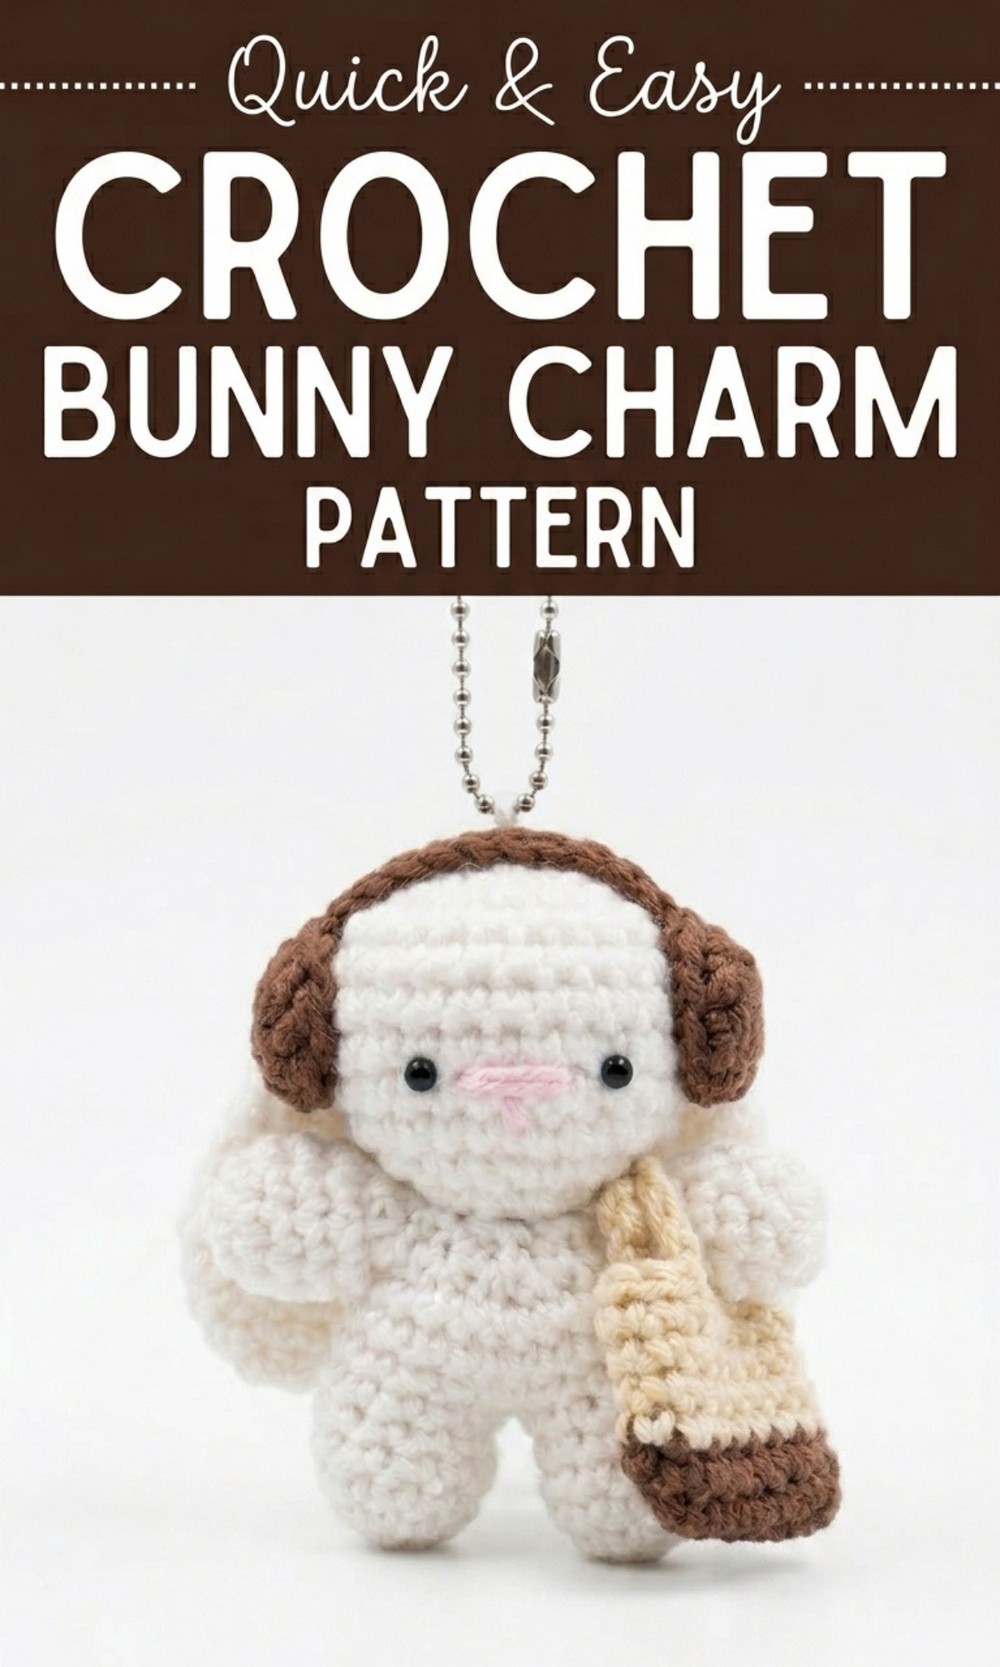
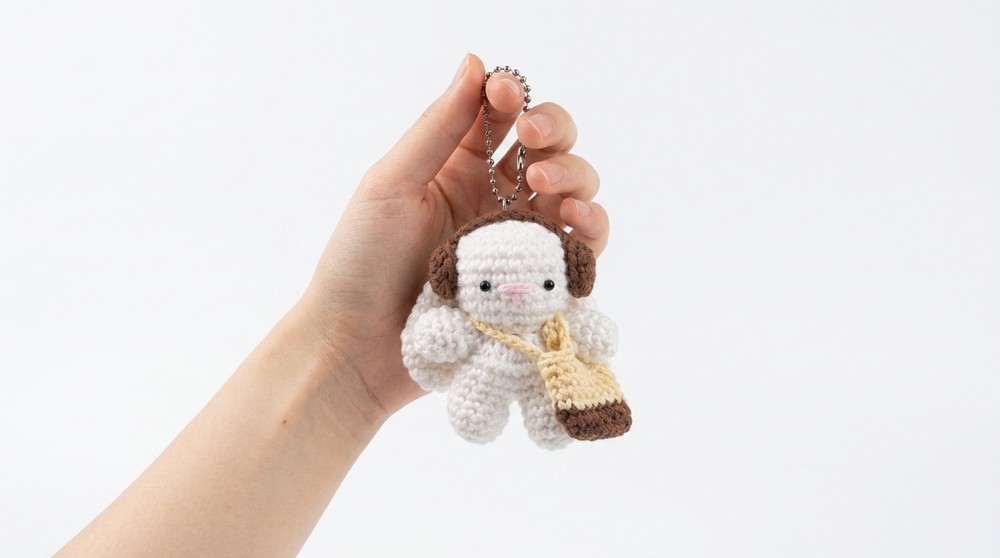
Enter a world of fun making with this adorable free crochet bunny charm pattern that is perfect for adding a playful touch to your gifts and decorations.
 Hook This Lovely Free Crochet Bunny Charm Pattern
This guide opens the door to crocheting your very own delightful crochet bunny charm that’s bound to steal hearts. We have everything you need to create a playful and adorable bunny with a soft, round body, cute floppy ears, and charming accessories like a backpack and headphones. This little creation isn’t just fun to make—it’s perfect as a gift, keychain, or cheerful decoration for your space. 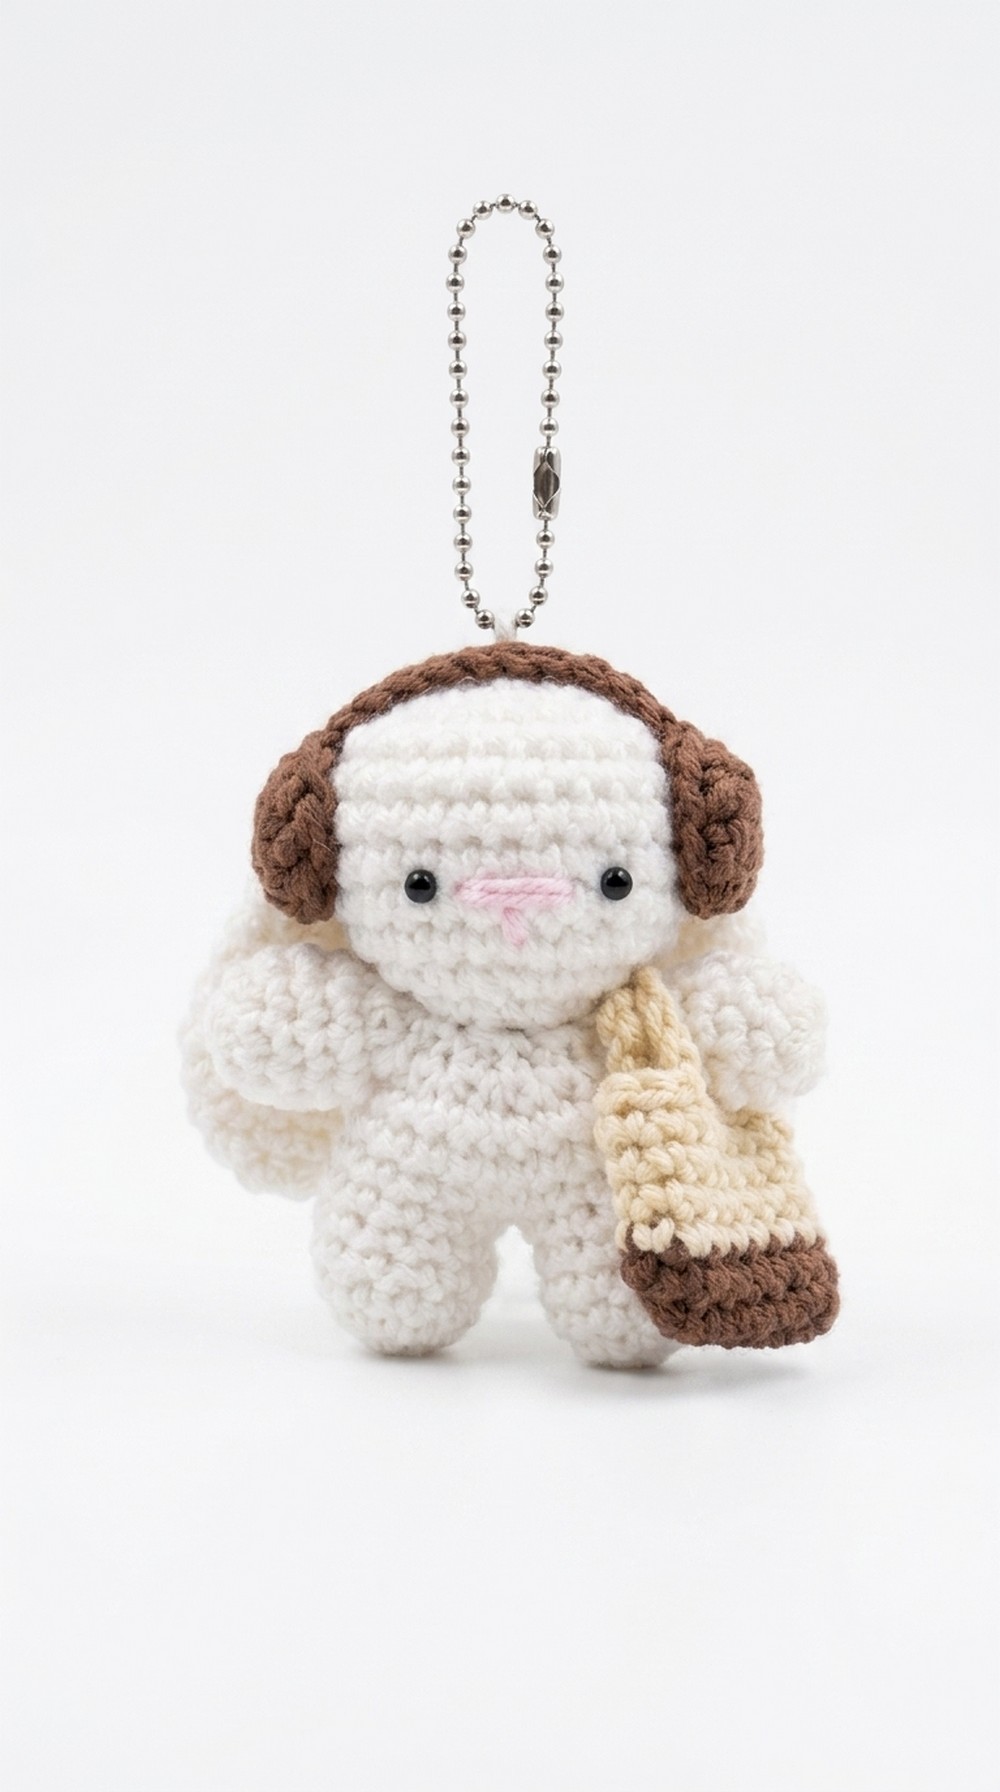 Designed with beginners in mind, the Free Crochet Bunny Charm Pattern uses simple stitches and offers detailed steps to make every part of the bunny, from its arms to its tiny head. Plus, you can personalize it with your favorite colors to give it a unique touch. This project is easy, fun, and guaranteed to bring smiles to anyone who sees your beautiful handmade bunny.
Crochet Bunny Charm Pattern
Materials Needed
- Yarn (medium weight): Choose colors for the body, details (e.g., arms, legs, ears), accessories (e.g., headphones, backpack), and embroidery (e.g., nose/mouth).
- Examples: White (main body), Beige/Brown (bag), Pink (nose/mouth), and any color for headphones.
- Hook Size: Suitable crochet hook for your yarn, typically 2.5mm – 4mm for small amigurumi.
- Stuffing: Polyester fiberfill or similar for filling the body and head.
- Embroidery Needle: For sewing and detailing.
- Scissors: For cutting yarn.
- Stitch Markers: To track your rounds.
Abbreviations
- MR: Magic Ring
- ch: Chain
- sc: Single Crochet
- sl st: Slip Stitch
- inc: Increase (2 single crochets in the same stitch)
- dec: Decrease (crocheting 2 stitches together through front loops)
- st(s): Stitch(es)
Special Techniques
- Magic Ring (MR): A loop used to start crocheting in the round for seamless shapes. Wrap yarn around your finger, pull through to form a loop, and begin working stitches into the loop.
- Invisible Decrease: Worked in the front loops only to create a neater result when shaping the piece.
- Changing Colors: When switching colors, change yarn in the last pull through of the last stitch in the row.
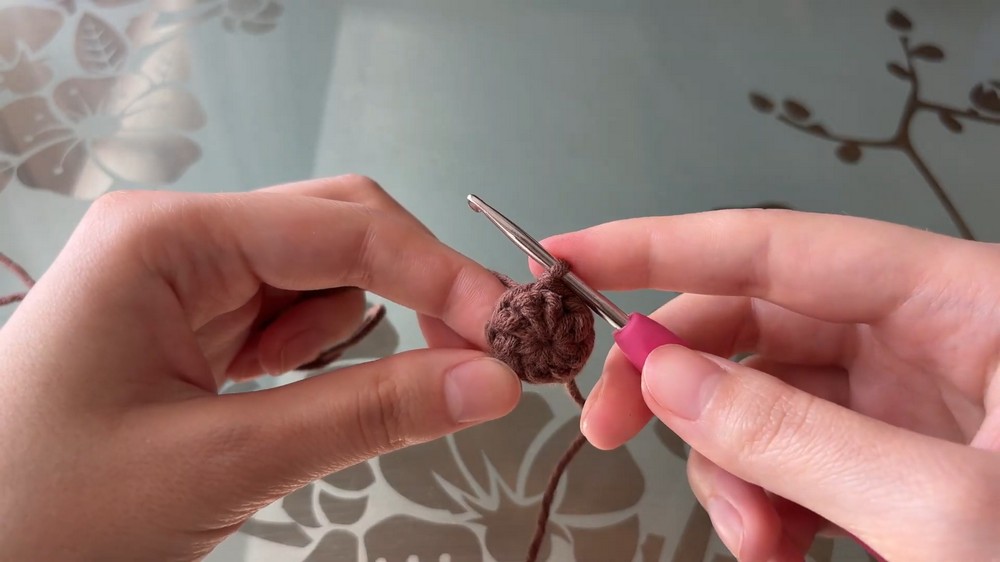
Pattern Instructions
Arms
Row 1:
- Start with a magic ring (MR).
- Crochet 8 sc into the MR. Pull tail to close. (8 sts)
- Sl st into the first sc to join.
Row 2:
- 1 sc into each st around. Place a stitch marker on the first sc. (8 sts)
- Sl st into the first sc to join.

Rows 3 to 4:
- Repeat Row 2.
Finishing the Arms:
- After completing 4 rows, ch 1, cut the yarn, and leave a short tail.
- Tighten the magic ring and weave in the beginning yarn tail inside the arm for neatness.
- Make a second arm using the exact same instructions.
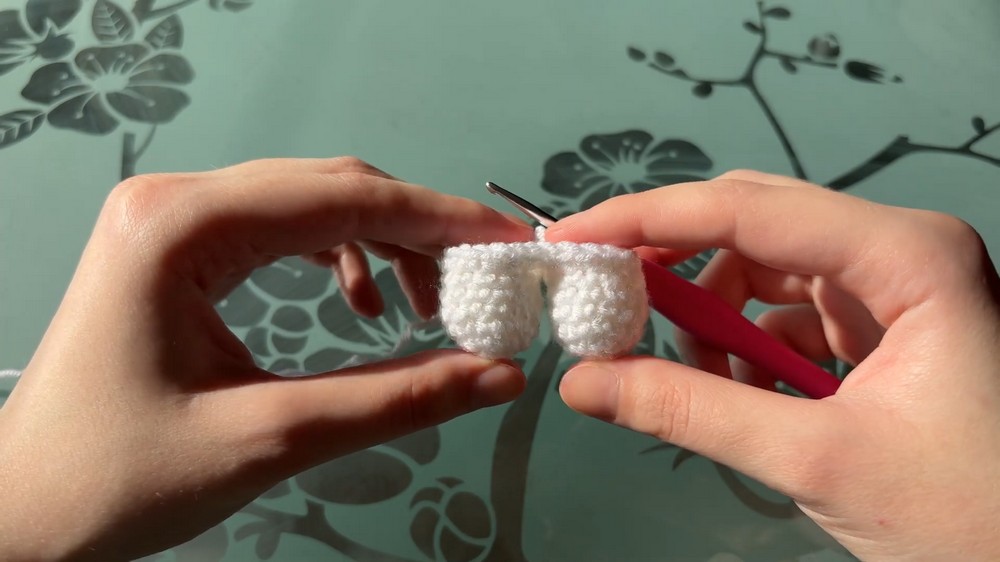
Legs
Row 1:
- Start with a MR.
- Crochet 5 sc into the MR. Pull tail to close. (5 sts)
Row 2:
- Make 1 inc in each stitch all around. (10 sts)
Rows 3 to 5:
- Work 10 sc around for a total of 3 rows.
Finishing the Legs:
- After the first leg, sl st into the first sc, ch 1, cut the yarn, and weave in the ends.
- For the second leg, follow the same instructions but do not cut the yarn after Row 5.
Body Assembly (Attaching Legs and Arms)
- On the second leg:
- Row 6: Ch 1, sc into any st on the first leg, and work 10 sc around the first leg.
- Sc into the ch between the legs, sc 10 around the second leg, and sc into the ch again. (22 sts)
Rows 7 to 9:
- Work 1 sc in each stitch around for three rows. (22 sts)
Row 10:
- Start decreasing: Work 1 dec into every two stitches using only the front loops. (11 sts)
Stuff the body firmly before moving to the head.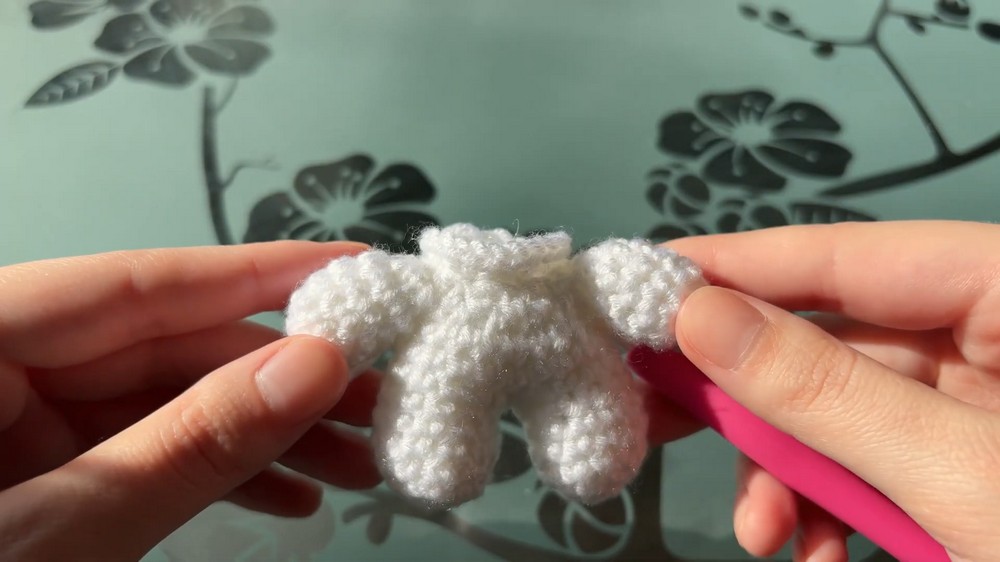
Head
Row 11:
- Work 2 sc into each stitch (increase in every stitch). (22 sts)
Row 12:
- Pattern: 2 sc, inc; repeat around. (26 sts)
Rows 13 to 19:
- Work 1 sc in each stitch around for seven rows. (26 sts)
Row 20 to 21:
- Decrease to shape the head. Stuff the head too.
- Row 20: 1 dec in every 2 stitches. (13 sts)
- Row 21: 1 sc, 1 dec around. (7 sts)
To close: Use a needle to weave through the remaining stitches, pull tight, and secure.
Ears
Row 1:
- MR with 8 sc into it. (8 sts)
Row 2:
- Work 1 sc, inc in the next st; repeat. (12 sts)
Rows 3-10:
- Follow provided instructions for shaping, including sc and decreases to form the flat ear.
Finishing the Ears:
- Fold each ear flat along the decreases and stitch the open end closed.
- Attach each ear to the top of the head using the long tail.
Eyes, Nose, and Mouth
- Sew or glue small black beads or felt for eyes.
- Use pink yarn to embroider a tiny triangle nose and mouth below the eyes.
Accessories
Headphones
- Use leftover yarn to make 2 headphone pieces:
- MR with 9 dc. (9 sts)
- Sl st to close, bind off for the first headphone.
- On the second headphone, create a ch (approx. 11) to connect the two pieces. Sl st to first headphone, bind off.
- Attach headphones using glue or thread.
Backpack
- Bottom Part:
- Ch 7. Work sc into the chain, adding increases at both ends and working along the other side to form an oval.
- Complete 2 rows with increases at the ends (16 sts).
- Body:
- Change color at Row 3.
- Work 1 sc in each st for 6 rows (16 sts).
- Handles:
- Create 2 handles by chaining 10 and skipping 2 stitches before reattaching.
- Create 2 handles by chaining 10 and skipping 2 stitches before reattaching.
Final Steps
- Weave in all loose ends.
- Attach all accessories securely.
Tips for Success
- Keep stitches snug but not too tight.
- Use stitch markers to keep track of rows.
- Adjust the chain length on handles and headphones for your bunny’s proportions.
- Stuff firmly for a well shaped charm.
Final Words
Your adorable mini bunny charm is now complete! Whether you use it as a keychain, a gift, or a desk companion, this little bunny is bound to bring smiles.