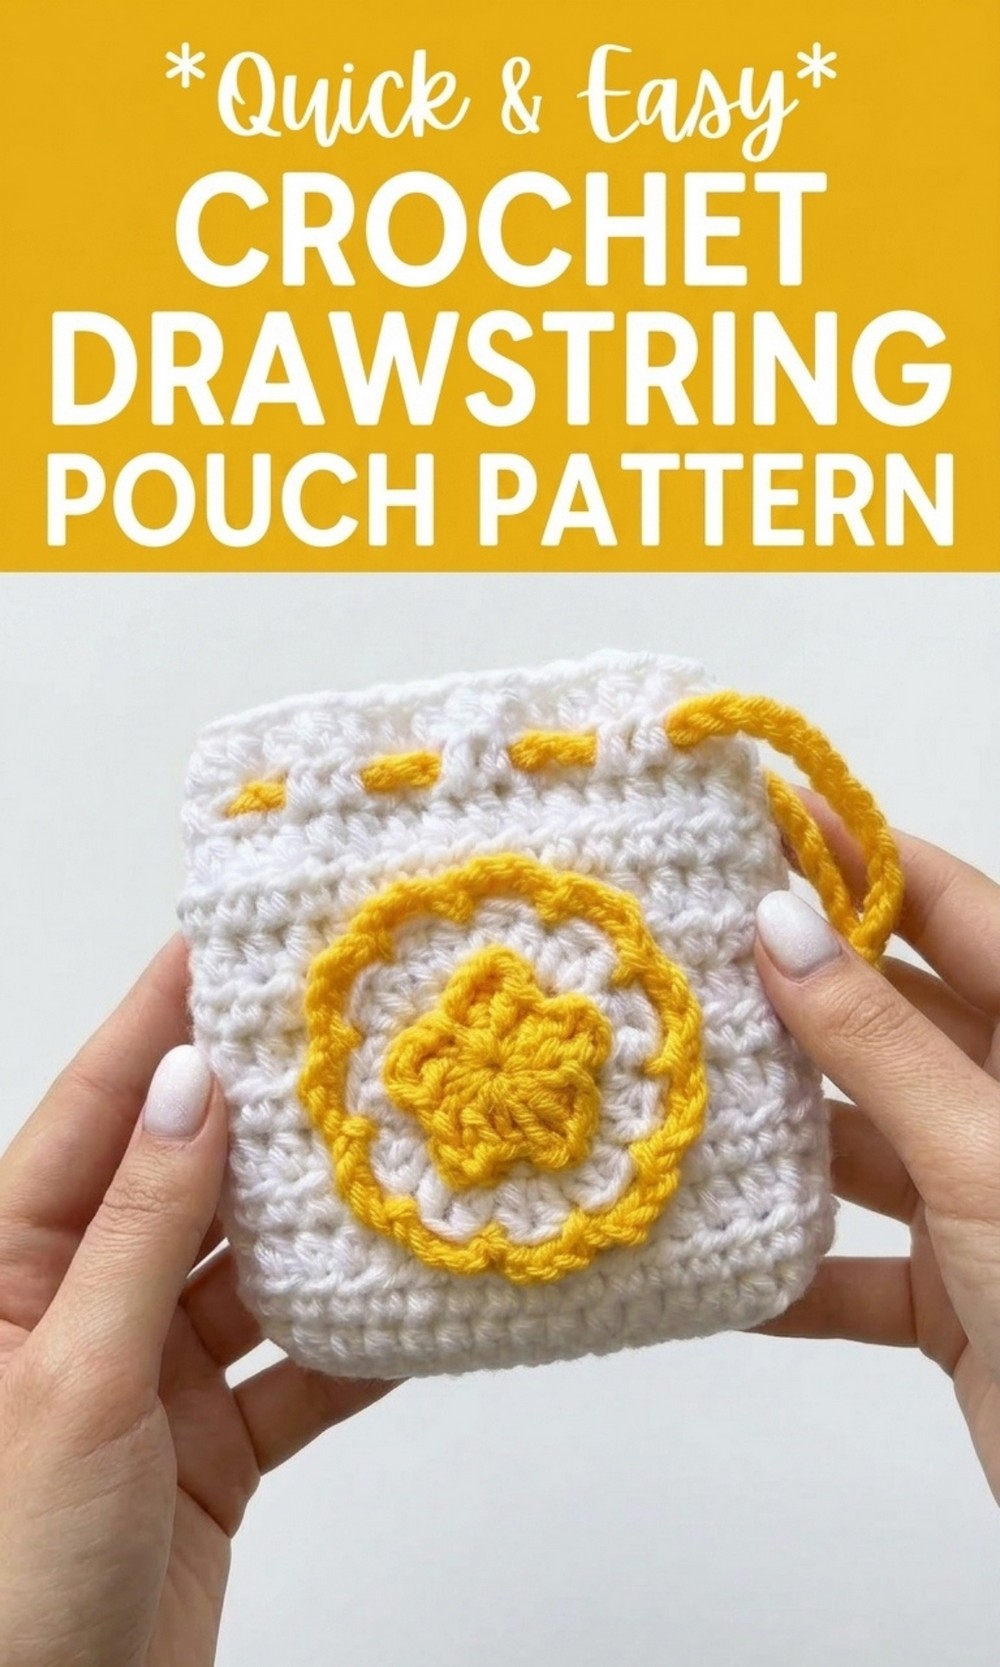
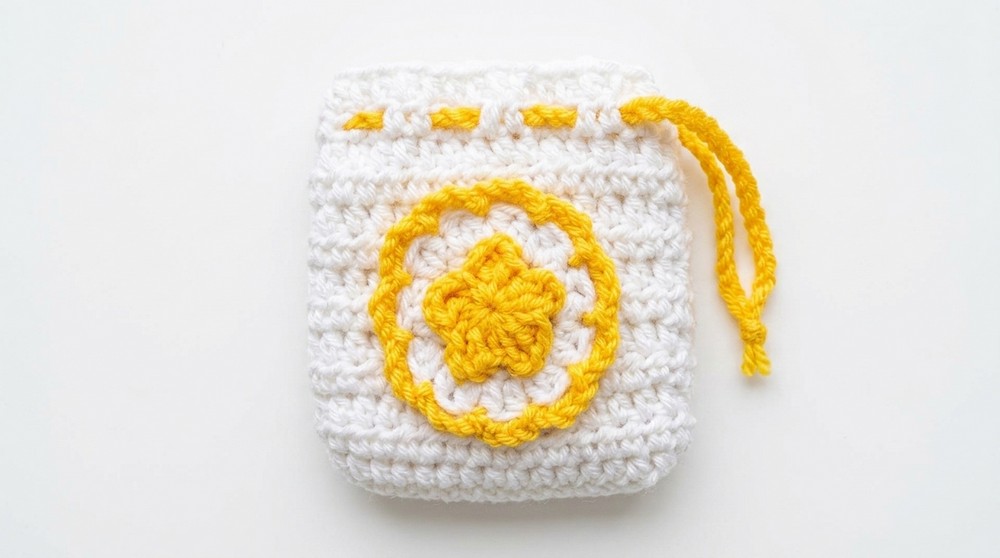
Try this free pattern to make a soft and lovely crochet drawstring pouch Pattern that’s great for holding things or giving as a meaningful crochet gift.
Perfect Free Crochet Drawstring Pouch Pattern You Need
Perfect for beginners and experienced crocheters alike, this pouch is small, charming, and incredibly practical. You can use it to store jewelry, coins, or other tiny treasures, making it both decorative and functional. The design stands out with its customizable colors, adorable star and heart decorations, and soft yarn texture, which bring a playful and cozy touch.
 Its scalloped edges and thoughtful stitching make it look truly unique and handmade. This pouch makes a wonderful gift for loved ones or a delightful personal keepsake. Get ready to make something truly special and enjoy every moment of this relaxing and creative activity.
Crochet Drawstring Pouch Pattern
Materials Required
- Yarn:
- Main yarn (medium weight yarn in any color for the pouch).
- Contrasting yarn for star, heart, and circle embellishments.
- Crochet Hook: 4mm or size appropriate for your yarn.
- Scissors: Standard craft scissors.
- Needle: Yarn needle for sewing and weaving in ends.
- Stitch Markers: Optional for row tracking.
- Sewing Pins: Optional for securing layers during assembly.
Abbreviations
- ch: Chain.
- sc: Single crochet.
- hdc: Half double crochet.
- dc: Double crochet.
- tr: Treble crochet.
- sl st: Slip stitch.
- st: Stitch(es).
Pattern Breakdown
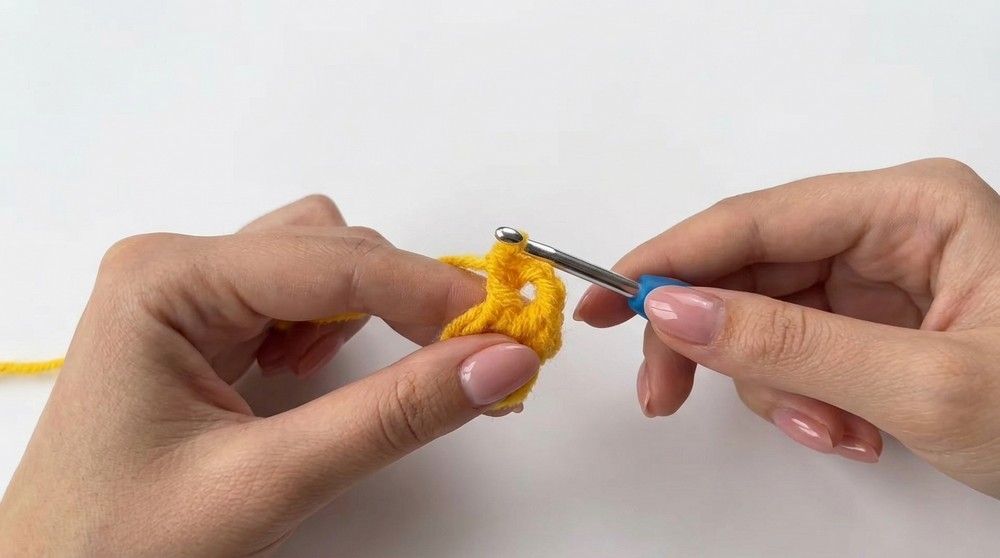
Part 1: Star
Step 1: Magic Ring
- Wrap yarn around your fingers. Hold the short end securely.
- Insert your hook under the first loop, grab the second loop, twist, and chain 1.
Step 2: Star Points
- To make the first point, work the following into the ring:
- 1 sc, 1 dc, ch 2, and 1 dc.
- Repeat this sequence 4 more times for a total of 5 points.
Step 3: Finish
- Pull the short tail to close the ring tightly, forming the star.
- Cut the yarn, leaving a long tail for sewing. Secure with a knot.
Part 2: Heart
Step 1: Magic Ring
- Create a magic ring using the same method as the star.
Step 2: First Half of Heart:
- Chain 1, then work the following:
- 3 tr, 3 dc into the ring.
Step 3: Point of Heart:
- Ch 1, 1 tr, ch 1 (this forms the tip of the heart).
Step 4: Second Half
- Mirror the first half, working:
- 3 dc, 3 tr into the ring.
Step 5: Finish
- Ch 2, sl st into the ring. Pull the tail tight to close the ring.
- Cut yarn, leaving a long tail for sewing.
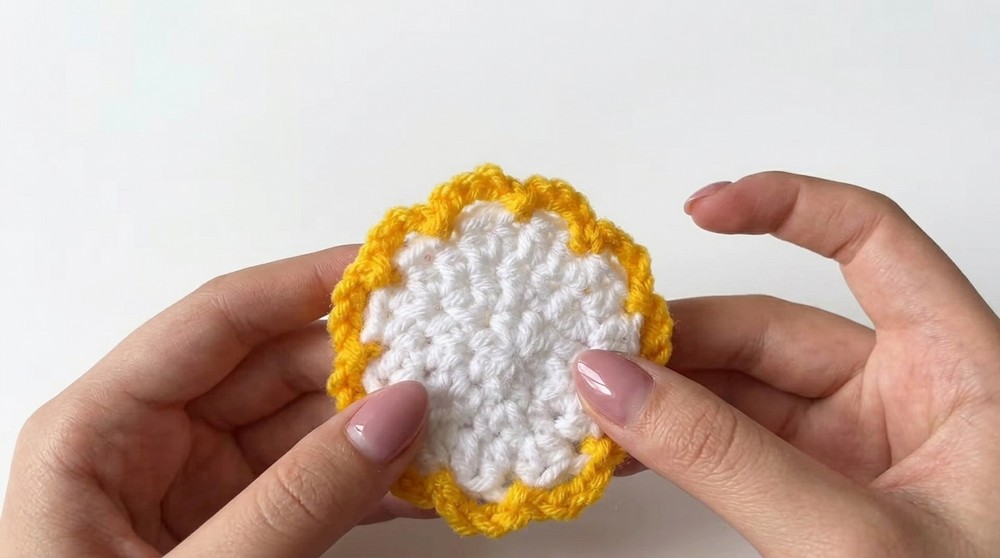
Part 3: Circle Base for Star/Heart
Step 1: Circle – Row 1
- Create a magic ring.
- Work 8 hdc into the ring. Pull tight to close.
- Sl st into the first hdc.
Step 2: Circle – Row 2
- Place a stitch marker in the first st for tracking.
- Work 2 hdc (increase) into each stitch for a total of 16 stitches.
Step 3: Circle – Row 3
- Work the following sequence around: 1 hdc, 2 hdc into the next stitch. (Total: 24 sts).
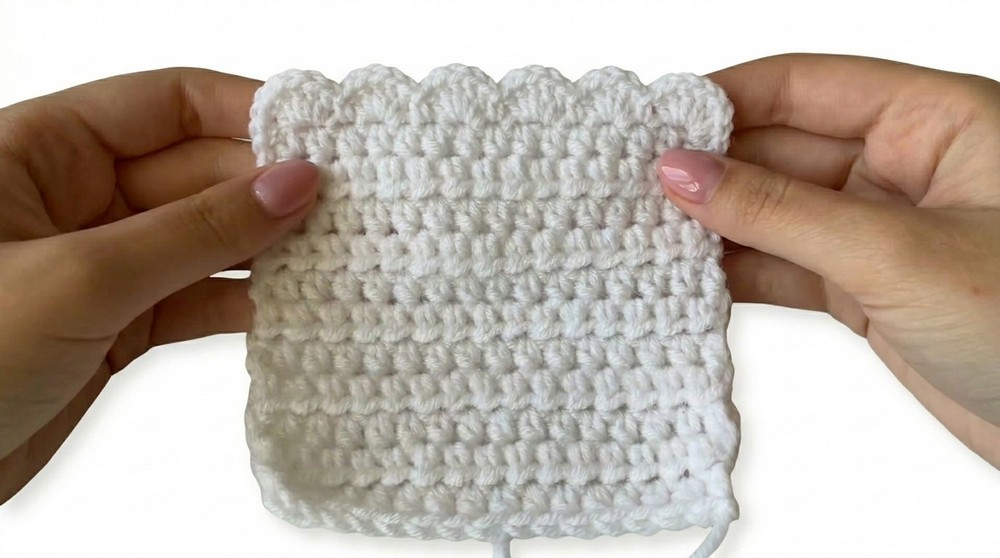
Step 4: Decorative Edging
- Preparation:
- Make a slip knot, joining your yarn to any stitch on the edge.
- Edge Work:
- Work: ch 4, skip next stitch, sl st into the following stitch.
- Repeat around, creating a scalloped edge.
- Finish:
- Sl st into the first stitch. Trim yarn, securing the tail in stitches.
- Sl st into the first stitch. Trim yarn, securing the tail in stitches.
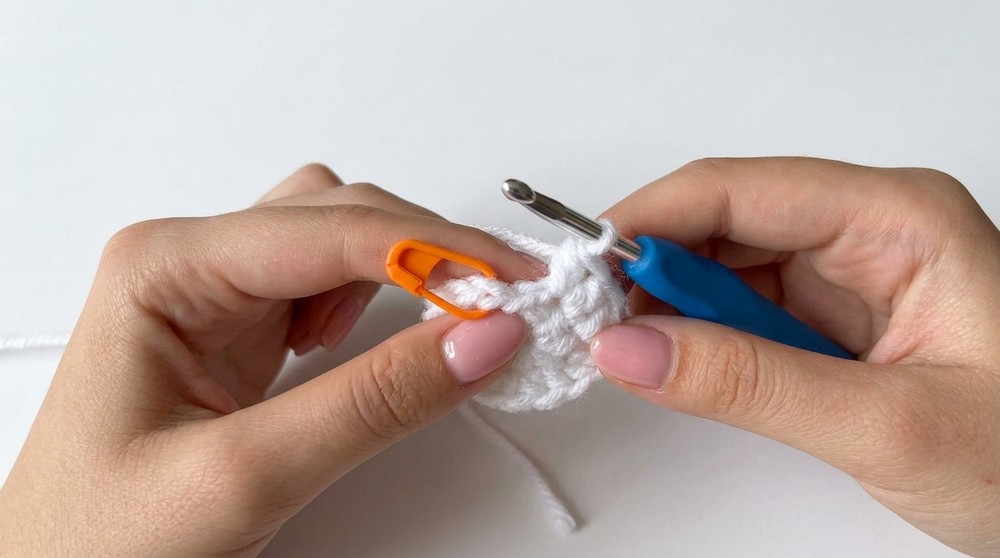
Part 4: Panels for Pouch
Step 1: Foundation Chain
- Ch 16.
Step 2: Rows
- Row 1: Work hdc into the second chain from the hook, and across (15 sts).
- Subsequent Rows: Ch 1, turn, work hdc into each st.
Step 3: Repeat
- Create 13 rows for one panel.
Step 4: Make Two Panels
- Repeat the process for a second panel.
Part 5: Sewing the Circle to One Panel
Placement
- Position the circle in the center of one panel, aligning it about two rows above the bottom edge.
- Pin the circle in place if preferred, or hold with your fingers.
Sewing
- Using the long yarn tail from the circle, sew the circle onto the panel with small stitches around the edges.
- Pay extra attention to points (if sewing a star).
Part 6: Assemble the Pouch
Step 1: Attach Panels Together
- Place two panels together, wrong sides facing outwards.
- Sew along three edges: the two sides and bottom, leaving the top edge open.
Step 2: Secure Corners
- Reinforce corner seams with extra stitches for durability.
Step 3: Flip Pouch
- Turn the pouch right side out once sewing is complete.
Part 7: Drawstring
Chain for Drawstring
- Make a slip knot and crochet a chain of about 60 stitches (adjust length based on personal preference).
- Cut yarn, leaving a short tail.
Thread the Drawstring
- Insert drawstring into the second row from the top of the pouch, threading through two stitches at a time.
- Repeat on the back panel.
Finish
- Tie small knots at both ends of the drawstring to secure. Trim excess yarn.
Finishing & Final Details
- Weave in Ends: Trim and hide yarn tails securely for a clean finish.
- Enhance Decorative Details: Embellish with beads or embroidery for added personalization.
Tips for Pattern Maintenance
- Use Stitch Markers: To simplify row counting and avoid losing track.
- Blocking: Lightly block the panels and decorations if uneven.
- Care Tips: Hand wash the pouch gently using mild detergent, and let it air dry in flat position.
Final Words
Congratulations on completing your super cute crochet drawstring pouch, With its whimsical attachments and functional design, this pouch makes a wonderful handmade gift or organizer.