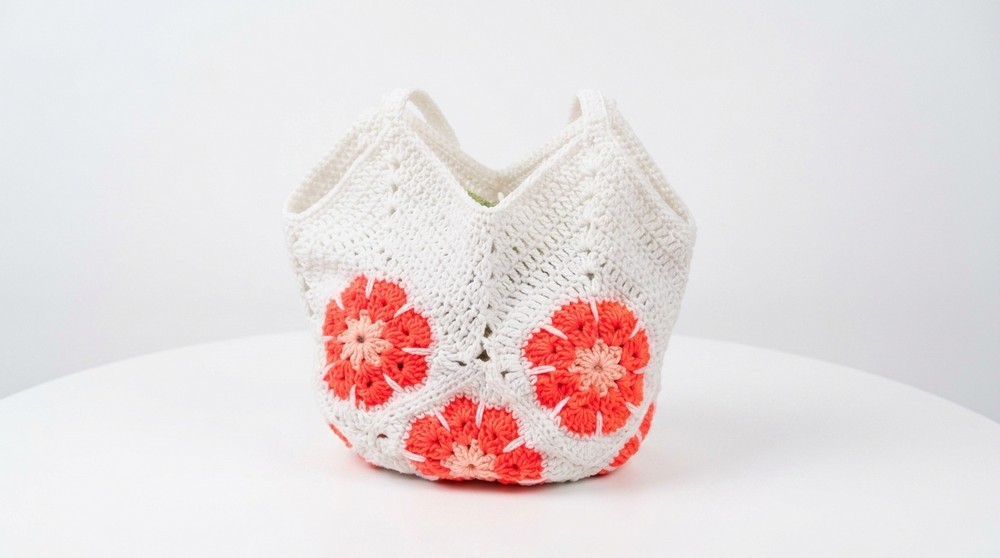
Turn simple squares into a pretty and useful bag with this free crochet granny square bag pattern that is fun to make and carry every day.
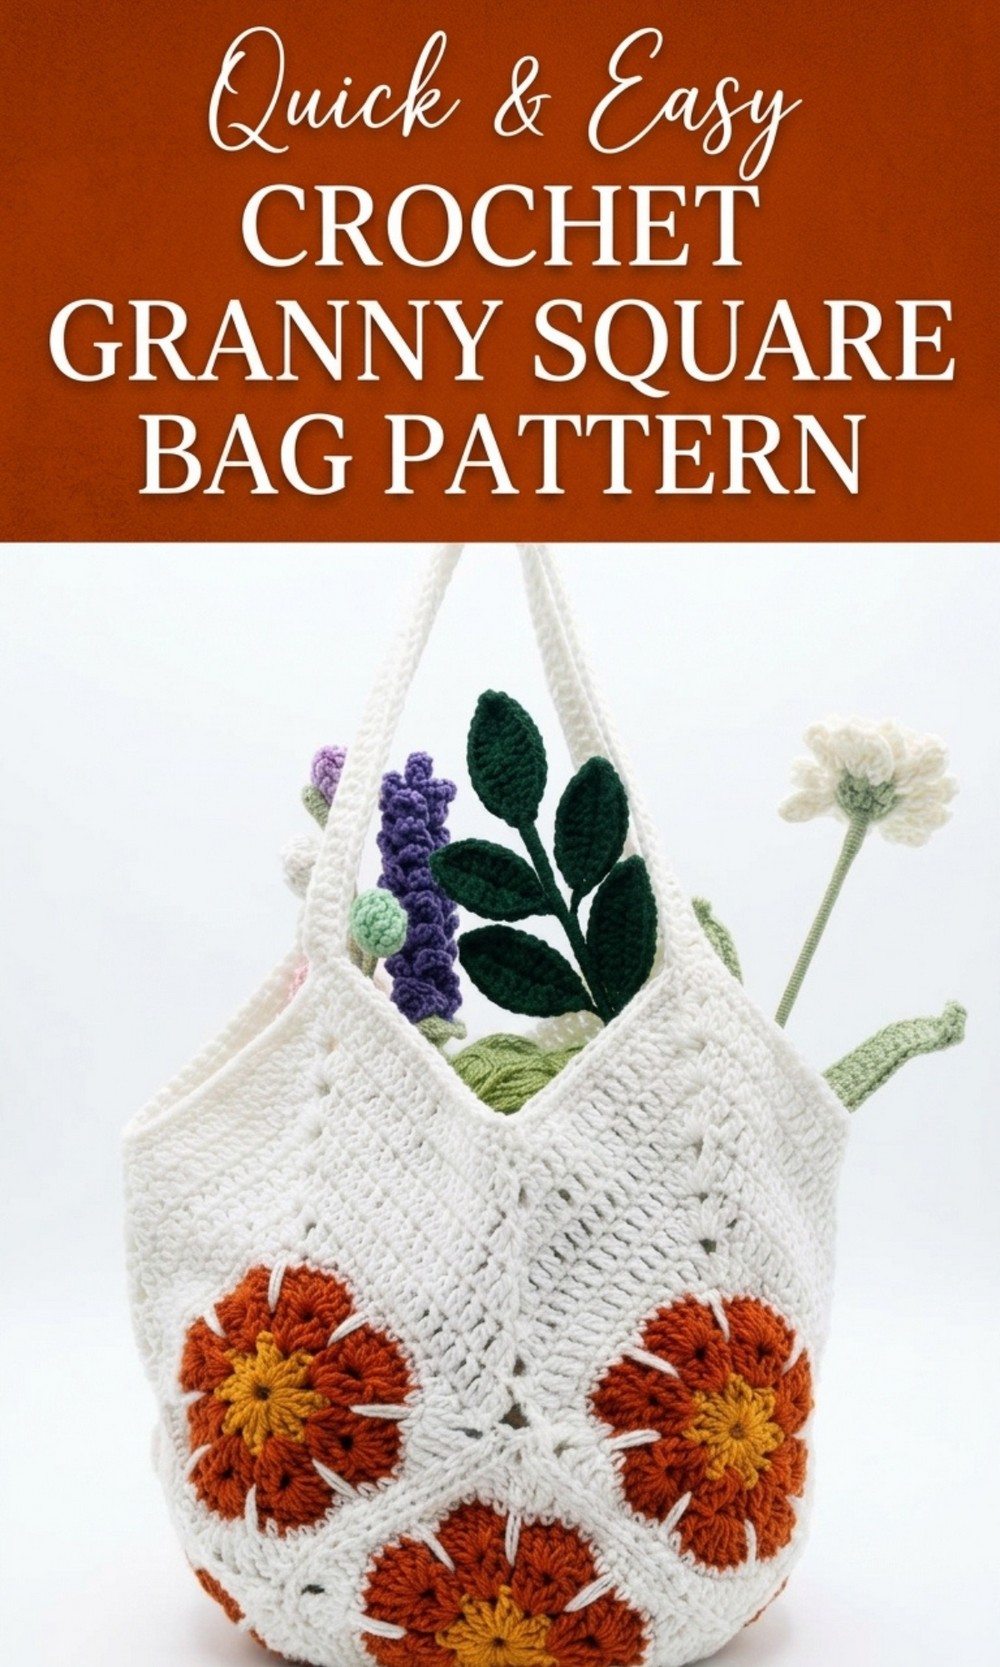
Charming Free crochet granny square bag pattern for instant use
A free crochet granny square bag pattern is a simple and fun way to make your own beautiful bag at home. This pattern uses small flower granny squares that are joined together to form a pretty and colorful bag. The bag looks very cute and stylish and you can choose any colors you like to match your clothes. It is useful for daily use like shopping school college or casual outings and it is strong enough to hold small items. 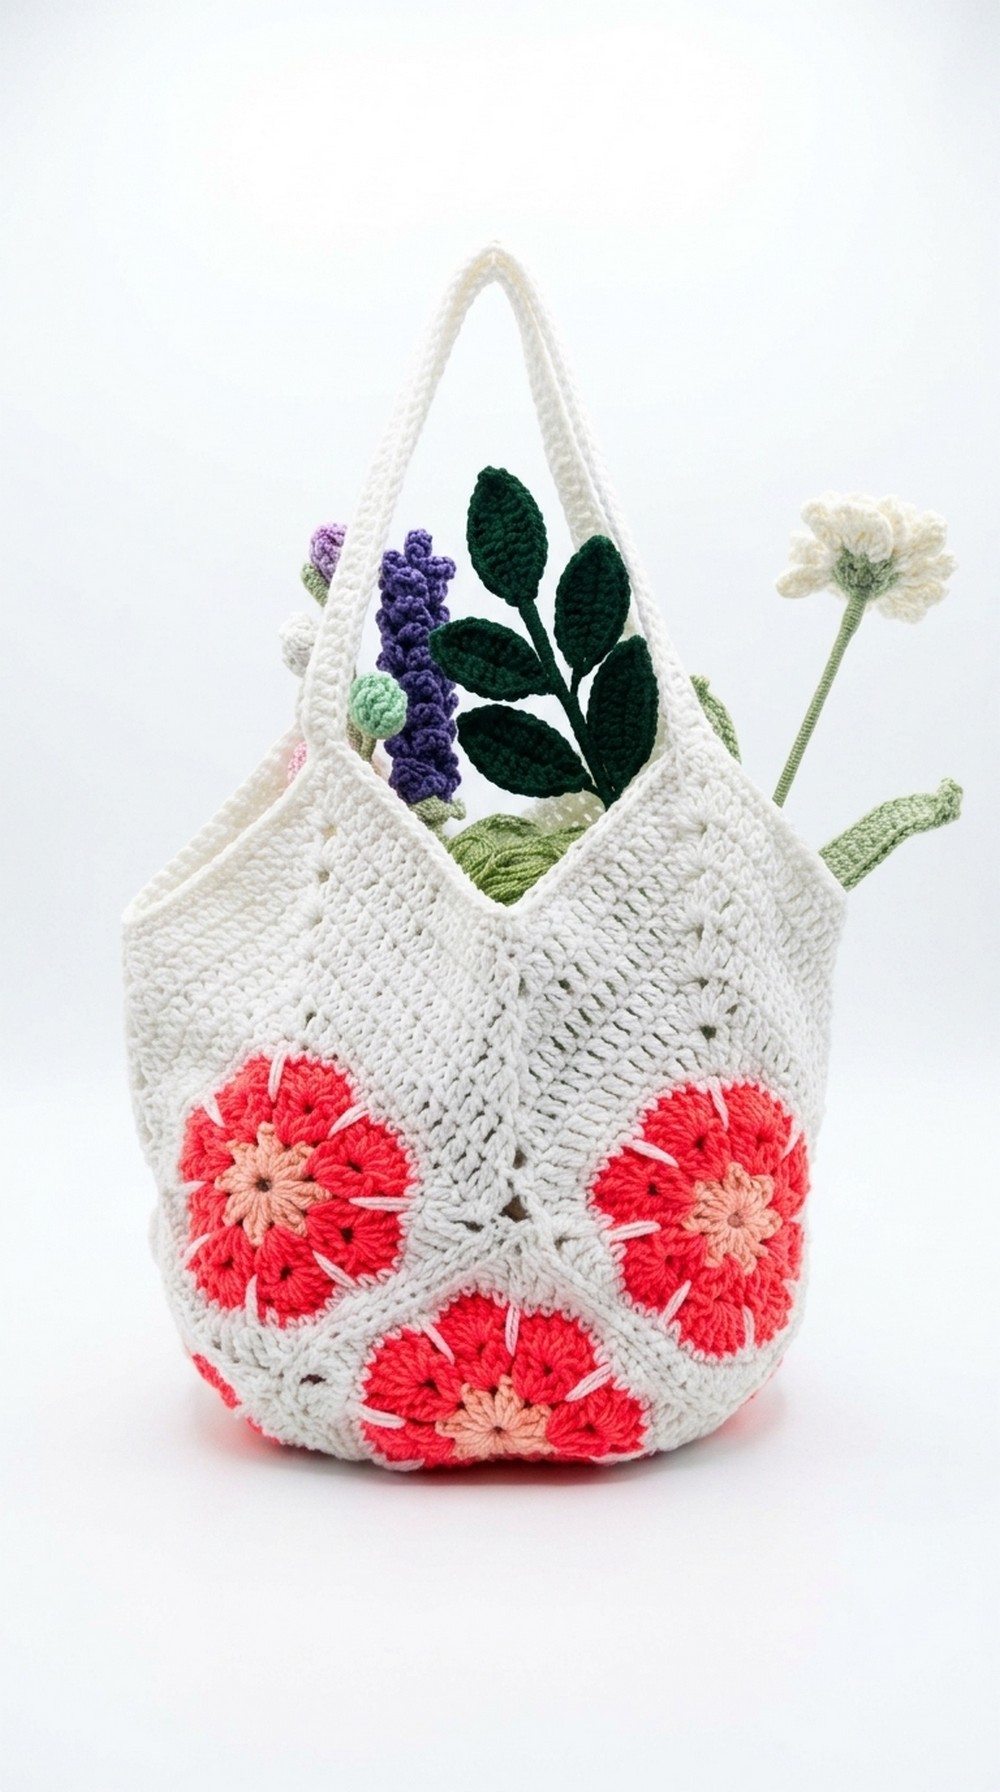
The design has a neat strap so you can carry it on your shoulder comfortably. The flower squares make the bag look special and unique and it also shows your creativity. This pattern is perfect for beginners who want an easy project with a beautiful result.
Crochet Granny Square Bag Pattern
Materials Needed
- Yarn:
- Primary Color: Light shade (e.g., Light Yellow or Pastel).
- Secondary Color: Dark Orange.
- Accent Color: White.
- Crochet Hook: 3.5 mm.
- Tapestry Needle: For weaving in ends and sewing granny squares together.
- Scissors: To trim excess yarn.
- Measuring Tape: To confirm the finished size.
- Optional Embellishments: Crochet flowers or small charms for decoration.
Gauge
- Achieving the correct gauge ensures the given size of the granny squares.
- Make one granny square with your yarn and hook to measure the size. For this pattern, a granny square should be approximately 5 inches by 5 inches.
Finished Size
- The completed bag is approximately 10 inches (25 cm) in height and 10 inches (25 cm) in width once assembled. The length of the strap is roughly 40–45 inches after adjusting.
Special Techniques
- Magic Circle: Starting the granny square using a magic circle helps create a clean center.
- Double Crochet (dc): Main stitch used throughout the pattern.
- Single Crochet (sc): Adds structure and stability to the final piece.
- Decrease Stitch: Used around corners for shaping.
Instructions
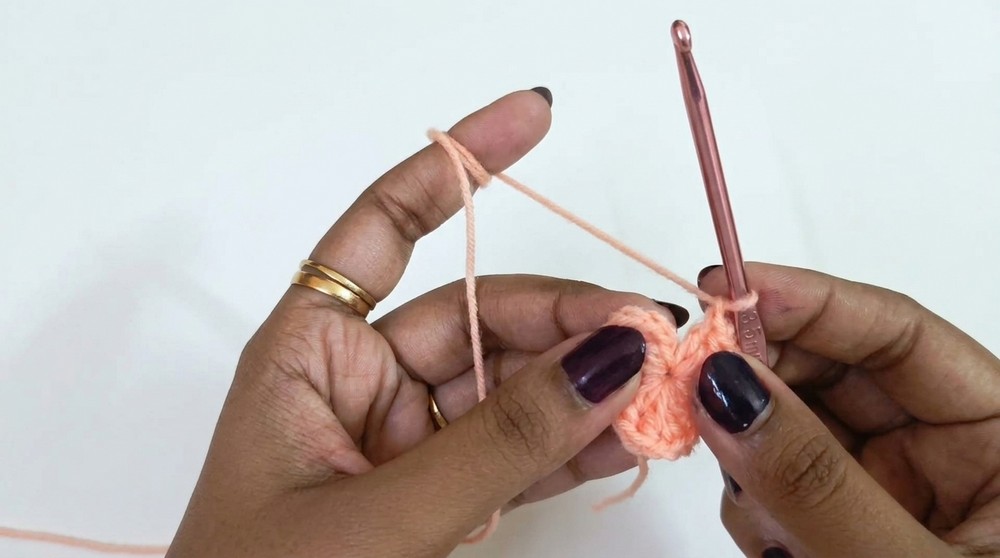
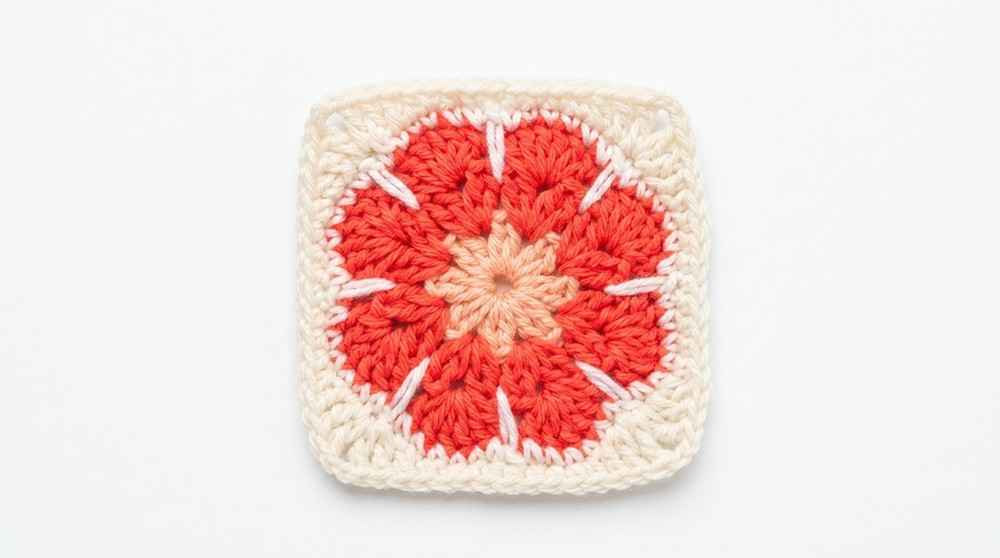
1. Granny Square Pattern
You will make 8 granny squares for this project. Follow the steps below:
Round 1:
- Start with a magic circle and chain 3 (counts as 1 dc).
- Make 2 double crochets (dc) into the ring.
- Chain 1. Repeat [2 dc, ch 1] 7 more times for a total of 8 groups.
- Pull the ring tightly to close the circle and slip stitch to the top of the first chain-3. Trim the yarn and fasten off.
Round 2 (Dark Orange):
- Join the second color yarn (orange) in any chain 1 space.
- Chain 3 (counts as 1 dc), make 1 more dc in the same space, chain 2, and then make 2 dc in the same space.
- Move to the next ch 1 space, repeat [2 dc, ch 2, 2 dc].
- Continue this pattern in all chain 1 spaces until you reach the first space. Slip stitch to join, trim, and fasten off.\
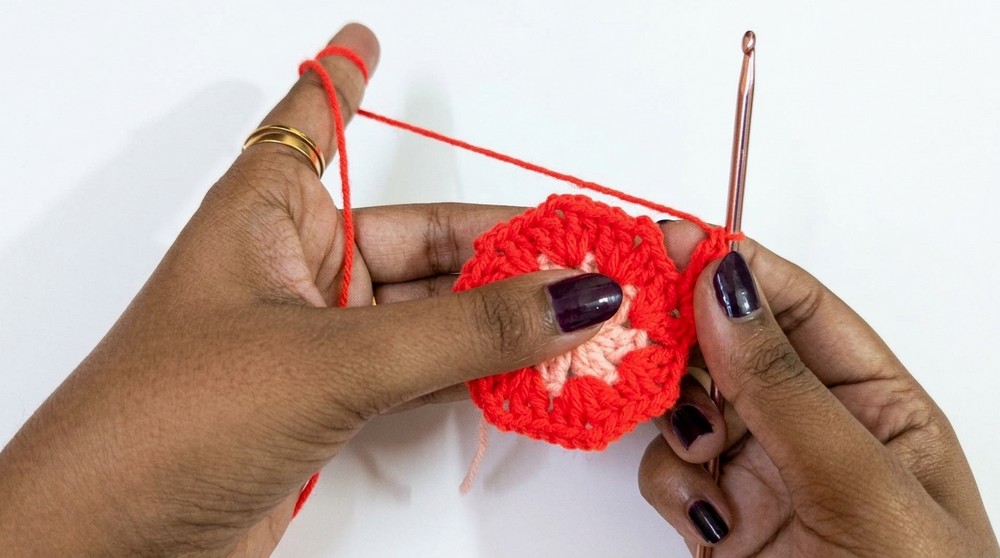
Round 3 (White):
- Join the third color yarn (white) in any chain 2 corner space.
- Chain 3 (counts as 1 dc), make 5 additional dc into the same space.
- Move to each chain 2 space across and make 6 dc in each.
- Slip stitch to close the round, trim the yarn, and fasten off.

Round 4 (White – Optional Border):
- Join yarn to the chain spaces between petals.
- Single crochet (sc) in each dc and create a single crochet in chain gaps.
- Add this border only if you want a neater finish.
2. Assembling the Bag
- Lay out the 8 completed squares as follows:
- Four squares to form the front.
- Four squares to form the back of the bag (similar layout).
- Sew or Crochet Together:
- Use a tapestry needle or slip stitches to join the squares. Sew along edges to connect them.
- The front and back panels should each look like a 2×2 square.
- Joining the Panels:
- Once the front and back panels are created, sew along the edges to form the body of the bag. Leave the top open for the bag opening.
3. Adding the Strap
- Chains for Strap:
- Attach the yarn at one corner of the bag. Chain 110 (or adjust the length to your preference).
- Join the chain to the opposite corner with a slip stitch.
- Reinforcing the Strap:
- Work back along the chain with a row of double crochets (dc) for strength and width.
- Add an additional row of single crochets (sc) if desired.
Tips and Customizations
- Color Variations: Experiment with different color combinations for a unique look.
- Add a Lining: Sew a fabric lining inside for extra durability and a polished finish.
- Extra Embellishments: Add crochet flowers or tassels to the bag’s front for personality.
Important Remarks
- Blocked Squares: Block each granny square before assembling to ensure uniform size.
- Weave in Ends: Trim and weave all loose ends using a tapestry needle for a clean finish.
- Handle Comfort: Ensure that the strap length suits your comfort by adjusting the chain count.
Conclusion
The finished granny square bag is a charming, handmade accessory that showcases your crochet skills. The colorful squares and textured stitches make it eye-catching and versatile, perfect for casual outings or as a thoughtful gift for a loved one.
This project can be customized with different colors, strap lengths, or embellishments to suit your style.