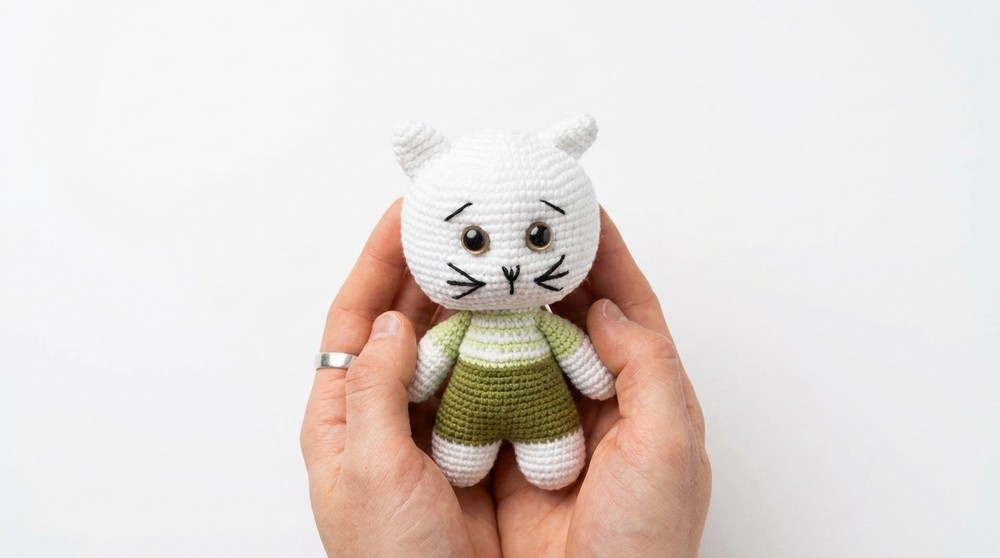
Turn yarn into a playful kitten with this free crochet kitty amigurumi pattern that is simple to follow and makes a cute little friend.
Hop On The Trend With This Free Crochet Kitty Amigurumi Pattern
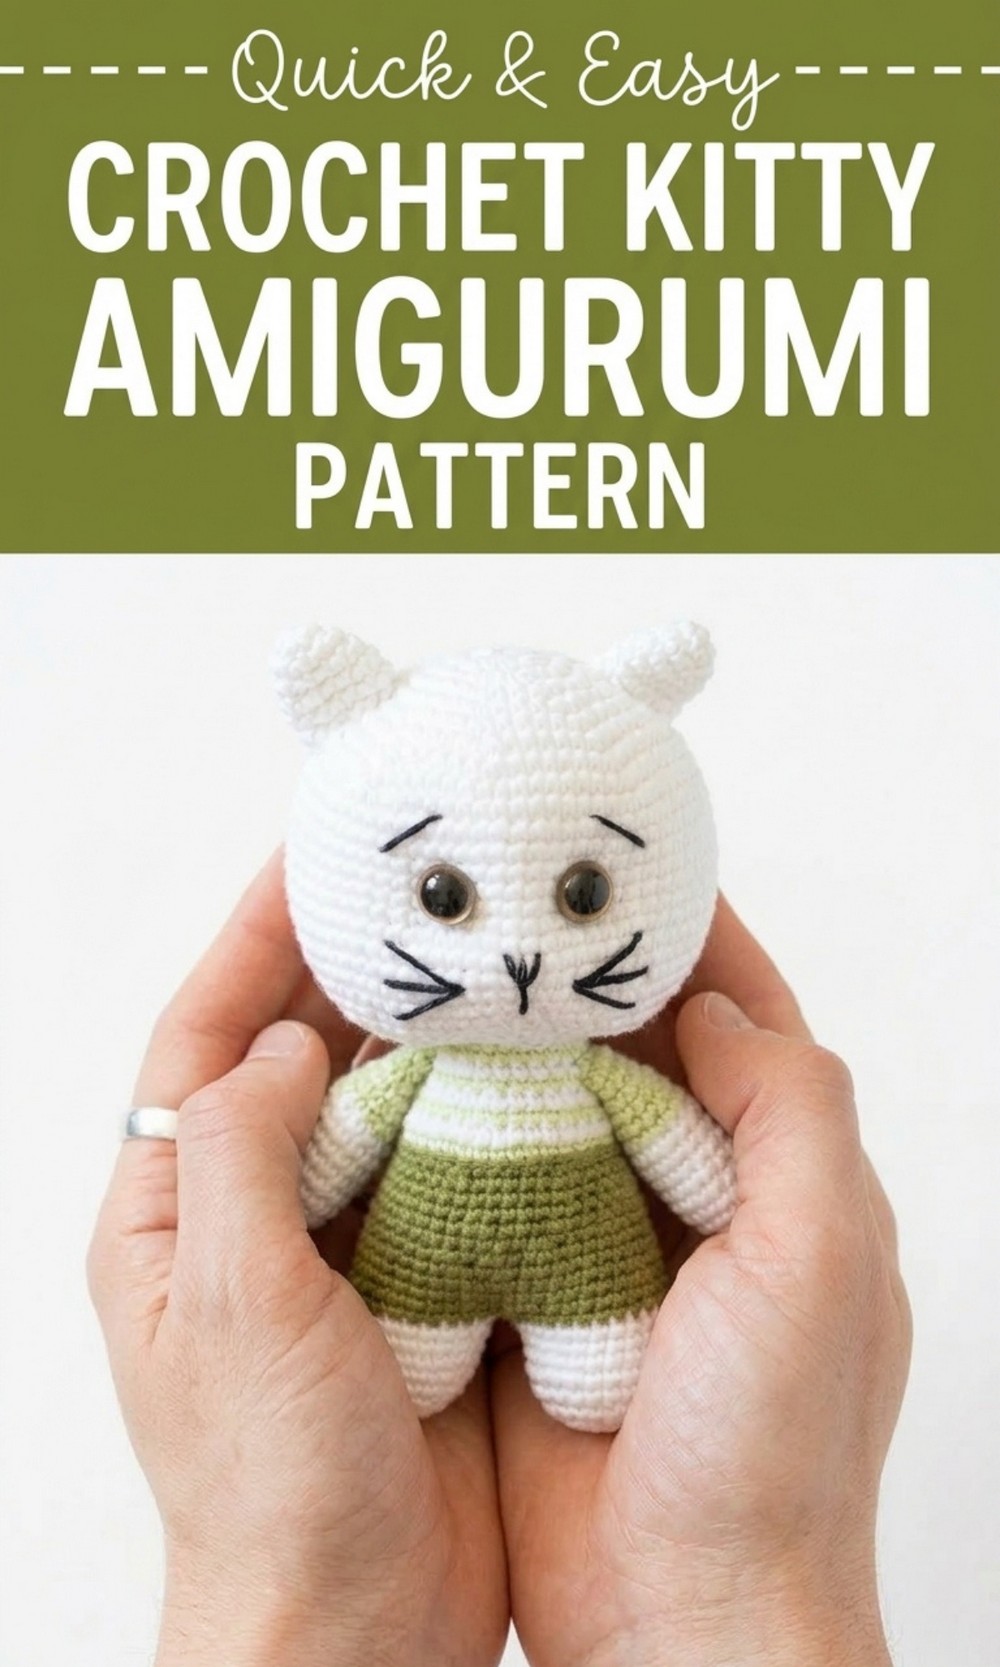
Make a tiny and purr fectly soft friend for your room by making a sweet little cat with this Free Crochet Kitty Amigurumi Pattern. This adorable kitty looks like a round and fluffy ball of joy with pointy ears and a long tail that curls up behind its back.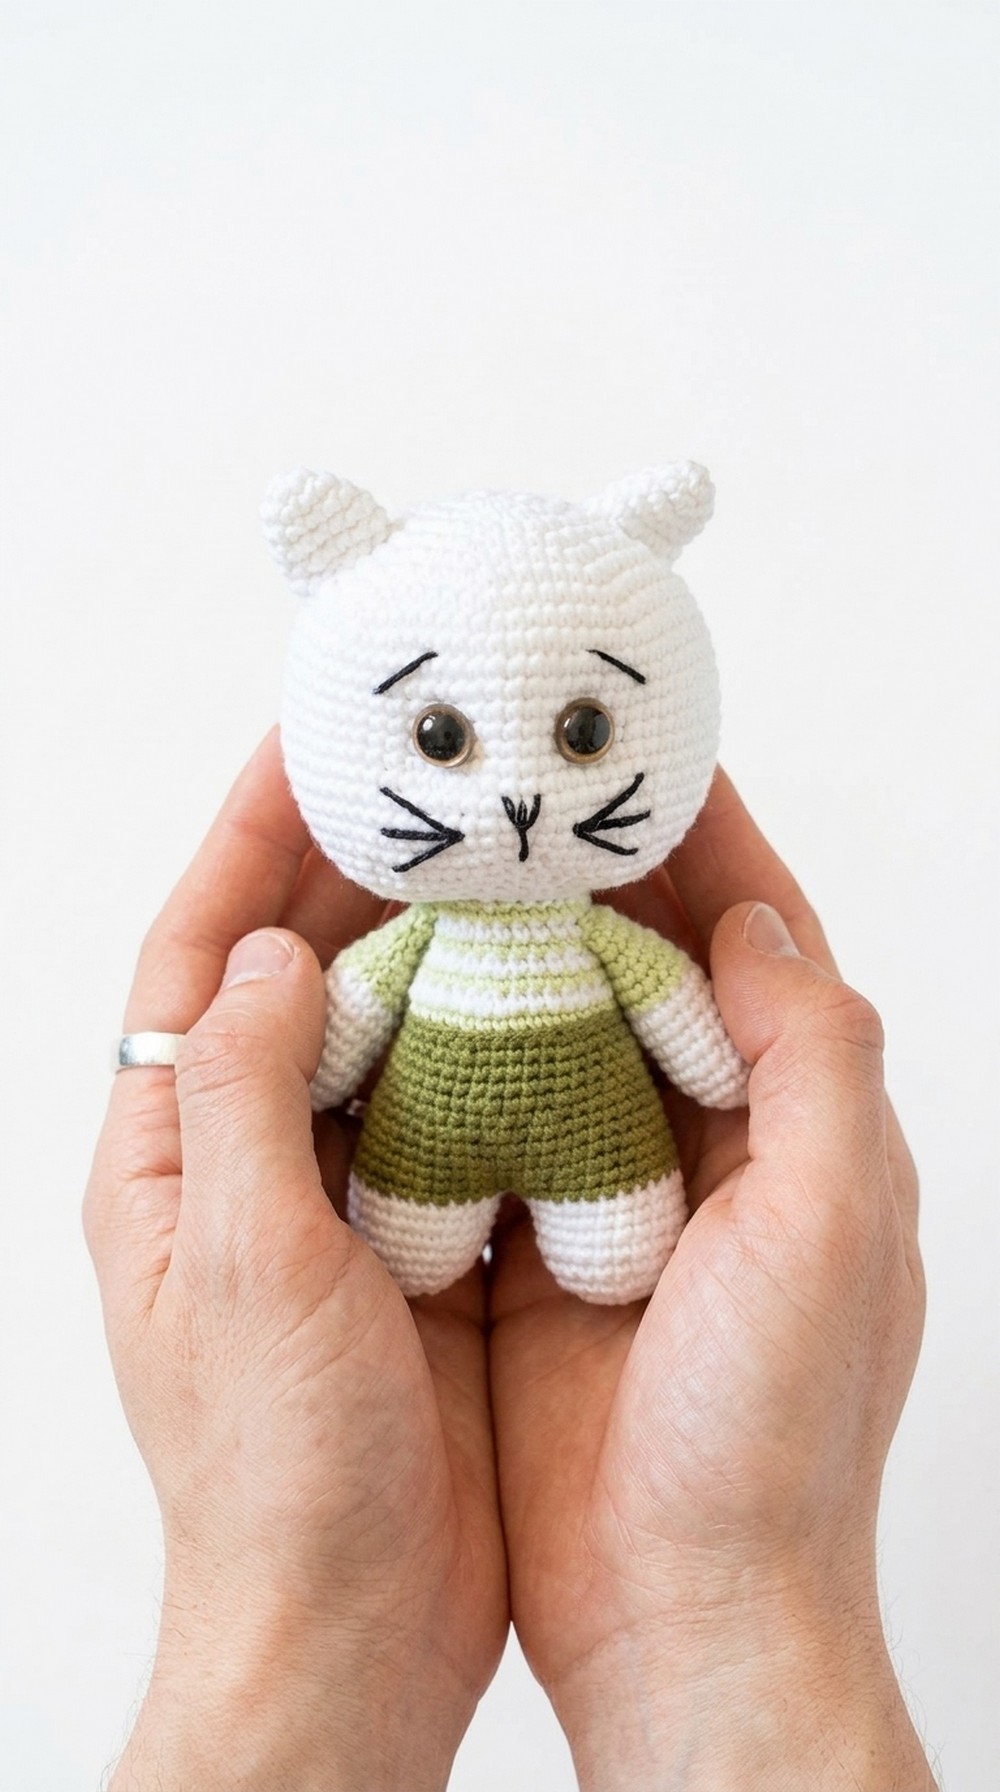
It features a bright pink nose and long whiskers that give your cat a very curious and happy personality. Its unique appearance comes from the way the head and body fit together to make a sitting pose that looks like a real pet watching you play.
You can use this handmade toy to decorate your desk or give it as a special surprise to a friend who loves animals.
Crochet Kitty Amigurumi Pattern
Finished Size
- Approximately 20–25 cm (8–10 inches) tall when using similar yarn and tools.
Materials Needed
- Yarn:
- White yarn (main body color).
- Dark green yarn (pants/bottom color).
- Light green yarn (shirt/top color).
- Dark yarn for eyebrows and mustache detailing.
- Tools:
- 2.0 mm crochet hook.
- Scissors.
- Yarn needle.
- Other Supplies:
- Polyester fiberfill stuffing.
- Safety eyes (1 mm in size).
- Stitch marker or scrap piece of yarn to mark rounds.
Gauge
Gauge is not critical for this pattern, but maintaining consistent tension will result in a well-proportioned amigurumi. Ensure stitches are tight enough so the stuffing doesn’t show through.
Special Techniques
- Magic Ring: Used to start crocheting in the round.
- Increase: Crochet two stitches into the same stitch.
- Invisible Decrease: Insert the hook into the front loop of the next two stitches and crochet them together.
- Color Change: On the last stitch of the current round, stop before completing the final yarn-over, switch to the new color, and finish the stitch using the new yarn.
Abbreviations
- SC: Single Crochet.
- INC: Increase (2 SC in one stitch).
- DEC: Decrease.
- SL ST: Slip Stitch.
- MR: Magic Ring.
- ST(S): Stitch(es).
Pattern Breakdown
Body
With white yarn:
- Start with a magic ring (MR):
- Inside the ring, work 8 SCs and tighten the ring. [8 STS]
- Round 1: Work 8 INCs (2 SC in each ST). [16 STS]
- Round 2: (1 SC, INC) repeat 8 times. [24 STS]
- Round 3: (2 SC, INC) repeat 8 times. [32 STS]
- Round 4: (3 SC, INC) repeat 8 times. [40 STS]
- Continue increasing: Work similar rounds with increasing SCs between INC (e.g., 4 SC, INC; 5 SC, INC), stopping when you’ve reached a round of (7 SC, INC). [72 STS]
- Rounds 13–24: Work 72 SCs for 12 rounds without any increases. This builds height for the body.
Head
- Round 1: Start with a magic ring (MR) and work 8 SCs into the ring. Tighten. [8 STS]
- Round 2: Work 8 INCs. [16 STS]
- Round 3: (1 SC, INC) repeat 8 times. [24 STS]
- Round 4: (2 SC, INC) repeat 8 times. [32 STS]
- Increase evenly: Continue the same logic, stopping at a round of (7 SC, INC). [72 STS]
- Rounds 13–24: Work 72 SCs (12 rounds) without increases.
Facial Features
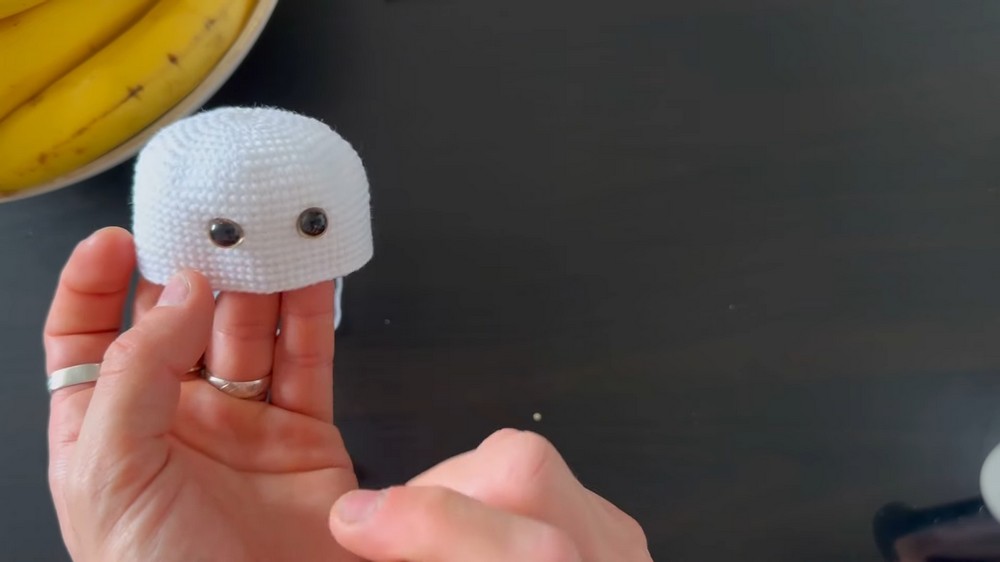
- Count 14 rows down from the top of the head to position safety eyes. Ensure there’s 9 stitches between both eyes.
- Use dark yarn to embroider eyelashes, eyebrows, and a mustache. Follow the video tutorial to add a triangle-shaped nose and smile.
Ears (Make 2)
- Start with MR: Work 4 SCs into the ring. Tighten the ring.
- Round 1: Work 4 INCs. [8 STS]
- Round 2: (3 SCs, INC) repeat 2 times. [10 STS]
- Continue increasing up to 6 SCs between INCs. Once completed, finish with a SL ST and leave a long tail for sewing.
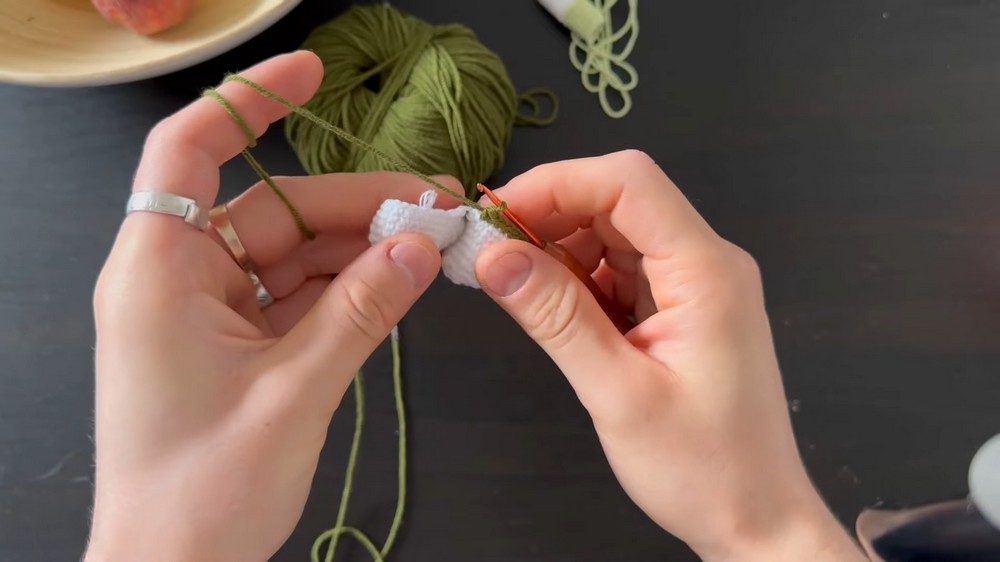
Arms (Make 2)
- Start with white yarn:
- Work MR with 7 SCs, tighten the loop.
- Round 1: Work 7 INCs. [14 STS]
- Rounds 2–8: Work 14 SCs (7 rounds) without increases.
- Switch to light green (for the shirt):
- Rounds 9–14: Work 14 SCs using light green yarn (6 rows).
- Bind off and leave a long tail for sewing. Stuff lightly.
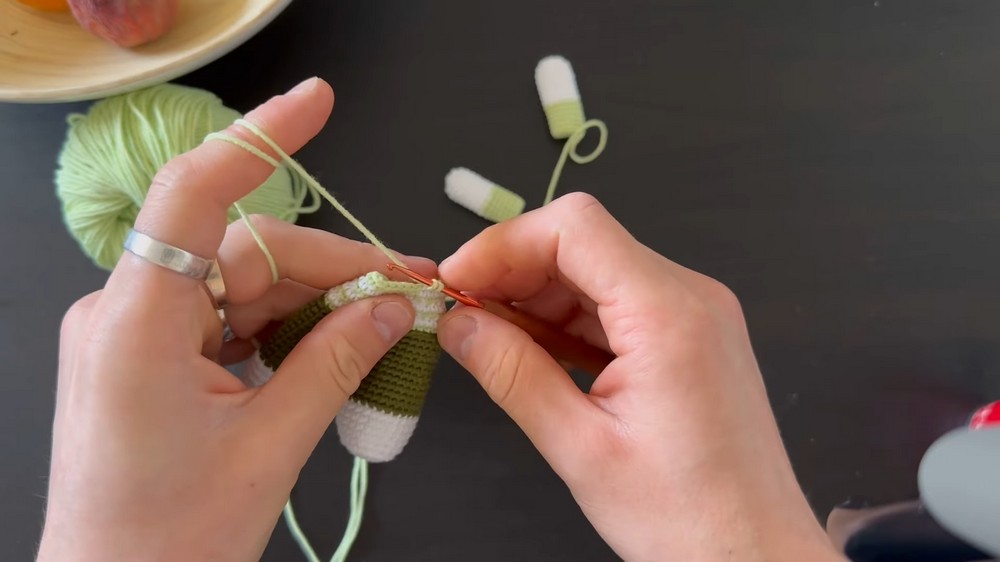
Legs (Make 2)
- Start with MR in white yarn:
- Work 8 SCs and close the ring.
- Round 1: Work 8 INCs. [16 STS]
- Round 2: (1 SC, INC) repeat 8 times. [24 STS]
- Rounds 3–7: Work 24 SCs for 5 rounds.
- Switch to dark green (pants):
- Join legs together by crocheting across both legs to form the body’s base.
- Join legs together by crocheting across both legs to form the body’s base.
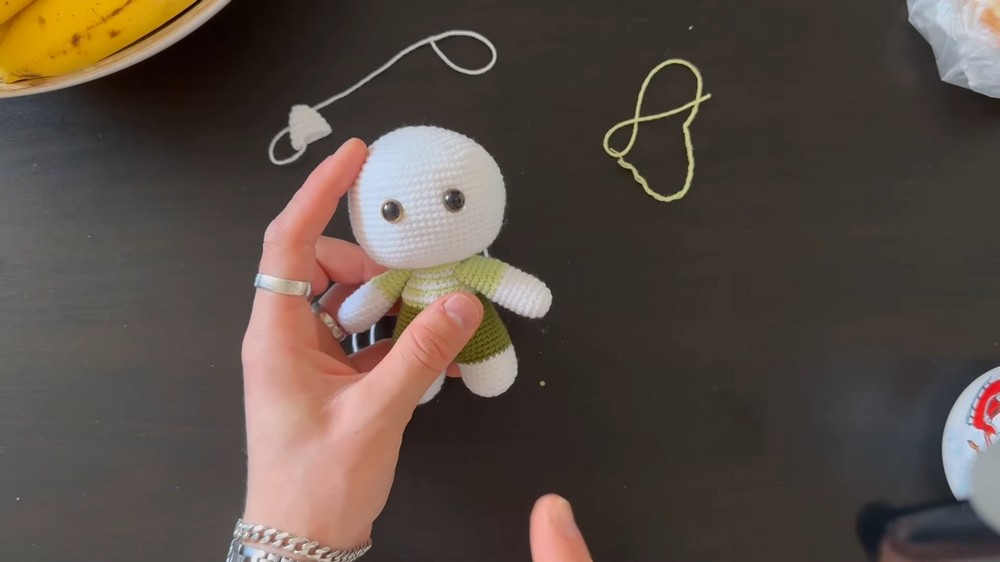
Finishing and Assembly
- Head: Sew the head onto the body, ensuring it faces forward.
- Ears: Attach ears to the head, spacing them 4 rows down from the top. Place them evenly on either side.
- Arms: Sew arms under the neck area, aligning them above the legs.
- Stuffing: Ensure all parts are stuffed firmly but evenly before sewing them together to maintain a shapely form.
Customization Ideas
- Add Accessories: Use ribbon or yarn to crochet a small bow, scarf, or hat to personalize your kitten.
- Color Variations: Mix colors to create striped or patterned clothing.
- Expressions: Adjust the embroidery to give the kitten different expressions, such as sleepy eyes or a big smile.
Helpful Tips
- Always keep tension consistent for a polished look.
- Use a stitch marker to track the beginning of each round.
- Hide loose yarn ends securely inside the project.
Conclusion and Remarks
Congratulations on completing your crochet kitten amigurumi, This project combines basic stitches and fun details to create a delightful handmade toy. The kitten makes a perfect gift, nursery decoration, or keepsake. Feel free to experiment with colors and styling to make it your own.