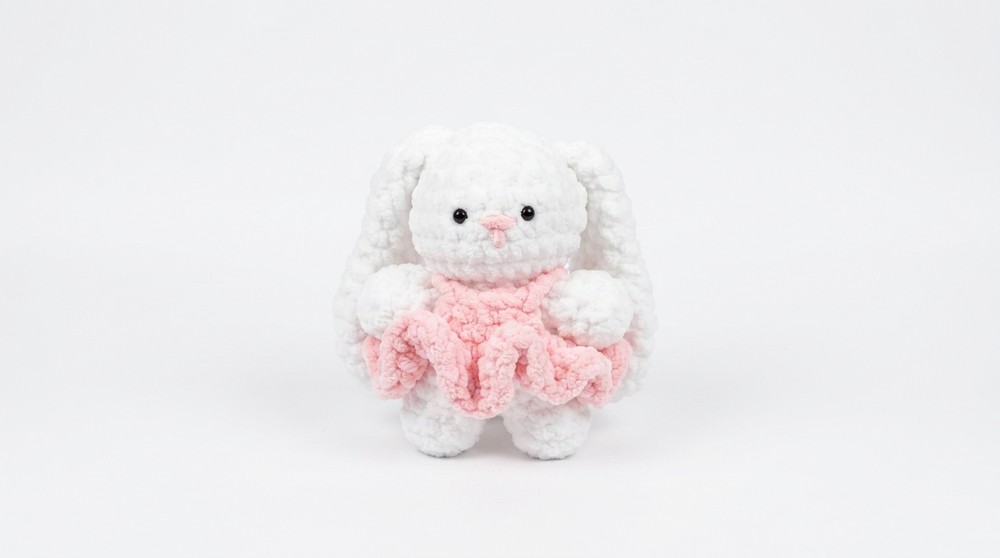
Delight in the joy of crocheting with this Free Crochet Bunny Pattern that transforms simple yarn into a charming, cuddly friend for you or loved ones.

Loveable Free crochet bunny pattern cozy friend for little ones
Bring a new hopping friend to life by making a soft and cuddly toy with your very own hands using this Free Crochet Bunny Pattern. This adorable bunny looks like a tiny ball of fluff with long floppy ears and a sweet little face that makes you smile every time you see it.
The beauty of this project comes from the round stitches that form a chubby and huggable body that feels so good to hold. It has a tiny pink nose and big bright eyes that give your handmade animal a very happy and friendly personality.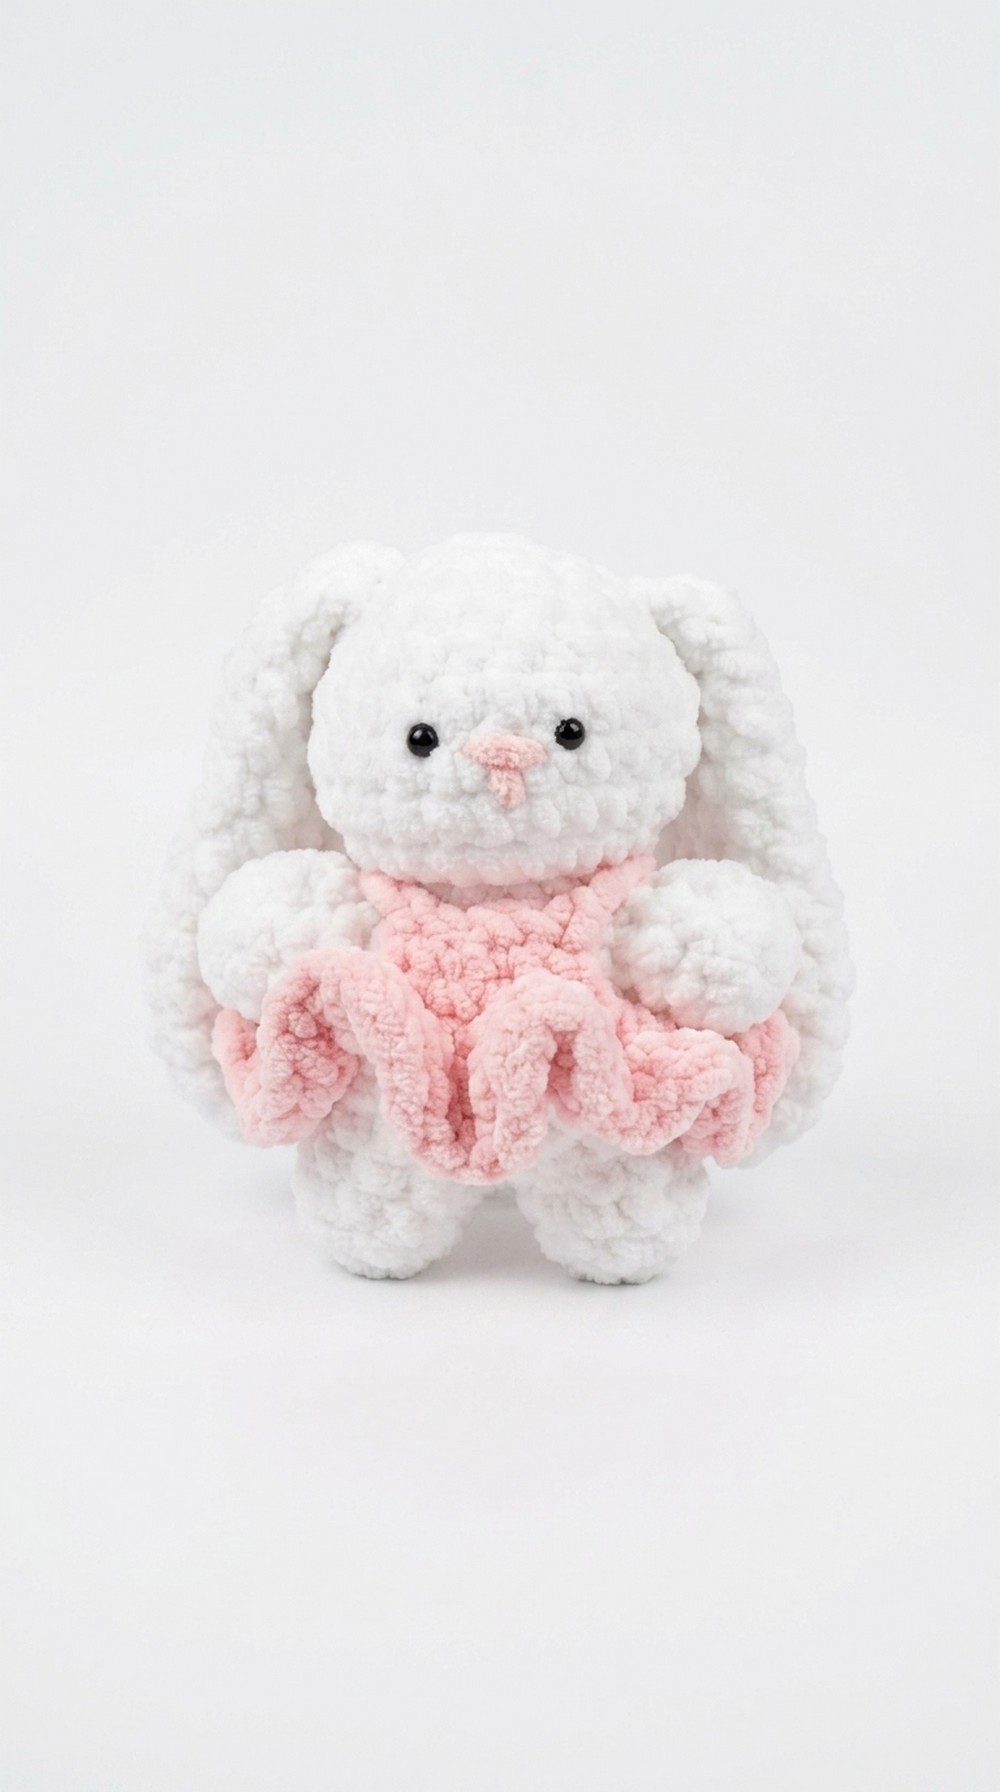 Its unique look comes from the soft yarn and the way the legs are shaped so the bunny seems ready to play. This cute toy is lovely on your bed or as a special birthday gift for your best friend.
Crochet Bunny Pattern
Finished Size
- Approximately 12 cm (4.7 inches) tall, including ears.
Materials
- Yarn:
- Light pink, white, or preferred bunny base color (soft acrylic or cotton yarn recommended).
- Contrasting color for the dress (e.g., pink, pastel shades).
- Crochet Hook: Size 3.5 mm or appropriate for yarn weight.
- Stuffing Material: Polyester fiberfill.
- Safety Eyes: (Optional) 6 mm size, or embroider eyes if preferred.
- Darning Needle: For sewing and weaving in ends.
- Markers: Optional, for tracking the start of rows.
- Scissors.
Gauge
- Gauge is not crucial for this pattern. Ensure stitches are tight enough that the stuffing does not show through.
Stitch Abbreviations
- ch: Chain
- sc: Single Crochet
- sl st: Slip Stitch
- inc: Increase (2 sc in the same stitch)
- dec: Decrease (working front loops of 2 stitches together)
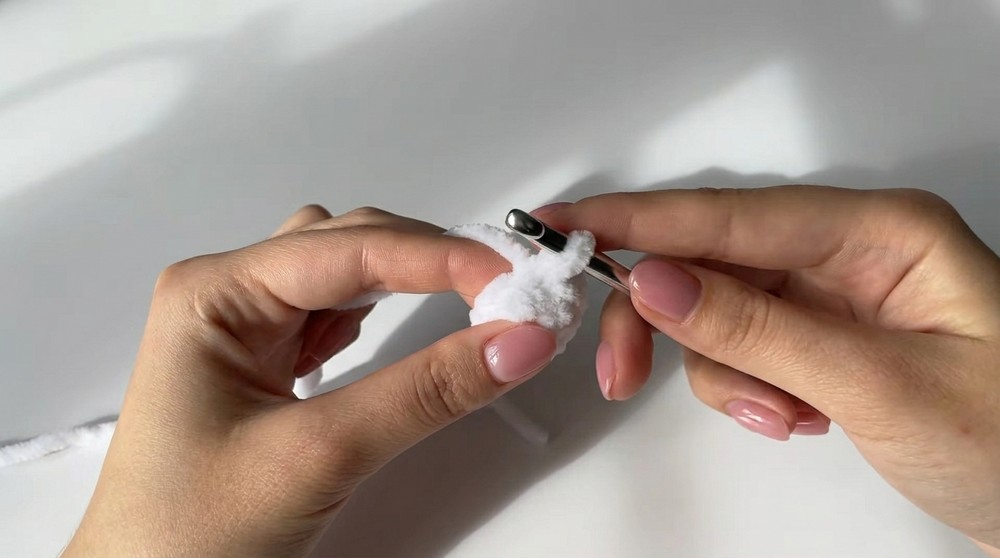
- MR: Magic Ring
Pattern Instructions
Arms (Make 2):
- Row 1: Start with MR. Work 7 sc into the ring. Pull the tail to close the ring. Sl st into the first sc.
- Rows 2–3: Work 1 sc in each stitch (7 sc per row). Sl st to join the final row.
- Finish: Chain 1, cut the yarn, leaving a small tail. Pull the short yarn from the MR tight and weave in the ends.
Legs (Make 2):
- Row 1: Start MR. Work 4 sc into the ring. Pull the tail to close the ring. Sl st into the first sc.
- Row 2: Work 2 sc into each stitch (increase in every stitch). Total: 8 sc. Sl st to join.
- Rows 3–4: Work 1 sc in each stitch (8 sc per row). Sl st to join.
For the first leg: Chain 1, cut yarn, weave ends. For the second leg, do not cut yarn after Row 4.
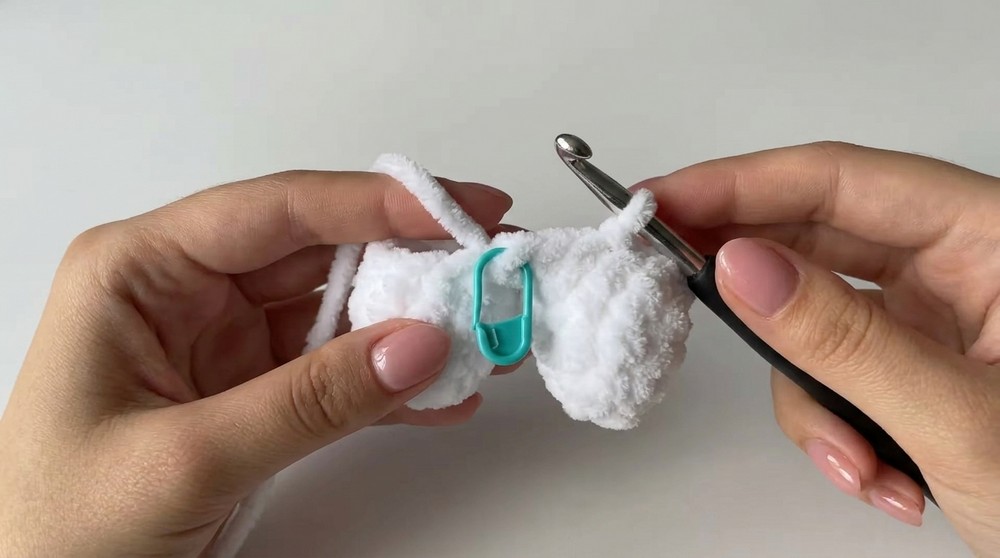
Join Legs Together:
- Row 5: After completing the second leg, chain 1 and sc into any stitch of the first leg. Work 8 sc across the first leg.
- Sc into the chain space between the legs. Work 8 sc into the second leg and 1 sc across the other chain space. Total: 18 sc. Sl st to join.
- Row 6: Work 1 sc into each stitch around (18 sc). Sl st to join. Use a marker to note the starting stitch.
Attach Arms and Body Shaping:
- Row 7: Sc into the next 4 stitches. Position the first arm and insert your hook through any arm stitch and the next body stitch simultaneously. Make 1 sc. Repeat for 8 sc across the arm.
- Continue with 8 sc across the body and attach the second arm similarly for 8 sc. Finish the row with 4 sc on the body.
- Row 8: Work 1 sc into every stitch around, including the arms (7 sc on each arm and 18 sc for the body). Total: 32 sc.
Head:
- Row 9: Perform decreases in every stitch using front loops (dec around). Total: 18 sc.
- Row 10: Repeat dec around. Total: 8 sc. Stuff the bunny’s body firmly but avoid overstuffing.
- Row 11: Start the head with an increase in every stitch (inc around). Total: 16 sc.
- Row 12: Alternate 1 sc, 1 inc until the end. Total: 24 sc.
- Rows 13–15: Work 1 sc in each stitch (24 sc per row).
Insert Safety Eyes: Place them between Rows 14 and 15, 3 stitches apart.
Head Tapering:
- Row 16: Alternate 4 sc, 1 dec around. Total: 20 sc.
- Row 17: Alternate 3 sc, 1 dec around. Total: 16 sc.
- Row 18: Alternate 2 sc, 1 dec around. Total: 12 sc. Add more stuffing.
- Row 19: Dec around. Total: 6 sc.
Cut the yarn, leaving a long tail. Thread the tail with a needle and weave through each stitch of Row 19 to close the head. Pull tight and knot securely.
Ears (Make 2):
- Row 1: Start with MR. Work 6 sc into the ring. Pull to close, sl st to first sc.
- Row 2: Increase in every stitch (inc around). Total: 12 sc.
- Row 3: Alternate 1 sc, 1 inc (repeat). Total: 18 sc.
- Rows 4–5: Work 1 sc in each stitch (18 sc per row).
Shaping: Decrease along edges in Rows 6–15 to form a flat ear. Use slip stitches to sew the ear flat along the open edge.
Attach ears toward the back of the head, sewing securely.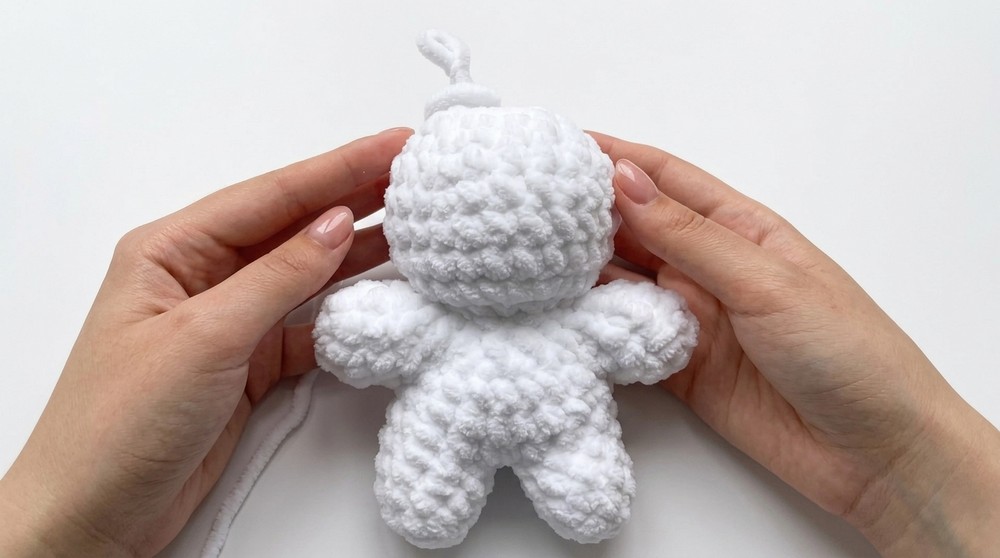
Dress:
- Panel 1: Chain 5, sc into each chain (starting from second chain from hook). Total: 4 sc. Chain 1, cut yarn. Make a second panel identically but do not cut yarn for Panel 2’s final row.
- Join Panels: Chain 6, attach via 1 sc into the nearest stitch of Panel 1. Sc across the panel. Chain 6 again and join around Panel 2.
- Rows 2–4: Work 1 half double crochet (hdc) into each stitch around to form the dress skirt. End with a slip stitch.
Straps: Attach yarn at the front corners of the dress, chain 5, and sl st to the back corners. Repeat for the second strap.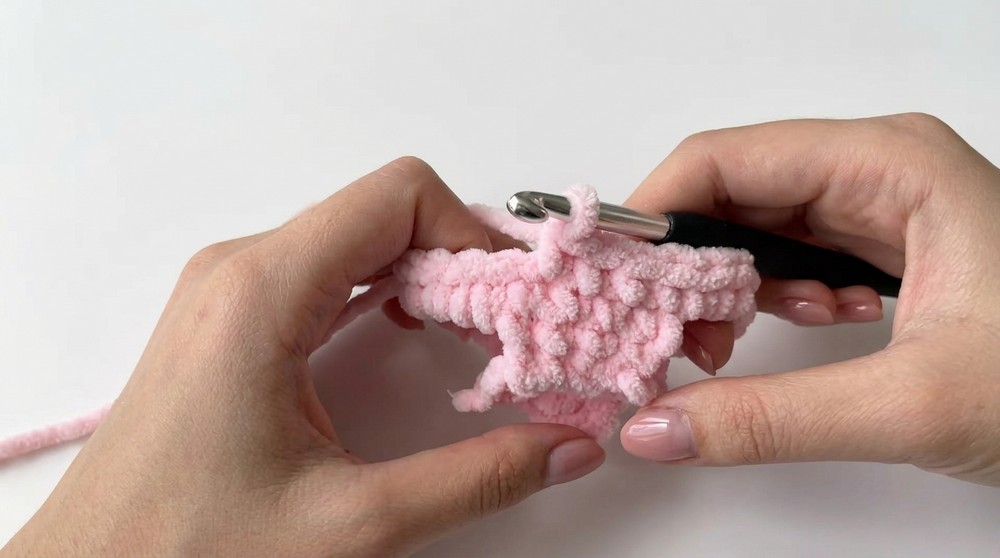
Customization Tips
- Colors: Choose vibrant or muted shades for the bunny and dress depending on the theme (e.g., pastel for spring).
- Accessories: Add embellishments like bows or flowers using scrap yarn.
- Features: For extra personalization, embroider extra facial features using contrast yarn.
Special Techniques
- Magic Ring: Essential for starting circular rows. If unfamiliar, begin with a chain loop.
- Invisible Decrease: Work into front loops to avoid gaps, ensuring neat shaping.
Important Remarks
- Ensure stitch counts at the end of each row to maintain symmetry.
- If sewing placement doesn’t look perfect on the first try, redo the section until satisfied.
- Always weave ends securely inside the bunny to avoid unraveling.
Conclusion
By following this pattern, you will crochet a delightful plush bunny wearing a beautiful, removable dress. Perfect as a gift or collectible, this bunny is beginner-friendly yet detailed enough for seasoned crocheters to enjoy.