Master the art of making a stylish crochet checkered bucket hat that’s perfect for sunny days while adding a trendy and chic touch to your wardrobe effortlessly.

Free Crochet Checkered Hat Pattern to Upgrade Style
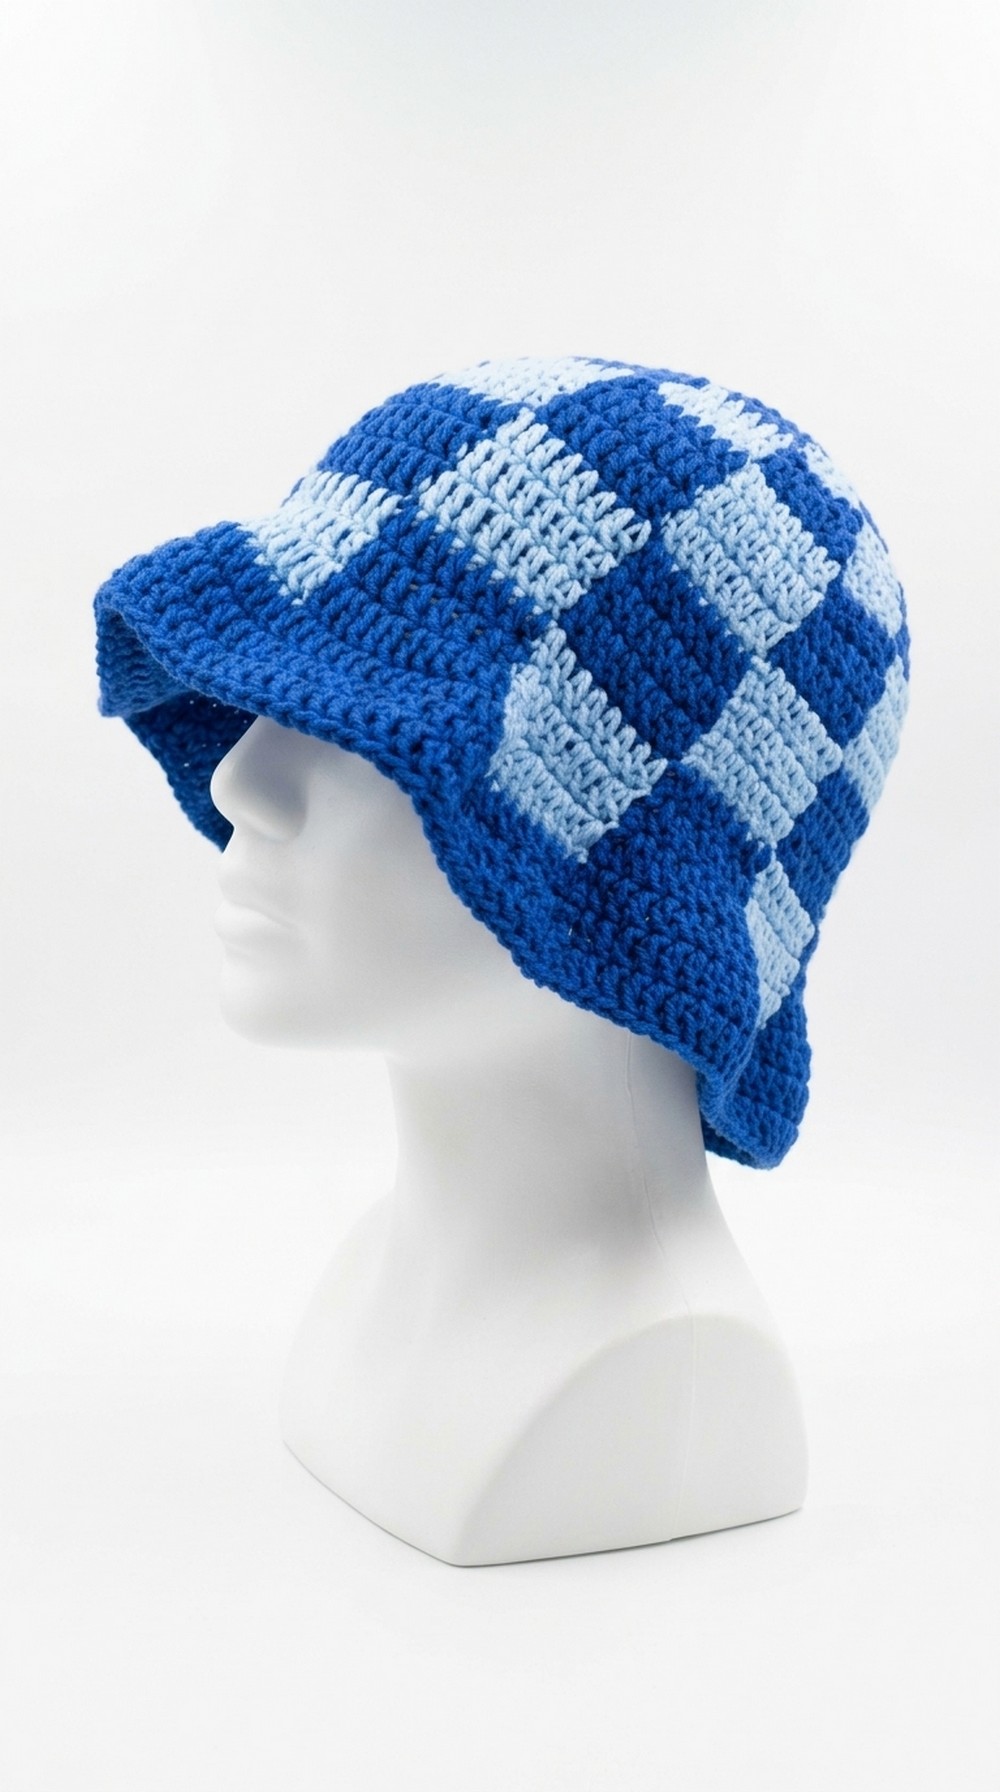
A crochet checkered bucket hat is a fun and stylish project that anyone can enjoy making with a bit of practice. This hat stands out because of its trendy checkered design, which adds a cool and playful touch to any outfit. It’s lightweight and perfect for sunny days, making it a great choice for outdoor adventures or casual looks.
Using two vibrant yarn colors, the checkered pattern creates a striking visual appeal that catches everyone’s eye. This hat is not only fashionable but also useful, shielding your face from the sun while keeping you comfortable.
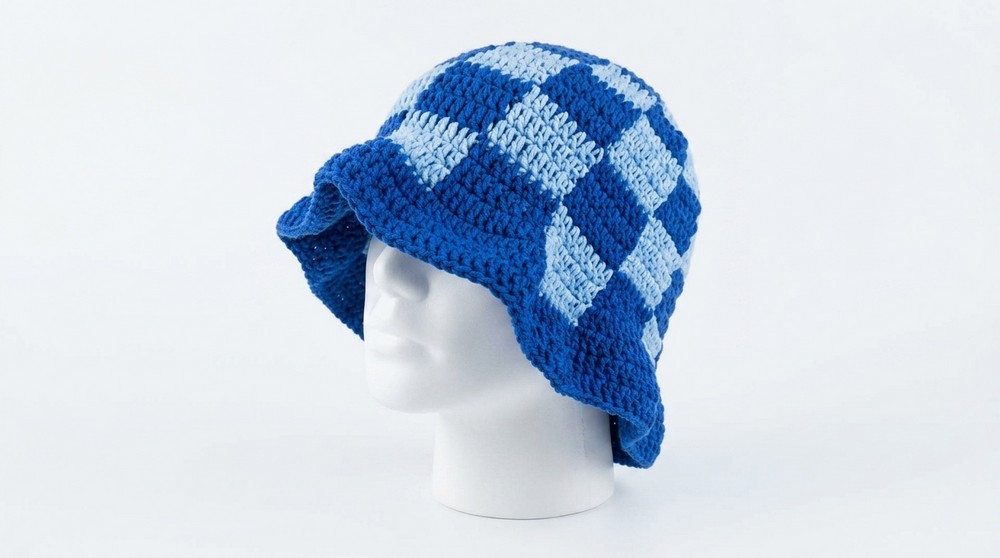 The cotton yarn makes it breathable, and its bucket style gives it a modern vibe, popular with people of all ages. Whether you want to make it for yourself or gift it to someone, this free crochet pattern is easy to follow and perfect for beginners and experienced makers alike.
Adorable Crochet Checkered Bucket Hat Pattern
Materials Needed:
- Yarn: Two colors of cotton yarn (or any equivalent lightweight summer yarn).
- Example: Cotton, raffia, or paper yarns as suitable alternatives.
- Hook Size: 3.5 mm crochet hook.
- Miscellaneous:
- Tapestry needle (for weaving in ends)
- Scissors.
Gauge:
- 12 double crochets count = Approximately 5 cm (2 inches) in diameter after the first 2 rounds.
- Adjust your hook size to match the gauge if necessary.
Finished Size:
- Tepe Diameter: 20 cm (approximately 8 inches).
- Crown Depth: Designed for an adult sized head circumference.
- Customization: Instructions are provided below for adjusting the size to fit smaller or larger heads.
Abbreviations (US Terminology):
- ch: Chain
- dc: Double Crochet
- sl st: Slip Stitch
- st(s): Stitch(es)
- rep: Repeat
- rnd: Round
- YO: Yarn Over
Step by Step Instructions
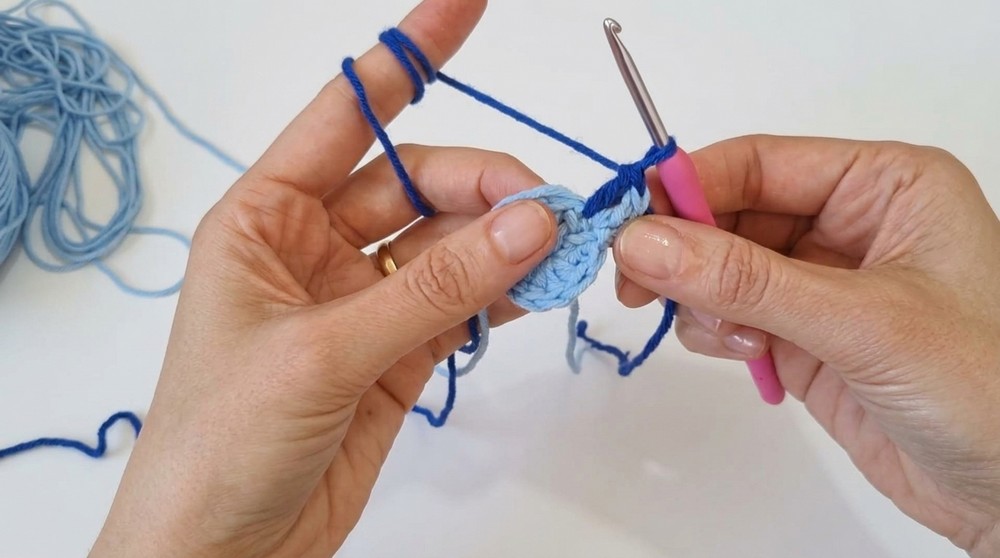
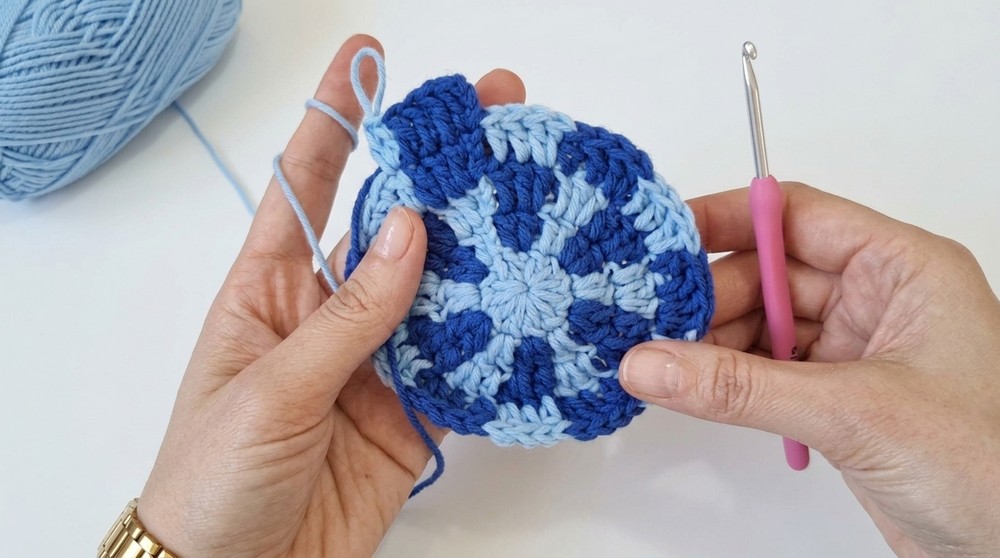
Step 1: Starting the Magic Circle
- Create a magic ring.
- Rnd 1: Ch 3 (counts as the first dc), crochet 12 dc into the magic ring. Pull the ring tightly to close, and sl st to the top of the beginning ch 3 to join. (Total: 12 dc).
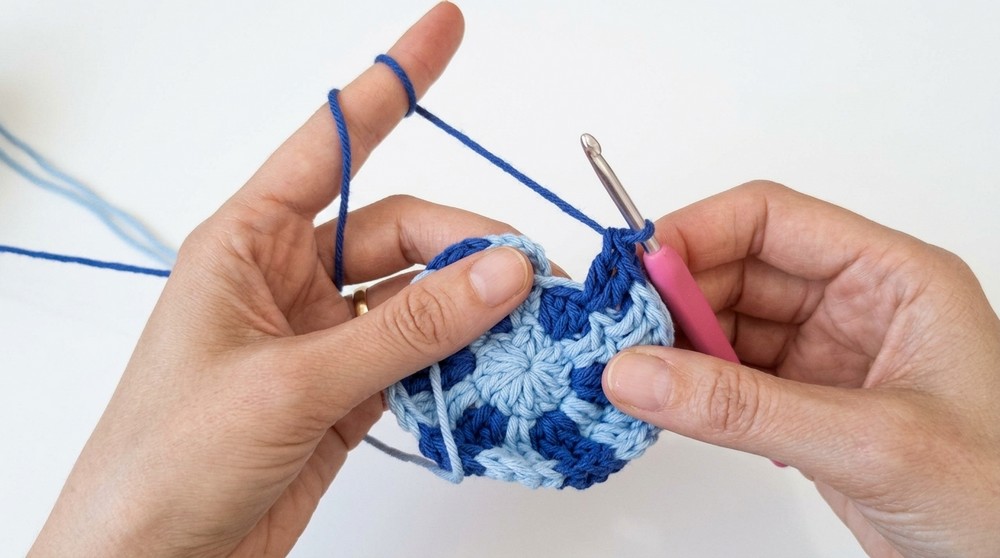
Step 2: Increasing to Form the Crown
- From Rnd 2 onwards, you’ll alternate between two yarn colors and follow this increase pattern.
- Carry the unused yarn as you crochet to avoid frequent cutting and joining.
Round by Round Instructions:
- Rnd 2: Attach the second color. Ch 3, work 2 dc in each st around. Alternate colors every other stitch by switching to the new yarn while finishing the last pull of the dc. Sl st to join. (Total: 24 dc).
- Rnd 3: Ch 3, (1 dc in next st, 2 dc in the next st). Rep from * to * around. Continue smooth color changes as in Round 2. Sl st to join. (Total: 36 dc).
- Rnd 4: Ch 3, (1 dc in each of next 2 sts, 2 dc in the next st). Rep from * to * around. Smoothly transition colors as needed. Sl st to join. (Total: 48 dc).
- Rnd 5: Ch 3, (1 dc in each of next 3 sts, 2 dc in the next st). Progress with the same technique as before. Sl st to join. (Total: 60 dc).
- Continue increasing in a similar way until you reach 8 dc per segment (see customization options if you prefer a smaller size). You will need a total of 8 rounds. The end diameter should measure about 20 cm (8 inches).
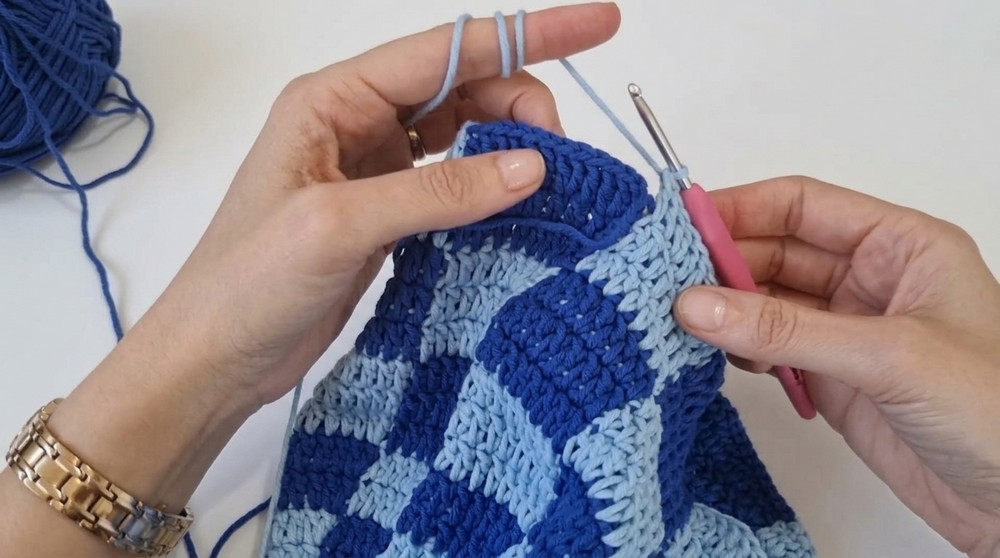
Step 3: Transition to the Checkered Pattern
From this point, you will alternate blocks of contrasting colors to form the checkered design.
- Work 2 rounds per color block initially, ensuring you keep the stitches aligned for clean transitions.
- Switch to 3 rounds per block as you progress into the body of the hat to create a more pronounced checkerboard effect.
- Follow this pattern for the crown until the desired depth is achieved. For this project, the depth up to the brim was 8 rounds of 8 dc per segment.
Step 4: Brim Shaping
- Once the body of the hat is complete, a final expansion round is worked by alternating:
- (1 dc in the first st, 2 dc in the second st), and rep around.
- Continue alternating colors.
- After this single expansion round, switch to a single solid color (use the darker tone for contrast).
- Work 3 uninterrupted rounds of dc across the brim, without any increases or decreases. This will create a neat contrast and stabilize the hat’s shape.
- Finish off and secure the ends.
Special Techniques:
- Color Changes: Always pick up the unused yarn from the same side of the hat (either the front or back) to keep the inside neat.
- Invisible Finish: For a clean edge at the end of your work, use this method:
- Work the last stitch until the final yo. Cut the yarn and pull it through.
- Use a tapestry needle to mimic the top of the final stitch by threading the yarn through the first dc of the row and back into the center of the last stitch. Weave in the ends.
Tips & Customization Ideas:
- Adjusting Size: To make the hat smaller, stop increasing at 6 or 7 dc per segment instead of 8. Reduce the body rounds proportionally.
- Colors: Experiment with different color combinations, such as pastel tones for a softer look, or vibrant colors for a summery feel.
- Yarn Options: While cotton yarn is recommended for summer hats, wool blends are ideal for winter versions.
- For Children: Reduce the crown diameter to 15–17 cm and adjust the body depth accordingly to fit.
Conclusion & Final Remarks:
Congratulations on finishing your beautiful checkered crochet hat. The clean checkerboard pattern, combined with its practical yet stylish design, makes it a standout piece in any wardrobe. Whether used as a summer headpiece or a creative gift for loved ones, this hat is sure to impress.