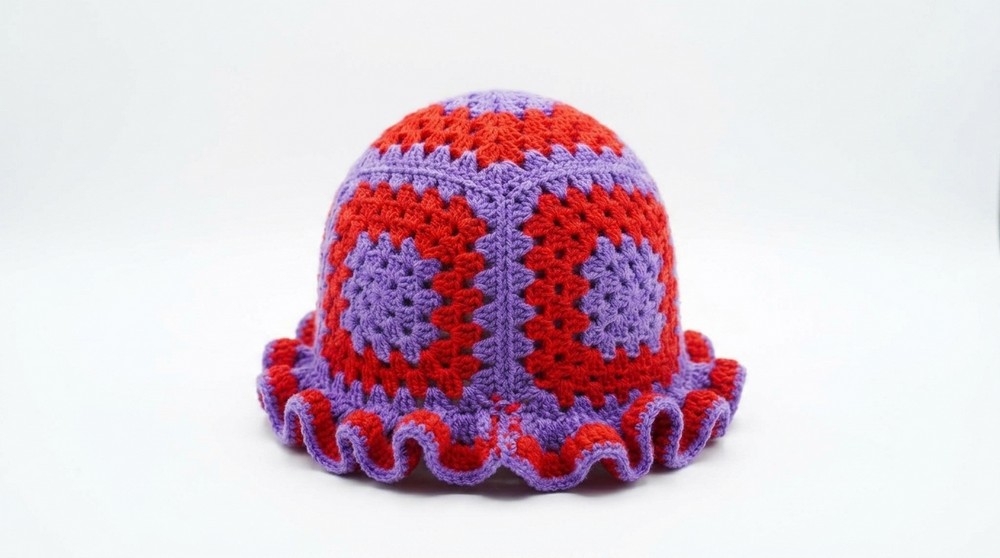
Rock a totally cool and wavy hat that makes you look like a famous star by using this Free Crochet Granny Square Hat Pattern to finish a soft and very colorful handmade masterpiece.
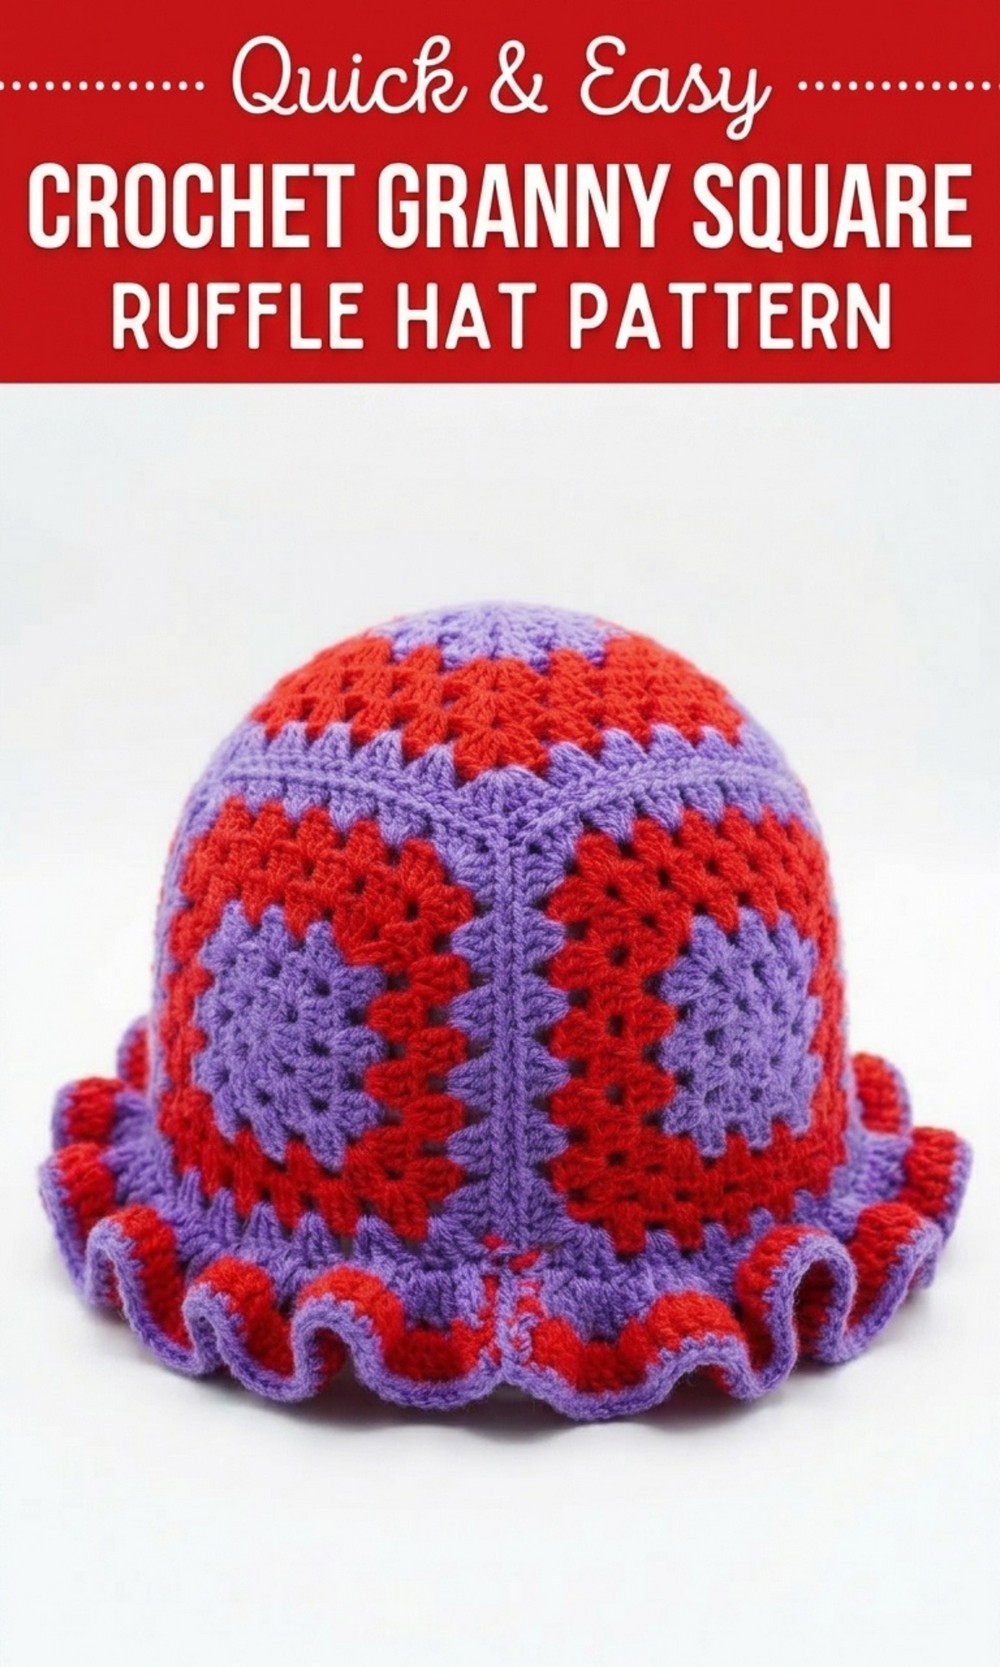
Use This Free Granny Square Hat Pattern to Make Unique Gifts
This hat is made by combining lovely granny squares into a unique and stylish design. It is perfect for adding a pop of color and creativity to your wardrobe or giving as a thoughtful gift to someone special. The Free Crochet Granny Square Ruffle Hat Pattern features soft ruffled edges that make it look playful yet elegant, making it suitable for all ages. You only need two yarn colors, a 3.5 mm crochet hook, and basic supplies like scissors and a needle to complete this easy design. This crochet hat pattern is beginner friendly, and the step by step instructions make it easy to follow. Create something special with this beautiful granny square ruffle hat, perfect for every season and occasion.
Crochet Granny Square Hat Pattern
Materials Needed
- Yarn:
- Two colors of 100% acrylic 2 ply yarn.
- You can use single strands of yarn for this project.
- Hook:
- 3.5 mm crochet hook.
- Tools:
- Scissors.
- Needle to sew in loose ends.
- Measuring tape (to ensure consistency).
Crochet Terminology (US Standards)
- Chain (CH): Simple looped threads to form the base of crochet.
- Single Crochet (SC): Insert hook, yarn over, pull through, yarn over, pull through both loops.
- Double Crochet (DC): Yarn over, insert hook, pull up a loop (three loops on hook), yarn over, pull through the first two loops, yarn over, pull through the remaining two loops.
- Treble Crochet (TR): Yarn over twice, insert hook, pull up a loop (four loops on hook), yarn over and pull through two loops three times.
Special Techniques Used
- Slip Knot: Used to start the yarn loop.
- Magic Ring: Center of a granny square.
- Color Switching: Explained in detail throughout the pattern.
- Joining Squares: Single crochet stitch is used to join granny squares seamlessly.
- Creating Ruffles: Treble crochets in multiples of four form the decorative ruffle edges.
Pattern Instructions
Part 1: Granny Square Creation
Each granny square will form the base for the hat’s cross shaped pattern. Follow the steps below:
Round 1
- Create a slip knot: Wrap yarn around your finger, hold with your thumb and middle finger, twist the yarn with the hook, yarn over, and pull through. Tighten to form the knot.
- Chain 6: 1, 2, 3, 4, 5, 6.
- The first chain forms the magic ring where stitches will be worked.
- The next 3 chains count as the first double crochet.
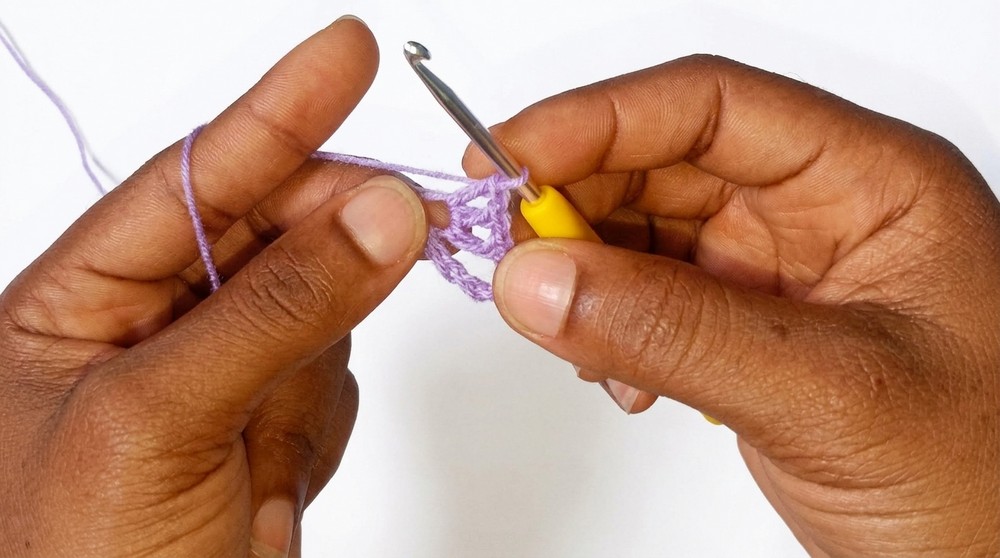
- The last 2 chains will count as space chains between clusters.
- Yarn over, insert hook into the first chain, and create three double crochets into the ring as follows:
- Yarn over, insert hook into the ring, pull up a loop (3 loops on hook).
- Yarn over, pull through two loops. Yarn over, pull through the remaining two loops.
- Chain 2 to form a corner.
- Repeat 3 DC + CH 2 two more times to form three sides.
- For the fourth side: Only make 2 DC + CH 3 (the original CH 3 counts as the last DC stitch).
- Join with a slip stitch into the third chain of the original CH 3. You should now have a square with four sides.
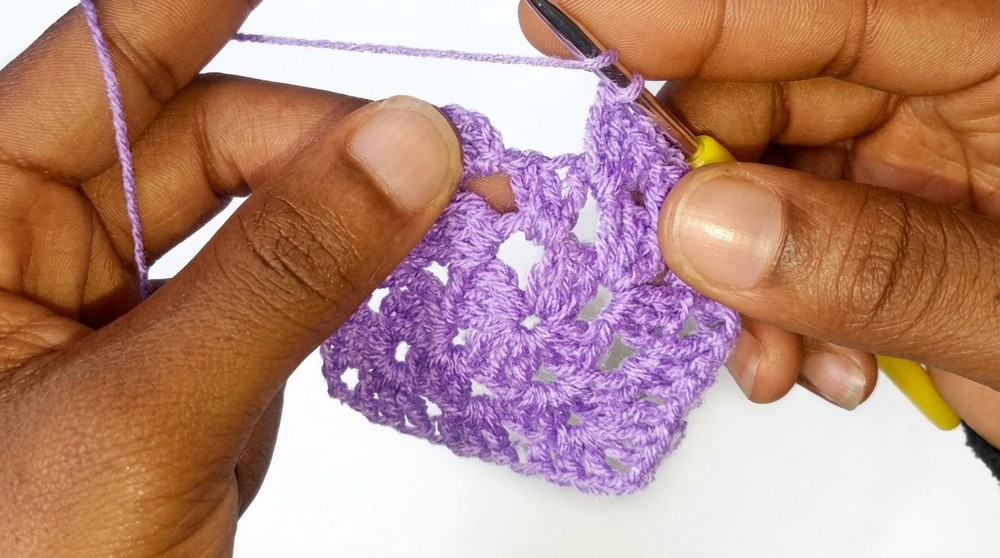
Round 2
- Slip stitch into the chain space corner.
- Chain 5 (counts as CH 2 + 3 DC).
- In the same space, work 3 DC, CH 2, and 3 DC into the chain space.
- This forms the corner cluster group (3 DC + CH 2 + 3 DC).
- In the side chain spaces, work 3 DC only (no chain space between).
- At the corners, continue the pattern: 3 DC + CH 2 + 3 DC.
- For the last corner, make 2 DC and join with a slip stitch into the third chain.
Rounds 3 to Desired Size
- Follow the same structure:
- Work clusters (3 DC + CH 2 + 3 DC) in each corner space.
- Work only 3 DC in the side spaces.
- Repeat rounds until the square size measures 5 inches wide and tall.
- Finish the Square: Cut the yarn, tighten the stitch, sew in loose ends, and set the square aside.
- Create Five Squares: Repeat the instructions to create five squares in total.
Part 2: Joining Squares
Arrange the five squares in a cross pattern: one central square, and four squares surrounding it on the sides.
Joining Process:
- Place two squares right sides facing each other.
- Use a single crochet (SC) stitch to join: Insert the hook through both square edges, yarn over, pull through, yarn over, pull through both loops.
- Continue joining along the common edge.
- Add the next square by repeating the process.
- Repeat until all edges are joined into a cross pattern.
- Close up remaining open sides using the same SC joining technique.
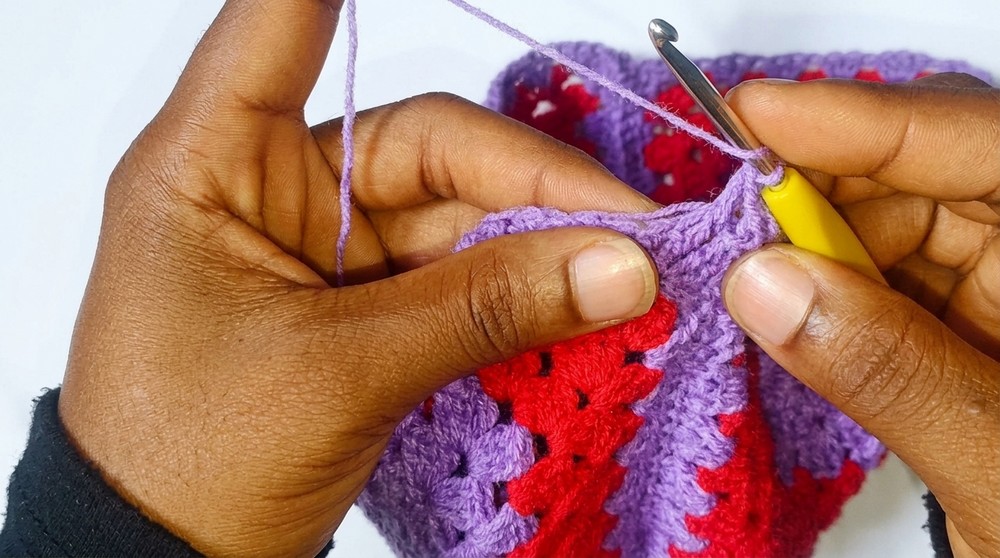
Part 3: Ruffle Hat Body
Half Double Crochet Base for Ruffles
- Attach yarn in the edge space by creating a slip knot and slip stitch into the space.
- Chain 2, and work 1 half double crochet (HDC) across the edge stitches.
- Yarn over, insert hook, pull up a loop (3 loops on hook). Yarn over, pull through all three loops.
- For every 7th stitch, make 2 HDC into a single stitch to tighten the fit.
- Slip stitch to finish the round.
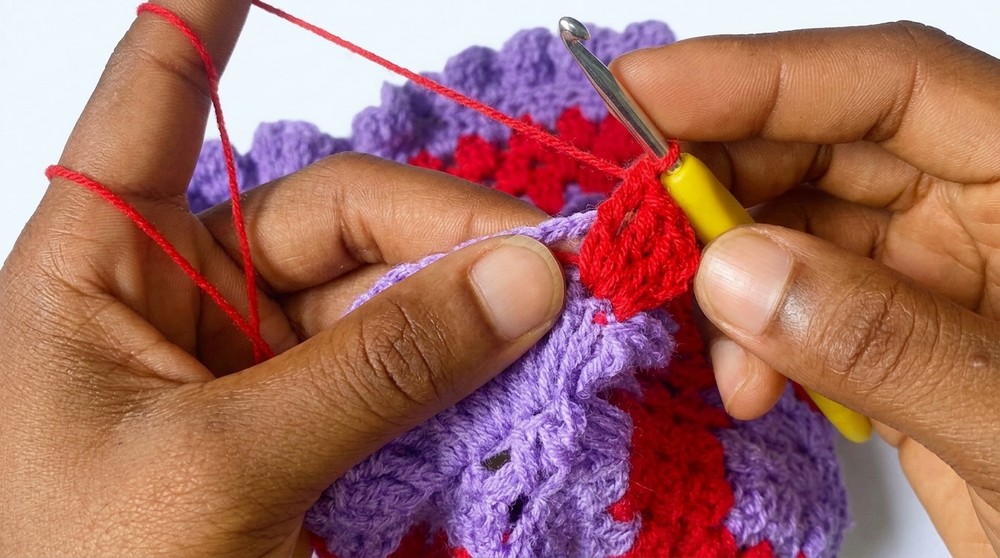
Creating Ruffles
- Begin ruffles using triple crochet (TR):
- Chain 4 (the first TR).
- Work 3 TR stitches into each stitch around the hat’s brim.
- For each TR: Yarn over twice, insert hook into space, pull up a loop, yarn over, pull through two loops three times.
- Repeat around the hat’s brim for one round.
- Optionally, add additional rounds of ruffles or switch colors following the color change instructions outlined earlier.
Finishing the Pattern
- Sew in all loose ends using a needle.
- Turn the hat to the right side.
- Verify all edges, ruffles, and joins are well formed.
Final Words
Congratulations on completing your granny square ruffle hat! This project demonstrates the versatility and elegance of granny squares used in functional designs. You can experiment with more colors, sizes, or additional rounds depending on your preferences.
Tips to Maintain the Pattern
- Tension Control: Maintain consistent tension to ensure neat stitches.
- Blocking: Block the granny squares before joining to ensure uniform sizes.
- Color Variations: Experiment with gradients or stripes for the ruffled edges.
- Loose Ends: Always sew in loose ends tightly to prevent unraveling.
- Customization: Add a decorative bow or pompom to enhance the design further.