Bring creativity to life with this easy crochet wallet and coin pouch pattern, perfect for adding charm and keeping your essentials organized daily.

Lovely Free Crochet Wallet and Coin Pouch Pattern for Gifting Ideas
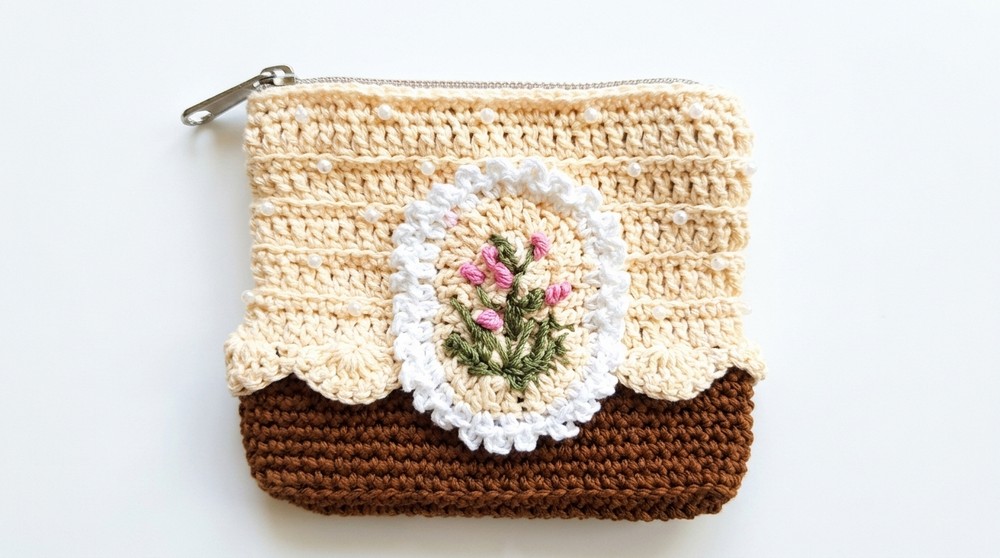
Turn simple yarn into a gorgeous, handmade treasure that’s not only useful but also a true piece of art. This free crochet wallet and coin pouch pattern is perfect for adding a touch of beauty to your everyday essentials. With its delicate beads, floral embroidery, and charming fan shaped stitches, it’s more than just a pouch—it’s a statement of creativity. Small yet roomy, it’s ideal for keeping coins, small accessories, or tiny keepsakes safe and organized.
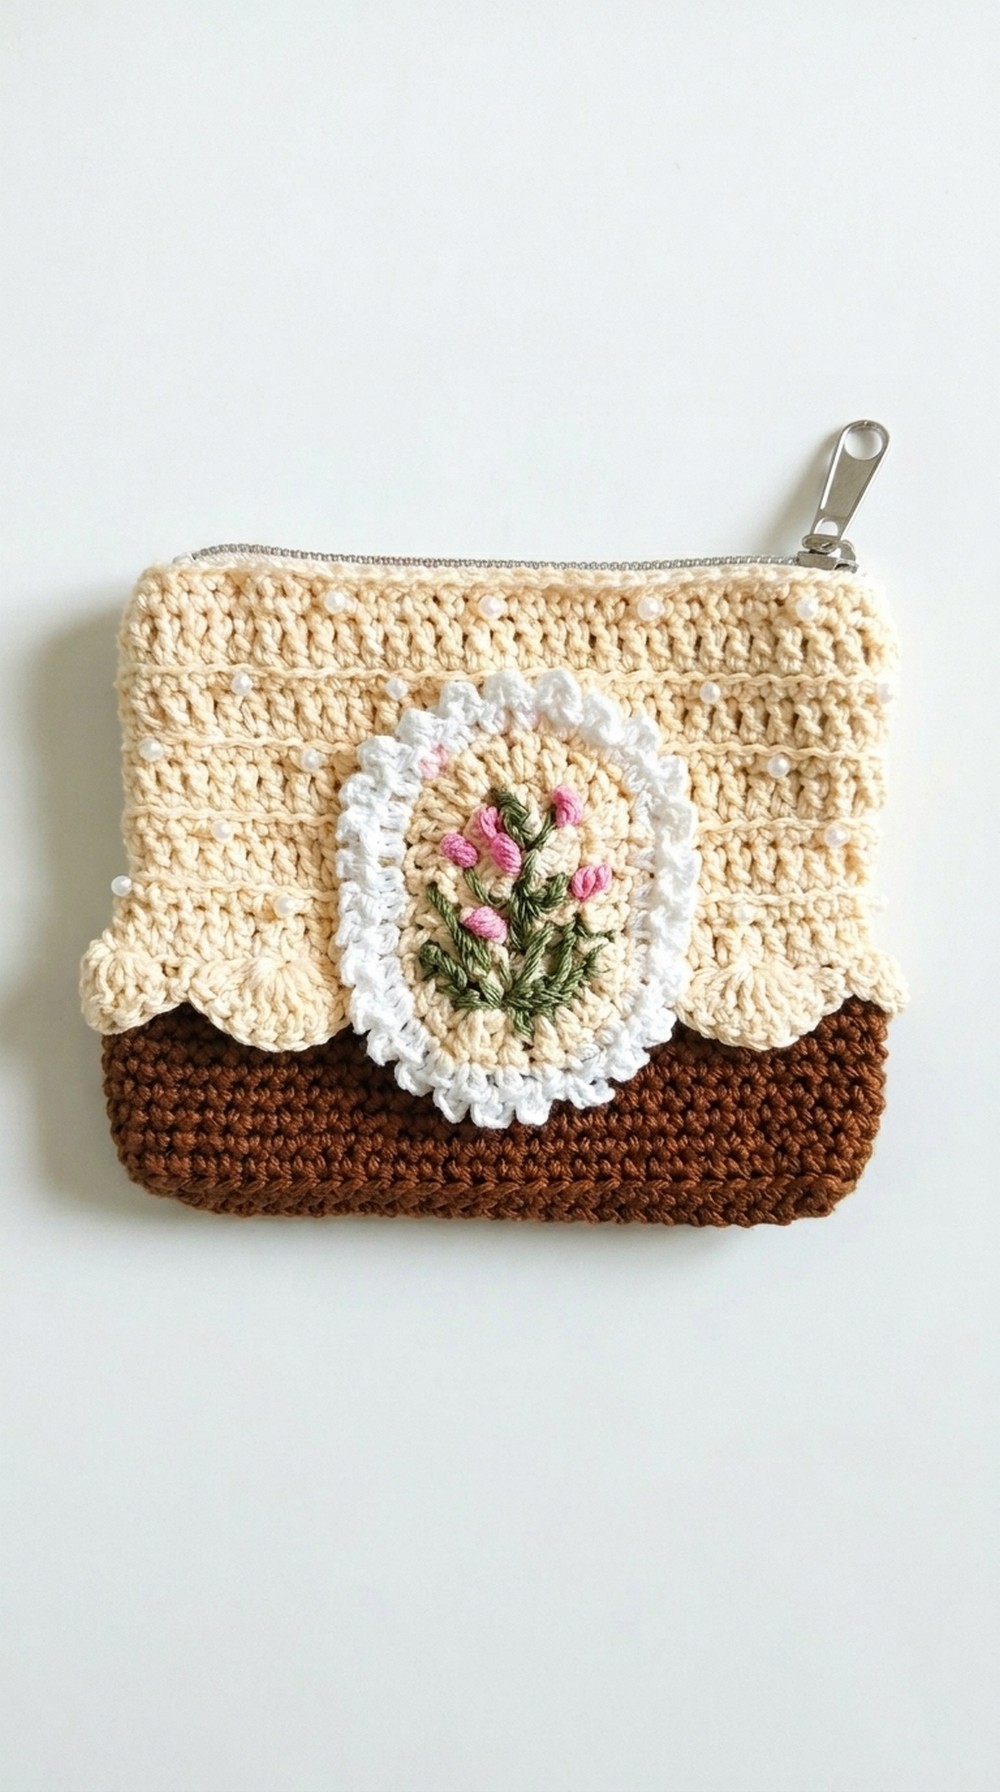 The soft texture, practical zipper closure, and stunning design make it a joy to crochet and use. Even beginners can create this lovely piece by following easy to learn stitches like single crochet, double crochet, and picot edging. Whether it’s for yourself or a heartfelt gift, this crochet wallet promises to be an inspiring and rewarding project.
Crochet Wallet and Coin Pouch Pattern
Finished Size
- Approximate Dimensions: 5.5 inches (14 cm) wide × 4.3 inches (11 cm) tall (excluding zipper section).
(Note: Actual size may vary depending on yarn choice and tension.)
Necessary Materials
- Yarn:
- Primary color: Polycherry yarn in two shades (blue and cream).
- Decorative color: White yarn for detailed edging.
- Embroidery thread: Green (for stems and leaves), pink (for flowers).
- Hook: Size 4.0 mm crochet hook (Tulip brand recommended but optional).
- Beads: Approx. 2 mm small beads (quantity depends on your preference).
- Zipper: 4.5 inches (11 to 12 cm). Match the zipper color to the yarn.
- Sewing Tools: Needle, thread (color to match), scissors, and a lighter.
- Tapestry Needle: For sewing embroidery details and zipper.
Gauge
- Single Crochet: 20 stitches x 22 rows = 4×4 inch (10×10 cm) square.
(Note: Gauge may be adjusted for tension differences by altering hook size.)
Special Techniques
- Slip Stitch (sl st): Used for joining rounds and achieving a neat finish.
- Single Crochet Increase (sc inc): Two single crochets in the same stitch.
- Double Crochet (dc): Standard double crochet stitch.
- Picot Stitch: Small decorative loops in edging achieved with 3 chains, slip stitch back into the base.
- Back Loop Only (blo): Insert stitch into the back loop of the stitch for texture.
- Bead Attachment: Thread beads onto yarn for seamless inclusion in crochet rows.
Instructions
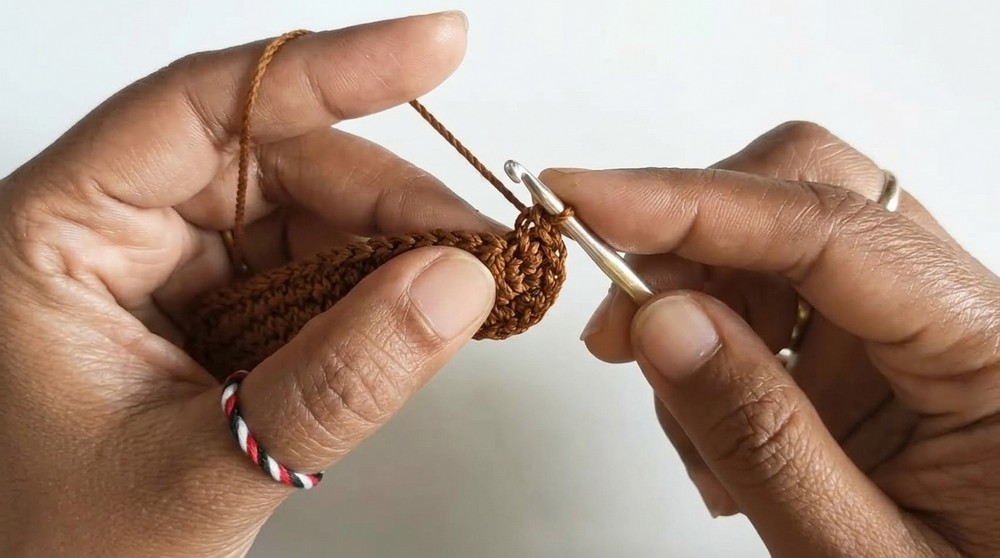
Base of the Purse
- Foundation Chain and First Row:
- Make a slip knot and crochet 27 chains loosely.
- Skip the last chain, and work 3 single crochets (sc) in the next chain.
- Work 24 sc, one in each chain.
- At the end of the chain, work 3 sc into the last chain for the rounded edge.
- Continue along the other side of the foundation chain with 24 sc.
- Join with a slip stitch into the first sc. (Total: 54 sc).
- Second Row:
- Chain 1.
- Make 2 sc in each of the next 3 stitches (sc inc – 3 times).
- Work 24 sc for the straight edge.
- Repeat the same sc increases (2 sc in next 3 stitches) for the rounded edge.
- Complete with 24 sc on the straight edge. Join. (Total: 60 sc).
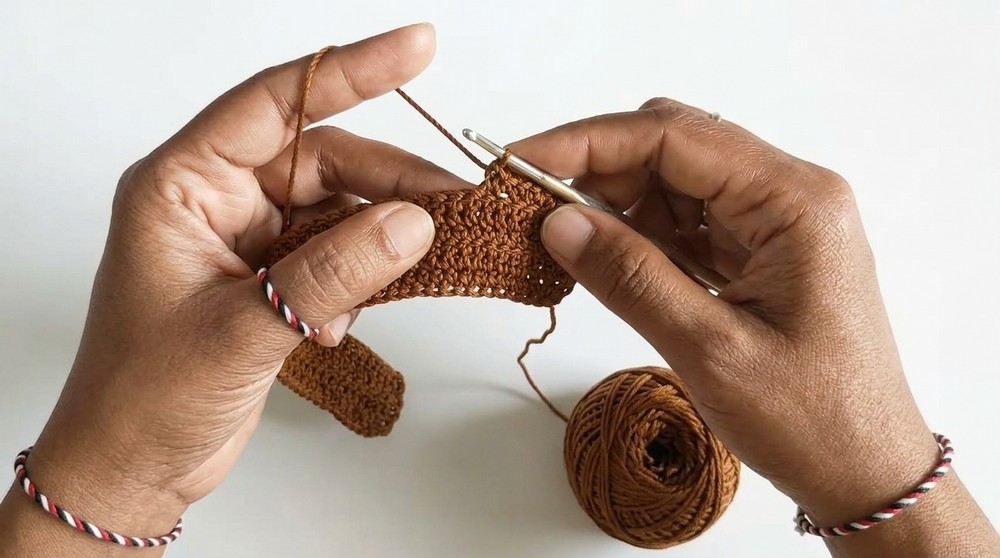
- Third Row:
- Chain 1. Work in the back loop only (blo) for the entire row.
- Crochet 60 sc blo, creating a textured bottom edge. Join.
- Rows 4-10:
- Chain 1 at the start of each round.
- Work 60 sc in each round. Join after each round. Do not work in blo for these rows.
Tip: Adjust Purse Height
- For a taller purse, add rows here before continuing to the next section.
Adding Beads and Shape Decoration
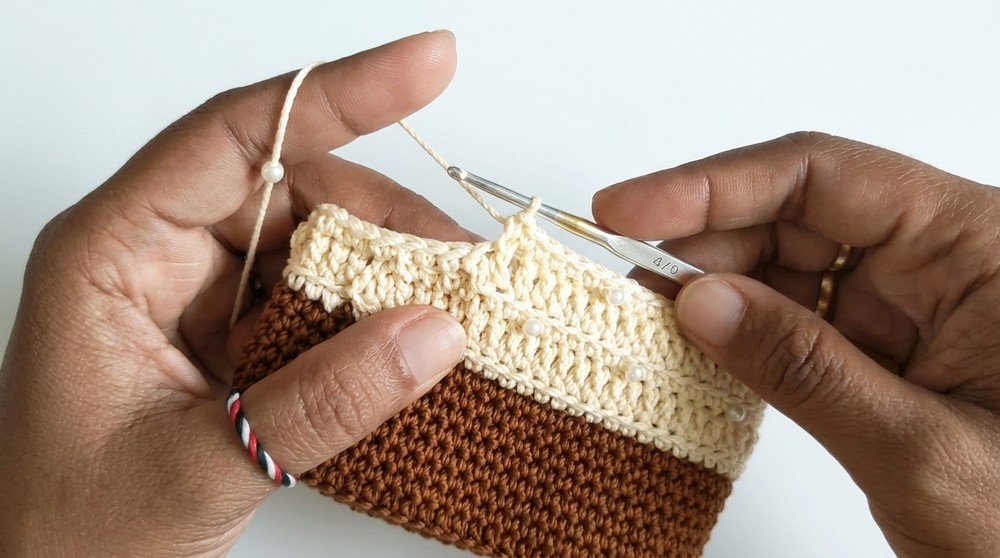
- Row 11: (Changing Yarn Color)
- Attach cream colored yarn. Thread small beads (approx. 2 mm) onto the yarn beforehand.
- Work 60 sc with the new yarn and attach beads as follows:
- Crochet 5 sc, attach a bead on the 6th sc, and repeat this pattern to the end.
- Join with a slip stitch (Total 60 sc with beads).
- Row 12:
- Begin with 2 chains. Work in blo. Crochet 60 double crochets (dc) across.
- Join with a slip stitch and fasten off.
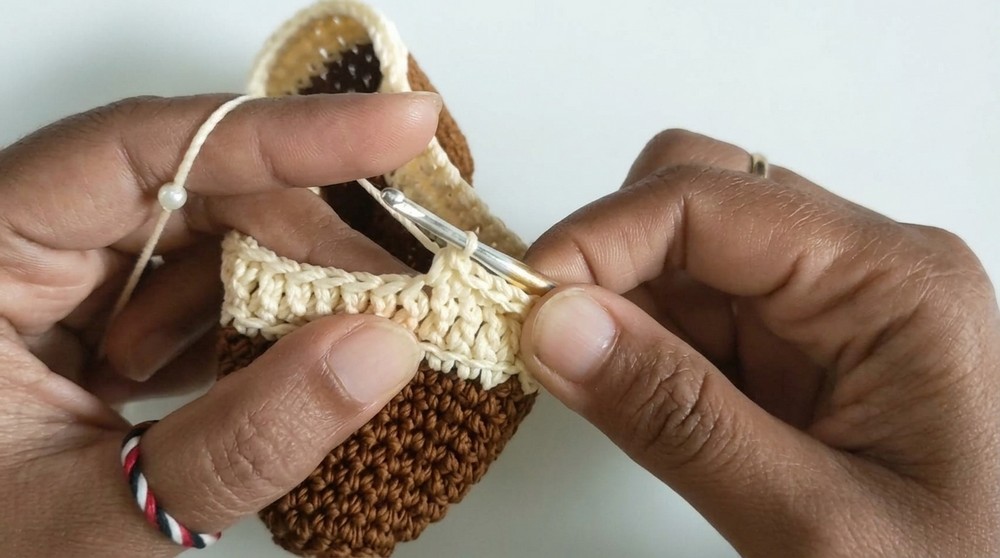
Decorative Top Edging
- Use the remaining front loops from Row 11 to create the decorative edging.
- Attach white yarn with a slip knot.
- Skip 2 front loops, then work a fan pattern:
- Crochet 7 dc into the same stitch to form one fan.
- Skip 2 front loops and make 1 sc in the next stitch.
- Repeat the fan pattern and sc combination. Continue for one full round.
- Join and fasten off.
Embroidery and Zipper Assembly
- Adding the Zipper:
- Manually sew the zipper into the top of the purse using a needle and matching thread.
- Embroidery Details:
- Use green thread to embroider stem and leaf patterns on the purse.
- Add pink thread flowers to complement the design.
- Optional: Create a custom embroidery pattern for extra flair.
Customization Ideas
- Experiment with Colors: Use variegated or pastel yarns for a unique effect.
- Bead Patterns: Incorporate beads in different colors or shapes for extra charm.
- Larger Purse: Use thicker yarn or add additional rows to increase size.
- Personalized Embroidery: Include initials or monograms to make it a special gift.
Tips for Success
- Keep your tension even throughout to ensure uniform stitches.
- When attaching beads, push them snugly to the last stitch for a polished look.
- Use a lighter to gently melt and seal yarn ends for durability.
Conclusion
Your crochet purse is now complete! Featuring a mix of texture, crochet techniques, and embroidery, this project is perfect for showing off your skills. The luxurious bead accents and delicate floral embroidery elevate its charm, making it a beautiful and practical accessory.
Important Remarks:
- Take care to align the zipper evenly before stitching for a professional finish.
- Remember, creativity has no limits—experiment with patterns and colors to make your piece truly unique.