Cozy comfort comes through the Free crochet Beanie Pattern, offering a simple approach for warm headwear that suits daily outfits with ease.
There’s a certain charm in reaching for a beanie that instantly elevates your outfit while keeping you comfortably warm. It’s the kind of accessory that fits effortlessly into daily routines—whether you’re heading out for a walk, styling a casual look, or preparing thoughtful handmade gifts. The Crochet Beanie Pattern captures this blend of simplicity and elegance, offering a piece that feels both timeless and wonderfully practical.
Cozy Crochet Beanie Pattern You’ll Wear All Season
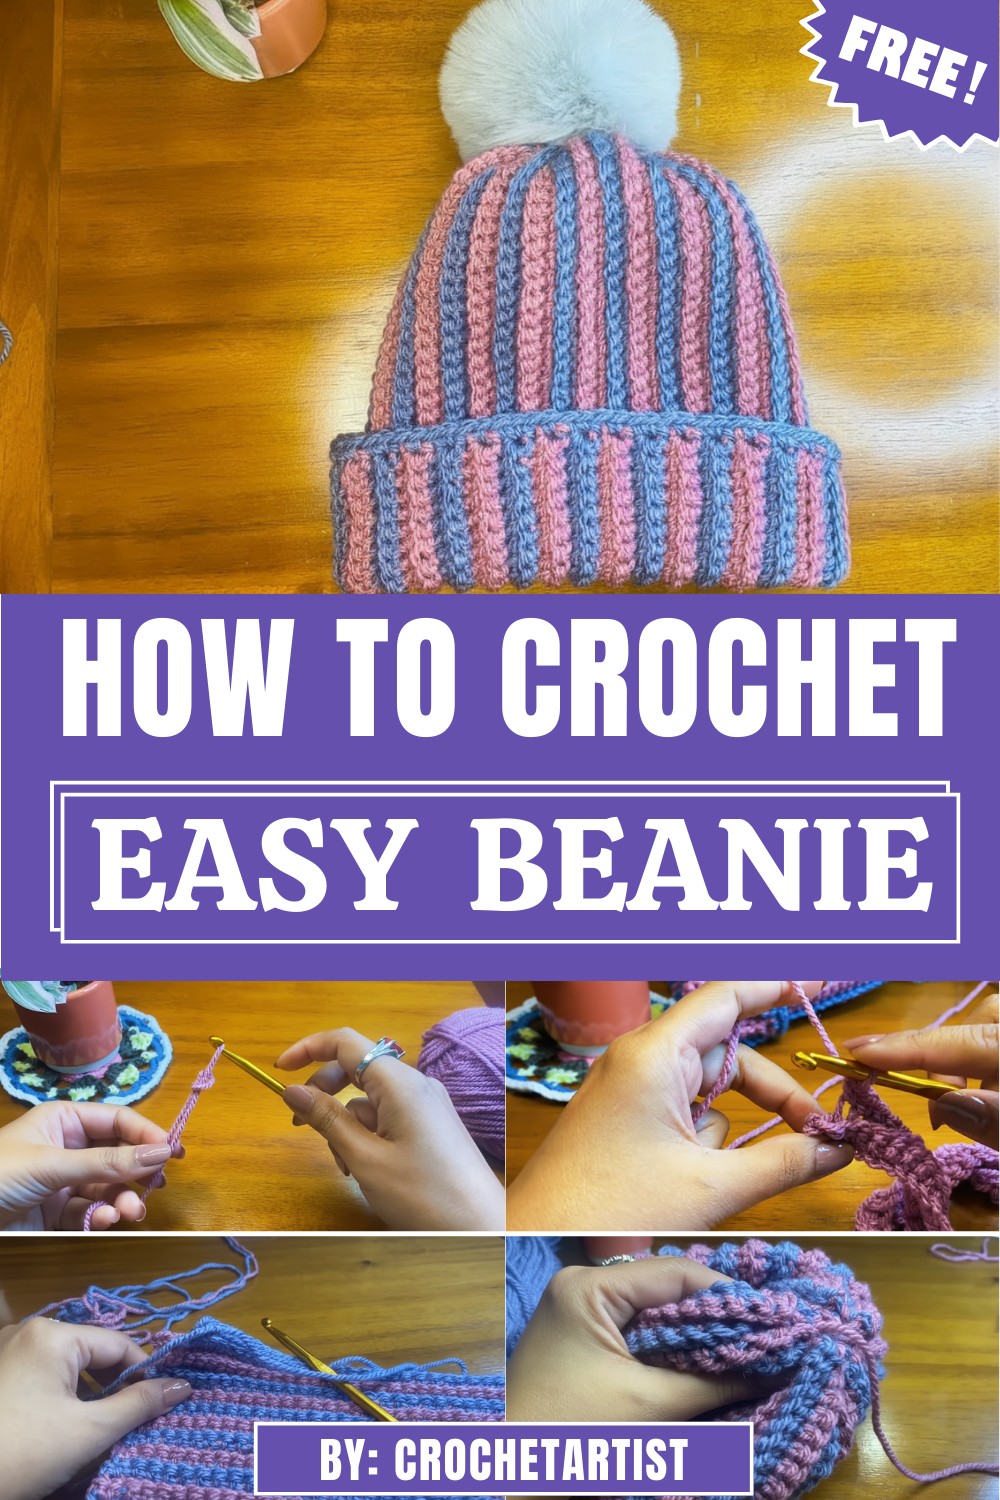
Designed with a smooth, flattering silhouette, the pattern creates a beanie that hugs the head comfortably while maintaining a clean, modern shape. The Crochet Beanie Pattern is easy to follow yet provides a beautifully polished finish, making it suitable for beginners as well as seasoned makers. Its balanced stitch structure ensures just the right amount of stretch, giving the beanie a snug but relaxed fit. Whether you prefer a classic style or something with a touch of slouch, the pattern adapts with ease.
With endless color and yarn options, this beanie becomes a perfect canvas for personal expression. Soft neutrals add a refined, everyday look, while vibrant tones or textured yarns offer a bold, contemporary feel. The Crochet Beanie Pattern encourages creativity while delivering dependable warmth, comfort, and style—an accessory you’ll find yourself wearing throughout the seasons.
Step-by-Step Details
Step 1: Gather Materials
To crochet the beanie, you need the following:
- Yarn: The tutor uses “Everyday Knitcraft Yarn” but mentions that any size or type of yarn can work.
- Crochet Hook: A 6 mm hook is used for this project.
- Scissors: For cutting the yarn.
- Yarn Needle: To sew the beanie together and weave in ends.
- Optional: A pom-pom (for decoration).
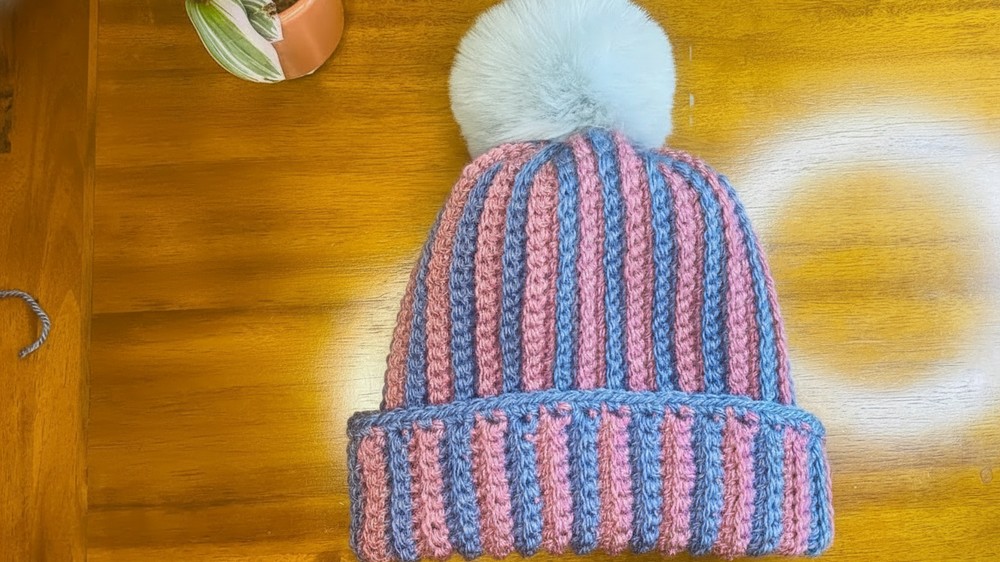
Step 2: Create the Foundation Chain
- Start by creating a slip knot to get your yarn on the hook.
- Form a foundation chain by yarning over and pulling through the loop. For this tutorial, the tutor makes 40 chains (for an adult medium size), but you can adjust the number of chains depending on the desired size of your beanie.
- After the foundation chain is complete, measure its length and adjust if needed.
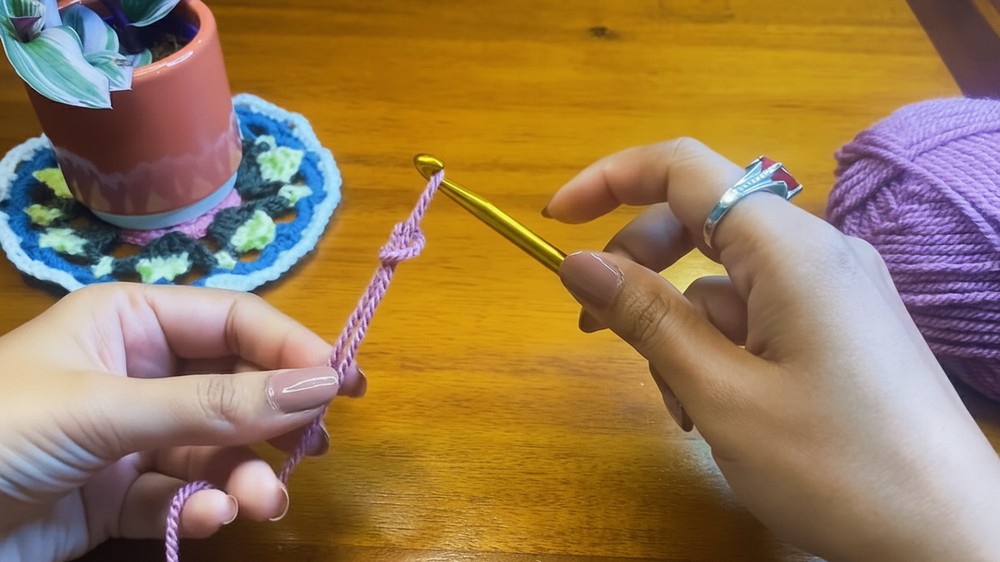
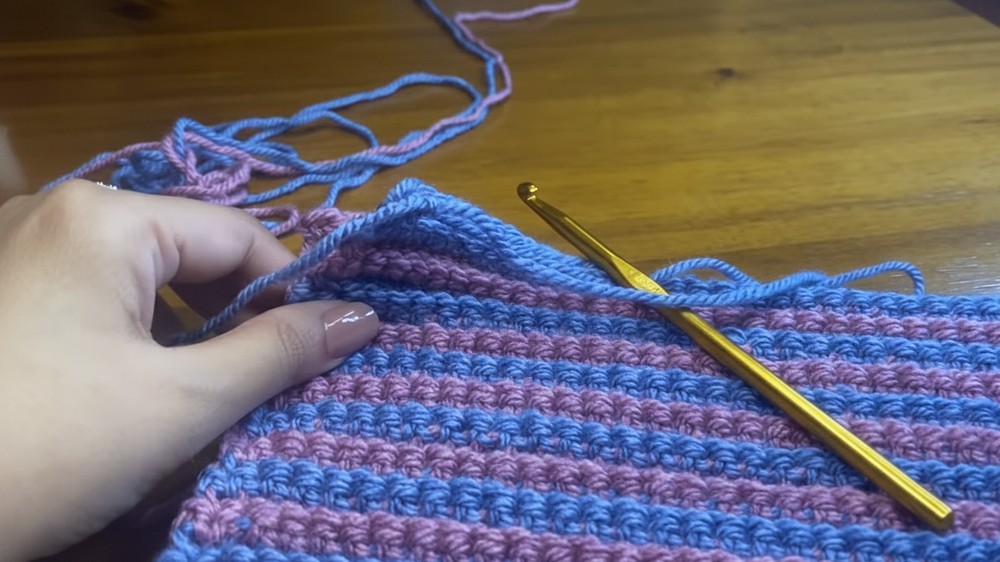
Step 3: Begin the Pattern (Single Crochet into Back Loop)
- Add one chain at the end of the foundation chain. Note: This chain does not count as a stitch.
- Turn your work and single crochet into the back loop of each stitch in the foundation chain. The back loop is the small loop running along the backside of your stitches.
- Insert the hook into the back loop.
- Yarn over, pull through the loop.
- Yarn over again and pull through the two remaining loops.
- Continue single crocheting into the back loops until you reach the end of the row.
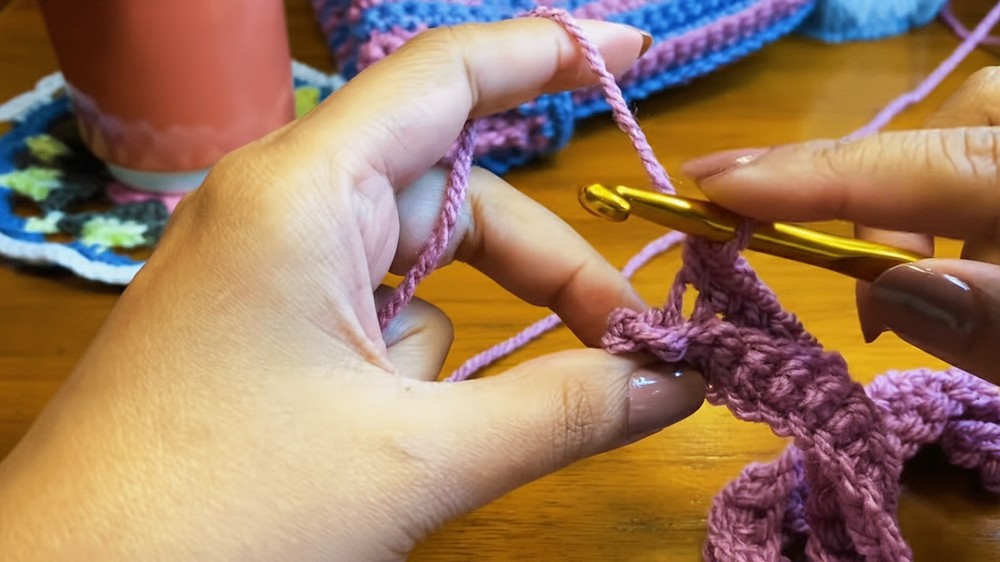
4: Repeat Rows and Change Colors
- At the end of each row:
- Chain one (does not count as a stitch).
- Turn your work.
- Single crochet into the back loops of the previous row.
- Use a stitch marker to mark the first stitch of each row to ensure you don’t lose track.
- Repeat the same pattern across all the rows.
- To create a striped pattern, change the yarn color every two rows:
- At the last stitch of the second row, add the new color.
- Pull the new color through the two loops on the hook.
- Leave the previous color’s tail loose instead of working it into the stitches, as these ends will be trimmed or weaved in later.
5: Build Rows and Complete the Beanie Body
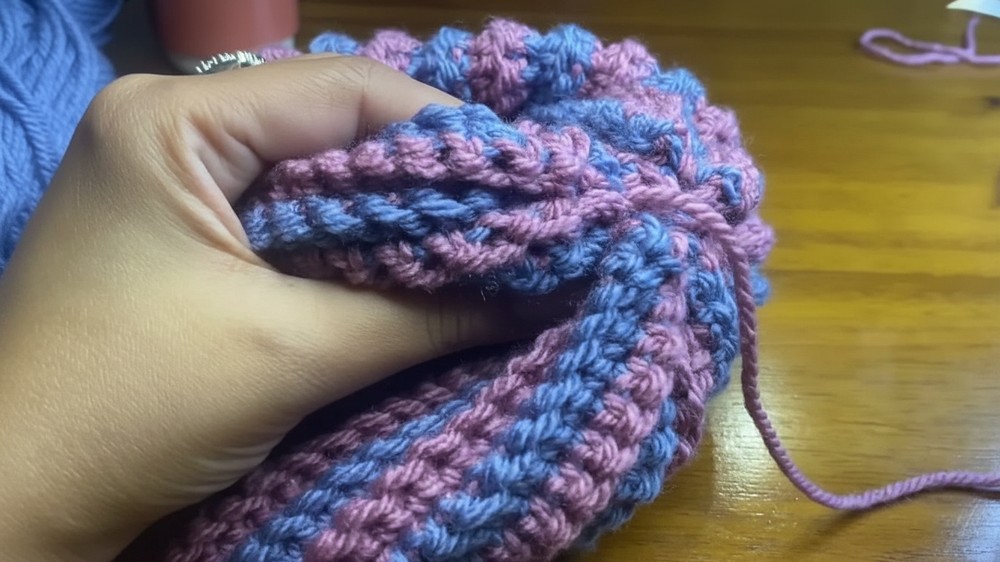
- Continue crocheting rows until the beanie reaches the desired height. The tutor creates 72 rows using this back loop single crochet method.
- Once complete, the pattern should resemble a stretchy ribbed fabric.
6: Assemble the Beanie
- Leave a long tail of yarn (approximately twice the length of the beanie’s opening) and cut the working yarn.
- Use a yarn needle to sew the two edges of the beanie together:
- Insert the yarn needle through the first stitch on one side and the corresponding stitch on the opposite side.
- Repeat this process across the edges to seam the ends together.
- Ensure the stitches are tight and secure.
7: Close the Top
- Use the remaining yarn tail to close the top of the beanie:
- Insert the needle loosely through the top edge of the beanie in a circular pattern.
- Once you’ve gone around, gently pull the yarn to bring all the gathered stitches together and completely close the top.
- Sew back and forth a few times to fully secure the closure.
8: Add Finishing Touches
- If desired, add a pom-pom to the top of the beanie. The tutor uses a store-bought pom-pom:
- Attach it to the top center of the beanie using its pre-attached strings.
- Secure it with a firm knot but leave it slightly adjustable in case you want to swap or remove it later.
- Weave in all loose ends from the color changes and trimming.
- Finally, shape and smooth the beanie with your hands.
Special Features
- Stretchy and Customizable: The beanie is highly stretchable and can be adjusted to fit any head size.
- Minimal Skill Required: It only uses the single crochet stitch, which is perfect for beginners or those looking for a quick and easy project.
- Color Changes: The striping pattern makes it visually appealing and allows for creative color combinations.
- Optional Decoration: Adding a pom-pom adds flair and allows for further personalization.
Level of Difficulty
- The tutorial is beginner-friendly, making it ideal for those with little to no crochet experience.
- The use of the single crochet stitch ensures simplicity, and the tutor provides clear guidance on each step.
- Advanced crocheters can still enjoy this project by experimenting with creative patterns, yarn types, or additional decorative elements.
Tutor’s Suggestions
- Count Stitches Regularly: Always ensure each row has the correct number of stitches. For example, if you start with 40 stitches, make sure you maintain 40 stitches in every row.
- Use a Stitch Marker: Add stitch markers at the first stitch of each row to avoid confusion.
- Change Colors Neatly: Be consistent with where and how you change yarn colors to keep the appearance tidy.
- Leave Longer Tails: Longer yarn tails make it easier to sew seams and close the top securely.
Uses
- Winter Accessory: Ideal for keeping warm during cold weather.
- Gift Idea: Handmade beanies add a personal touch and make excellent gifts.
- Fashion Item: The striped design and optional pom-pom make it perfect for casual, stylish wear.
Materials
- Everyday Knitcraft Yarn or any type of yarn.
- 6 mm crochet hook.
- Scissors.
- Yarn needle.
- Optional: Decorative pom-pom.
Tip
When changing colors, always ensure your work tension remains consistent to avoid uneven rows or shapes. Additionally, weave in or trim loose ends carefully for a professional-looking finish.
Conclusion
This crochet beanie pattern is an excellent project for beginners due to its simple techniques and high level of customization. By mastering a single stitch and working patiently, you can create a stylish, stretchy, and warm beanie suited to anyone. The added striped color effect and optional pom-pom elevate the design to a charming accessory that’s great for personal use or as a gift.