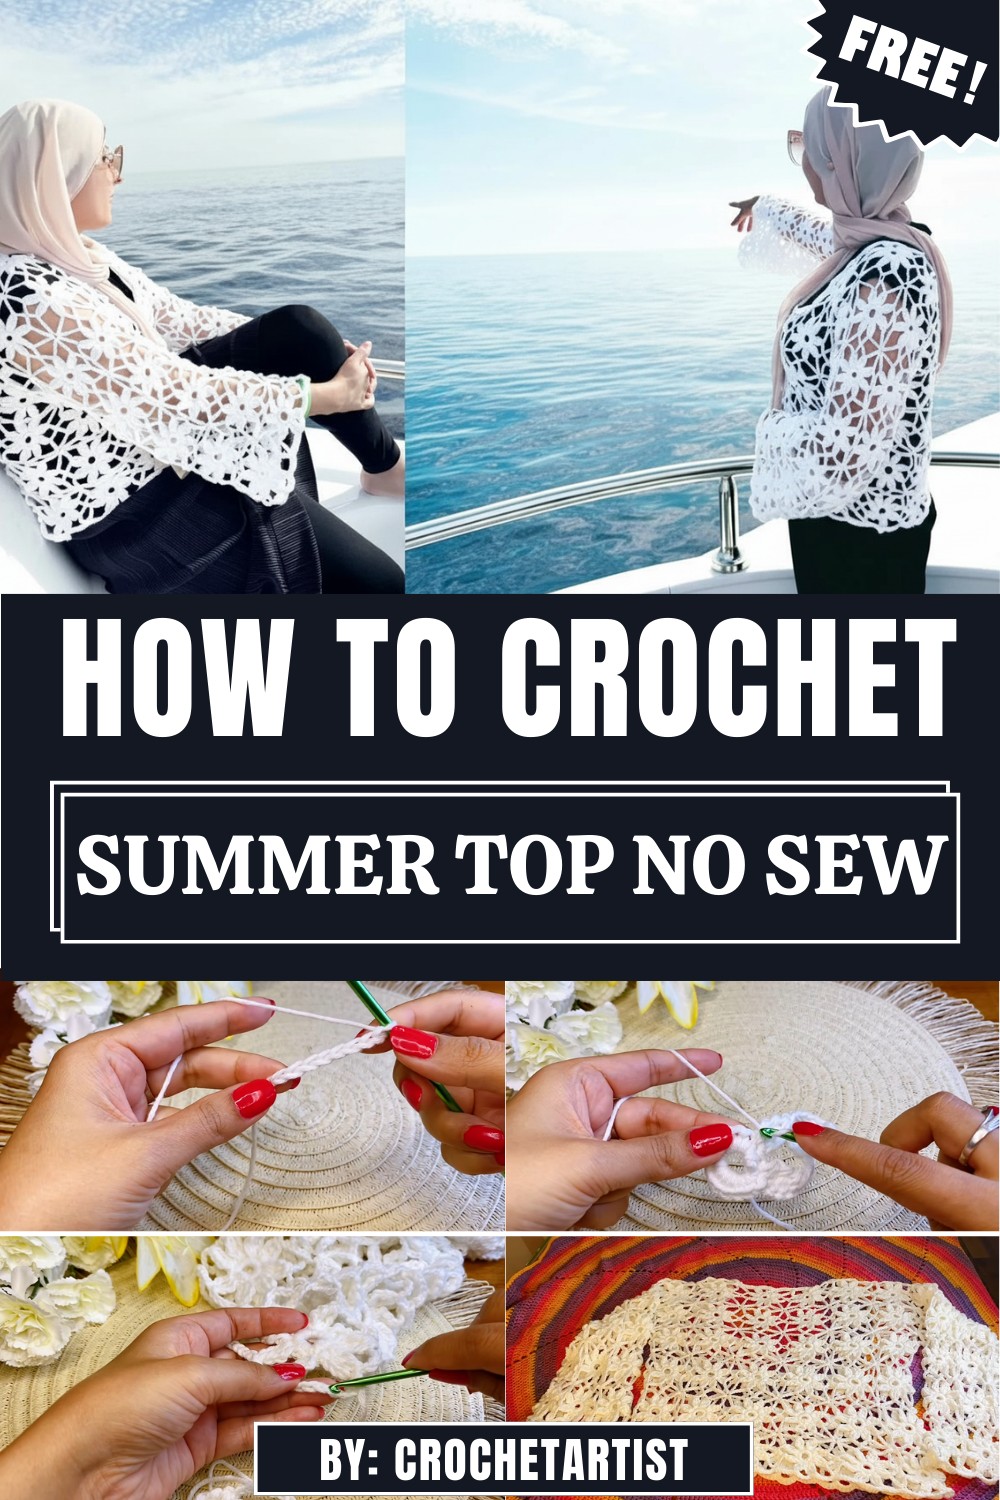
Stay cool and stylish with Free Crochet Summer Top Pattern, offering a light, colorful, and cheerful design perfect for warm-weather outfits.
Lightweight, breezy, and effortlessly stylish, this summer top is perfect for warm days, beach outings, or casual layering over your favorite outfits. Its comfortable design ensures ease of wear while adding a touch of elegance to any wardrobe. The Crochet Summer Top Pattern creates a flattering, airy piece that combines chic style with practical comfort, making it ideal for everyday summer wear.
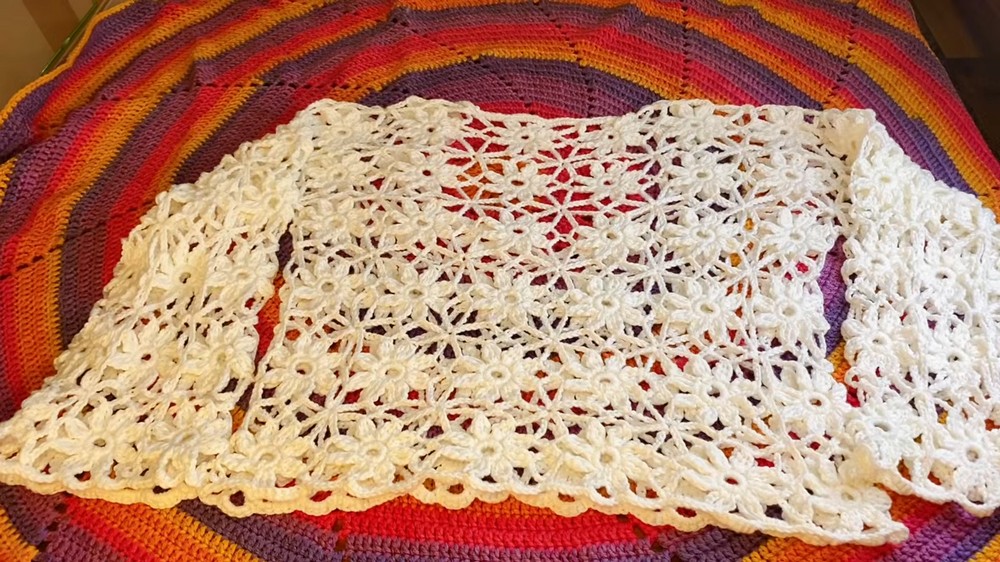
Cozy-Chic Crochet Summer Top Pattern Perfect for Vacations
Featuring delicate stitch patterns and a flattering silhouette, the design allows for both comfort and a refined finish. The Crochet Summer Top Pattern is easy to follow yet delivers a polished result, offering makers the satisfaction of creating a versatile garment that drapes beautifully. Its breathable construction keeps you cool while maintaining shape, and the adaptable design works for various body types, making it a go-to choice for summer wardrobes.

Customizable with different yarns and colors, this top can reflect a range of styles, from soft pastels for a subtle, elegant look to bold shades for a statement piece. The Crochet Summer Top Pattern encourages creativity, allowing you to add personal touches like lace details, textured stitches, or color variations. Lightweight, stylish, and comfortable, this pattern results in a summer essential that blends fashion and function seamlessly.
Step-by-Step Details
Step 1: Gather Materials
The materials used in the tutorial include:
- Yarn: Cotton blend DK yarn (4-5 balls, depending on size).
- Crochet Hook: A 4mm crochet hook.
- Scissors: For trimming the yarn.
- Yarn Needle: To weave in ends after finishing.
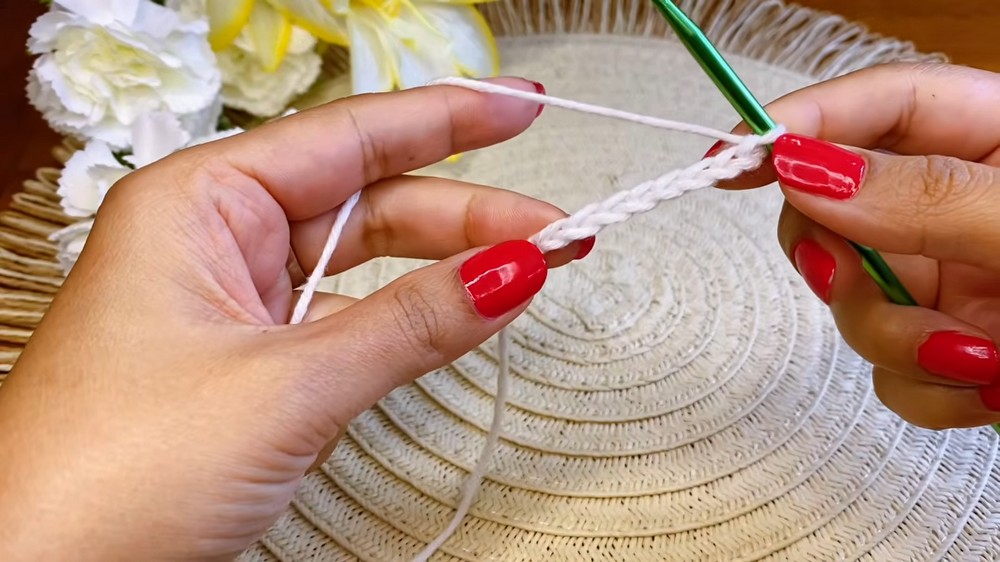
Step 2: Start With a Slip Knot and a Chain
- Create a slip knot on your hook.
- Chain 8 stitches. This forms the first ring for the square.
- Slip stitch into the first chain to form a ring.
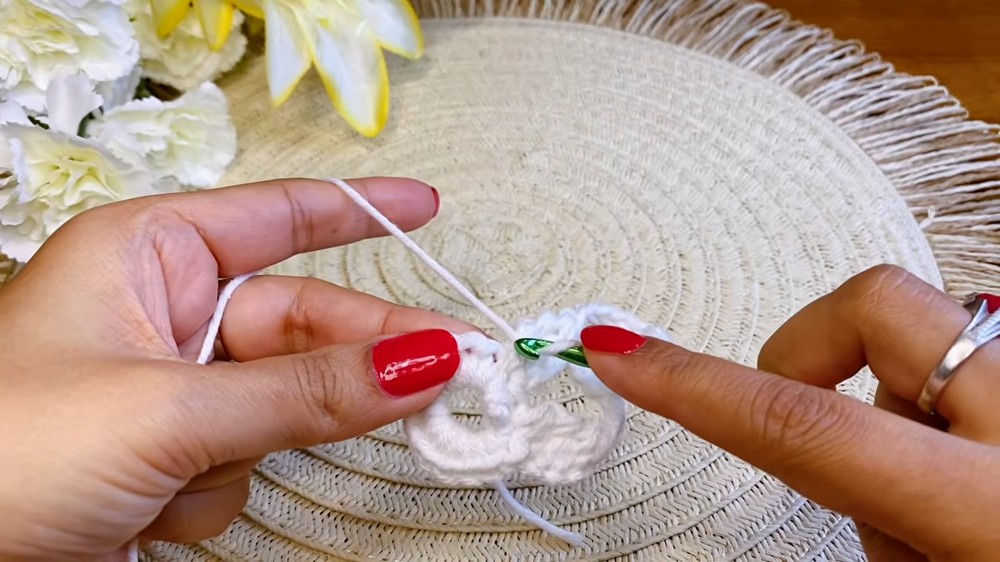
Step 3: Add the First Round
- Work 16 single crochets into the center of the ring.
- For a single crochet: Insert the hook into the ring, yarn over, pull through, yarn over again, and pull through both loops.
- Slip stitch into the first stitch of the round, fastening it securely.
4: Begin the Petals
- Chain 4, then yarn over twice to begin the first half treble crochet (htrc).
- Insert the hook into the same stitch, yarn over, pull through two loops, yarn over again, and pull through two loops. Repeat this process twice more until there are three loops on the hook.
- Yarn over, pull through all loops, chain 1, and chain 5.
5: Continue the Pattern
- Skip the next stitch, make another petal with half treble crochets (htrc).
- Chain 5 after every petal, and chain 10 when creating the larger spaces of the square.
- Continue working around the ring until you close the square with a slip stitch into the starting chain 4.
- At the end of the round, fasten off the yarn and cut it, leaving a small tail to weave in.
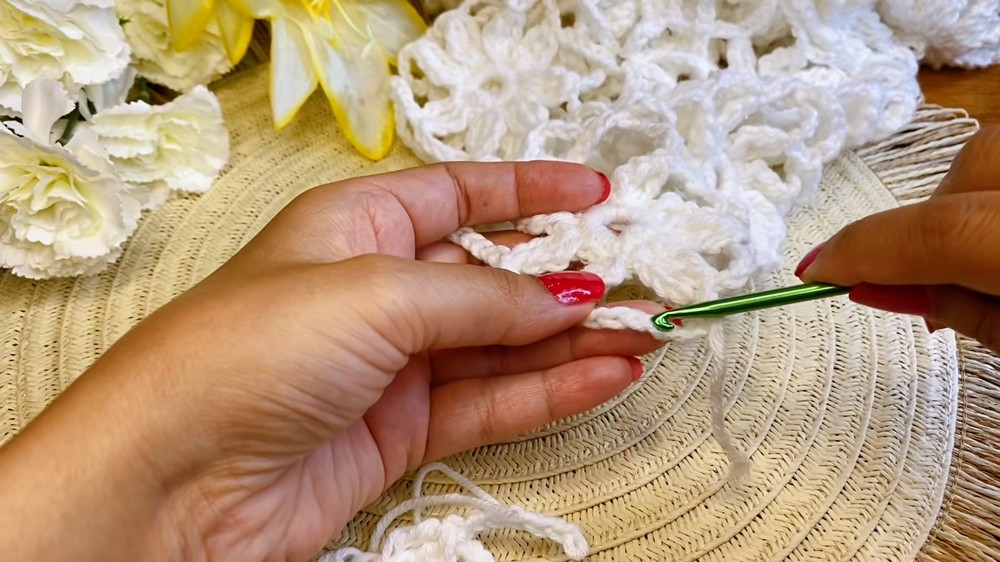
6: Attach Squares Together
- Once you complete one square, begin a new square in the same way.
- As you near the end of the second square, attach it to the previous one by connecting the chain 10 spaces. Pull the fifth chain through the middle of the chain 10 space on the adjacent square.
- Continue crocheting and attaching other squares in the same way, ensuring that the correct sides are aligned neatly.
7: Create a Half-Square
- To complete the neckline and armholes, you will need half-squares.
- Follow the same pattern as the full square but only work on the first half, stopping at the halfway point.
- Attach the half-square between completed squares on the neckline or other areas that need filling.
8: Customize for Size
- For the main body, create a total of 6 squares for the front panel and 6 squares for the back panel, depending on your size. Adjust the number of squares to fit your body measurements.
- For the neckline, leave two middle squares open and work three squares on either side, attaching half-squares where necessary to form the shape.
9: Work the Sleeves
- Create a new square for the sleeves directly attached to the armhole area.
- The instructor recommends 5 squares per sleeve for a comfortable fit. You can adjust the number of squares depending on how wide or fitted you want the sleeves to be.
- Attach the armholes securely by repeating the process of connecting chain 10 spaces to achieve clean connections.
10: Add the Border
- Once all squares are attached, single crochet around the top’s edges (including the neckline, sleeves, and bottom hem) to create a neat finish.
- Work 5 single crochets into each chain 5 space for even spacing.
- Continue single crocheting to create a polished border.
Special Features
- No Sewing Required: The seamless joining of squares means you don’t need to sew the pieces together.
- Customizable Sizing: Adjust the number of squares or chain sizes to fit the top to your body perfectly.
- Lightweight and Breathable: The use of cotton-blend yarn makes the top airy and ideal for warm, tropical climates.
- Versatile Design: This method can be adapted to create beach dresses or other garments.
- Beginner-Friendly: The design relies on mastering basic crochet techniques, making it suitable for all skill levels.
Level of Difficulty
This project is beginner to intermediate. While it introduces patterns such as petals and half-treble crochets, the square construction and repetition make it manageable. The lack of sewing also simplifies the process for new crocheters.
Tutor’s Suggestions
- Be Patient with Petals: Practice creating consistent petals with even tension for a professional finish.
- Test for Fit: Create a few test squares and half-squares to adjust the size before committing to the full project.
- Use Stitch Markers: Mark joining points on the squares, especially when attaching multiple squares, to avoid mistakes.
- Choose Quality Yarn: A cotton-blend yarn will produce a better drape and durability for a wearable garment.
- Experiment with Colors: While the video uses a neutral color, you can make the top vibrant using multiple colors or yarn shades.
Uses
- Beachwear: Light and breathable, perfect for layering over swimwear.
- Summer Top: Comfortable and stylish for casual summer outings.
- Marketable Item: Handmade tops like this are popular at craft markets or as personalized gifts.
- Crochet Practice: This is a great project for learning and mastering basic techniques like petals, joining squares, and half-treble crochet.
Tip
When attaching squares, ensure that chain spaces are neatly aligned. This helps maintain symmetry in the final garment and avoids overlapping or uneven joins.
Conclusion
This pattern provides a comprehensive guide to creating a stunning crochet beach top using a simple square-based design. The seamless construction, lightweight yarn, and customizable sizing make it a perfect summer garment for crochet enthusiasts. Whether you create it for yourself, as a gift, or for sale, this project combines creativity and practicality in one.