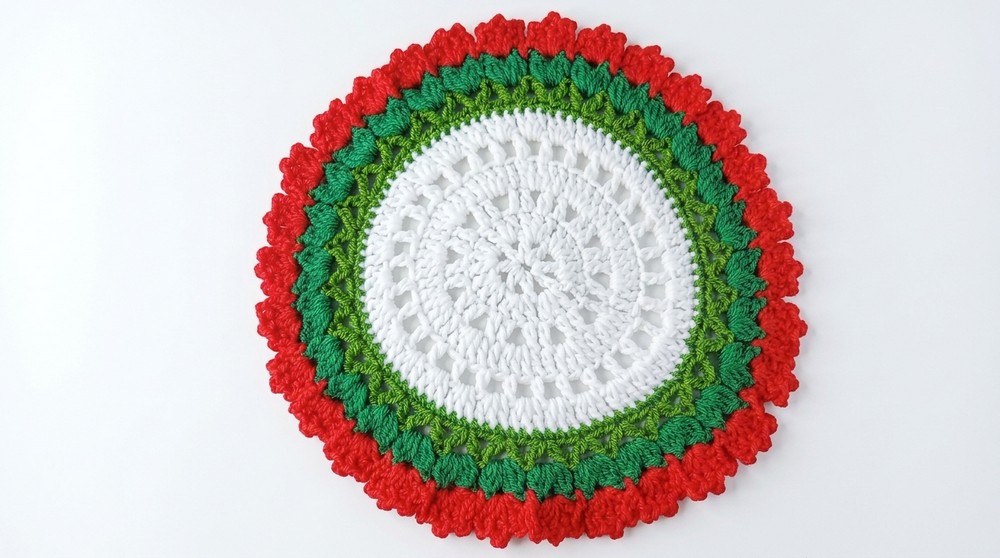
Give your table a fresh and lovely look with this free crochet round doily placemat pattern ideal for a calm and fun crocheting time at home.
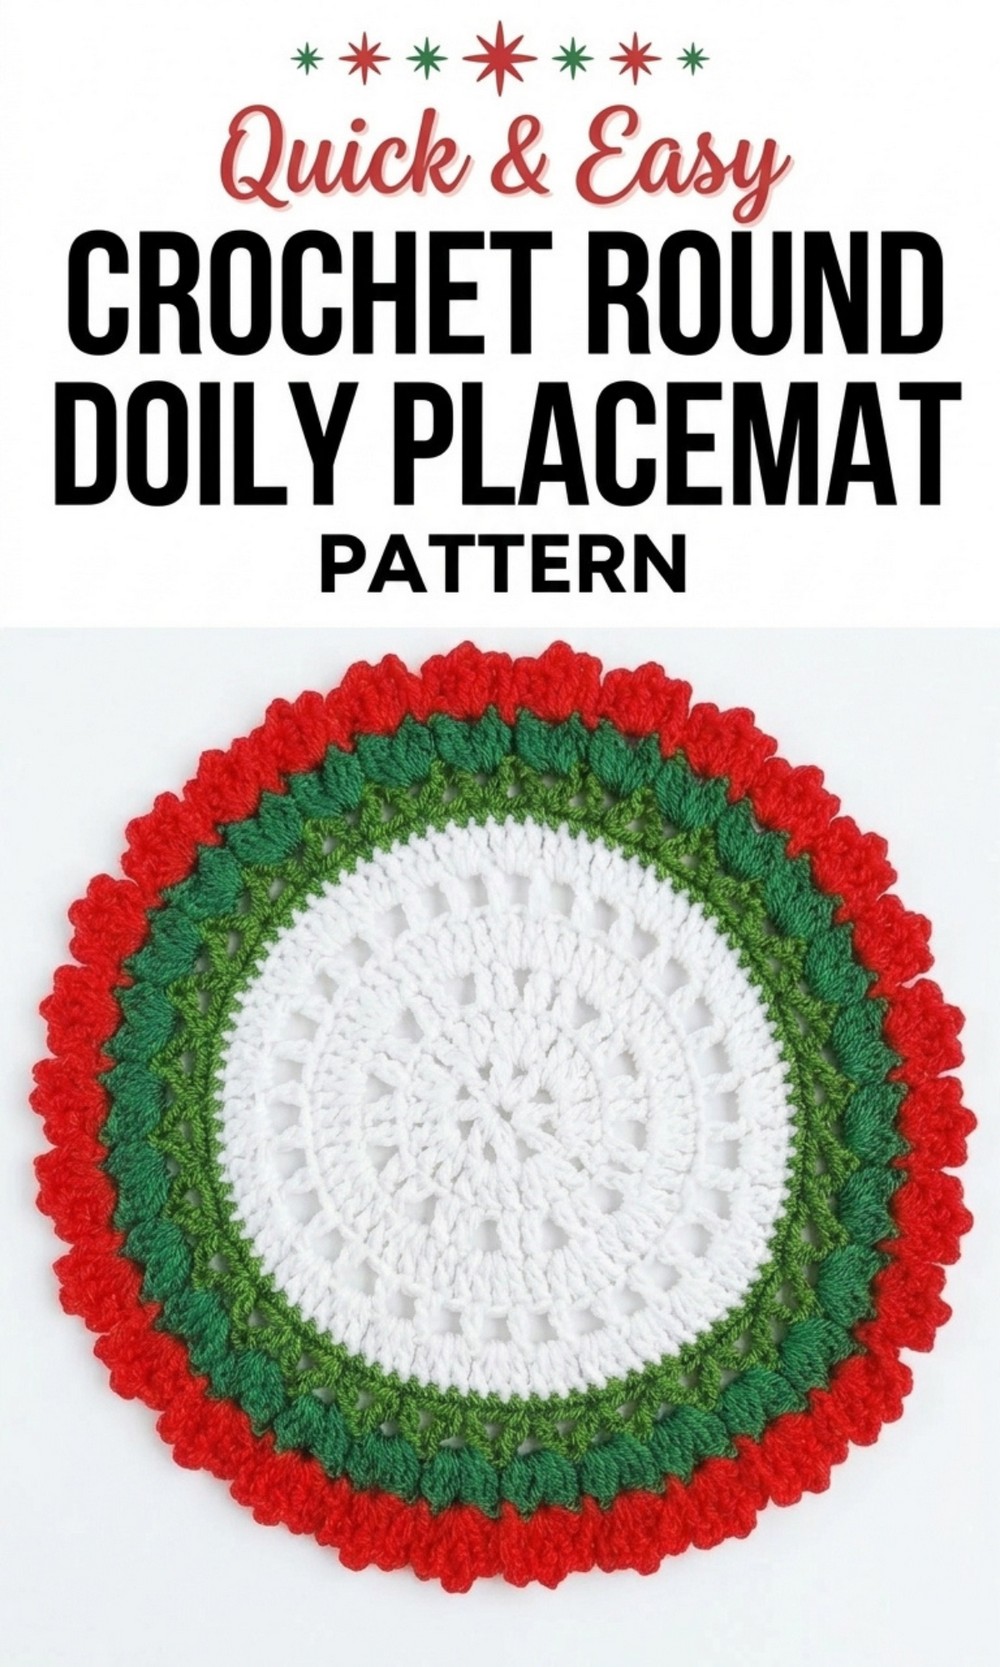
Gorgeous Free Crochet Round Doily Placemat Pattern for Rustic-Inspired Dining
Bring charm and beauty to your table with a crochet round doily placemat. This stunning handmade piece features soft, seamless patterns with delicate floral details that instantly brighten any space. Made using vibrant threads, it not only looks beautiful but also serves a practical purpose by protecting your table from heat and scratches.
Whether placed under a vase, a candle, or on the dining table during family dinners, this placemat adds warmth and elegance to your home. Its lightweight design makes it easy to use for daily decor or special occasions like birthdays and celebrations. 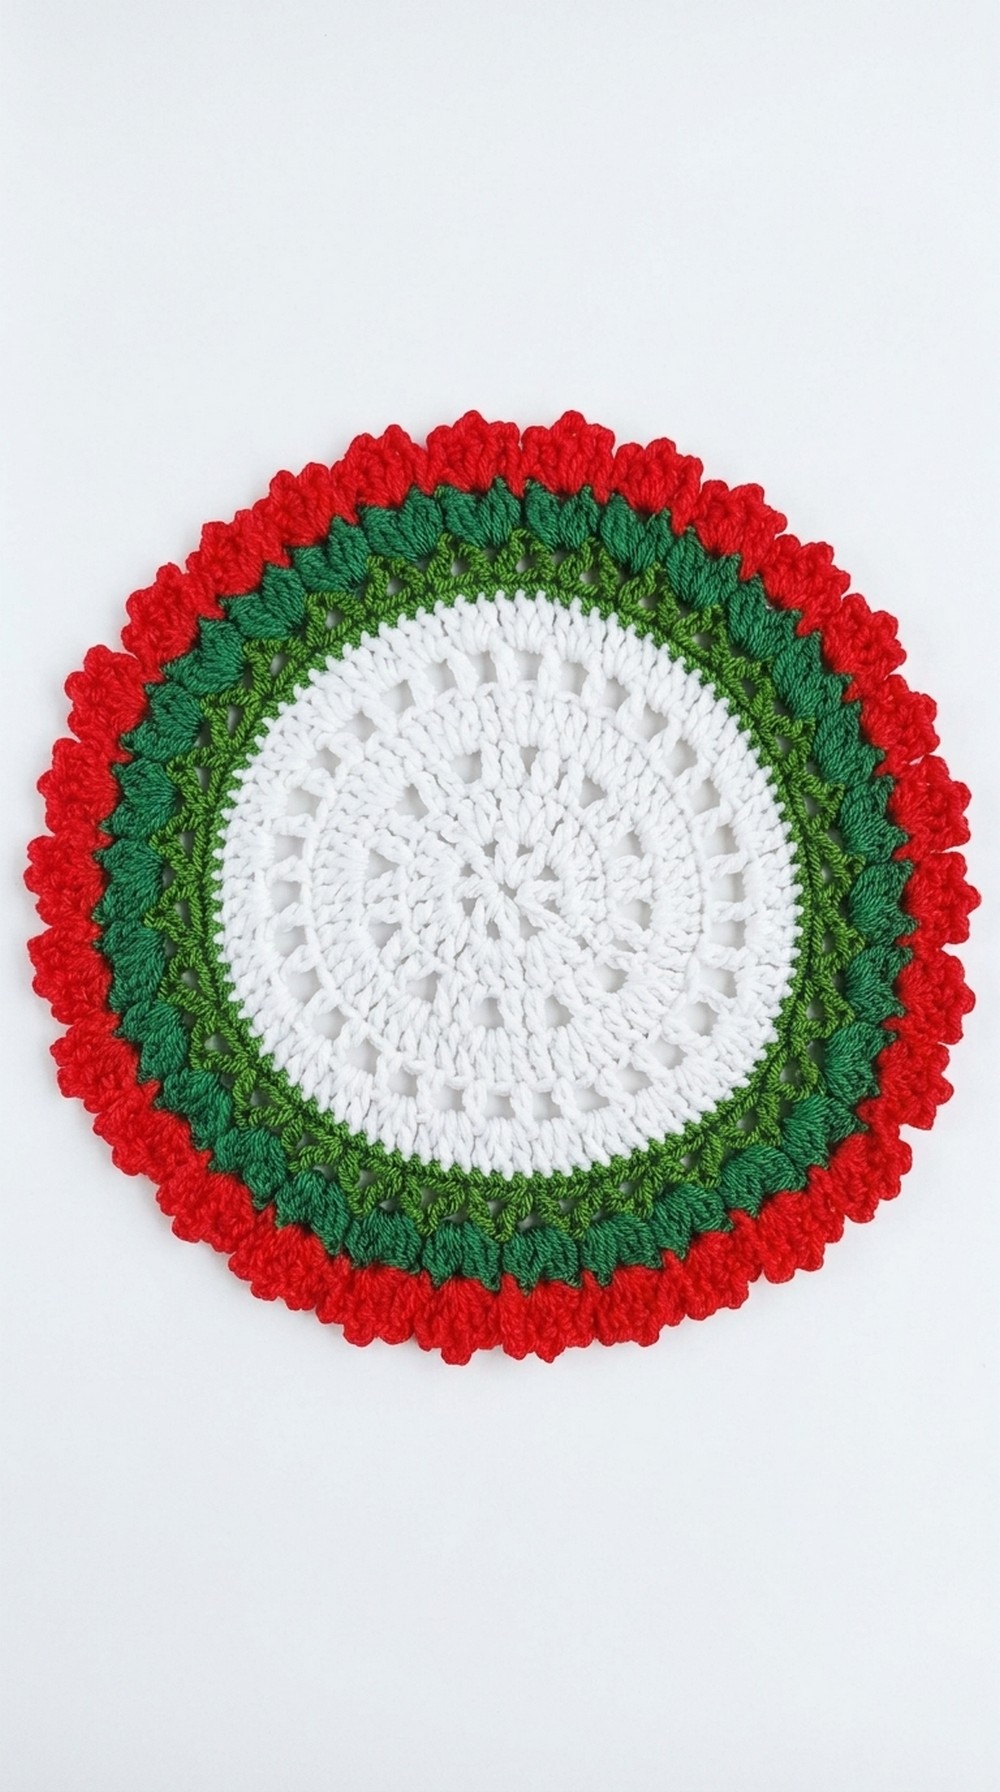
With simple instructions, it’s easier than ever to make, allowing you to enjoy a timeless touch of beauty in your home that will impress everyone who sees it.
1. Necessary Materials
To create this beautiful and elegant thalposh, you will need:
- Yarn: 3-ply thread in two colors:
- Color A: For the main base of the thalposh (e.g., green in the video).
- Color B: For the border and detailing (e.g., contrasting colors like yellow or white).
- Crochet Hook:
- 3.0 mm crochet hook (for smaller, tighter details).
- 3.5 mm crochet hook (for larger, slightly looser detailing).
- Scissors: To cut the thread.
- Tapestry Needle: To weave in the ends neatly after completing the project.
2. Gauge and Measurements
- Gauge is based on the hook size and yarn tension.
- Suggested Gauge: With 3.5 mm hook and 3 ply yarn, 10 rounds = approximately 6 inches in diameter.
- Finished Size: The completed thalposh from the video is around 12–15 inches based on the number of rounds (customizable).
3. Special Crochet Techniques Used
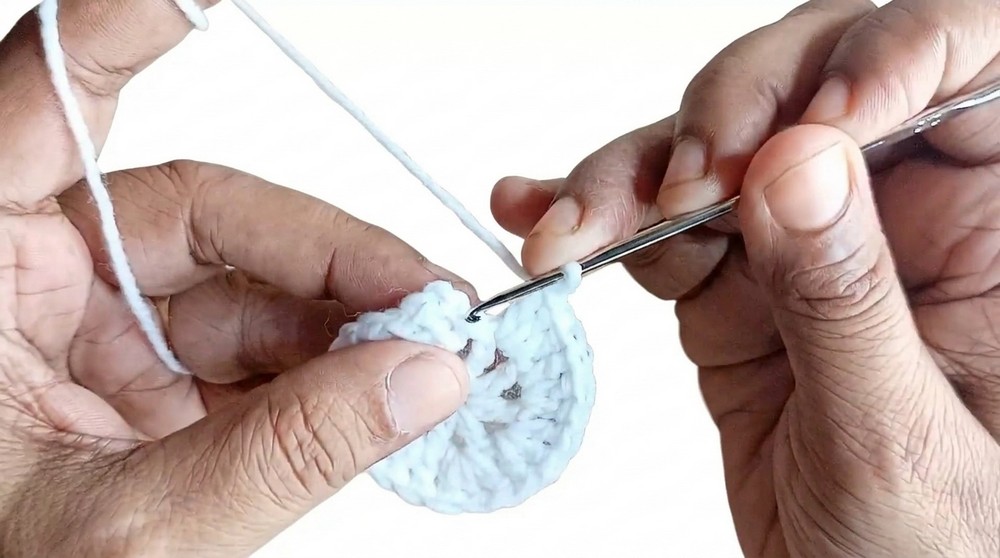
- Magic Ring (MR): This technique forms a closed, adjustable loop at the center of the piece.
- Single Crochet (sc): A tight, simple crochet stitch for neat edges.
- Double Crochet (dc): A taller stitch that forms the majority of the base design.
- Slip Stitch (sl st): Used to join rounds and create a seamless look.
- Change of Color: Switching threads mid project for decorative contrast.
4. Pattern Instructions
This pattern consists of three main sections:
- Center Base Pattern
- Border Detailing
- Final Petal/Floral Like Edging
Instructions
Center Base Pattern
ROUND 1:
- Create a Magic Ring (MR).
- Make 3 chains (ch); this counts as 1 double crochet (dc).
- Work 11 dc into the MR.
- Close the MR by pulling the loose end tightly to close the center.
- Slip stitch (sl st) into the top chain of the starting 3 chains to close the round.
- Total stitches in Round 1: 12 dc.
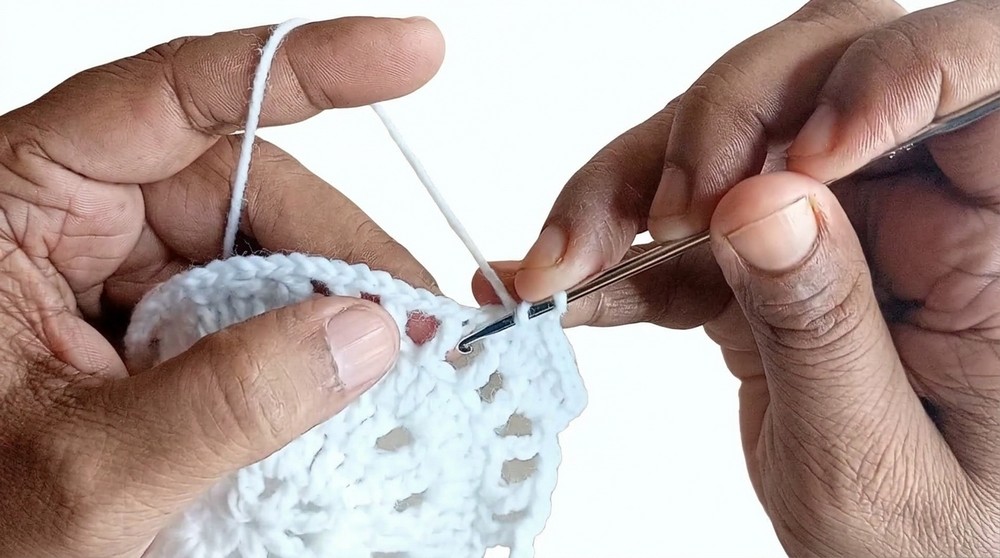
ROUND 2:
- Chain 3 at the start (counts as 1 dc).
- Work 1 dc in the same stitch (increase).
- Work 2 dc in every stitch around.
- Slip stitch into the top chain of the starting 3 chains.
- Total stitches in Round 2: 24 dc.
- Total stitches in Round 2: 24 dc.
ROUND 3:
- Chain 3 at the start.
- Work 1 dc in the same stitch.
- Work 1 dc in the next stitch, then 2 dc in the next stitch (increase).
- Repeat across the round: 1 dc, 2 dc.
- Slip stitch to join.
- Total stitches in Round 3: 36 dc.
ROUNDS 4 TO 8 (Increasing Rounds)
- Each round begins with 3 chains (counts as 1 dc).
- Gradually increase the number of single stitches between increases. For example:
- Round 4: 2 dc, 2 dc in the next stitch → Total: 48 stitches.
- Round 5: 3 dc, 2 dc in the next stitch → Total: 60 stitches.
- Round 6: 4 dc, 2 dc in the next stitch → Total: 72 stitches.
- Round 7: 5 dc, 2 dc in the next stitch → Total: 84 stitches.
- Round 8: 6 dc, 2 dc in the next stitch → Total: 96 stitches.
You can adjust the number of rounds depending on the size of the thalposh you need.
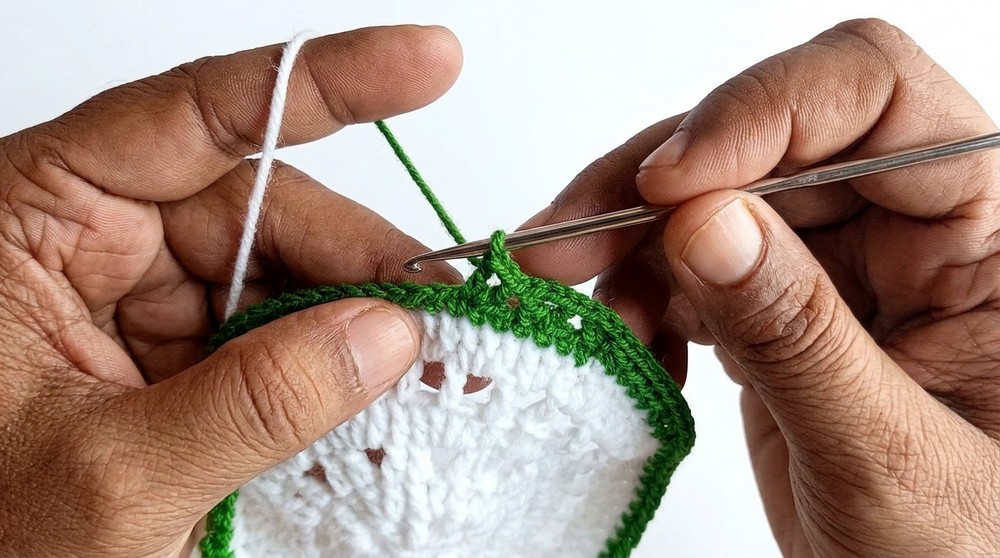
Border Detailing (Color B)
ROUND 9: Single Crochet Border
- Switch to Color B. Tie the thread at any starting point.
- Chain 1.
- Work 1 sc in each stitch around the entire edge.
- Slip stitch to the first sc to close the round.
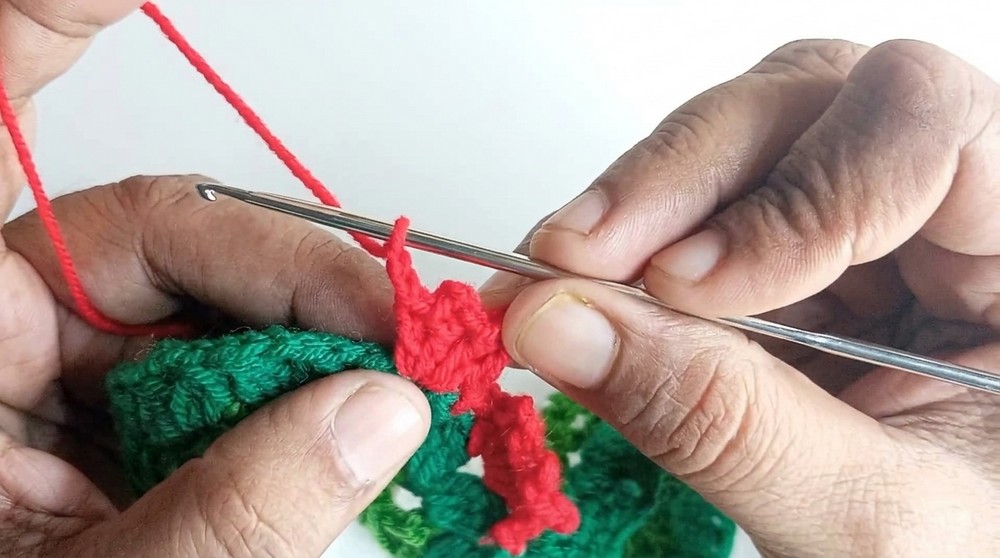
Final Petal/Floral Like Edging (Color B)
ROUND 10:
- Chain 2 (creates a gap for petals).
- Skip 1 stitch.
- In the next stitch, work 7 dc into the same stitch (forms a petal).
- Skip 1 stitch.
- Slip stitch into the next stitch to secure the petal.
- Repeat around the entire circle: ch 2, skip 1 st, 7 dc in next st, skip 1 st, sl st into the next st.
When you reach the end of the round:
- Join the final petal with a slip stitch to the base of the first petal.
- Cut the thread, pull through, and weave in the ends with a tapestry needle.
5. Customization Ideas to Enhance Experience
- Color Variations: Experiment with vibrant color combinations or gradients for the petals to suit your home decor.
- Thread Type: For more durability, use cotton yarn instead of acrylic.
- Size Customization:
- For a small table coaster, stop at Round 6 or 7.
- For a larger thalposh, continue adding rounds in the base with the same increasing pattern.
- Adding Beads: You can place decorative beads on the petals to make the thalposh unique.
6. Tips for Best Results
- Keep your tension consistent to achieve a flat, round shape.
- Use a larger hook size (4.0 mm) when creating the petals if they appear too tight.
- Starch the final piece lightly to make it stiff and more decorative for festivals or special occasions.
7. Conclusion
This intricate Crochet Crosia Thalposh Design combines beautiful craftsmanship with functionality. Its floral edging gives it a decorative, almost regal look, making it perfect for living rooms, dining areas, or even traditional pooja settings. The lightweight nature and colorful options make it easy to customize for any occasion or gift. Children and beginners can follow this guide to create their very own beautiful table mat.
8. Final Remarks
- Beauty and Use: The finished thalposh looks like a delicate flower with petals spreading out. It is perfect for enhancing the beauty of your home.
- Care: Hand wash gently, lay flat to dry, and avoid stretching it to maintain its shape.
- Creative Additions: Feel free to customize the size, color, and decorations to suit your preferences.
With this guide, anyone can crochet this stunning thalposh with ease and pride. Try it today and enjoy the joy of handmade creations.