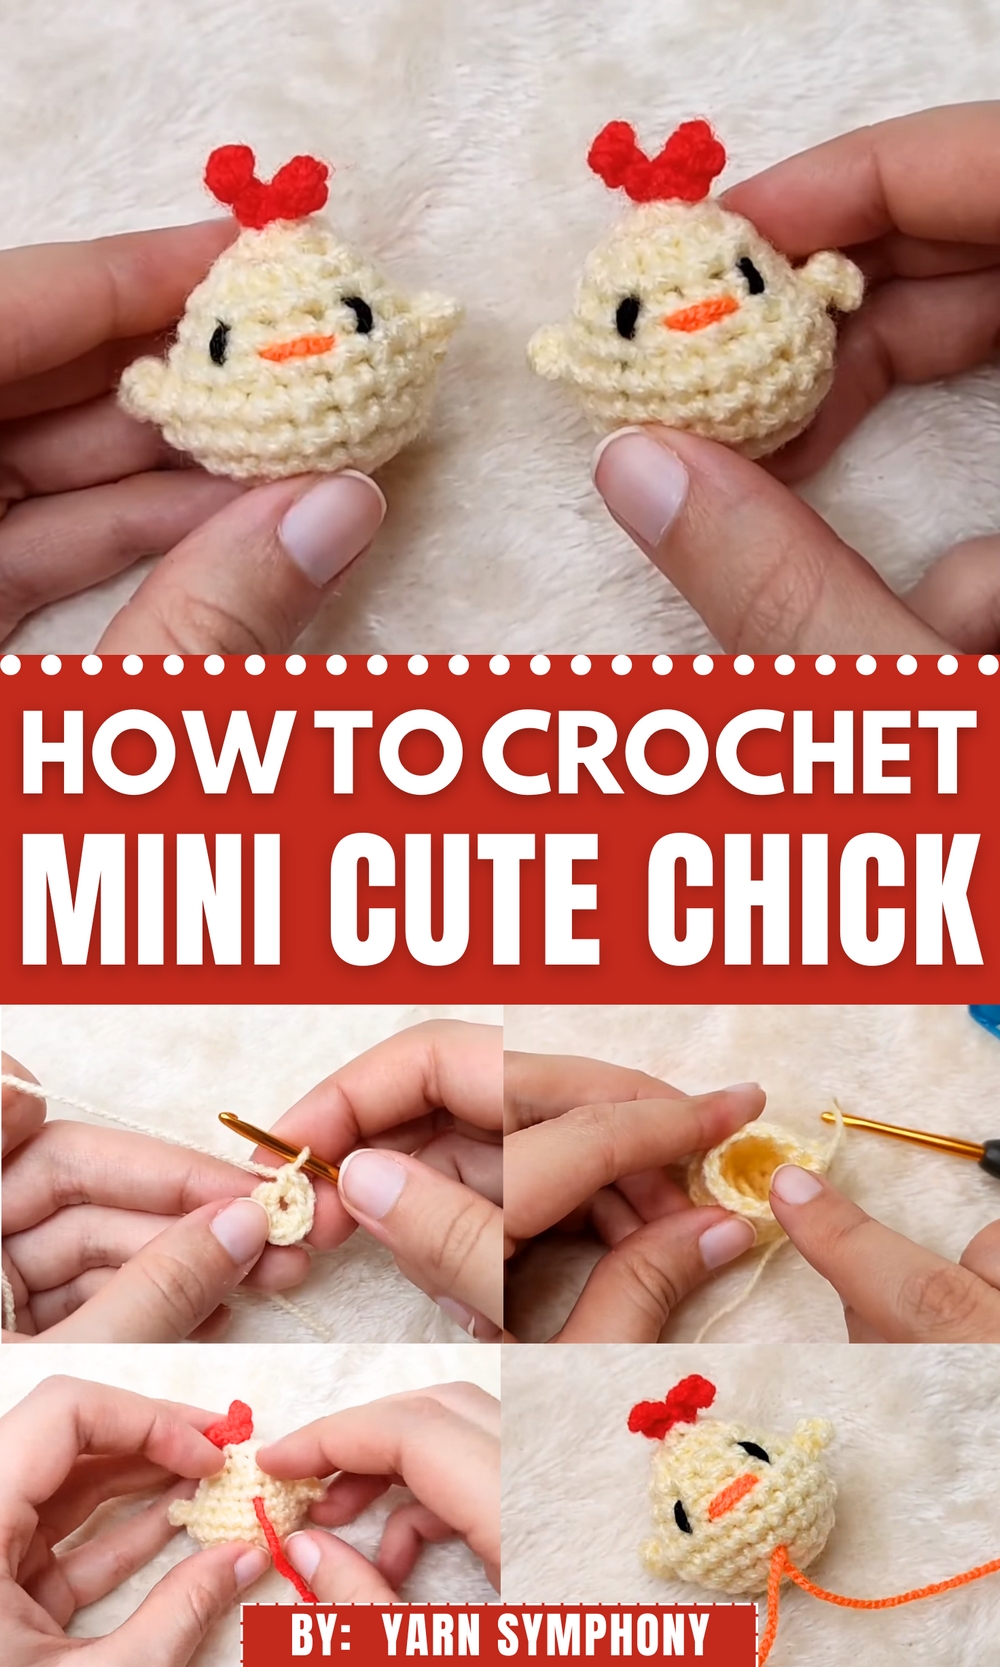
Brighten your day with the CrochetChick Pattern, a charming project perfect for adding a touch of whimsy and warmth to your handmade collection.
Crocheting has long been celebrated as both a therapeutic activity and an art form, capable of bringing joy and a sense of accomplishment to crocheters of all skill levels. This Free Crochet Chick Pattern brings to life the charm of a tiny chick, a playful, heartwarming creation fit for gifting, decorating, or simply appreciating as a personal keepsake. Its adorable form captures the innocence of springtime and serves as a cheerful addition to your home or workspace.
Classy Crochet Chick Pattern for Your Handmade Gift
This delightful crochet chick embodies more than skill—it’s a symbol of creative persistence and attention to detail. Offering an approachable project for absolute beginners, it serves as a gateway to the world of crochet, while delivering lasting benefits such as improved motor skills, mindfulness, and a tangible sense of achievement. Share the joy by gifting this heartwarming crochet or display it proudly as a testament to your creative spirit, the crocheted chick holds timeless appeal for anyone who values beauty in simplicity.
Materials Needed
- Yarn: Light yellow (or any shade of your choice), red for the bow, and black/orange threads for the eyes and mouth.
- Hook: 3 mm crochet hook.
- Fiberfill: For stuffing the body of the chick.
- Sewing Needle: For shaping the head and attaching the bow.
- Stitch Marker: Used to track the start of crochet rounds.
 1
1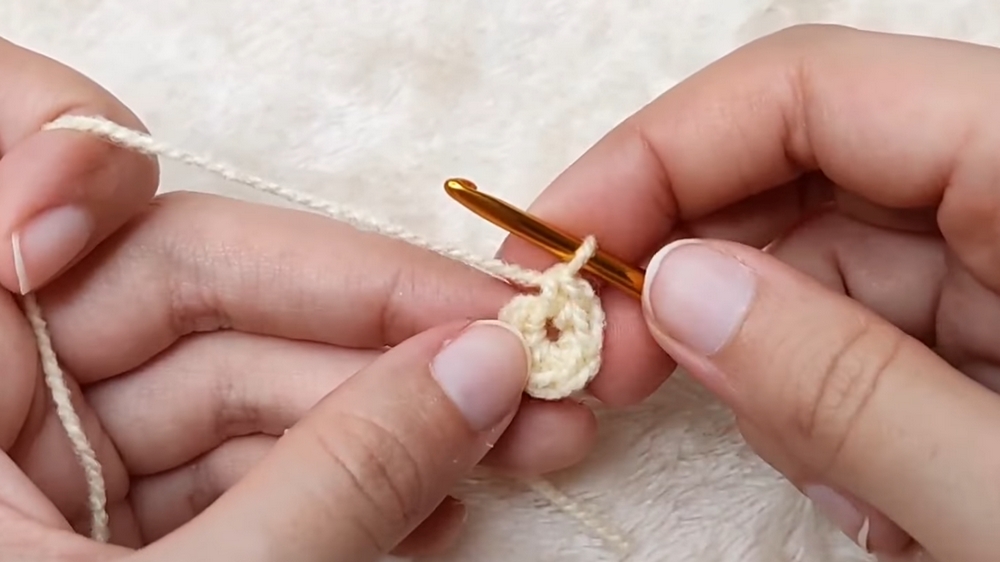
This no-magic-ring creation is perfect for beginners, starting with a slip knot that forms the foundation of the chick’s design. Each stitch builds upon itself with precision and simplicity, guiding crocheters through chains, single crochets, and thoughtful increases to form a compact, well-rounded body.
 3
3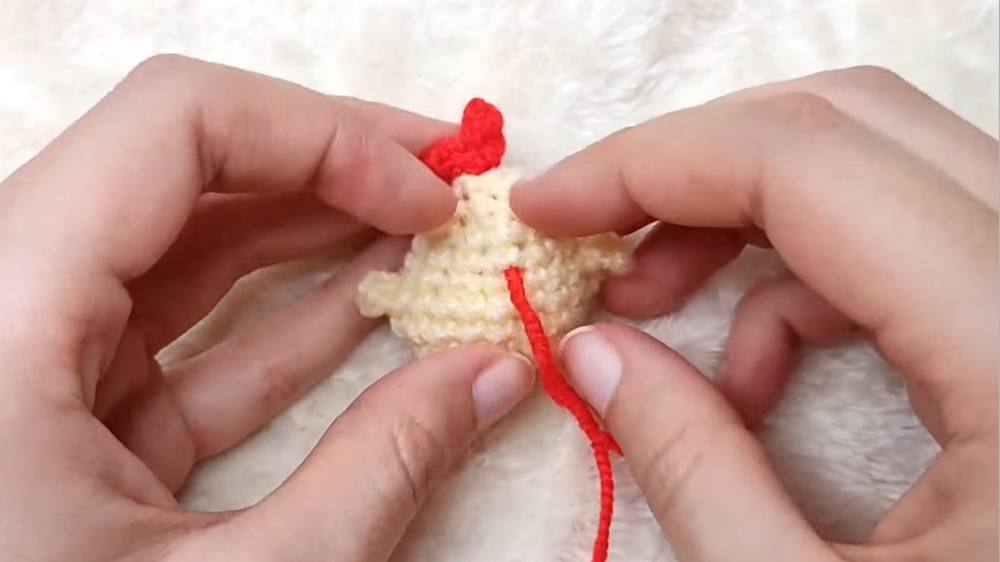
Following initial rounds that focus on setting up the chick’s spherical shape, successive steps gracefully incorporate charming details, like the wings and bow, which lend the bird a playful personality. The thoughtful incorporation of stitch markers ensures accuracy, even for those new to crochet, while the repetitive rhythm of stitches invites relaxation and mindfulness.
One of the standout moments comes with the use of fiberfill for shaping the body—a tactile, satisfying step that draws the chick closer to completion. As the wings are crocheted in place, followed by a delicate bow perched atop the head, the chick’s character simply blooms. The addition of carefully embroidered black-thread eyes and an orange-yarn mouth brings the tiny crochet creature to life, making it ready to elicit smiles from all who encounter it.
Special Features of the Tiny Chick
- No Magic Ring Needed: Unlike many crochet projects that require a “magic ring,” this chick is crocheted without one, making it easier for beginners.
- Quick Completion Time: A project designed to be completed in under an hour.
- Perfect for Beginners: Emma explains every step using fundamental stitches like chains, single crochets, and slip knots.
- Detailed Techniques:
- How to create a slip knot.
- Increasing (adding stitches to expand a project) and decreasing (reducing stitches to shape a project).
- Marking stitches for rounds.
- Customizable Design: Experiment with different colors of yarn or bows to create unique variations.
Step-by-Step Details
Step 1: The Basics (Slip Knot & Chain)
- Begin with a Slip Knot: Create a slip knot on your 3 mm hook.
- Chain Two: Start your project by chaining two.
Step 2: Round One
- Foundation Round: Work 6 single crochets into the first chain, creating a circular base. Count the “V-shapes” on top to confirm you have 6 stitches.
Step 3: Round Two – Increasing
- Technique: Make two single crochets in each stitch of the previous round. This increases the count to 12 single crochets.
Step 4: Round Three – Alternating Increases
- Pattern: Alternate between one single crochet and an increase (two single crochets in the same stitch) until you have 18 single crochets.
Step 5: Round Four
- Steady Progress: Work one single crochet per stitch with no increases. This keeps the total at 18 stitches.
Step 6: Round Five – Adding Wings
- Work 4 single crochets, then create:
- A chain of 3.
- Insert your hook into the 2nd chain from the hook and make two single crochets.
- Resume crocheting around, creating the second wing using the same technique.
- Ensure you have 9 single crochets between the wings.
Step 7: Rounds Six and Seven – Shaping the Body
- Round Six: Crochet across, including working over the wings.
- Round Seven: Start decreasing. Use the front loops of the next two stitches to create each decrease, repeating until you have 12 stitches.
Step 8: Rounds Eight and Nine – Stabilizing
- Continue with steady single crochets across each stitch for two rounds, maintaining 12 stitches.
Step 9: Round Ten – Closing the Head
- Using only decreasing stitches, shape and close the head down to 6 stitches.
- Finish off with a slip stitch and carefully weave the ends with a sewing needle.
Step 10: Adding the Bow
- Use red yarn to crochet the bow directly onto the chick’s head:
- Chain 3, then crochet 2 single crochets into the 2nd and next chain.
- Attach and repeat for the second loop of the bow.
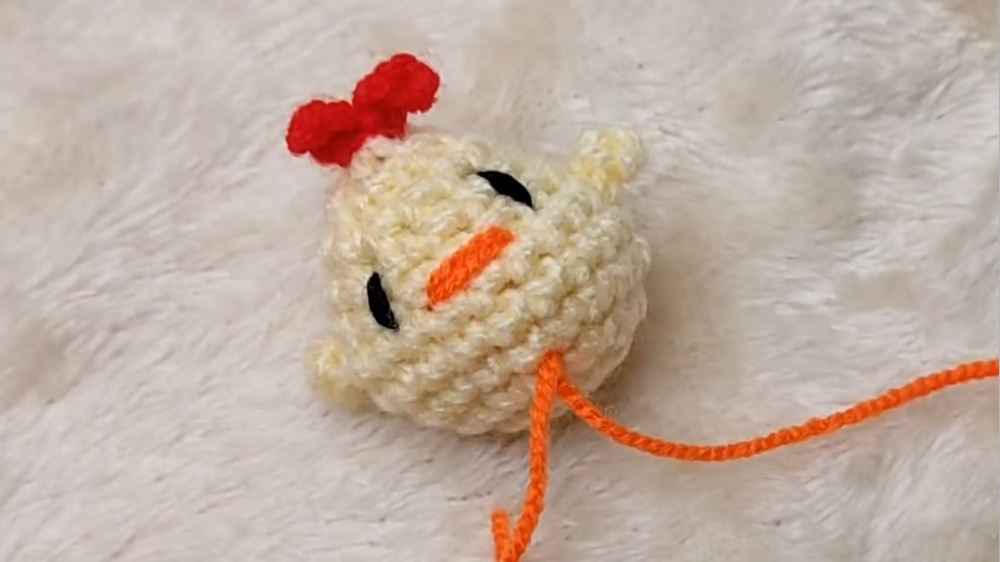
Step 11: Details – Eyes and Mouth
- Eyes: Use black thread to embroider simple, small eyes.
- Mouth: With orange yarn, stitch a tiny triangle or “V” shape below the eyes.
Tutor’s Suggestions
- Take your time: creator encourages beginners not to rush and prioritize mastering each step.
- Ask questions: If confused, leave comments or refer to Emma’s additional tutorials in the “Absolute Beginner” playlist.
- Experiment with colors: Try different yarn colors to customize your chick.
Uses for the Tiny Chick
- Gifts: Perfect for Easter baskets, baby showers, or handmade presents.
- Keychain/Decoration: Attach a loop and use it as a cute charm, keychain, or desk décor.
- Beginner Practice: Excellent for practicing your crochet skills before moving to more complex patterns.
Tip to Enhance Your Project
- Count Your Stitches: Regularly count your stitches at the end of each round. This will save you from unraveling an entire row due to a skipped or accidental stitch.
Crochet Tiny Chick Tutorial: Step-by-Step Guide
Crocheting is an enjoyable, creative hobby, and this tutorial is perfect for beginners looking for a quick win. The small, light-yellow chick can be completed quickly—”you can finish this tiny chick before your coffee is even ready!” creator emphasizes simplicity and provides clear, supportive instructions, making this project approachable for all skill levels.
Conclusion
The Tiny Chick crochet project is a delightful and approachable way for beginners to learn foundational techniques. With clear guidance, simple materials, and a creative outcome, this pattern is a great starting point for anyone new to crochet. The chick’s adorable design and versatility make it a fun addition to any project collection.