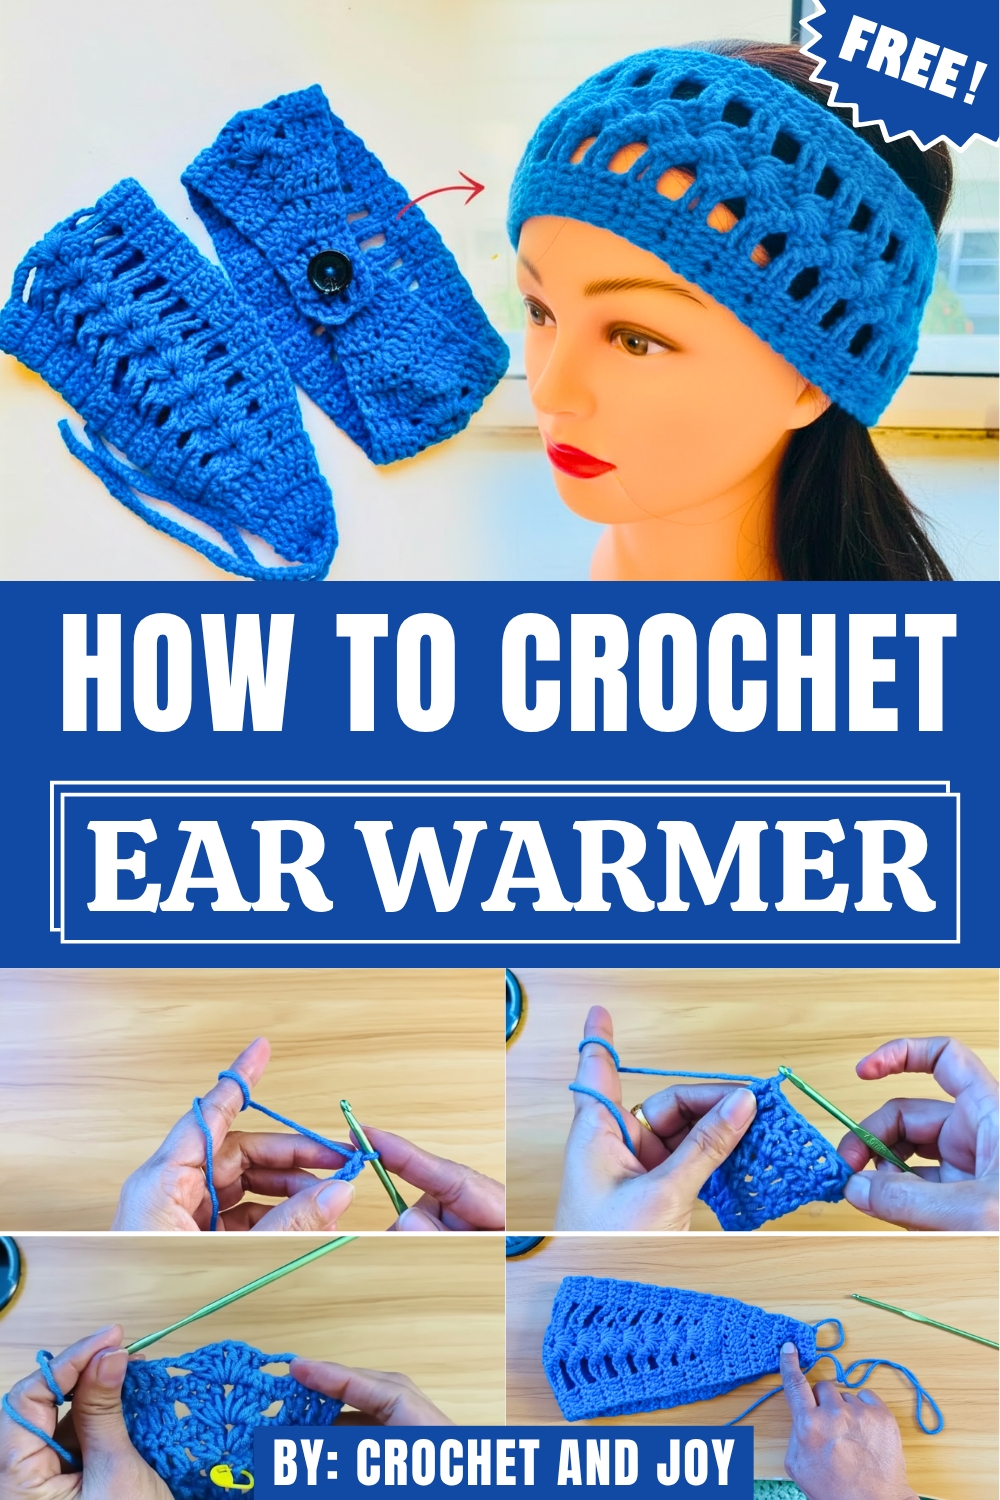
Cozy up with the Free Crochet Ear Warmer Pattern, a stylish handmade accessory that keeps ears warm while adding texture and charm to any outfit.
On a crisp morning’s walk, a soft headband wraps around the ears like a gentle whisper of warmth, its subtle twist and snug fit offering both comfort and style. The Free Crochet Ear Warmer Pattern brings that comforting touch to life, offering a simple way to stitch an accessory that works through chill and breezy days alike.
How To Crochet a Trendy Ear Warmer Pattern
The texture-rich stitch pattern gives the ear warmer depth and visual interest without bulk, making it perfect for pairing with a casual jacket or a weekend run. Because it uses a standard worsted weight yarn and a moderate hook size, this project moves quickly and suits both beginners and seasoned makers.
The elongated band covers the forehead and ears well, while maintaining flexibility for different head sizes thanks to its stretchy construction. You’ll appreciate how the turned edge keeps the piece clean and secure in wear, and how it holds its shape wash after wash.
Its minimalist but dynamic look fits seamlessly into a variety of wardrobes—whether layered under a hoodie or worn on its own during errands.
Once completed, the ear warmer becomes more than just a protective accessory; it becomes a versatile staple you’ll reach for throughout the season, combining handcrafted warmth, effortless style, and reliable functionality.
Crochet a Trendy Ear Warmer Pattern
Special Features
This accessory offers several special features that make it unique:
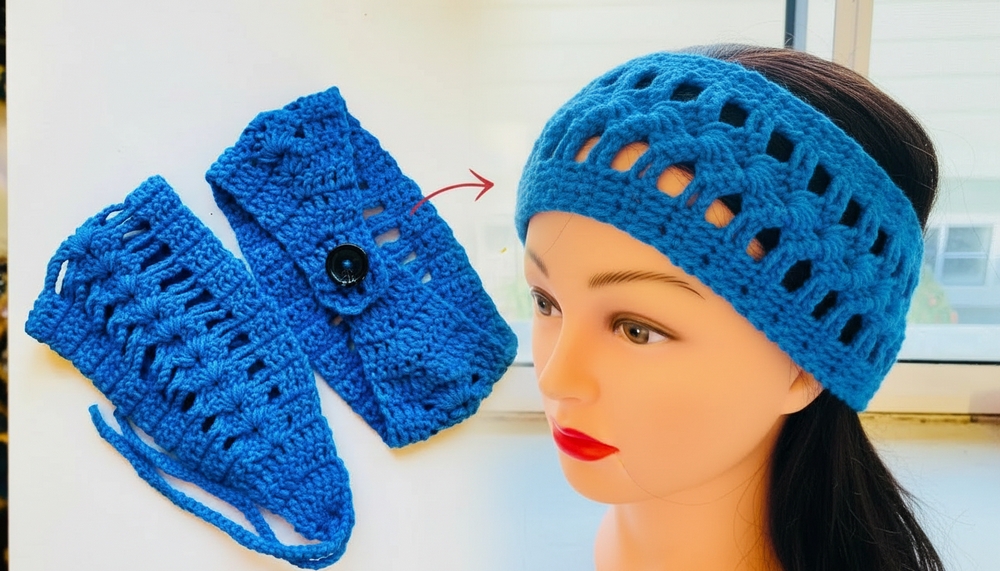
- 3-in-1 Functionality: You can easily wear the finished piece as a cozy ear warmer, a stylish neck warmer, or a decorative headband, depending on the length and how you close it.
- Low Yarn Consumption: The entire project requires minimal yarn, using only about 25–26 grams for one finished piece (and two can be made from a single 50-gram skein), making it a great scrap yarn project.
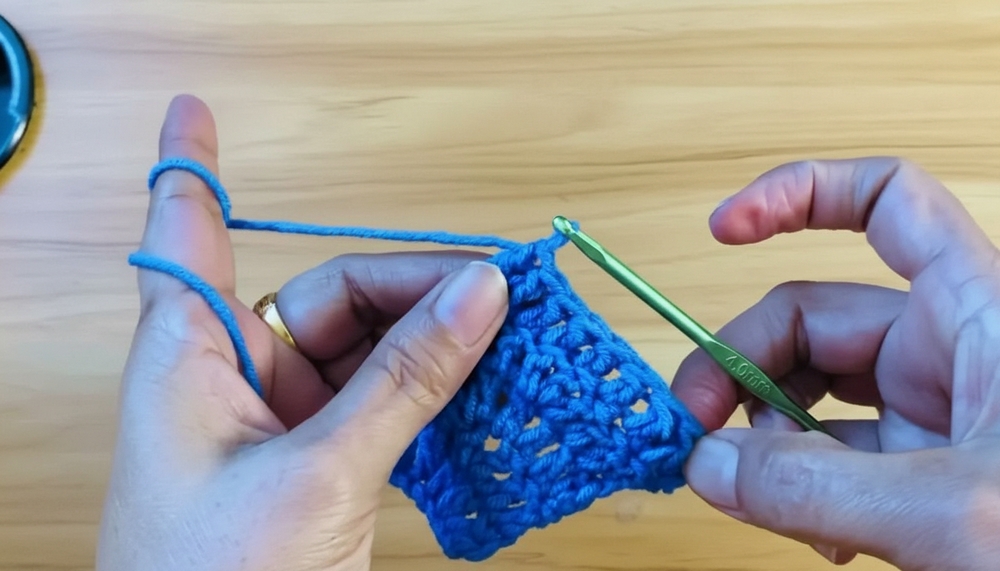
- Pattern-Controlled Shaping: You achieve the wide, curved shape without traditional increases by simply increasing the number of chains between the side edge and the center motif in the double crochet rows.
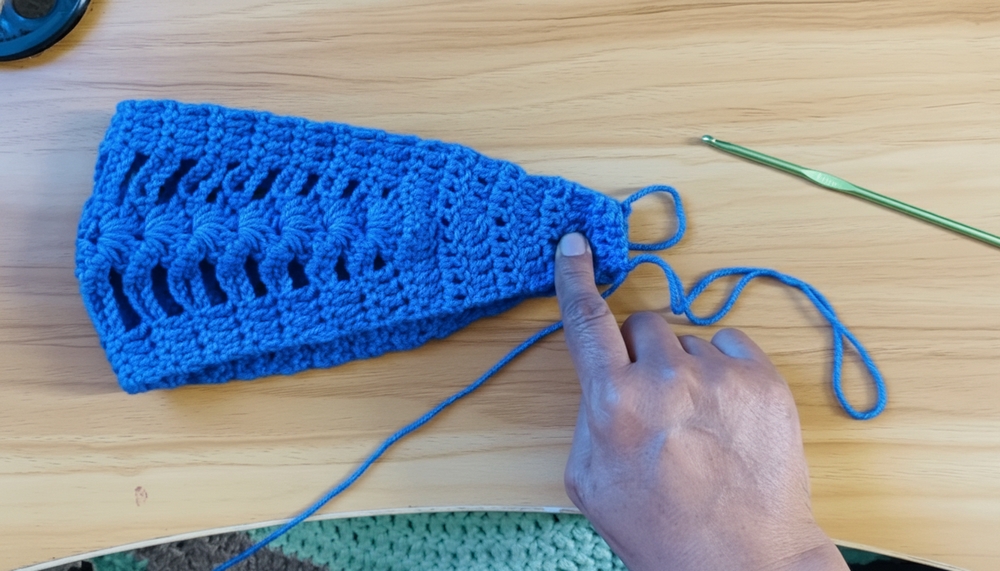
- Button Closure Option: The starting end is designed to create a hole that perfectly accommodates a button, providing a secure and adjustable closure.
Level of Difficulty
We rate this project as Intermediate. You must know the fundamental stitches (single crochet and double crochet) and accurately follow the repetitive sequence of alternating single crochet and double crochet pattern rows. The main challenge lies in correctly implementing the controlled increases and decreases by adjusting the side chains and then converting the pattern back to a simple stitch count.
Tutor’s Suggestions
The tutor offers crucial advice for success with this project:
- Sizing is Key: You must use the measuring tape to ensure you hit the target lengths for each section: approximately 8 inches for the increase section, 4 inches for the straight section, and then 8 inches for the decrease section.
- Turn Without Chaining: When you turn your work to begin a single crochet row, do not chain before working the first stitch. This maintains the smooth edge of the work.
- Create the Button Hole: If you want the button closure, intentionally substitute the center stitch of the second starting row (where you would normally work 3 double crochets) with a single chain stitch. This creates the necessary buttonhole.
- Weigh Your Yarn: The tutor recommends weighing your yarn before starting. Since the project uses so little, you can easily create two accessories from a standard 50-gram ball.
Uses
- Wearable Accessory: Use it as a functional ear warmer, a light neck warmer, or a fashionable headband.
- Handmade Gifts: Because it works up quickly and uses minimal yarn, it makes an excellent giftable item for craft fairs or holiday presents.
Materials
- Yarn: 100% Acrylic Cotton Yarn in a color of your choice.
- Hook: A 4 mm crochet hook.
- Notions: A tapestry needle (yarn needle), a small sewing needle and thread (for attaching the button), a button, a stitch marker (optional), and a measuring tape.
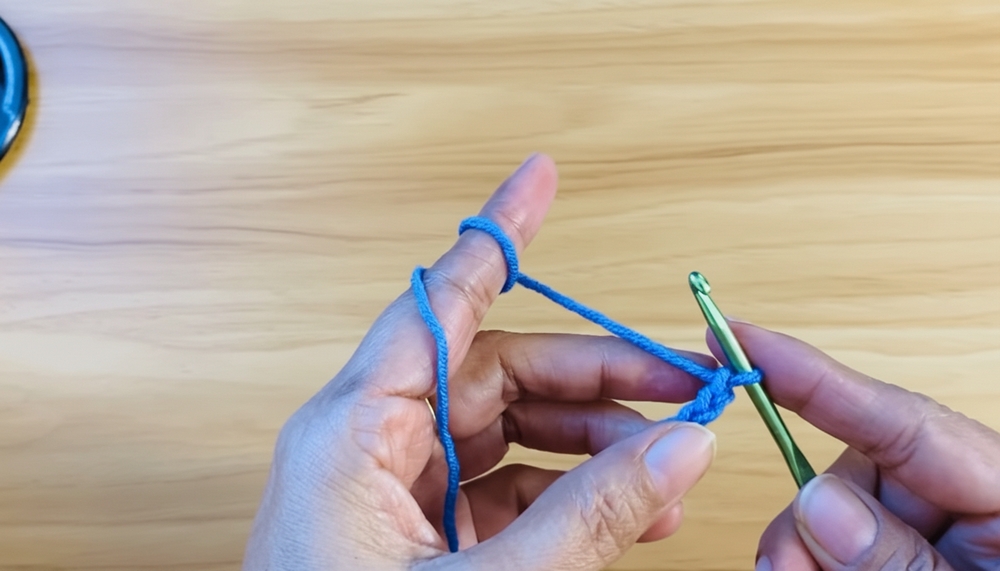
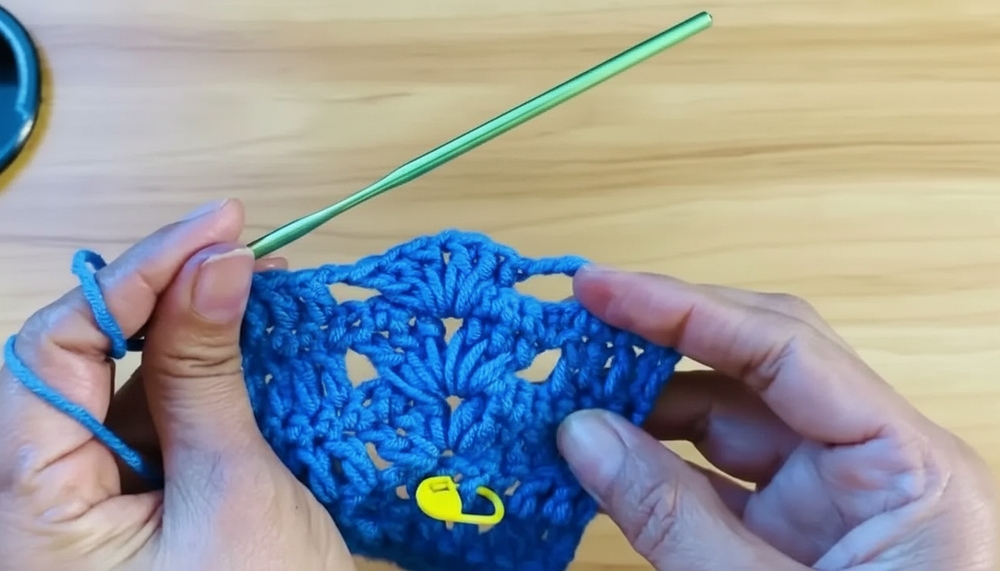
Step-by-Step Details
This tutorial shows you how to crochet a beautiful and versatile accessory that functions as a 3-in-1 ear warmer, neck warmer, or headband. You will start by shaping the piece with gradual increases using a decorative pattern, work a long straight section, and then mirror the increases with decreases. The finished project features a unique texture and can be customized with either a button closure or a simple tie.
Conclusion
You successfully crocheted the versatile 3-in-1 accessory! By mastering the technique of shaping with controlled side chains and alternating decorative rows, you created a beautifully textured and practical piece. Enjoy wearing your new ear warmer, headband, or neck warmer, and feel confident knowing you can easily recreate this pattern in any size or color.
Tip
To prevent the piece from buckling or having an uneven edge in the middle, make sure you always work 1 SC into the chain space when working the single crochet rows. This ensures the stitch count remains consistent and the shaping relies entirely on the chains in the double crochet rows.