Learn how to crochet some colorful smiling face keychains inspired by emojis with a step-by-step tutorial. The steps include creating tassels with loops, adding chains, and using wooden beads for decorative touches. The detailed instructions ensure beginners and experienced crocheters can follow along.
The final outcome is a beautifully crafted and customizable project, combining technique and creativity.

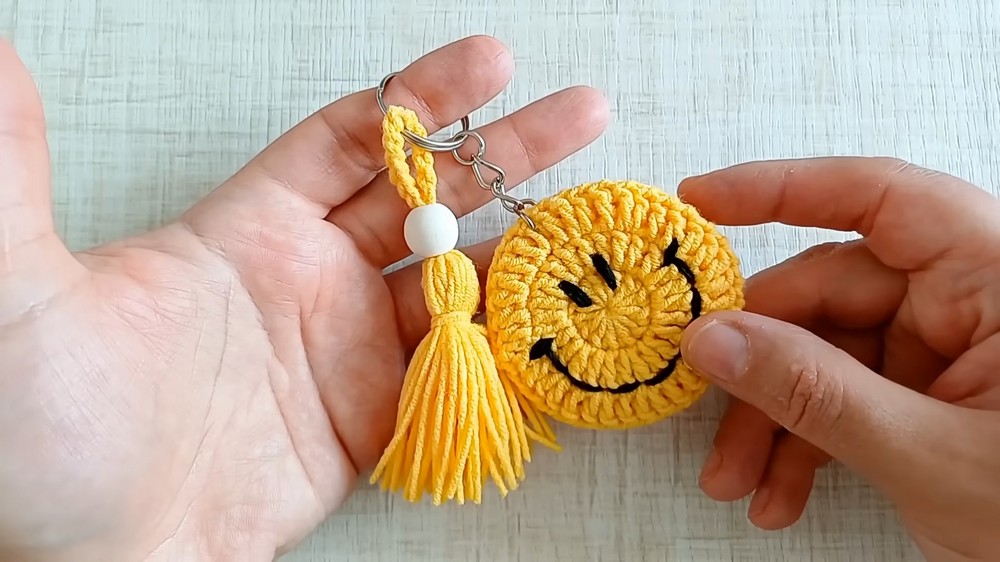
Crochet Colorful Smiley Face Tutorial
The video opens with the host introducing the crochet project—a decorative and functional item enhanced with tassels and beads. The focus is on crafting a creative and personalized piece that can be used for gifts or home decor. The host highlights the materials, including acrylic yarn, a 3mm crochet hook, wooden beads, and scissors.
Beginning the Project
- Creating the Foundation:
- The tutorial starts with building a magic ring as the base for the crochet work.
- The host demonstrates how to properly form the ring, ensuring the yarn is tightly secured.
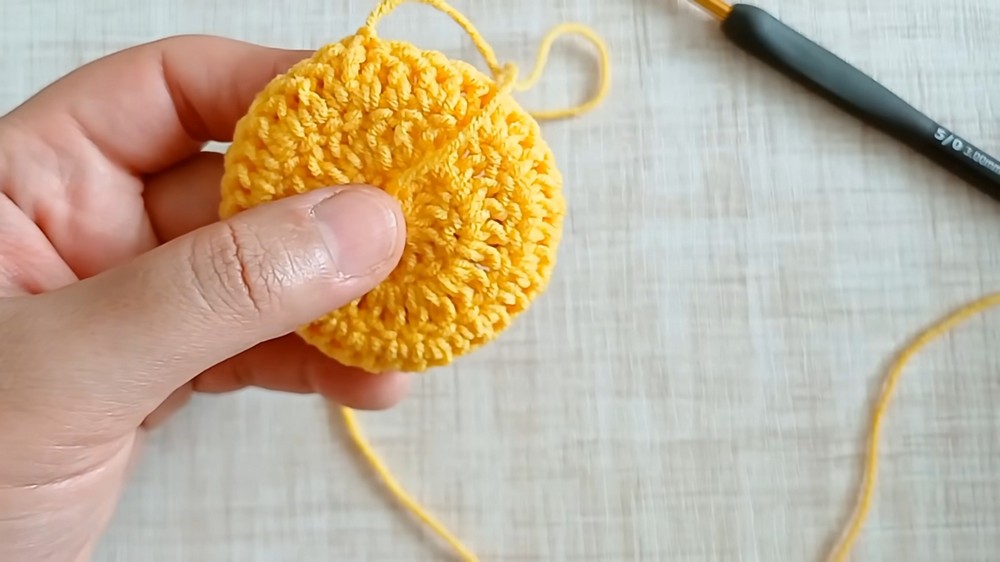
- Round One Development:
- The first round begins with the addition of stitches into the magic ring.
- The design aims to combine functionality and aesthetics with a solid circular foundation.
Building the Design
- Expanding the Rounds:
- Successive rounds are worked to expand the design.
- The host carefully demonstrates how to build an even and symmetrical pattern, focusing on achieving consistent tension and clean edges.
- Special techniques like slip stitching are used to join rounds seamlessly.
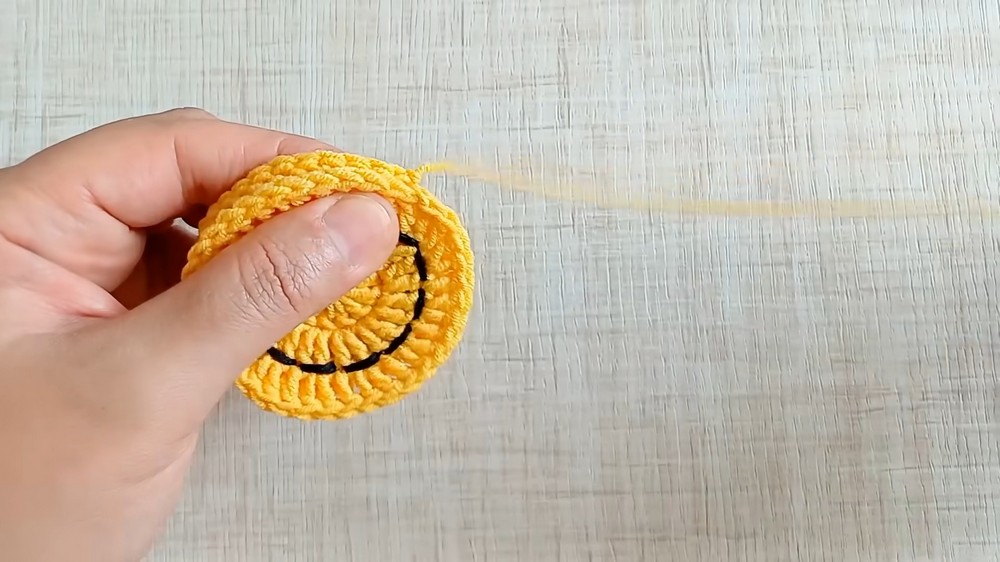
- Enhancing the Structure:
- As the rounds progress, the tutorial describes how to strategically place stitches to create a visually appealing design and maintain shape.
- The host encourages viewers to adjust the design size to match their personal preferences.
Adding Decorative Elements
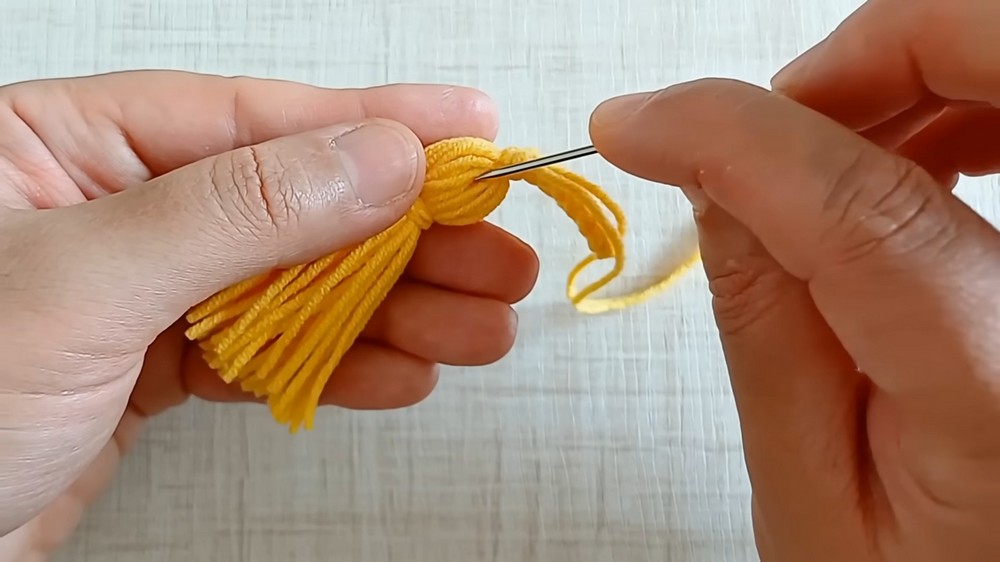
- Crafting the Tassels:
- The tutorial features a step-by-step guide to creating tassels for the project.
- The tassels are made using loops of yarn, cut and secured in creative arrangements.
- Detailed instructions are provided to ensure the tassels are uniform in size and neatly attached.
- Preparing the Beads:
- Wooden beads are introduced as decorative elements.
- The host explains how to thread the beads onto the yarn effortlessly and incorporate them into the design.
- Beads are evenly spaced and add a unique charm to the finished piece.
Finishing the Project
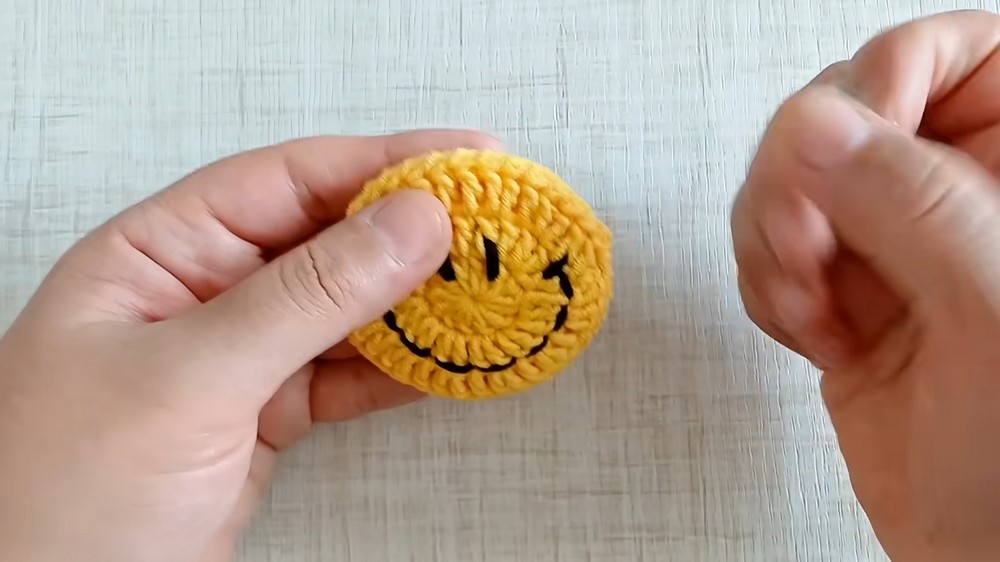
- Securing the Edges:
- The edges of the project are finished with clean rows of stitches to secure the design.
- This step helps ensure durability and functionality, making the piece look polished.

- Weaving in Loose Ends:
- Any loose yarn ends are woven into the project using a needle.
- The host demonstrates techniques to hide the tails discreetly for a seamless look.
- Final Touches:
- The tassels and beads are checked for alignment and properly adjusted.
- The host suggests adding additional decorative elements if desired
Displaying the Finished Piece
- The tutorial concludes by showcasing the completed project.
- The host emphasizes how the item can be used for decor, gifting, or personal enjoyment.
- Creativity and customization are highlighted, with viewers encouraged to use different colors or embellishments.
Video Guide