Style a cozy Crochet Bonnet-style Hat Pattern that offers a soft vintage look perfect for cute outfits photos and charming handmade fashion for all ages.
Warm yarn and thoughtful shaping can turn a simple project into a cozy, timeless headwear piece. As you follow a Free Crochet Bonnet-style Hat pattern, you can create a snug and stylish accessory suited for babies, toddlers, or seasonal outfits. This bonnet style often features soft ties, textured stitches, and gentle curves that enhance both comfort and fit.
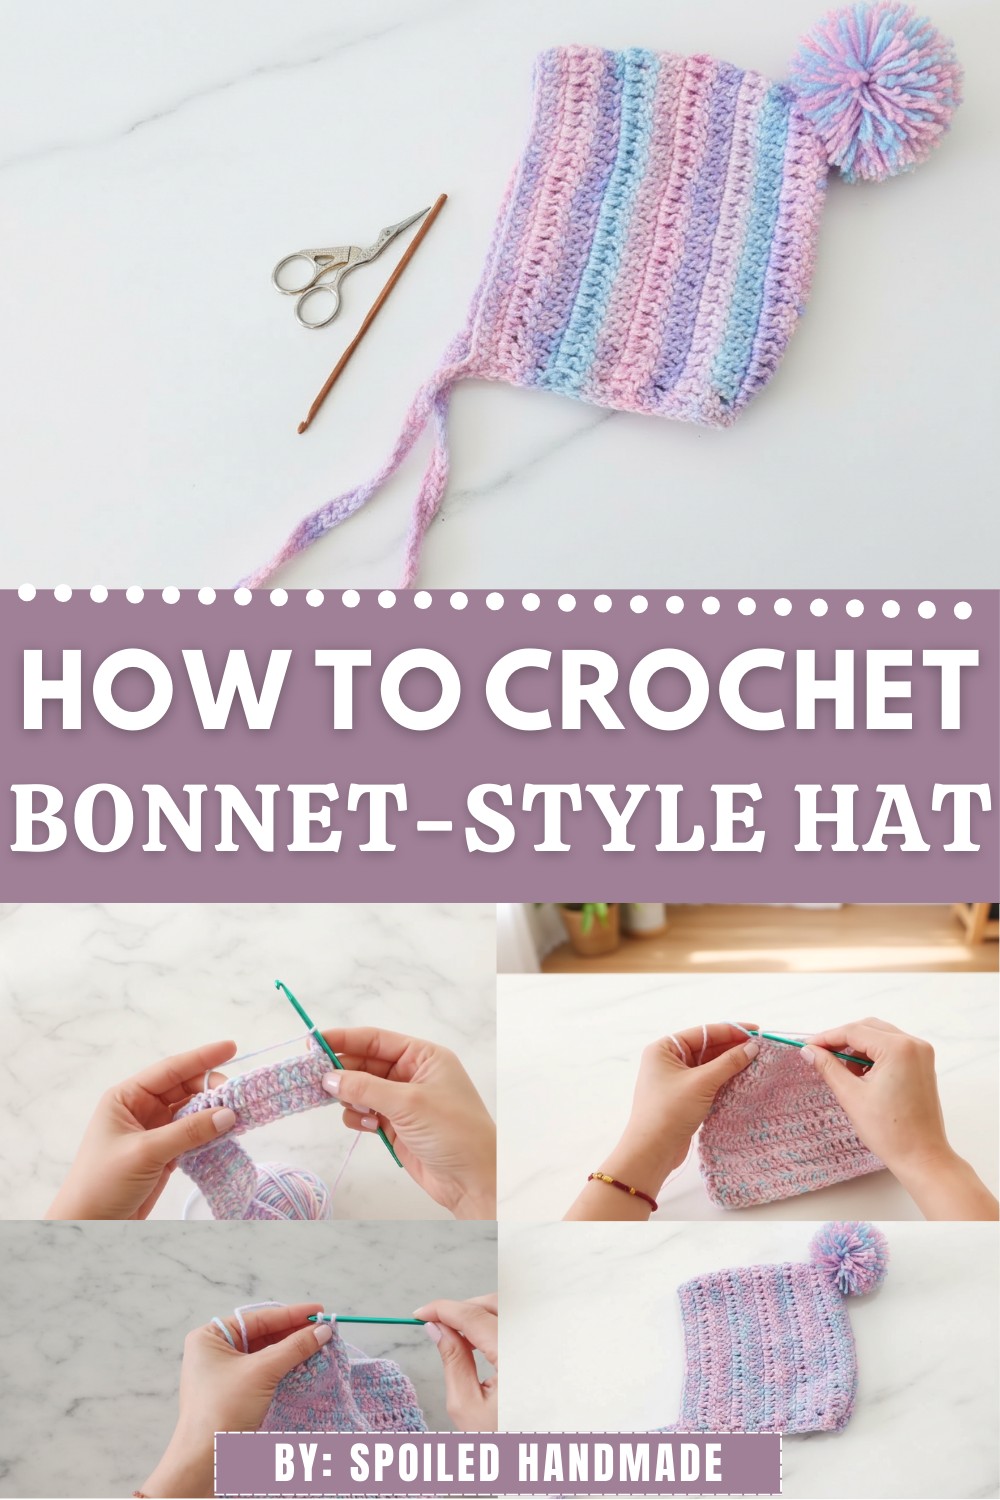
Cute Crochet Bonnet-style Hat Pattern That Looks So Cozy
It works beautifully for photo props, daily wear, or heartfelt handmade gifts. Ideal for practicing stitch control and shaping techniques, the design helps build confidence while using soft yarns. The finished bonnet provides warmth, elegance, and a delicate handcrafted touch that complements any outfit effortlessly.
Materials
Essential Items:
- Yarn:
- Yarn type: Acrylic wool, recommended for 4mm hook sizes (forked yarn or medium-weight yarn).
- Hypoallergenic yarn is ideal for children.
- Suggested color: Pink, but customization is encouraged.
- Crochet Hook:
- 4mm hook (US size G/6).
- Scissors: For trimming and finishing the project.
- Pom-Pom Tool Alternatives:
- Two small pieces of cardboard (approximately 8cm in diameter).
- Coin or similar round shape: To center the cut-out.
Optional Items:
- Measuring Tape: Ensure sizing aligns with the child’s head circumference for a proper fit.
- Yarn Needle: For weaving in ends and assembling the pom-pom.
Skill Level
Beginner-Intermediate
This pattern uses fundamental crochet stitches: chains, slip stitches, double crochet, and single crochet for the borders. It’s suitable for beginners with basic crochet knowledge.
Key Abbreviations (US Terminology)
- Ch: Chain
- Dc: Double crochet
- Sl st: Slip stitch
- Sc: Single crochet
Special Notes
- Sizing: This hat is designed for a baby aged 12–18 months, with a head circumference of approximately 39cm wide and 16cm high.
- Measuring for Other Sizes: Measure from below one ear, around the head to below the other ear, ensuring full coverage. Adjust stitch count accordingly.
- Pom-Pom Creation: Instructions are included for making a pom-pom without a pom-pom maker by using cardboard.
Pattern Instructions
Hat Base
Step 1: Chain Foundation
- Create a slip knot and insert your crochet hook.
- Ch 52: This will be the foundation chain for the hat.
- Optional: Adjust the number of chains depending on the desired size.
- Make 3 additional chains (this counts as the first Dc of the next row).
Step 2: First Row
- Yarn over and insert your hook into the 4th chain from the hook.
- Work 1 Dc in the stitch.
- Continue working 1 Dc into each chain across for the entire row.
- At the end of the row, you should have 52 Dc.
Step 3: Rows 2–11
- Ch 3 (counts as the first Dc), turn your work.
- Work 1 Dc in each stitch across, ensuring even tension and stitch count.
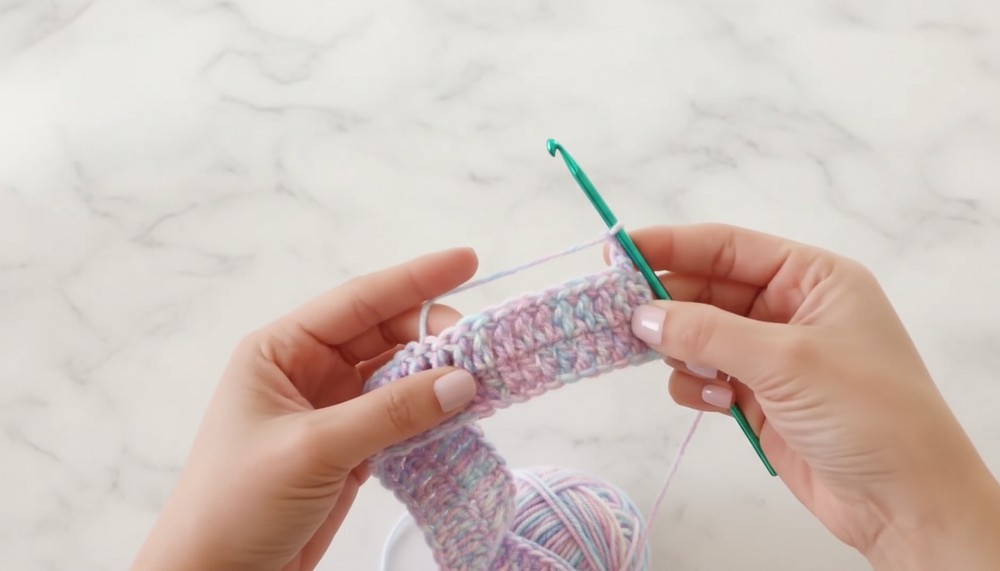
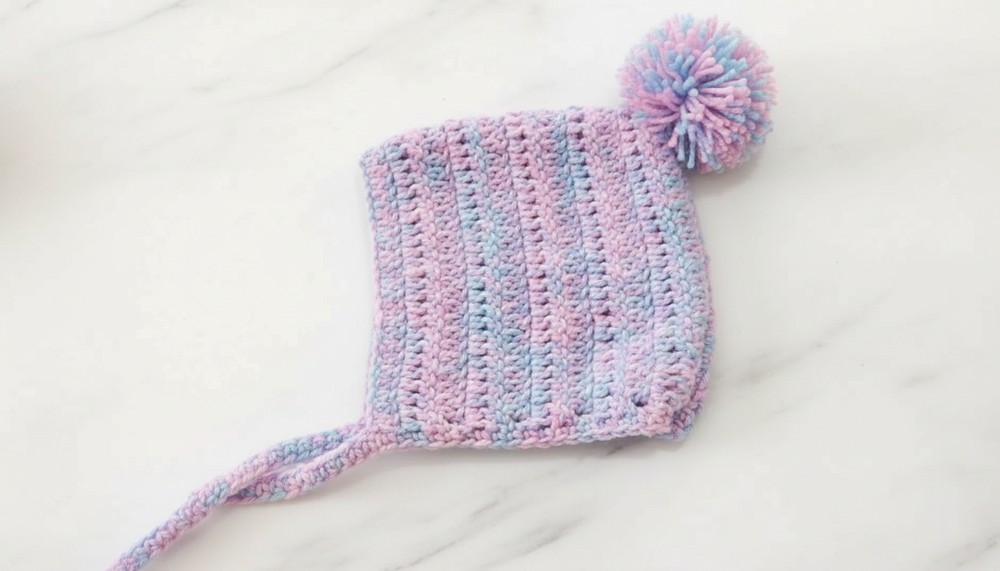
- Repeat this process for a total of 11 rows. The fabric should form a rectangle approximately 39cm wide by 16cm high.
Step 4: Joining the Hat
- Fold the rectangle lengthwise so the short edges meet.
- Option 1 (Slip Stitch Join):
- Insert your hook into the inner loops of the stitches on both edges to create a seamless join.
- Work Sl st across the edge, ensuring the stitches are firm but not tight.

- Option 2 (Yarn Needle Join):
- Cut a long length of yarn, thread it through a yarn needle, and sew the edges together using a whip stitch or mattress stitch.
- Secure and weave in ends.
- Turn the joined fabric inside out to hide the seam.
Ties and Border
Step 5: First Tie
- Insert your hook into the open edge of the hat.
- Attach new yarn and chain 40 Ch (or adjust for your desired tie length).
- Add 2 extra chains for turning.
- Work Sc into the third chain from the hook and in each chain across until you return to the base of the hat.
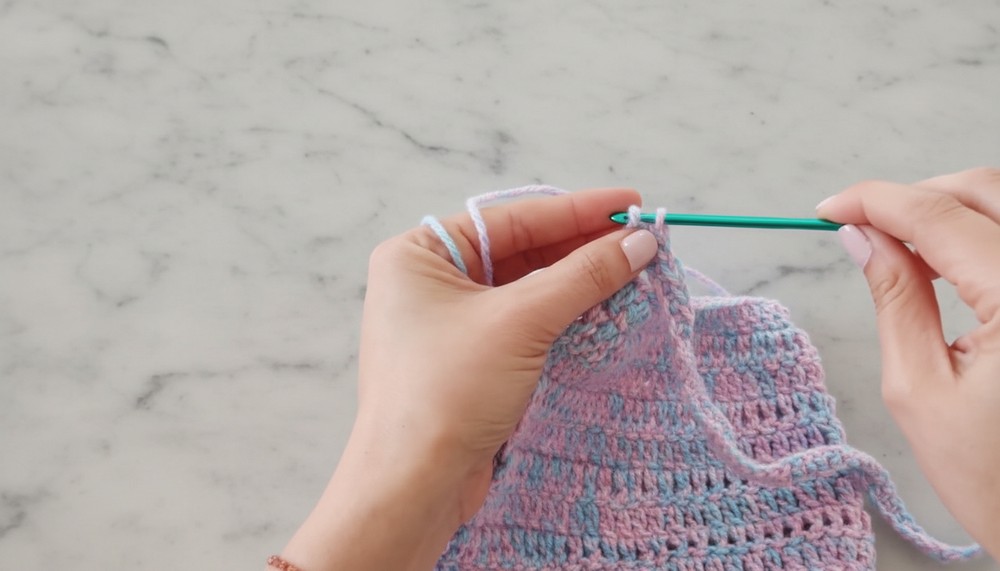
Step 6: Border
- Continue working Sc stitches evenly along the open edge of the hat.
- Tip: Work 2 Sc per Dc row to ensure a balanced and neat edge.
- Once you’ve completed the entire border, return to the starting point for tie #1.
Step 7: Second Tie
- Chain 40 Ch, add 2 extra chains for turning.
- Work Sc stitches back down the chain, just like tie #1.
- Join the last stitch of the tie to the edge of the hat with a Sl st.
- Cut the yarn and weave in all remaining ends.
Pom-Pom Instructions
Homemade Pom-Pom
- Create Cardboard Templates:
- Cut two circles of 8cm in diameter from cardboard.
- Use a coin or similar object to mark a smaller circle in the center (approximately 3cm in diameter).
- Cut out the center circle to form a donut-shaped template.
- Wrap Yarn:
- Stack the two cardboard templates together.
- Wrap yarn evenly around the template until it is sufficiently covered. Ensure enough bulk for a fluffy pom-pom.
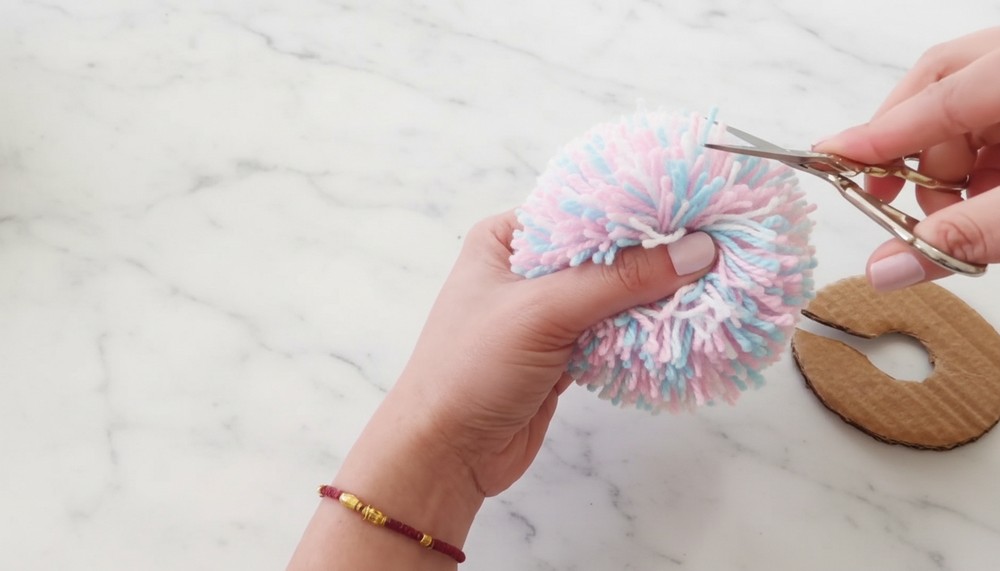
- Cut the Yarn:
- Carefully insert scissors between the cardboard edges and cut the yarn all the way around.
- Hold the yarn firmly to prevent it from falling apart.
- Secure:
- Slide a long piece of yarn between the cardboard templates, tying tightly around the center of the pom-pom.
- Knot securely multiple times and remove the cardboard templates.
- Finish:
- Trim the excess yarn to shape the pom-pom evenly.
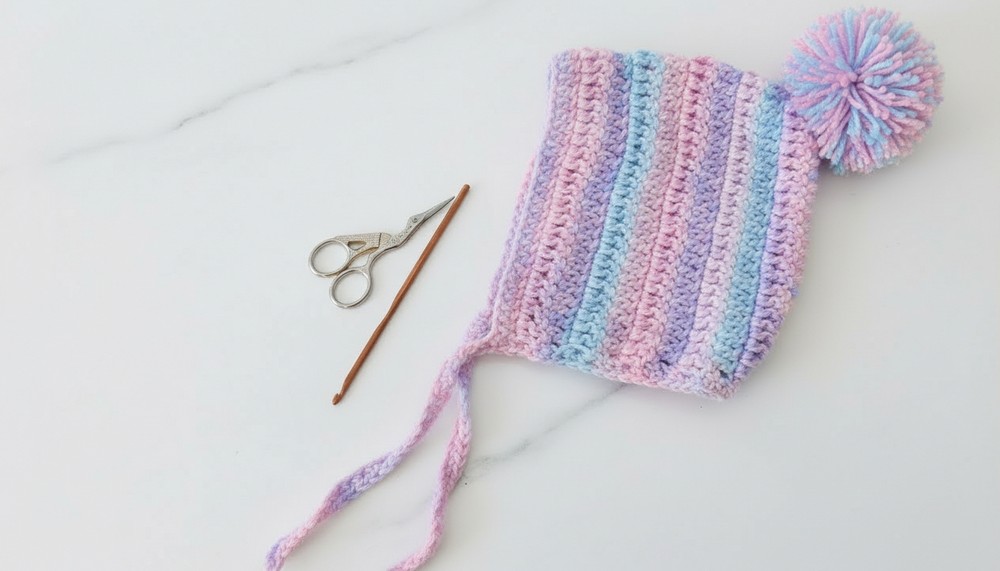
Attach the Pom-Pom
- Center the pom-pom at the top of the hat.
- Use leftover yarn tails to securely attach the pom-pom to the hat by threading them through the base.
- Tie off securely and weave in remaining ends.
Finishing Touches
- Ensure all loose ends of yarn are tucked away neatly.
- Adjust the ties and the pom-pom to sit properly.
Tips for Success
- Count Your Stitches: Ensure you maintain an accurate stitch count throughout to avoid uneven edges.
- Tension Control: Keep your crocheting tension consistent to prevent loose or tight areas.
- Customize Pom-Poms: Create multicolored pom-poms by using multiple yarn colors during wrapping.
Customizations
Size Adjustments:
- Smaller Version: Reduce the number of foundation chains and rounds for children under 12 months. Measure circumference.
- Larger Version: Increase chains and rounds for toddlers or older children. Use the ear-to-ear measurement method.
Colors:
- Experiment with stripes, alternating colors, or variegated yarn for a unique design.
Conclusion
This pom-pom hat with ties is cozy, stylish, and practical for cold weather. It works perfectly as an accessory for babies aged 12–18 months and can be customized for any size or color preference. The addition of the pom-pom brings a fun and playful touch to the design.