Shape your space with charm using this Free Crochet Delirium oval rug Pattern, perfect for softening floors and enhancing cozy corners with ease.
In many homes, the right rug doesn’t just sit underfoot—it shapes the energy of a room. A thoughtful floor accent can soften a space, quiet footsteps, and even tie together colors in a subtle, satisfying way. This is where the beauty of an oval rug shines, curved edges naturally calm the eye and work effortlessly with both modern and traditional interiors. The Free Crochet Delirium oval rug Pattern offers more than visual interest; it brings warmth, texture, and charm to hallways, bedrooms, nurseries, or reading corners.
Airy Crochet Delirium Oval Rug Pattern for Light and Space
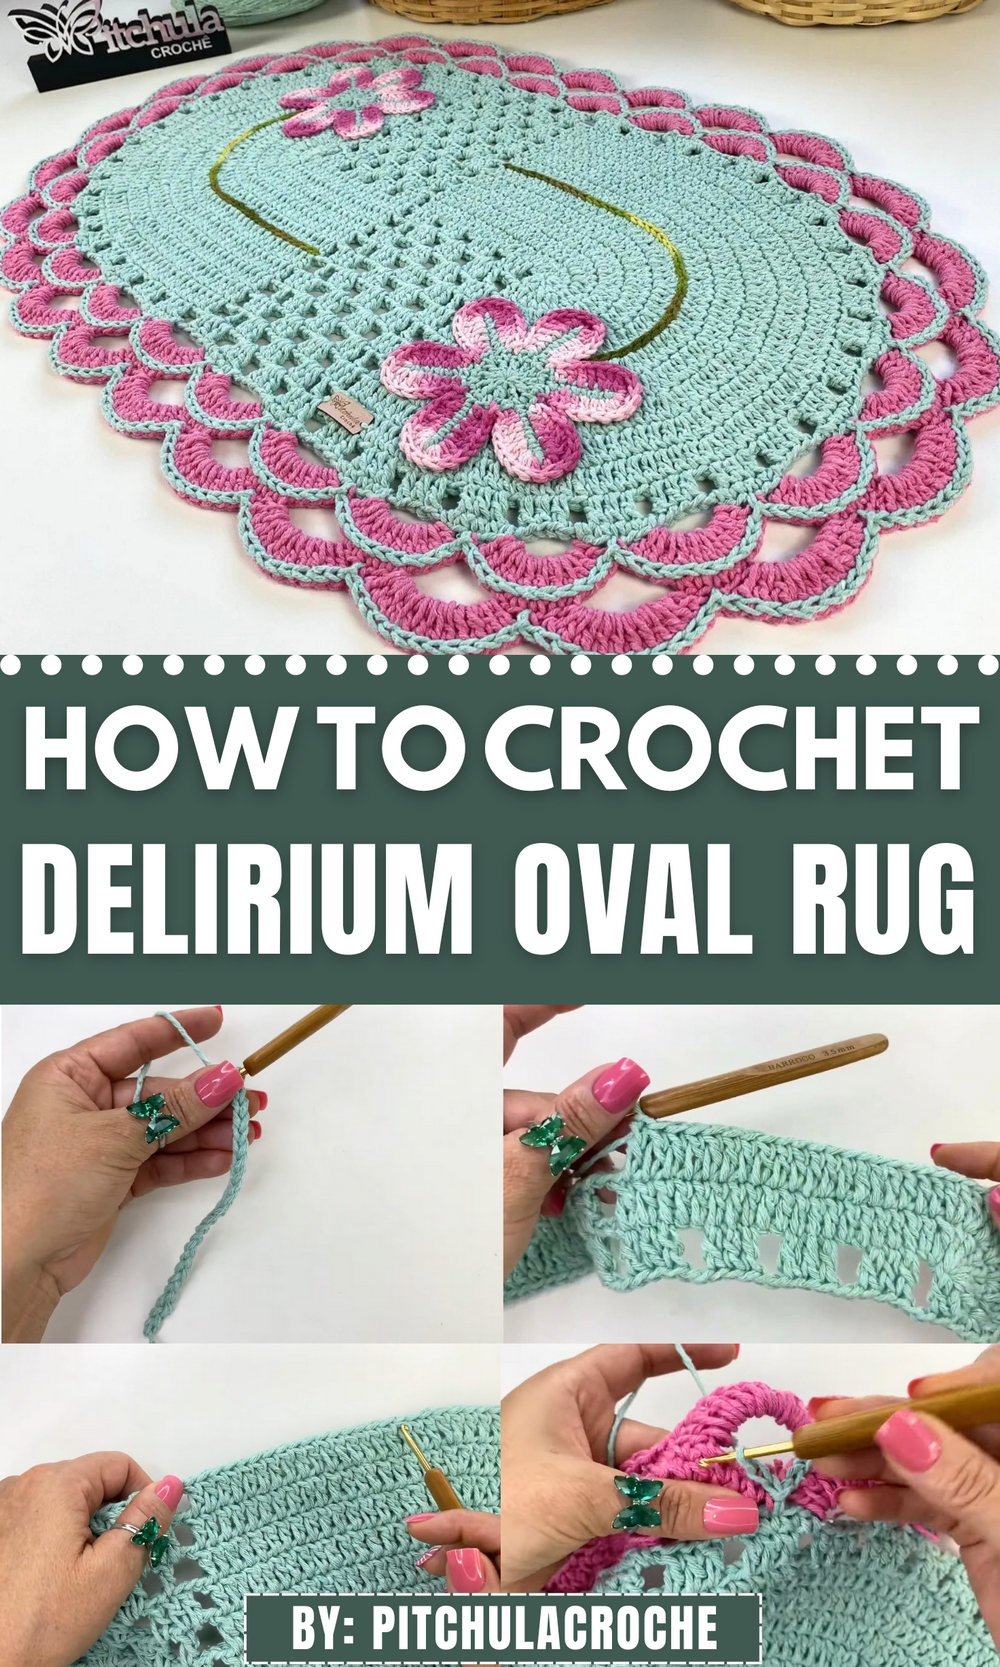
The oval form brings a soothing rhythm to hard angles and straight lines, while the varied stitching gives it a gentle structure that stays elegant yet grounded. You’ll notice how quickly this rug can turn cold tile or hardwood into a comforting surface, offering both visual and physical softness. Its size makes it ideal for layering or anchoring furniture, and the structure keeps it practical in high-traffic areas.
A soft handmade rug like this doesn’t shout, it speaks with quiet confidence, proving how small details can elevate the feel of an entire room without overwhelming it. With its flowing form and sturdy construction, this rug adds not only beauty but also long-lasting function.

Step-by-Step Instructions
Step 1: Preparing the Chains
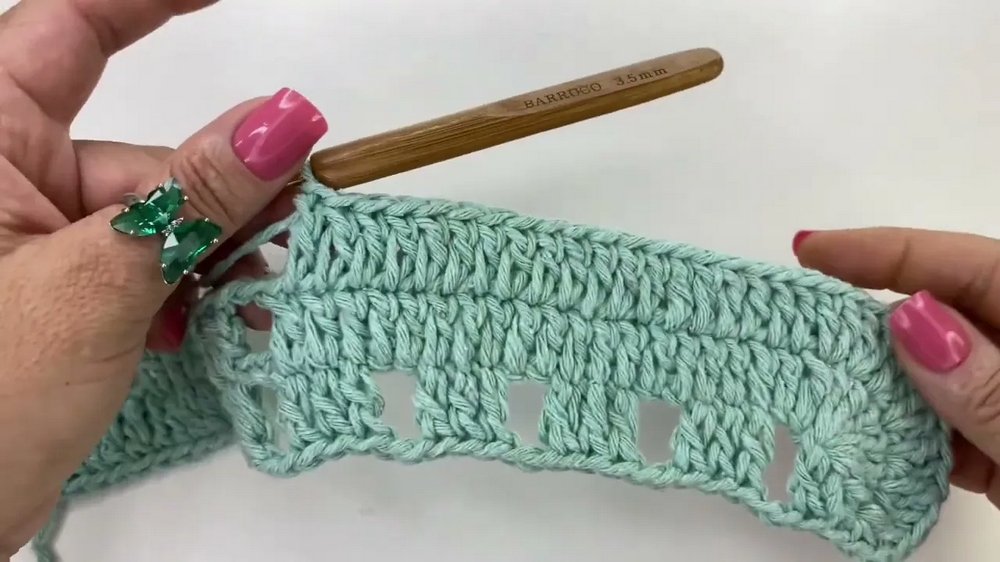
- Start by making 48 chains to serve as the foundation.
- Ensure your chains are slightly loose for ease of work. If tight chains are difficult, the tutor suggests using a larger needle than 3.5 (such as a 4.0) to make the chains looser.

Step 2: Creating the Curve
- Skip the first three chains and work seven double crochets into the fourth chain.
- Count these stitches and ensure there are seven (including the initial three skipped chains).
- This forms the curve for your rug.
Step 3: Adding Blocks
- Work 20 double crochets along the straight edge, taking one stitch from each base chain.
- Once at the end, create four blocks of three double crochets, separated by two chains. Skip two base chains in between each block.
Step 4: Completing the Other Curve
- At the other end, work eight double crochets in one chain space to complete the second curve.
- Repeat the process, working additional stitches along the base chain to ensure symmetry.
Step 5: Expanding the Rug
- As you progress through the rows, continue adding seven increases at the curves (two stitches in each base stitch of the curve) while working double crochet stitches along the straight edges.
- Alternate between rows with four blocks and rows with three blocks separated by additional motifs, such as a single double crochet in the chain space.

Step 6: Finishing the Rug
- After completing 10 rows, check to ensure both sides have 91 double crochet stitches.
- Work a decorative border by alternating between loops of 8 chains and blocks of three single crochets.
- For added flair, you can incorporate patterns, additional motifs, or colored yarn.

Special Features
- Simple Yet Elegant Design: This crochet rug is designed with basic stitches, making it easy to learn while looking visually intricate.
- Custom Color Options: The tutor highlights how the same design can be made in different colors with or without applications.
- Creative Applications: Adding flower embellishments or experimenting with leftover materials for a unique rug.
- Versatility: The rug can serve multiple purposes, such as home decor or gifts.
Level of Difficulty
Although suited for beginners familiar with basic crochet stitches, the rug provides enough challenge to keep intermediate-to-advanced crocheters engaged. Absolute beginners might want to practice chain stitches and double crochets first.
Tutor’s Suggestions
- Loose Chains: Avoid tight chains for easier handling. Use a larger needle if needed to loosen the chains.
- Creativity with Materials: Utilize leftover yarn for sustainable crafting. You can experiment by changing flower colors, middle designs, or edges.
- Tagging on Social Media: The tutor encourages viewers to share their rug creations on social media for inspiration and feedback.
Uses and Materials
Uses
- Home Decor: Ideal as a centerpiece rug for your living room.
- Gifting: Makes a thoughtful handmade gift.
- Crafting Practice: Helps hone your crochet skills.
Materials
- Pires Twine Yarn (1 kg ball, in water green or desired color)
- Crochet Hook/Needle (Size 3.5 or larger for loose chains)
- Optional Embellishments:
- Flowers using leftover yarn
- Branch and leaf patterns in green yarn
- Glue (for attaching embellishments)
Bonus Tip
To add a professional finish:
- Use a contrasting outline for the rug’s edges, matching a dominant color from the main design.
- Before attaching flowers or embellishments, mark positions on the rug for symmetry.
Conclusion
This crochet rug is a stunning project that blends simplicity with elegance. It allows flexibility in design and encourages creativity with vibrant color combinations or functional leftovers. Whether you’re working on it as a crochet practice, home decor piece, or gift, this pattern ensures each step is manageable yet satisfying. The added embellishments make it truly unique.