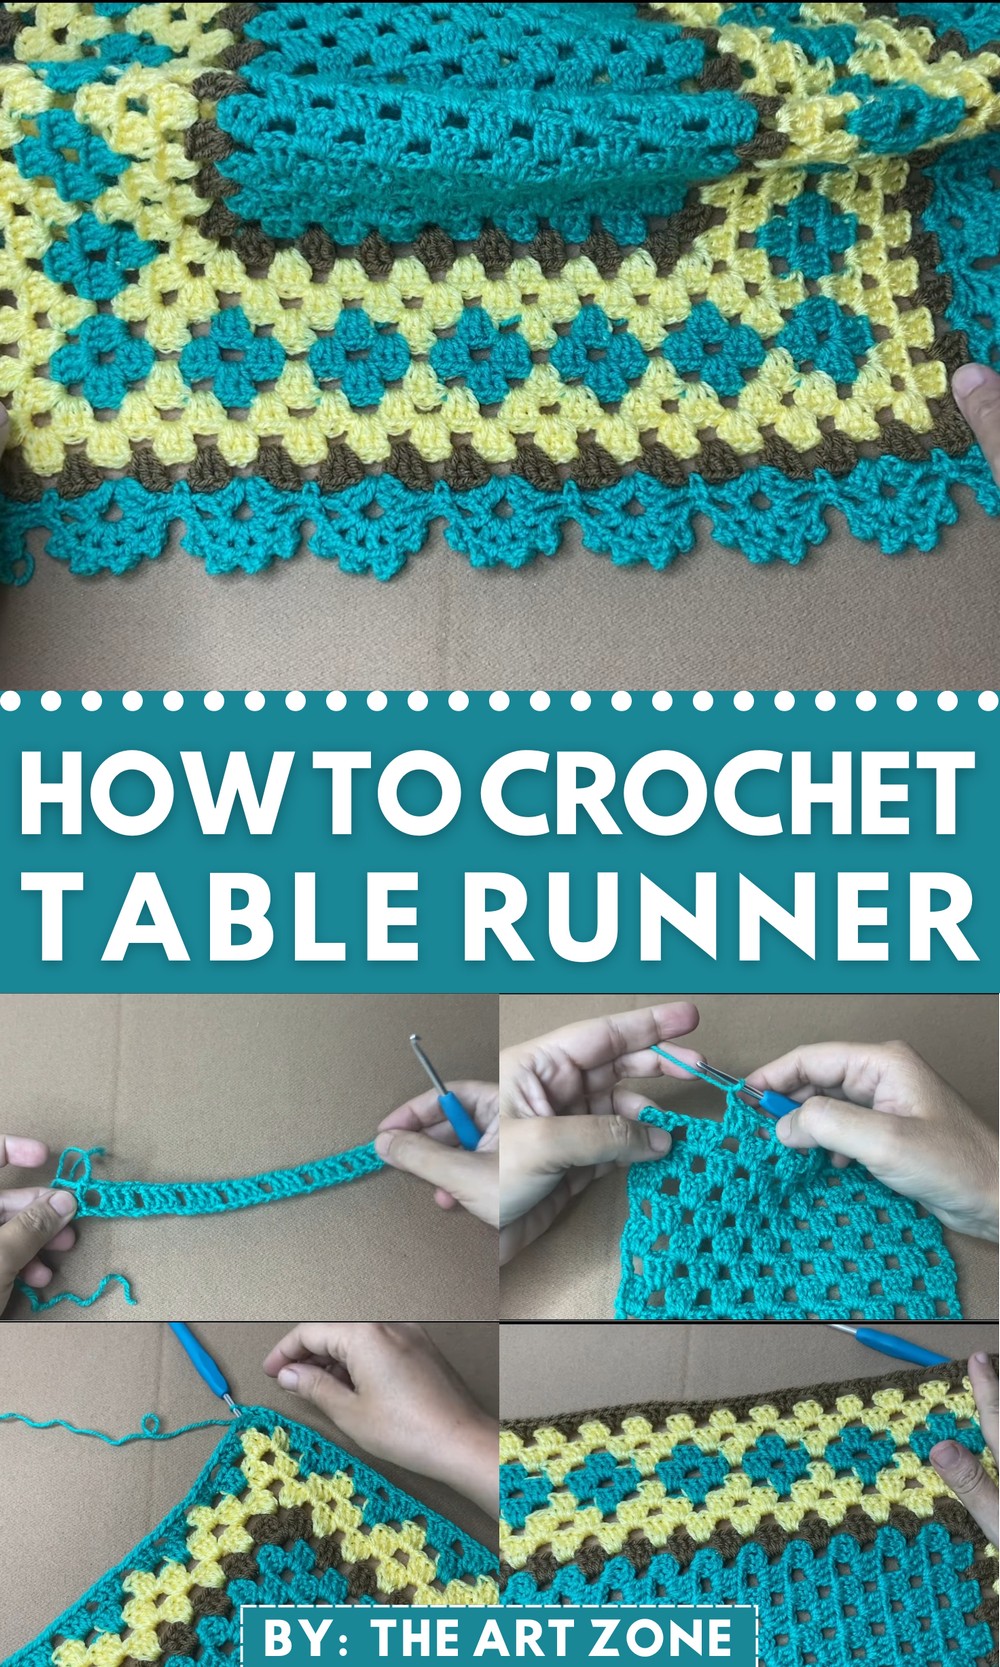
Learn how to crochet a mosaic crochet table runner in just three coordinating colors and lovely granny stitch. With clear, step‑by‑step instructions, it shows how to start, follow the pattern, and finish the edges neatly. Perfect for intermediate crocheters, the finished runner adds a stylish and cozy centerpiece to any table. The pace is easy to follow, making it a relaxing and rewarding home‑decor project.
Mosaic Crochet Table Runner Tutorial
The video walks you through creating a stunning crochet table runner with a simple yet elegant pattern. Using medium-weight number 4 yarn and a 4 mm crochet hook, the tutorial covers every step in detail, from making the base of 35 rows to adding colorful borders with intricate designs. Techniques like slip knots, chains, double crochets, and picots are demonstrated.
Introduction
- The video is presented by The Art Zone, featuring a crochet tutorial for a beautiful table runner.
- The table runner uses a simple yet elegant pattern, created with three colors.
- Materials recommended:
- Medium weight (number 4) yarn.
- 4 mm crochet hook.
- Dimensions of the completed runner: 29 inches long and 17 inches wide.
- The host requests viewers to subscribe, press the bell button, and leave their feedback in the comments section.
Creating the Base of the Table Runner
Foundation Chains
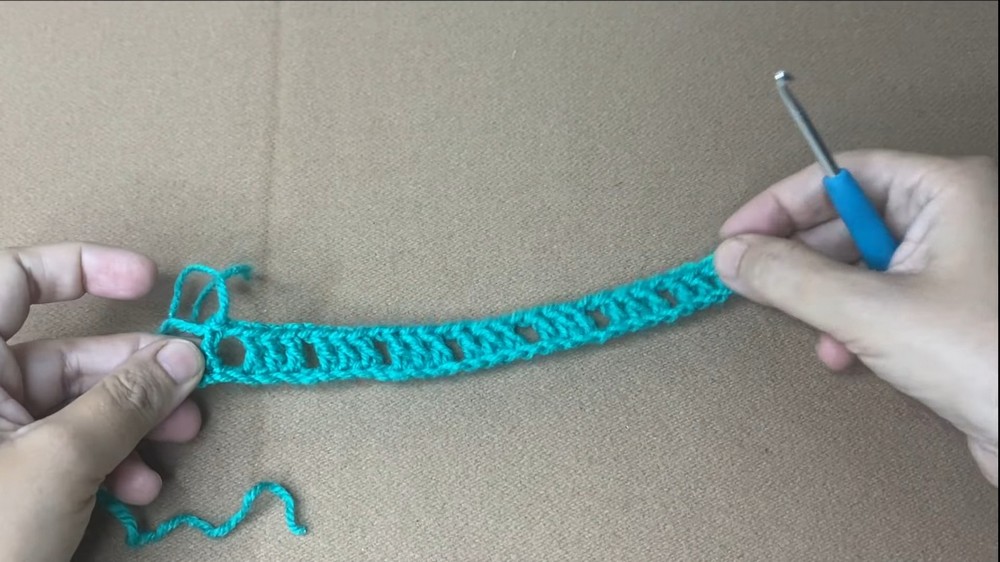
- The tutorial begins with making a slip knot, followed by 35 chains.
- Viewers are advised to increase chains in multiples of eight if wanting to make the runner larger.
Row 1 (Foundation Row)
- Skip six chains, and begin stitches from the seventh chain.
- The row follows a repetitive pattern:
- Groups of three double crochets.
- A chain space is added between groups, with one chain skipped before starting the next group.
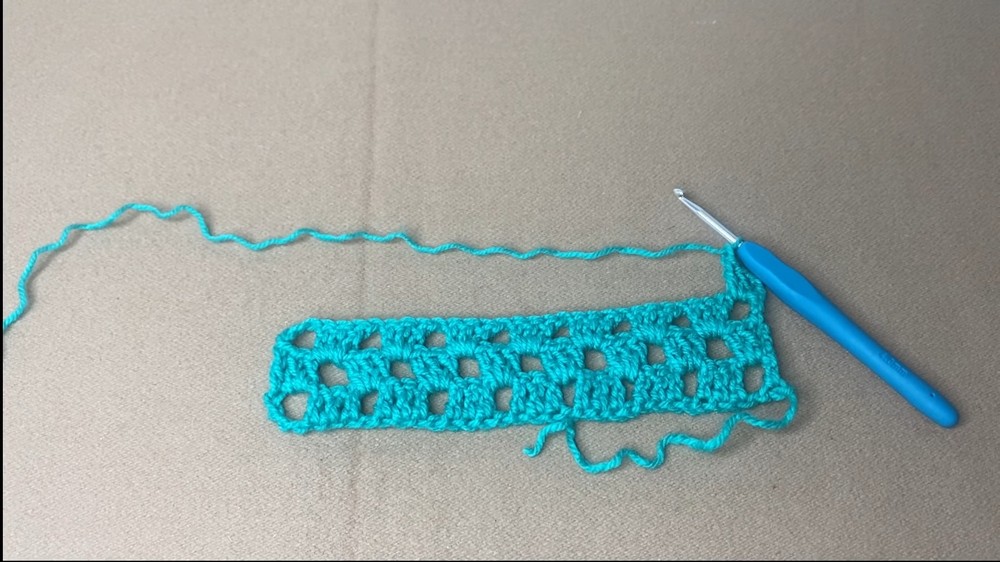
Row 2
- The row starts with three chains, which count as the first double crochet.
- Double crochets are worked in chain spaces from the previous row.
- The established pattern of three double crochets, one chain space, is continued.
Rows 3–35
- Rows are a repetition of Row 2. The design is built by continuing the same pattern to construct the base of the table runner.
- The instructions specify that the runner can be extended by adding more rows.
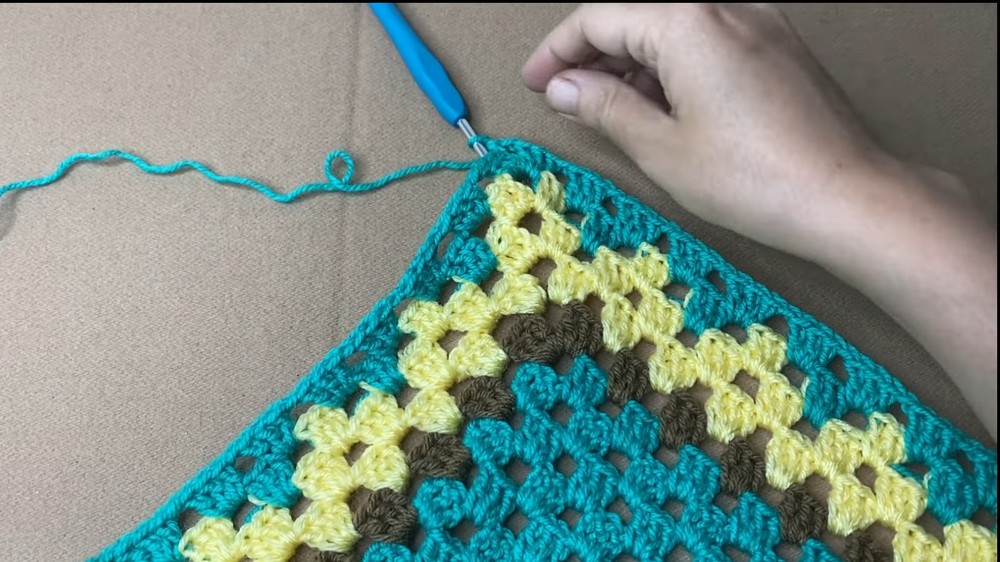
Adding Borders
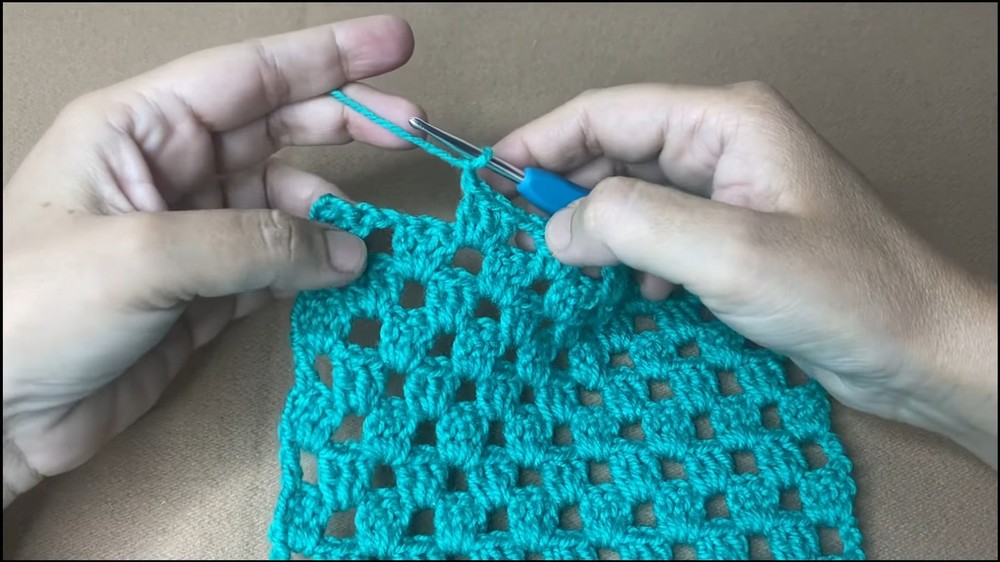
Round 1
- The border begins at the corner chain space with three double crochets, three chains, and three more double crochets to form a corner.
- The sides are worked by crocheting groups of three double crochets between chain spaces from the base pattern.
Rounds 2–3
- These rounds are repeats of the first round. Corners maintain the pattern of three double crochets, three chains, three double crochets, and the sides follow the same structure.

Color Variations and Design Advancements
Round 4
- A second color is introduced with incomplete double crochets to alternate between two chosen colors, creating a textured design.
- Corners still adhere to the same structure but incorporate color changes.

Rounds 5–6
- Similar patterns are maintained, alternating between the two colors.
- Double crochets and chain spaces are worked to create a uniform yet colorful design.
Rounds 7–8
- A single color is used to emphasize the alternating rows of the previous rounds.
- The same pattern of three double crochets with a chain space continues.
Final Decorative Edging
Round 9
- A contrasting new color is introduced, and the border design is repeated with the same corner structure of double crochets and chains.
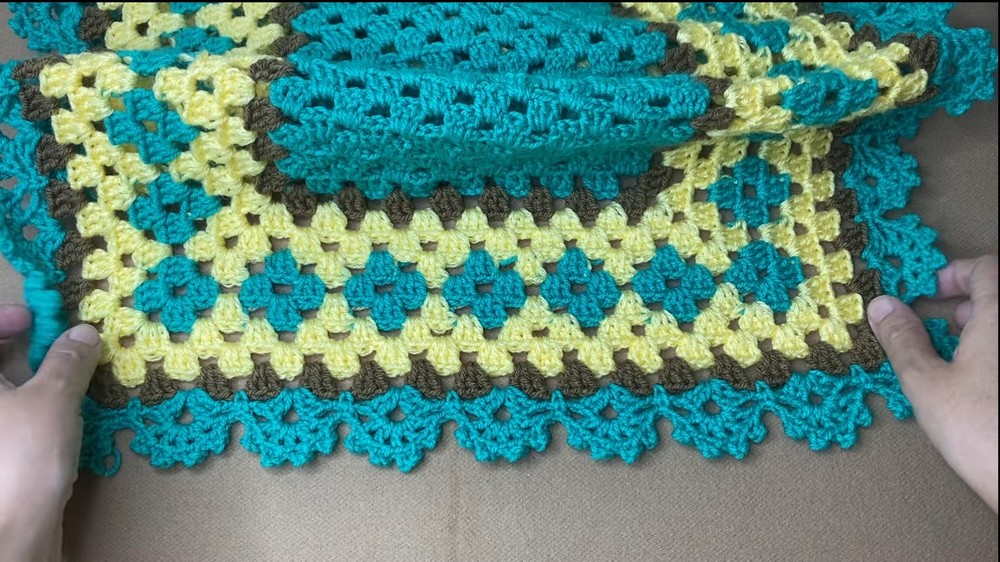
Round 10 (Last Round)
- The round features decorative picots added to the edges for a professional finish.
- Corners have seven picots with double crochets, while sides feature four picots between chain spaces.
Finishing Up
- After the final round, the excess yarn is securely cut and woven in to tidy up the project.
- The completed table runner showcases an elegant and colorful design, perfect as a decorative centerpiece.