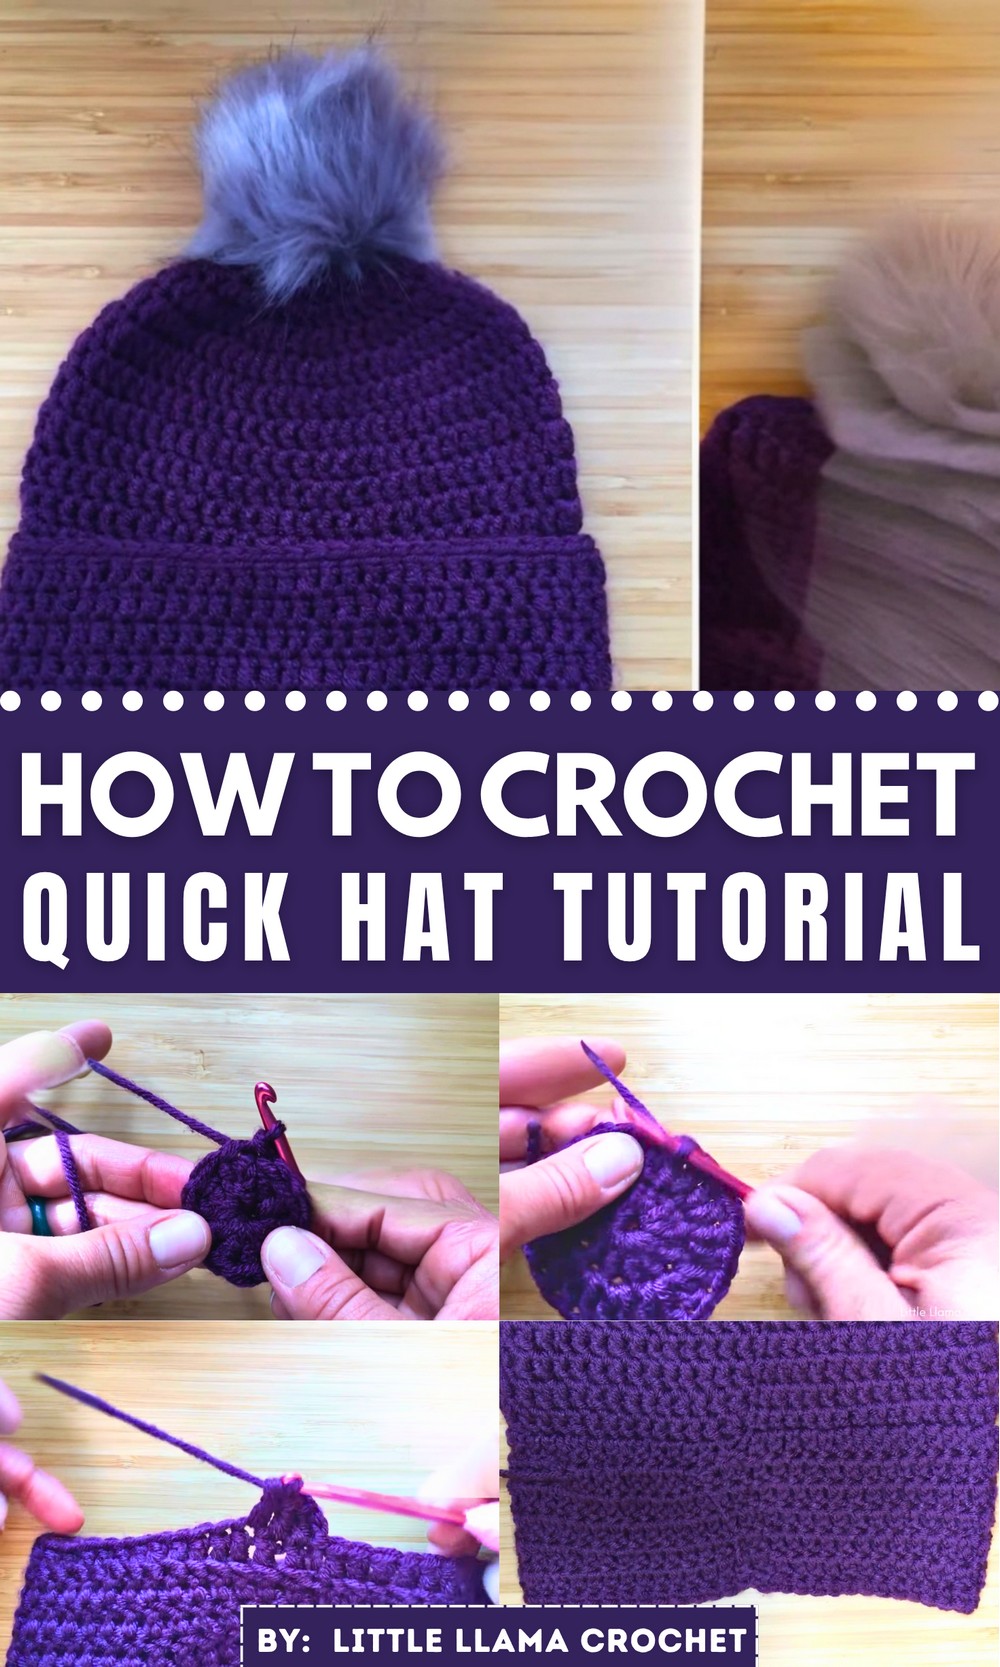
Learn how to crochet a beautiful chunky quick hat step-by-step, perfect for beginners and winter. It is available to crochet in various sizes, from newborn to adult. The hat includes a stylish brim made by crocheting into back loops, creating a lovely ridge detail. The final touches involve adding single crochet edging and optional accessories like faux fur pom-poms.
Materials
- Yarn: Chunky yarn – 4-weight or 5-weight (such as #5 bulky yarn for the pink version).
- Hook Size: 5 mm crochet hook.
- Additional Tools:
- Yarn needle for weaving in ends.
- Stitch marker to track rounds.
- Scissors for cutting yarn.
- Optional: A faux-fur pom pom, bow, or ribbon for additional decoration.
Gauge
- Gauge is not specifically mentioned, but follow the below guideline:
- For 4-weight yarn: ~12 double crochets = 4 inches.
- For 5-weight yarn: ~10 double crochets = 4 inches.
Gauge is flexible depending on fit preference.

Step-by-Step Crochet Chunky Hat Pattern
This pattern will guide you in creating a beautiful chunky hat using US crochet terminology. The chunky yarn combined with a simple design makes this pattern perfect for cozy winter hats for all sizes. Every detail has been tailored for an enjoyable crochet experience, whether you’re making a gift or treating yourself.
Skill Level
Intermediate (includes increasing, working in rounds, and back-loop-only techniques)
Finished Sizes
- 36 stitches circumference: Fits newborns.
- 48 stitches circumference: Fits an approximately 1-year-old child.
- 60 stitches circumference: Fits older children, teenagers, or standard adult sizes.
- 72 stitches circumference: Fits larger adult head sizes.
Pattern Instructions
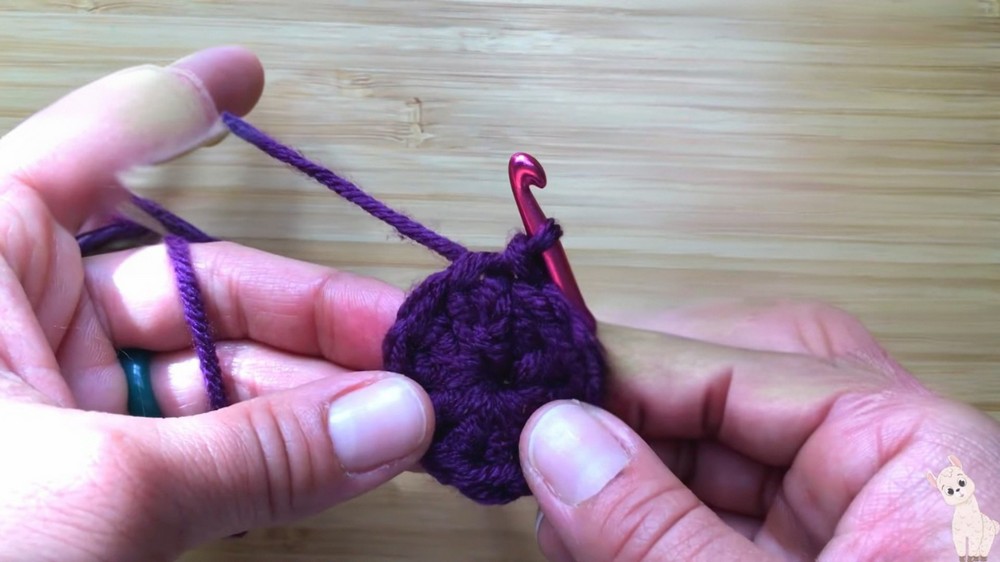
Step 1: Foundation – Magic Circle
- Create a magic circle (adjustable ring).
- Chain 2 – this will count as your first double crochet (Dc).
- Work 11 double crochets (Dc) into the magic circle for a total of 12 stitches (including the chain-2).
- Pull the magic circle tight. Slip stitch (Sl st) to the top of your chain-2 to finish the round.
Step 2: Round 2: Increase Round
- Chain 2 to start the round – this counts as your first Dc.
- Work 1 Dc into the same stitch as your chain-2, making your first increase.
- Work 2 Dc into each remaining stitch around.
- At the end of the round, you will have 24 stitches.
- Slip stitch to the top of the chain-2 to complete the round.
Step 3: Round 3: Alternate Dc and Increases
- Chain 2 – counts as your first Dc.
- Into the next stitch, work 2 Dc (an increase).
- Follow the pattern:
- 1 Dc in the next stitch, 2 Dc (increase) in the next stitch.
- Repeat pattern around for a total of 36 stitches by the end of the round.
- Slip stitch to the top of the chain-2 to close the round.
Step 4: Round 4: Increase Pattern for a One-Year-Old or Larger Size
- Chain 2.
- Follow this increase pattern:
- 1 Dc in the next 2 stitches, 2 Dc (increase) in the third stitch.
- Repeat the pattern around. You will finish with 48 stitches.
- If you are working on a smaller-sized hat (newborn), stop here and skip to the “Bulk of the Hat” section.
Step 5: Round 5: Increase Pattern for Adult or Larger Sizes
For a larger size:
- Chain 2.
- Increase pattern:
- 1 Dc in the next 3 stitches, 2 Dc (increase) in the fourth stitch.
- Repeat this pattern all the way around. You’ll have 60 stitches at the end of this round.
- For the largest version:
- Add another increase round. Use a pattern of 1 Dc in the next 4 stitches, 2 Dc (increase) in the fifth stitch. This will produce 72 stitches total by the end of the round.
- Add another increase round. Use a pattern of 1 Dc in the next 4 stitches, 2 Dc (increase) in the fifth stitch. This will produce 72 stitches total by the end of the round.
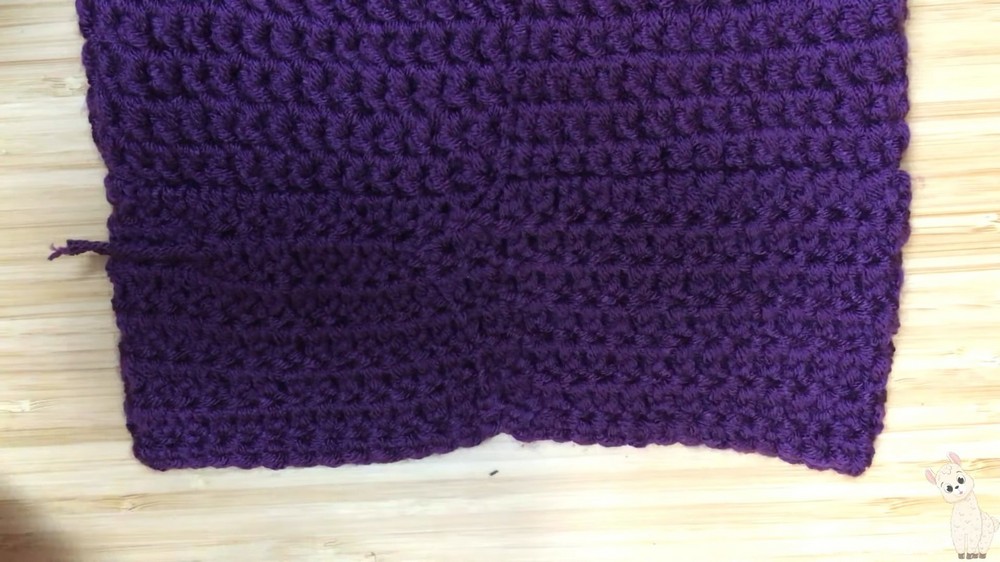
Bulk of the Hat
- Work 12 rounds of double crochet in each stitch (following the stitch count of your chosen size – 36, 48, 60, or 72 stitches per round).
- Slip stitch at the end of each round to join and start the next round with a chain-2 (counts as the first Dc).
Adjust the number of rows depending on the desired hat height. For a snugger, more fitted hat, crochet fewer rows.
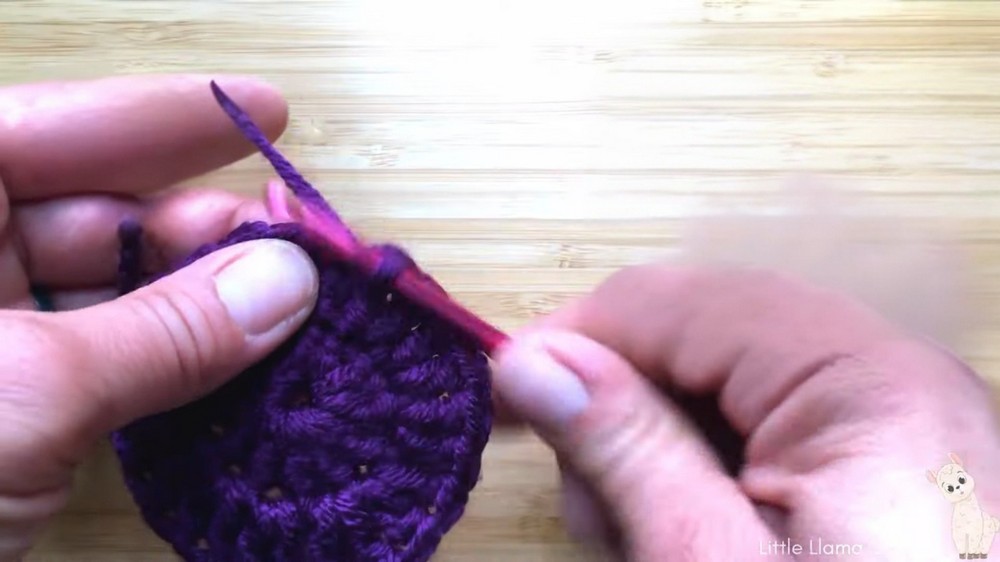
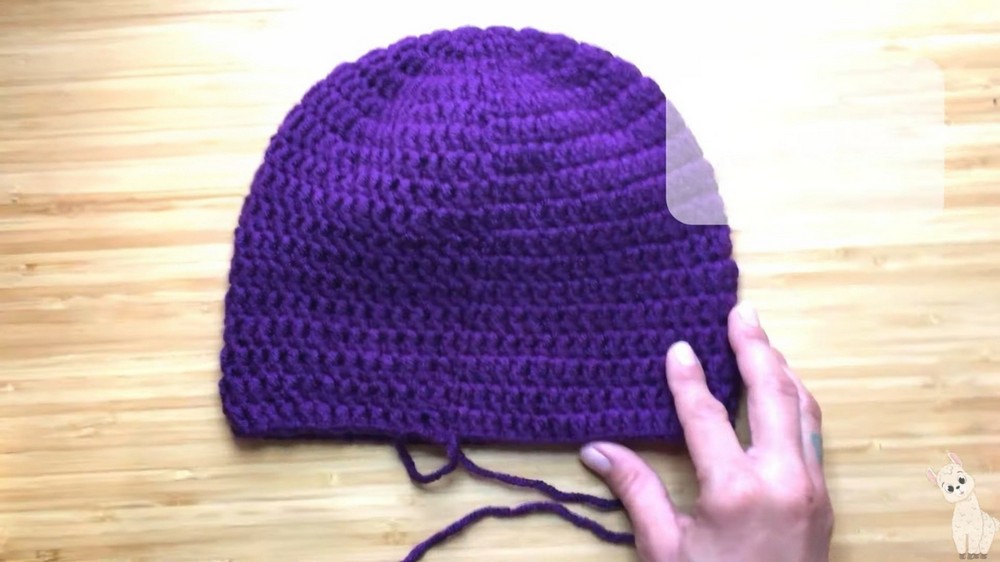
Step 6: Brim (Creating the Ridge)
- Turn the hat inside out.
- Chain 2, then work 1 Dc into the back loops only around the entire hat.
- You’ll need to work 59 Dc into the back loop for a total of 60 stitches.
- This creates the signature ridged brim.
- Slip stitch to the top of the chain-2 to finish the brim round.
Step 7: Increase the Brim Thickness
- Chain 2 and turn the hat back to the right side.
- Work 4–5 additional rows of Dc into both loops (or as many rows as needed to create your desired brim thickness).
- Work 60 Dc per round.
- The number of brim rows can be customized to your taste. A thicker brim is great for a cozy winter look.
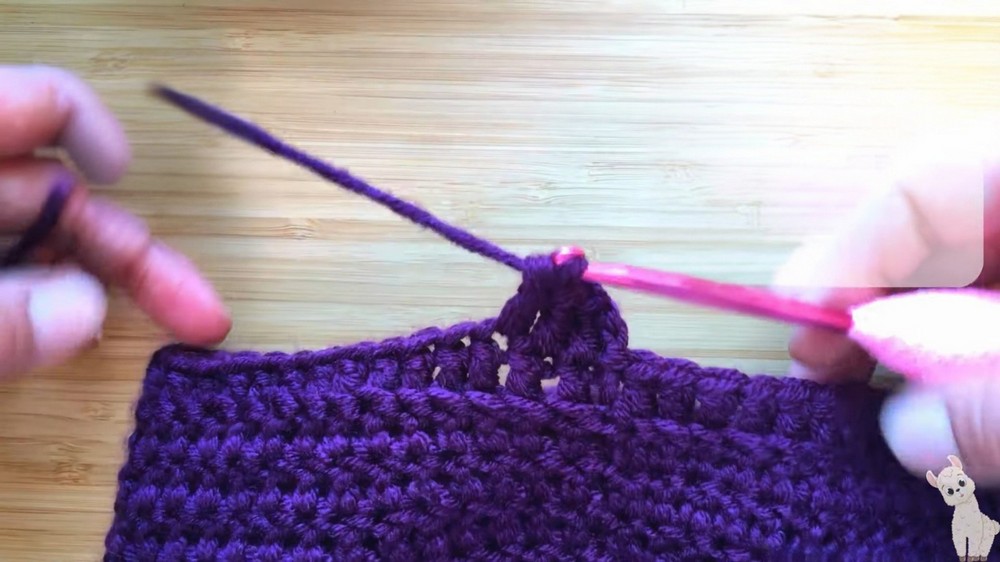
Step 8: Final Edging
To create a clean trim for the brim:
- Chain 1 and switch to single crochet (Sc).
- Work 59 Sc into the back loops only around the brim, for a total of 60 stitches.
- Slip stitch into the first Sc.
Step 9: Weaving in Ends
- Cut the yarn, leaving a small tail.
- Using a yarn needle, weave in all yarn ends neatly.
Optional Additions
- Add a pom pom using a faux-fur attachment or handmade yarn pom pom.
- Decorate with ribbons, bows, or embellishments to customize your hat.
- Experiment with stripes, color blocking, or ombré effects by switching yarn colors.
Special Techniques
- Back-Loop-Only (BLO): Work into the back loops of the stitch to create a ridged effect. This is used to define the brim.
- Magic Circle: Using a magic circle provides a clean and adjustable round opening for the top of your hat.
Tips for Customization
- Size Adjustments: Modify the increase pattern or number of stitches to create hats for different head circumferences.
- Explore Yarn Options: Try different yarn weights for a looser or more compact hat.
- Edging & Embellishments: Add a finishing touch like crab stitch (reverse single crochet) for a decorative edge.
Conclusion
This chunky crochet hat is quick to work up and boasts a clean, polished design perfect for cold weather. Its simple construction makes it versatile for all sizes and a great handmade gift idea. The reversible brim adds a professional, clean look that can be customized for your personal style.
Important Remarks
- Tighten your magic circle completely to avoid holes at the top of your hat.
- Use a stitch marker in the last completed stitch of each round to avoid losing track of stitches and rows.
- The finished hat can stretch, so it’s okay if it initially feels snug.