Enhance your wardrobe with this easy free crochet vest pattern to make a soft and stylish sleeveless piece that looks totally awesome over any shirt.
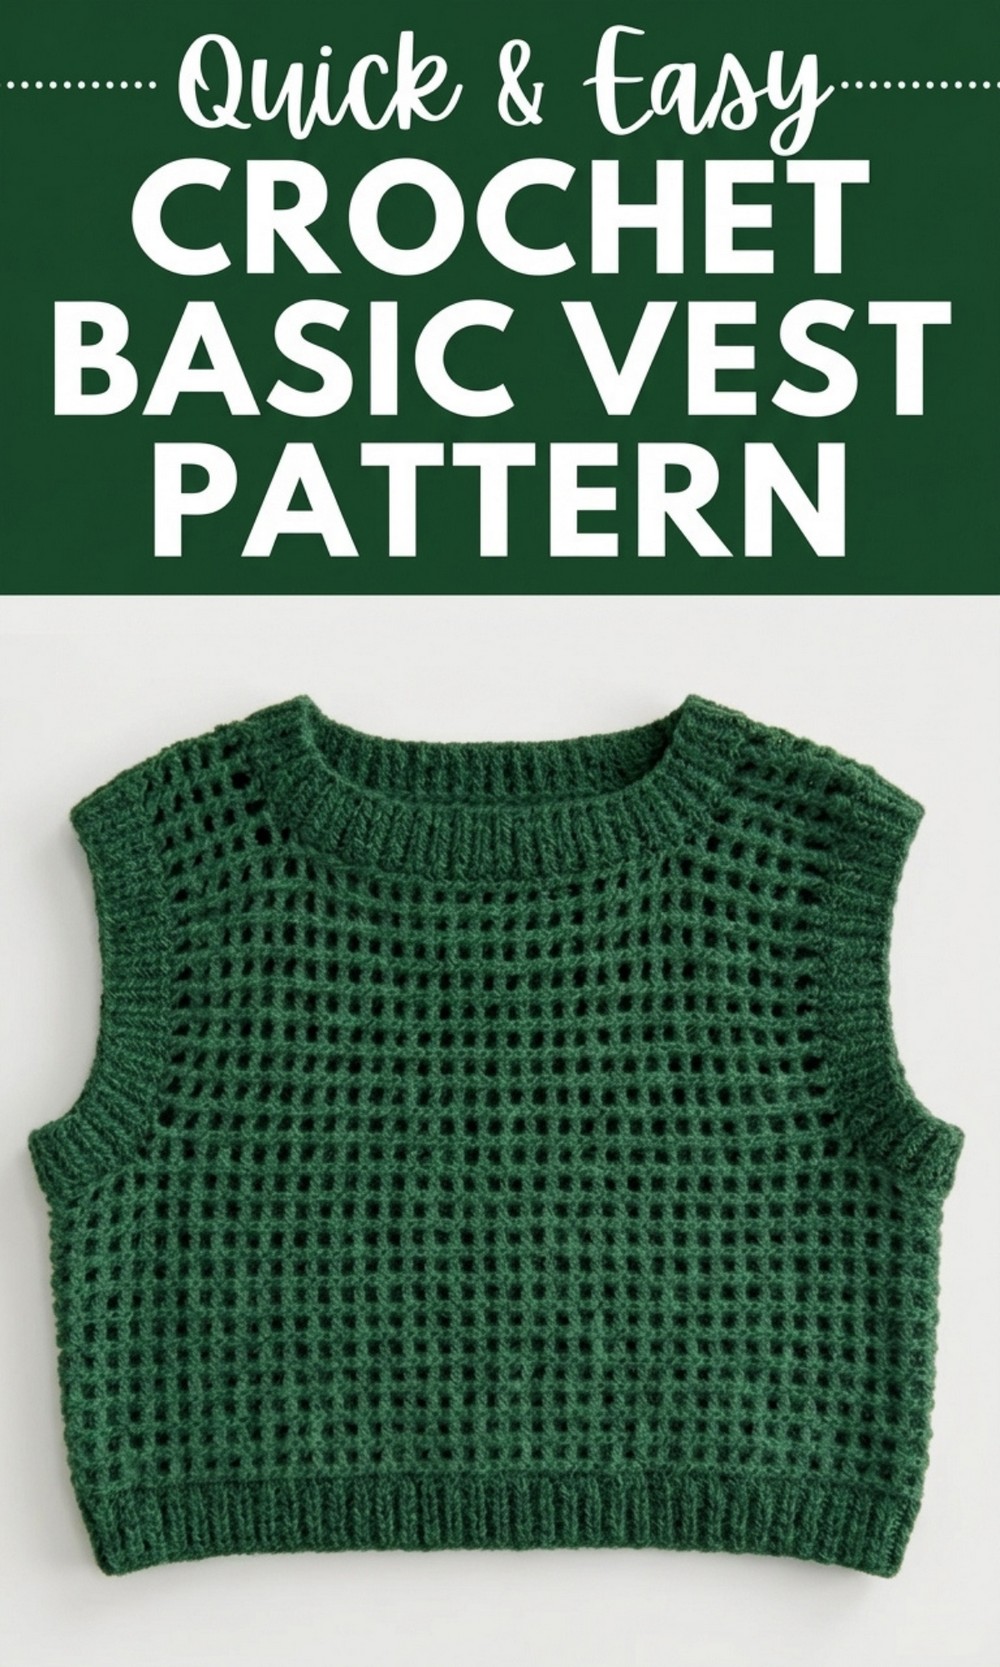
Wow Everyone with This Fashionable Free Crochet Vest Pattern
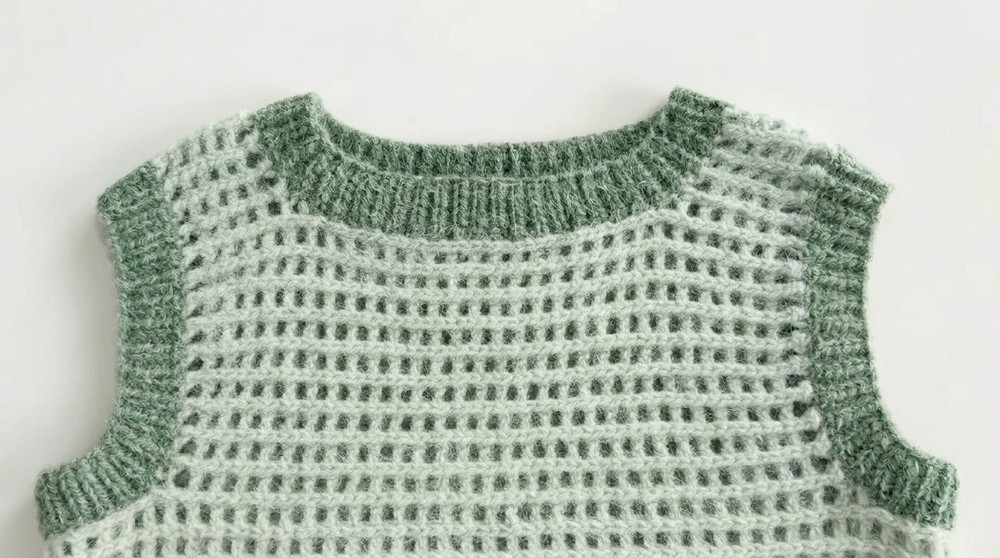
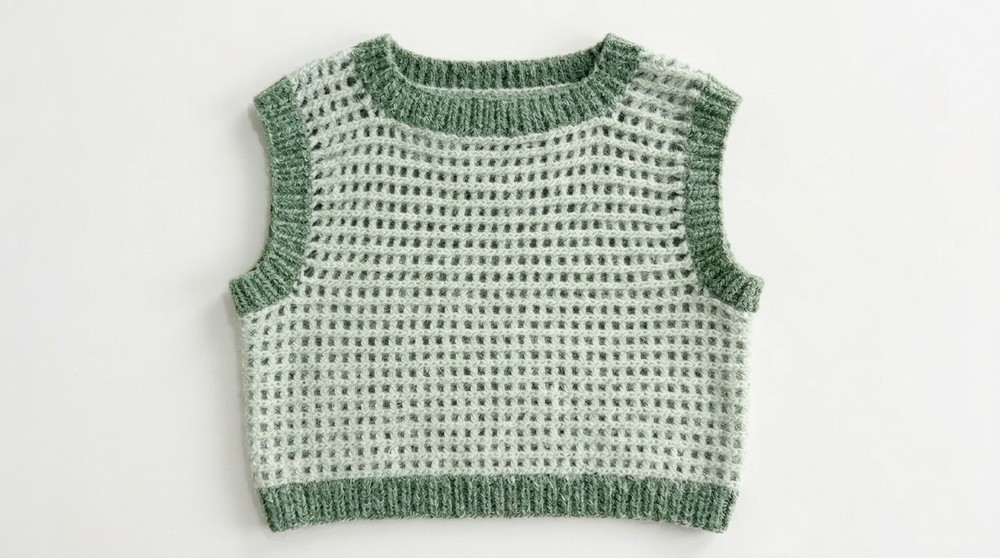
Cozy up with a free crochet vest pattern that lets you create a stylish and versatile piece perfect for any wardrobe. This pattern is designed for everyone, from beginners to seasoned crocheters, making it easy and fun to follow along. The vest features a beautiful 3D mesh design that combines elegance and warmth, perfect for layering or wearing on its own.
With the use of gradient yarn, this vest bursts with an array of colors making it both eye catching and unique. Whether you wear it at home, school, or on a chilly day out, it adds a touch of charm and comfort to your look. The simple stitches involved are easy to master, making this a delightful project for anyone, even those new to crochet.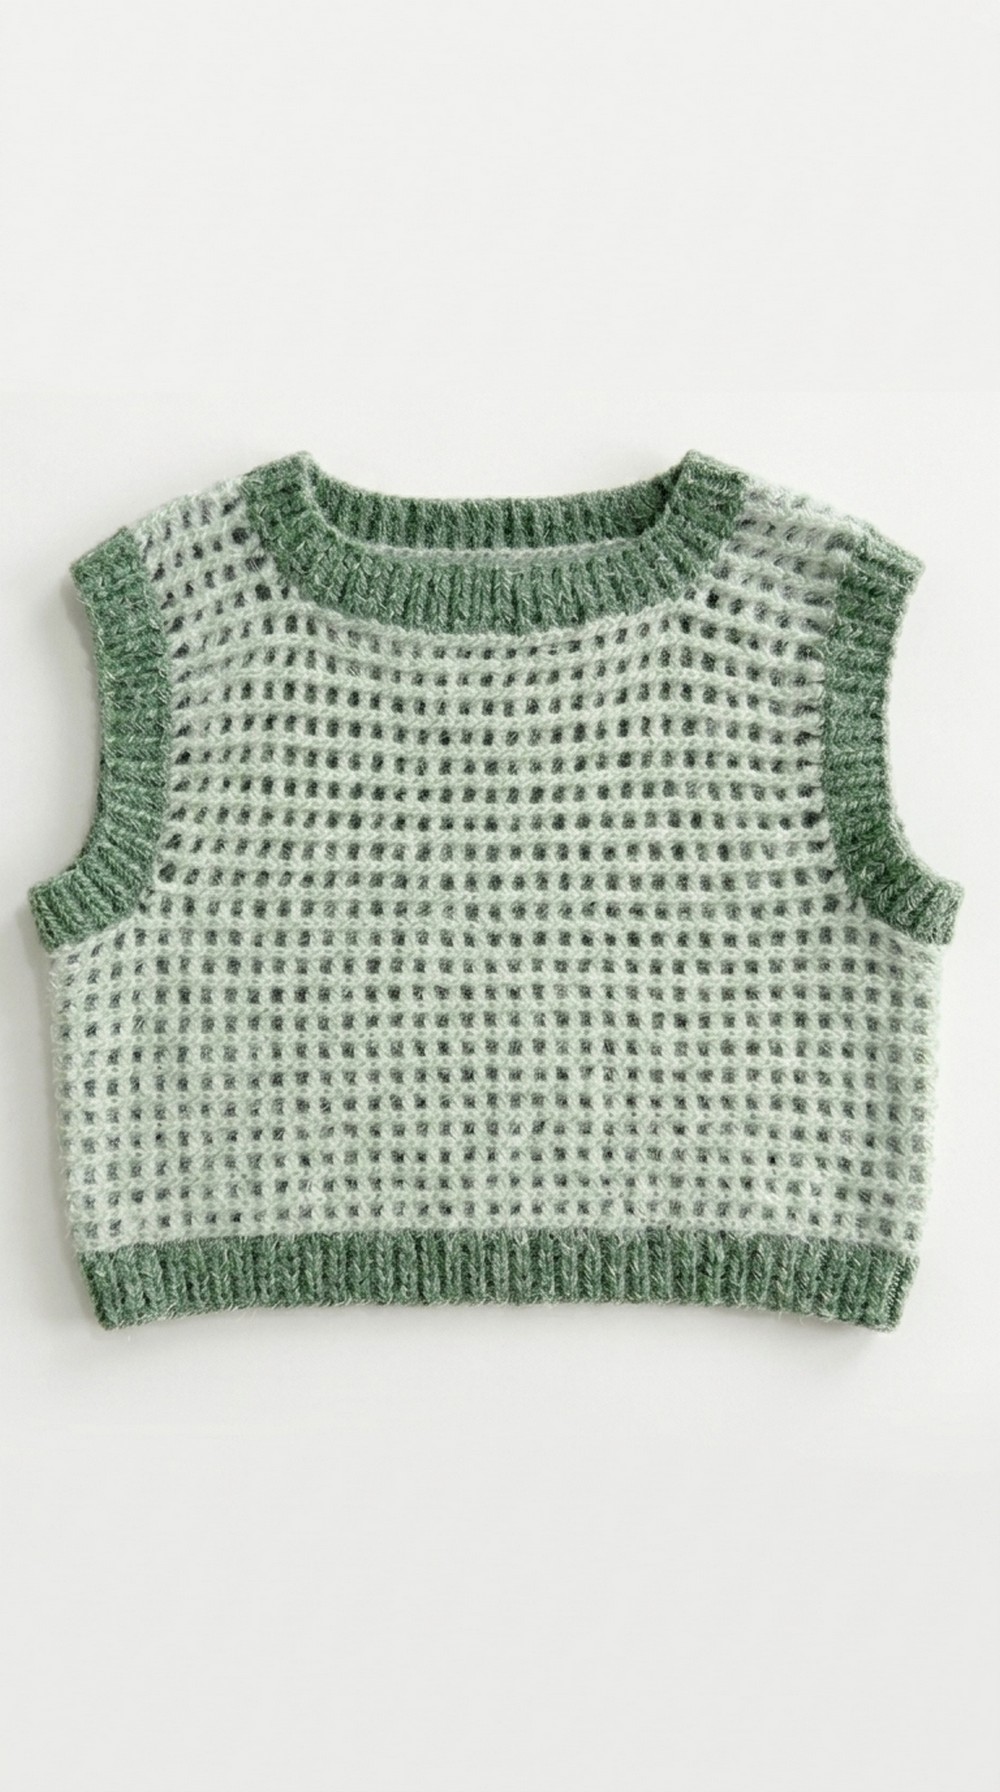 The vest’s design is easily customizable, allowing you to experiment with different colors and sizes. It’s a perfect way to express your creativity while making something both practical and beautiful.
Crochet Vest Pattern
Finished Size
- Bust Circumference: Approximately 36 inches (adjustable).
- Length: Approximately 22 inches (adjustable).
(You may adjust the size by increasing or decreasing the chain count and rows.)
Materials Needed
To recreate this vest, you’ll need:
- Yarn: Gradient long yarn (size 4 – worsted weight or appropriate for the hook size). You’ll need approximately 750–850 yards.
- Hook: 5.5 mm crochet hook (adjust if necessary to meet gauge).
- Notions: Tapestry needle, scissors, tape measure.
- Optional: Blocking tools such as pins and an ironing board.
Gauge
- 4 double crochet stitches = 2 inches.
- 3 pattern rows = 2 inches.
Check your gauge before starting to ensure the correct size and fit. Adjust hook size if necessary.
Special Techniques
- Slip Stitch (sl st): Insert hook, yarn over, pull through both the stitch and loop on the hook.
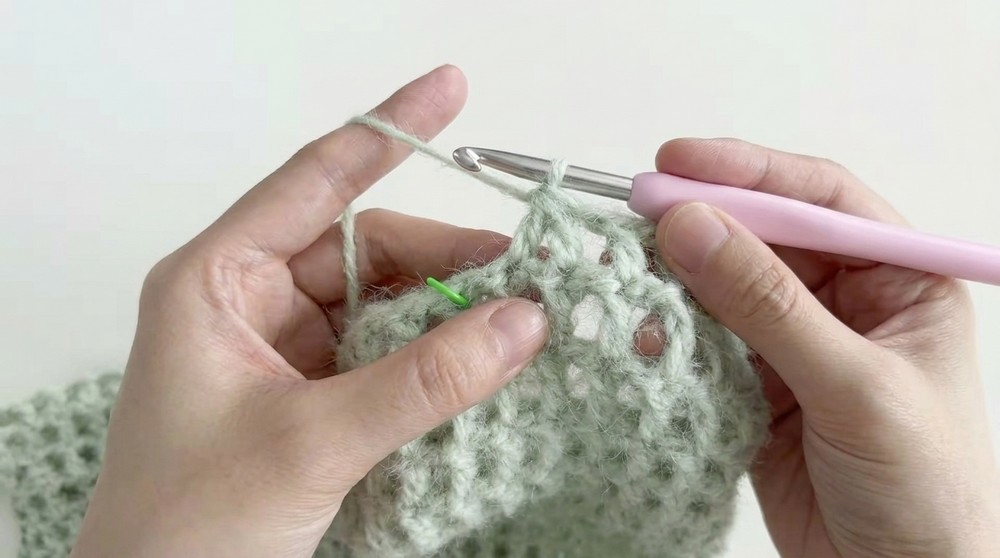
- Double Crochet (dc): Yarn over, insert hook in stitch, yarn over and pull up a loop (3 loops on hook), yarn over, pull through 2 loops, yarn over, pull through remaining 2 loops.
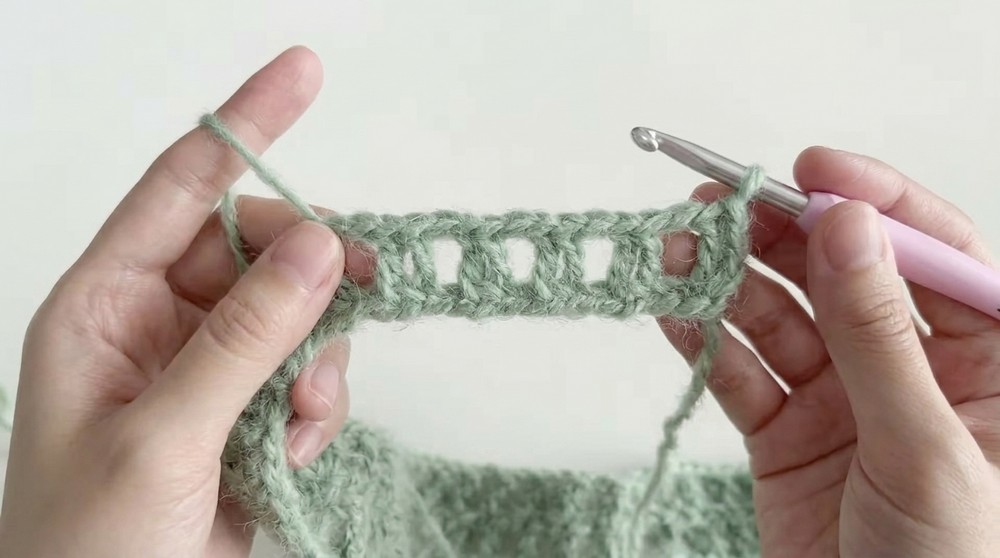
- Mesh Pattern: Alternating chain stitches and double crochet stitches to create the mesh texture.
Tips Before Starting
- Use a smooth yarn to make it easier to see stitches in the mesh pattern.
- Keep track of row counts. Mark the beginning of each round for easy reference.
- Block the finished garment for a polished and even finish.
Pattern Instructions
Step 1: Lower Half [Foundation & First Rows]
- Foundation Chain:
- Chain 160 stitches (or any multiple of 2 to adjust size for a wider or narrower vest).
- Join with a slip stitch into the first chain, forming a loop. Be careful not to twist the chain.
- First Round:
- Chain 4 stitches (counts as one double crochet and one chain stitch).
- Skip the next stitch. In the next stitch, crochet 1 double crochet and 1 chain stitch.
- Repeat: Skip 1 stitch, crochet 1 double crochet and 1 chain stitch around the loop.
- Join with a slip stitch to the 3rd chain of the starting chain 4.
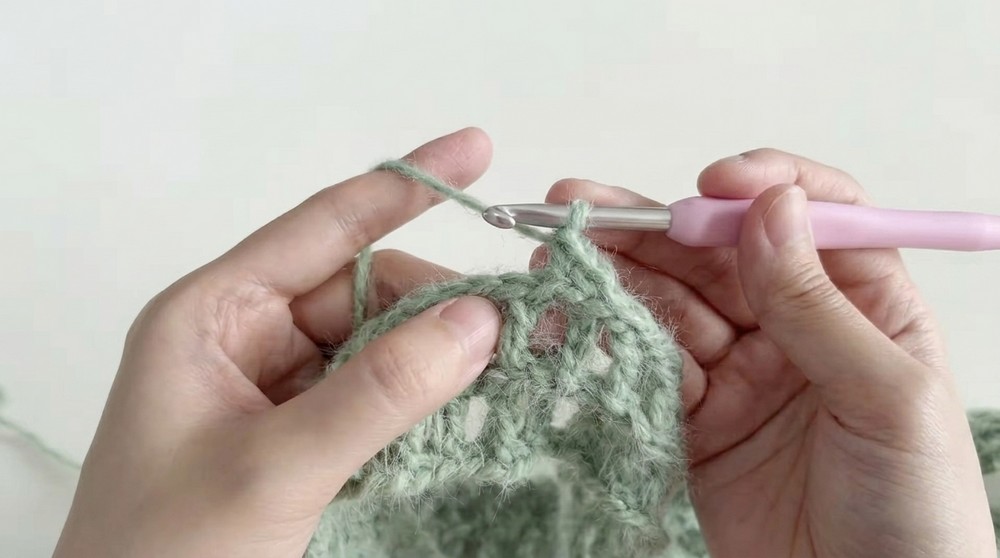
- Second Round (Slip Stitch Round):
- Work 1 slip stitch into each chain and double crochet of the first round.
- For each slip stitch, pick up two strands of the previous round’s stitches.
- Third Round:
- Chain 4 stitches (counts as one double crochet and one chain stitch).
- Crochet 1 double crochet and 1 chain stitch into the top of each double crochet from the previous round.
- Repeat this pattern around the loop and join with a slip stitch to the starting chain.
- Repeat Rows:
- Alternate Rows 2 and 3 to create the 3D mesh pattern.
- Follow the video’s demonstration and repeat this pattern for 36 rows to complete the lower half of the vest.
Step 2: Upper Half [Front and Back Pieces]
Front Piece
- Divide the Vest for Front and Back:
- Reserve 4 pattern repeats on each side as armholes.
- Work on the front portion by leaving 4 mesh patterns on each side unworked.
- First Row (Front Piece):
- Start on the wrong side of the fabric. Insert the hook into the first double crochet and chain 2 stitches.
- In the next double crochet, work 1 double crochet.
- Continue with the pattern: Alternate 1 double crochet and 1 chain stitch until you reach the other side of the front section, leaving the last 2 double crochet stitches.
- Knit 2 together (decrease): Work 2 stitches together for the final two double crochets.
- Second Row (Slip Stitch):
- Turn the fabric so the right side is facing you.
- Work 1 slip stitch in each double crochet and chain stitch from the previous row.
- Repeat Rows:
- Alternate between rows of double crochets (mesh pattern) and rows of slip stitches.
- Work a total of 20 rows, or adjust as needed.
- Create the Neckline:
- Leave the center 16 double crochet stitches unworked to form the neckline.
- For each shoulder, work 4 sets of mesh patterns for a total of 10 rows to create the straps.
Back Piece:
- Repeat the same process as the front piece.
- Note: Adjust the number of rows according to the desired length for the back.
- Join the shoulder straps of the front and back pieces together with a slip stitch.
Step 3: Hemline (Ribbing)
- Attach Yarn for Hem:
- Start at the joining point between the front and back pieces.
- Chain 11 stitches.
- Slip Stitch Row:
- Skip the first chain and crochet 10 slip stitches back toward the edge.
- Make 1 slip stitch on the next stitch along the edge of the vest.
- Repeat Rows:
- Turn the fabric, chain 1, and work 10 slip stitches for each row.
- Repeat these steps to crochet all the way around the hem.
Step 4: Neckline & Cuffs (Finishing Touches)
- Neckline:
- Attach yarn to the neckline and chain 7 stitches.
- Crocheting in a circular motion, work slip stitches into the neckline edge using the ribbing method (as shown for the hem).
- Cuffs:
- Repeat the neckline process for each armhole to add ribbing around the cuffs.
- Repeat the neckline process for each armhole to add ribbing around the cuffs.
Customization Ideas
- Size Adjustment: Modify the number of foundation chains and rows for a personalized fit.
- Yarn Choice: Experiment with different yarn textures, such as cotton for a summer feel or wool for warmth.
- Colors: Use a solid yarn or create color blocks for a modern effect.
Final Steps
- Ironing (Optional): Lightly steam or iron the finished vest to enhance its softness and elasticity.
- Blocking: Block the garment to achieve your desired size and shape.
- Show it Off: Pair your handmade vest with your favorite outfits for a stylish, personalized look.
Conclusion and Important Remarks
Your handmade mesh vest is complete. Its 3D texture, combined with a lightweight and breathable design, makes it perfect for any season. Whether you’re a beginner or an experienced crocheter, this project is an excellent way to develop skills and create something functional and beautiful. Share your finished work, and experiment with customizations to make it uniquely yours.