Organize your space with this Free crochet baskets from jute Pattern, ideal for storage, home styling, and keeping everyday items neatly sorted well.
Rustic Crochet baskets from jute Pattern for Natural Style
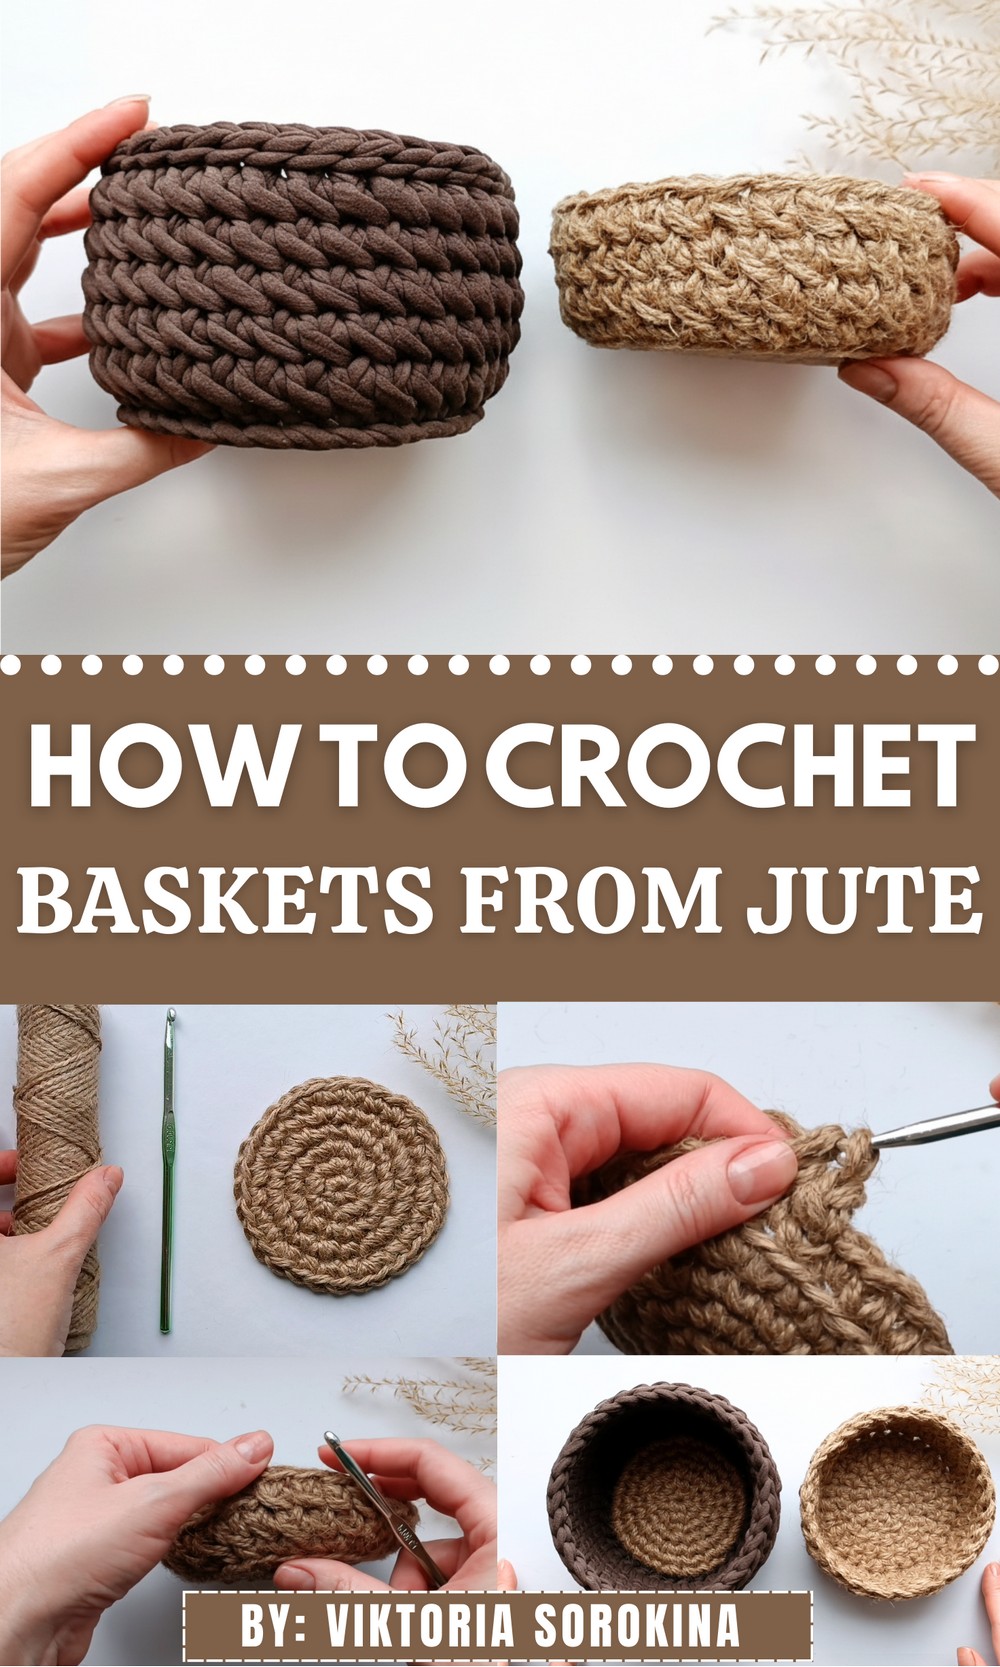
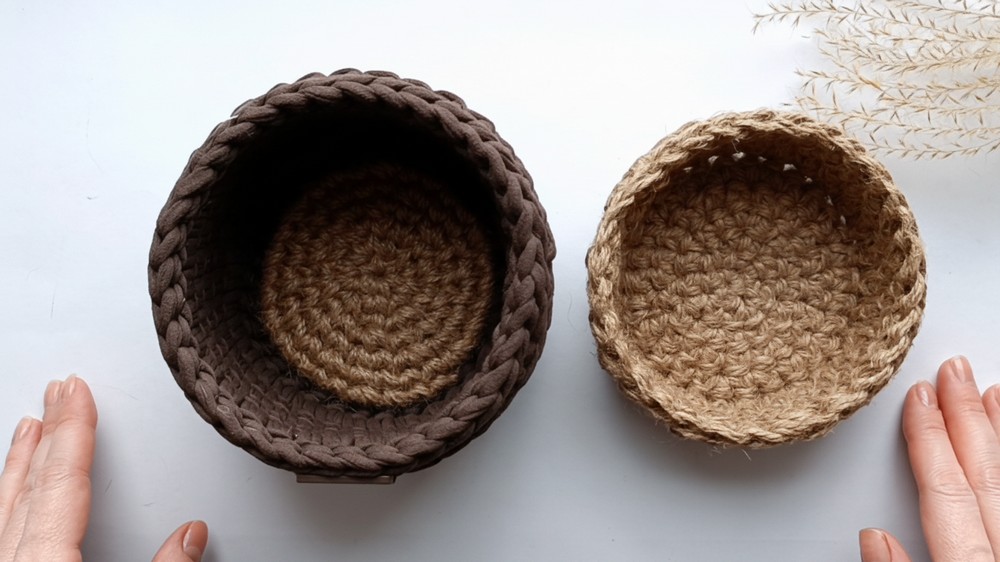
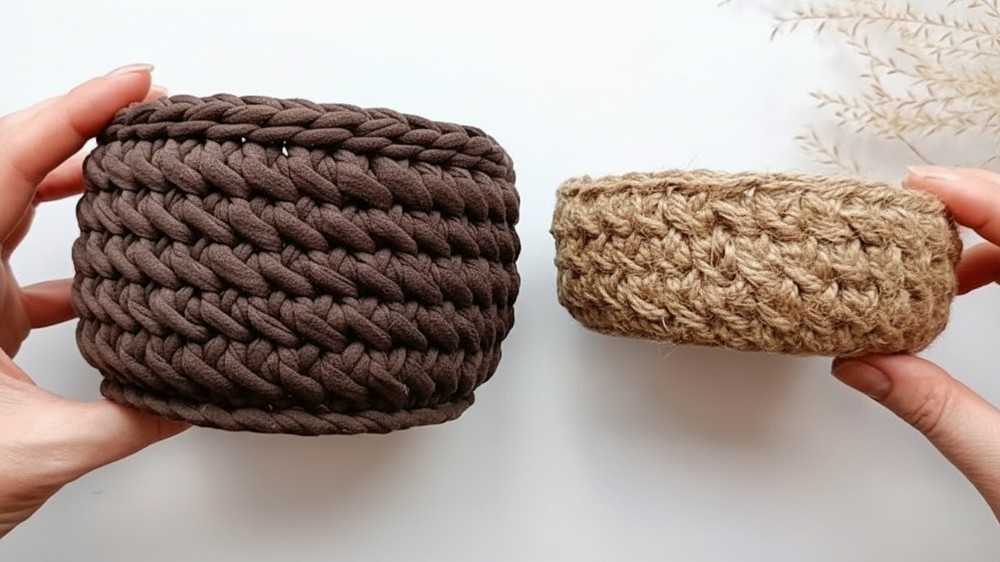
This jute basket pattern results in beautifully rustic storage pieces that are both useful and attractive in your home. Made from natural jute twine, the finished baskets have a strong, earthy look that fits well with modern, boho, or farmhouse décor styles.
Crochet Pattern: Jute Basket with Two Stitch Variations
Skill Level
- Intermediate: Knowledge of single crochet (sc), slip stitches, working into splits of stitches, and joining rows is recommended.
Preferred Materials
- Jute Twine:
- Two-strand jute twine, approx. 2 mm thickness, with a density of 1100 Tex (ensure uniformity in thickness and color, with minimal debris).
- Alternatives: Cotton cord, knitted yarn, or any fabric yarn with similar thickness.
- Hook Size: Use 5.5 mm crochet hook as the primary tool. An auxiliary smaller hook is recommended to assist with tighter stitches.
- Optional Materials:
- For combining materials, use leftover cords, yarn, or twine.
- Scissors: To cut thread.
- Tapestry/Darning Needle: For weaving in ends.
Finished Size (Basket)
Measurements will vary according to material, hook size, and tension. This pattern is highly customizable; adjust the number of rows and the base size to achieve the desired height and width of your basket.
Gauge
Exact gauge is not critical for this project. However, work tightly enough to create a stiff structure, not a floppy fabric.
Special Techniques & Tips
- Split Stitch Crochet:
- Define a split stitch by inserting the hook directly into the center of the post of the previous row instead of under the top loops of the stitch.
- Use a smaller, auxiliary hook to avoid stretching the thread unnecessarily.
- Tighten Your Loops: After each movement, ensure the working thread is tightened to the correct level to avoid gaps in the pattern.
- Uniformity: Ensure consistent tension to achieve an even basket shape.
- Heat Treatment: After completing the base, steam it with an iron using a cotton fabric to shape and flatten the bottom.
Pattern Instructions
Step 1: Basket Base
- Start the Base:
- Crochet a flat, circular base seamlessly in a spiral pattern using single crochet (sc) stitches.
- If you’re unfamiliar with making a seamless spiral base, a full tutorial is referenced in the video’s description.
- Heat Block the Base:
- Steam the base to flatten it, allowing it to cool before proceeding.
- This step ensures a well-shaped foundation for your basket.

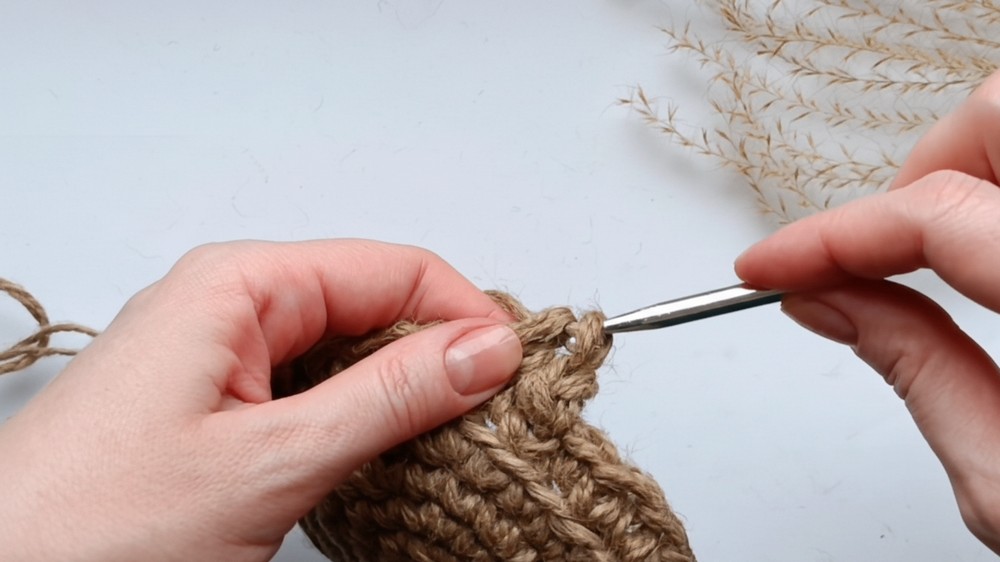
Step 2: Preparatory Row for the Basket Walls
- Row 1 (Preparatory Round):
- Work 1 sc in the back loop only (BLO) of each stitch around the outer loop of the base.
- Insert the hook into the back loops of the braid, or also grab the bar directly behind the stitch loops for added stiffness.
- Tip: Weave in the free end of the working thread as you crochet.

- End of Row 1 – Closing the Row:
- Insert the hook into the center of the first stitch. Pull the working thread through to form a loop. Remove the hook from the loop.
- Reinsert the hook in reverse order (insert into the last stitch, then the previously pulled loop). Hold both loops together, yarn over, and pull through to form the first stitch of the next row.
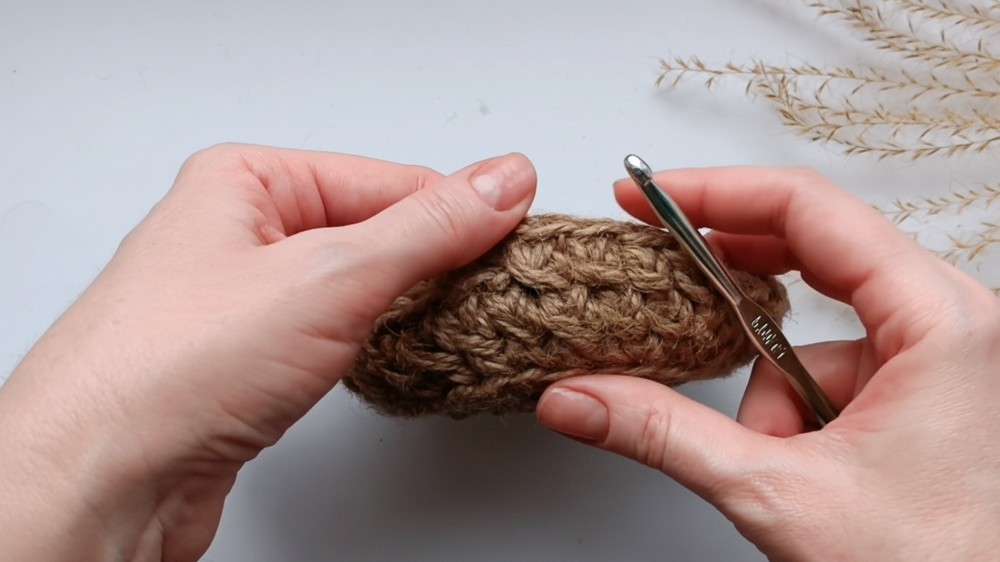
Step 3: Pattern 1 – “Split Stitch” Basket Walls
- Row 2 and Beyond:
- Insert the hook into the center of the stitch post of the previous row (split stitch).
- Pull the thread through the post up to the same height as the working yarn loop on the hook.
Steps to form stitches in this pattern:
- Insert the hook into the center of the current stitch post. Pull the thread through to the height of the working loop on the hook.
- Insert the hook into the center of the next stitch post. Pull the thread up to the height of the working loop on the hook.
- Yarn over and pull the working yarn through all loops on the hook in one movement.
- Closure and Starting New Rows:
- Repeat the same technique described for closing rows (insert the hook into the center of the first stitch, reinsert the hook in reverse order through the loops, and pull the yarn to close the round).
- Begin the new row with the same split stitch technique.
- Repeat: Continue repeating rows in the split stitch style until the desired basket height is reached.
- After each row, gently shape and straighten the walls to maintain consistent structure.
Step 4: Pattern 2 – Enhanced Cross Split Stitch
- Preparatory Round (as in Step 2):
- Work 1 row of sc into the back loops only (BLO).
- Row 2 and Beyond:
- To create this textured pattern, follow the steps below to form the characteristic stitch:
Steps to form stitches in this pattern:
- Stretch the working loop slightly.
- Insert the hook through the split of the stitch post from the previous row. Yarn over and pull up a loop.
- Insert the hook underneath the braid (horizontal bar) between the posts of the previous row. Yarn over and pull up a loop.
- Yarn over and pull the working thread through both loops on the hook.
- Closure and Starting New Rows:
- Close the row using the same technique described above in Step 2 (reinsert the last and penultimate loops in reverse order and close the row).
- Repeat: Continue repeating rows in this enhanced cross-style stitch until the desired height is reached.
Step 5: Edging and Handles
- Finalize the Basket Edge:
- Choose an edging style such as slip stitches, reverse single crochet (crab stitch), or another binding method.
- Reference additional videos/tutorials on binding methods if needed.
- Optional Handle Design:
- Work in the upper edge of the basket to form handles using chains and slip stitches. Design handles according to personal preference.
Step 6: Embellishments (Optional)
Decorate the basket according to your preferences:
- Wreath Addition: Create a small decorative wreath from twine (7-10 wraps around your hand) and secure it with monofilament thread. Decorate it with embroidery using green floss for needles, brown for branches, and red beads for berries.
- Combination Materials: Mix jute with knitted yarn for unique textural contrasts.
- Glue or Sew Decorations: Add ribbons, bows, or pendants for holiday-specific decorations.
Finishing and Final Remarks
Basket Shaping
- After completing the basket, use wet-heat treatment: Steam the basket using a cotton fabric for blocking. Straighten and form the basket while damp. Allow it to cool in the desired shape.
Customization Ideas
- Experiment with different materials like knitted yarn, fabric cord, or thinner cotton for varying textures.
- Adjust the size of the base to make smaller or larger baskets as needed.
Tips to Maintain Pattern Uniformity
- Consistently tighten the loops while working to prevent gaps in the pattern.
- Use a smaller, auxiliary hook when required, especially for split stitches.
- Regularly shape the basket during crocheting to maintain structure.
Conclusion
Congratulations on completing your Jute Basket with Two Stunning Patterns! This versatile design allows for endless modifications, making it suitable for everything from rustic storage to elegant home decor.