Bloom with creativity using this Free Crochet Flower for Application Pattern, adding charming handmade touches to clothing, bags, and home décor effortlessly.
Crocheting has long been a cherished art form, bringing together aesthetics and functionality through intricate threadwork. At its heart lies the captivating allure of floral motifs, a timeless expression of creativity that has adorned garments, home decor, and accessories for centuries. Among these, crochet flower for application stand out as graceful embellishments, offering versatility in their uses and limitless beauty. The delicacy of these handmade blooms adds sophistication to every project, whether decorating table runners, accentuating cushions, or enhancing clothing.
Soft Crochet Flower for Application to Style Clothing or Home Décor

These flowers can be used independently or as part of a series, embellishing larger projects with bursts of floral charm. Whether placed on clothing edges, blankets, curtains, or runners, these flowers lend purpose and beauty to any application.
With thoughtful guidance and fundamental crochet techniques explained thoroughly, this pattern lesson empowers both beginners and advanced crocheters to enhance their projects with a highly appealing floral motif. The flower, though small, serves as a testament to how simple threadwork can culminate into something truly magnificent.

Crochet Beautiful Flower Appliqué Pattern
Finished Project Information
- Purpose: Crochet flower for appliqué or embellishment.
- Skill Level: Intermediate.
- Gauge: Not essential for this project. Ensure all stitches are consistent throughout.
- Finished Size: Each flower measures approximately 2–3 inches depending on yarn and hook size.
Materials
- Yarn:
- Type: Medium-weight yarn (#6 cotton thread, red color used in the tutorial). You can choose another yarn type or color based on your preferences.
- Weight: DK or cotton thread recommended for appliqué projects.
- Hook Size:
- 4.0 mm hook (or use the size recommended for your yarn).
- Scissors: Essential for cutting yarn ends.
- Tapestry Needle: To weave in ends.
Pattern Instructions
Special Techniques
- Magic Ring (mc): Wrap the yarn around your fingers to form a loop and use a hook to pull the yarn through. Chain 1 or 2 to secure the magic ring.
- Petal Formation: Involves turning work after chaining and making increases to craft the petals.
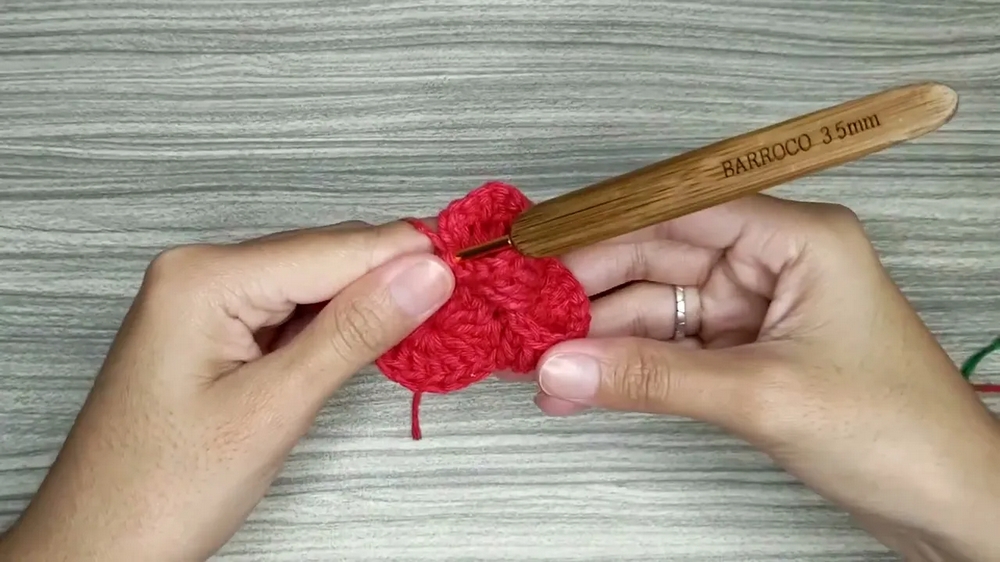
Step 1: Flower Center
- Make a Magic Ring:
- Wrap the yarn around your fingers and create a loop. Pull the yarn through using the hook and secure it with ch 2.
- Round 1:
- Work 16 dc into the magic ring.
- Pull the tail of the ring to tighten the center.
- Join with a sl st into the first dc.

At the end of this step, the flower center is formed.
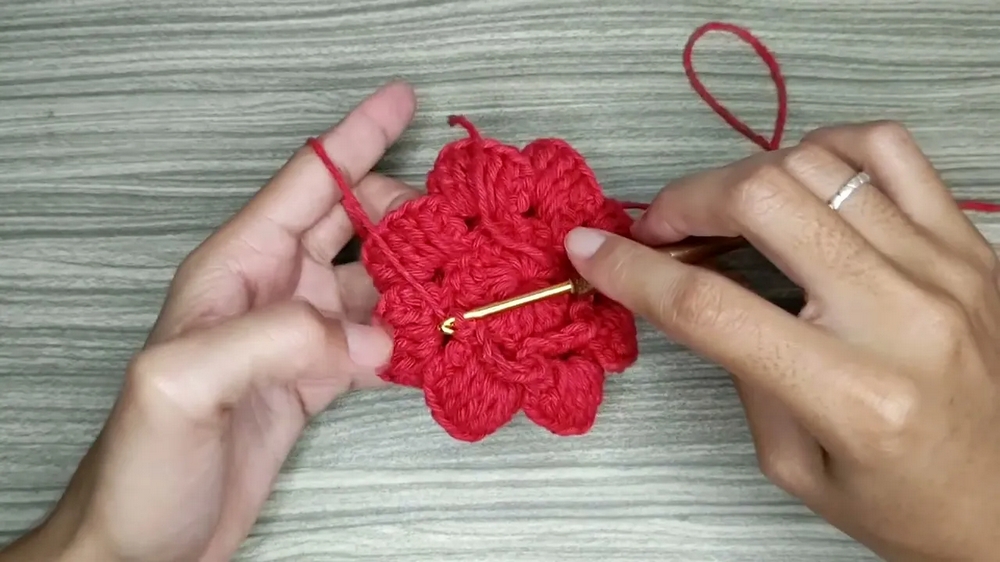
Step 2: Creating the Petals
- Begin Petal Base:
- Ch 5, skip 2 dc, and insert in the 3rd dc with sc.
- Repeat around until you form 8 loops (one for each petal).
- First Petal:
- Turn work after the last sc.
- Work ch 2, then 11 dc into the first loop.
- Turn to the front and insert your hook into the base of the skipped dc at the back. Make sc.
- Repeat for Remaining Petals:
- Ch 5, go to the next loop, and make sc as a joining stitch.
- Turn work. Work ch 2, 11 dc in the next loop, then turn back to the base dc and secure with sc.
- Continue this process until all 8 petals are formed.
Step 3: Adding Loops Around Petals
- Form Chains Between Petals:
- Work ch 5, sl st into the top of the petal, and make sc at the base of the petal into the loop.
- Repeat for each petal, ensuring neat and symmetric loops around each petal.
- Final Loops:
- Join the last loop with sc in the center of the flower.
- Join the last loop with sc in the center of the flower.
Step 4: Completing the Outer Petal Details
- Enhance Petal Shape:
- In each chained loop (from Step 3), work:
- sc, ch 2, 7 dc, ch 2, secure with sc back into the same loop.
- In each chained loop (from Step 3), work:
- Repeat Around:
- Work the same pattern into all 8 loops evenly until petals are complete.
- Work the same pattern into all 8 loops evenly until petals are complete.
Customization Ideas
- Change Colors: Use multiple colors for a vibrant effect. Alternate petal layer colors or use gradient yarns.
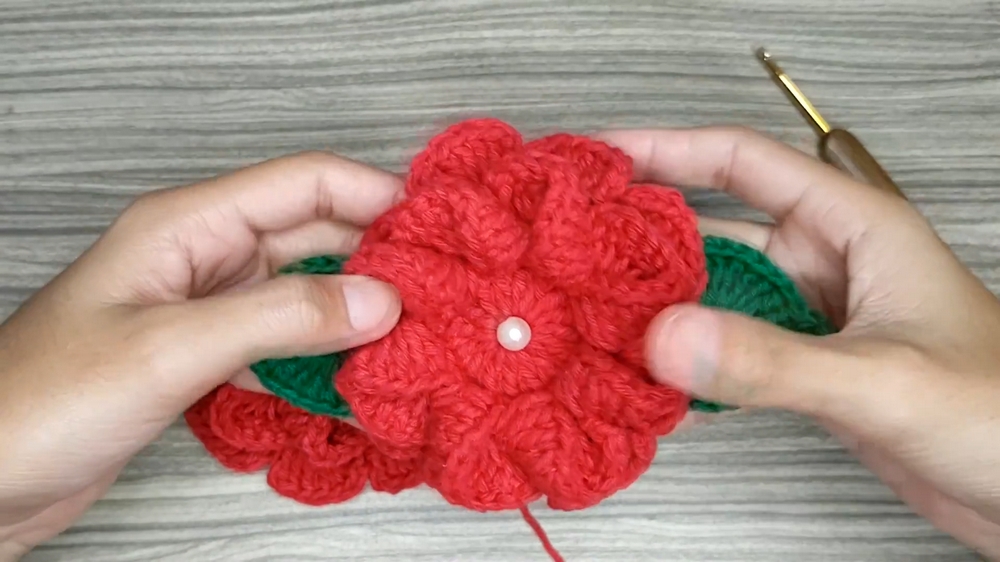
- Add Beads/Rhinestones: Sew beads or rhinestones onto the center of the flower for added sparkle.
- Size Variation:
- Smaller Flower: Use finer thread and smaller hook.
- Larger Flower: Use thicker yarn with a larger hook.
- Layered Flowers: Crochet multiple flowers and stack them for a 3D effect.
- Use Metallic Thread: For holiday or special event décor, metallic yarn adds a striking touch.
Conclusion
Congratulations! You’ve completed your Crochet Flower Appliqué. These embellishments are versatile and can be added to countless projects for a professional, handmade touch. With practice, you can create variations of this pattern to fit your specific needs.
Tips
- Perfect Petal Symmetry:
- Use stitch markers to track the center points between petals.
- Count stitches carefully to ensure each petal has the same number of stitches.
- Consistent Tension:
- Maintain even tension for smooth and uniform petals.
- Weaving Ends:
- Always weave yarn tails neatly into the back for a polished finish.
Final Remarks
The completed flower features cozy layers of petals radiating from a clean, circular center. Despite the initial crumpling, once the petals are adjusted, the floral design blooms beautifully. It is perfect for applications like adding to table runners, bags, pouches, scarves, or cushions.