Cozy hands await with this Free Crochet Fingerless Gloves Pattern, an easy and stylish project perfect for warmth, gifts, or chic everyday wear.
A brisk autumn breeze swept through a quiet street, sending leaves swirling across cobblestones and reminding passersby of the first chills of the season. The Free Crochet Fingerless Gloves Pattern offers a stylish way to stay cozy while maintaining freedom of movement, blending comfort with everyday practicality. These gloves provide warmth to the hands without restricting finger dexterity, making them ideal for typing, texting, or handling small objects while outdoors or at home.
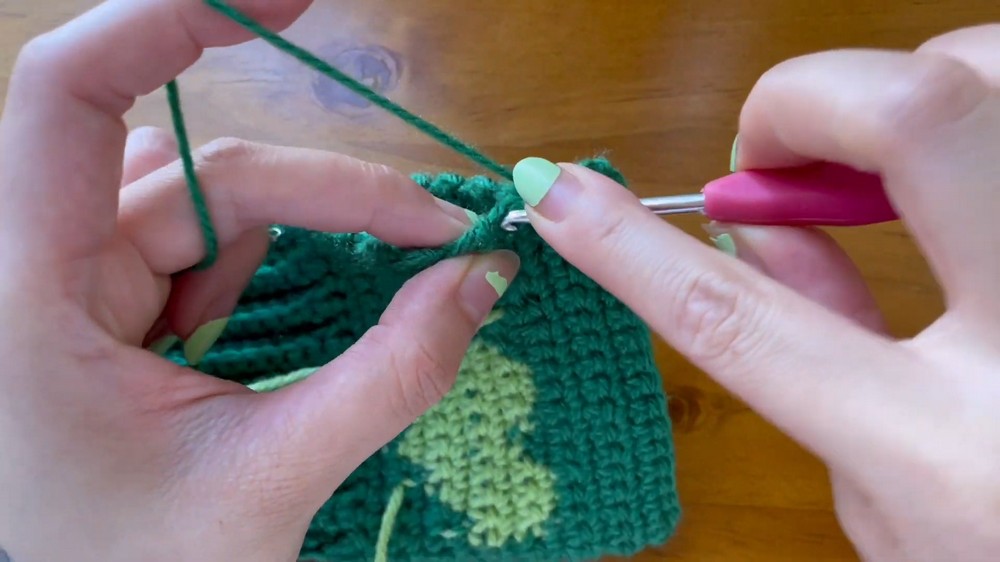
How to Crochet Fingerless Gloves Pattern Easily
Their intricate stitch work adds subtle elegance, transforming simple hand coverings into fashionable accessories that complement any outfit. Beyond their functional appeal, working on this project offers a mindful and calming activity, allowing focus and patience to grow with each completed stitch. Lightweight yet insulating, these gloves are perfect for transitional seasons and provide a soft, personalized touch that ready-made options often lack.
Versatile in size and style, they can be adapted for gifts, casual wear, or layering with other accessories, making them both practical and expressive. Each carefully crocheted detail contributes to comfort, durability, and aesthetic charm, turning a simple necessity into a statement of skill and care. These Crochet Fingerless Gloves harmonize utility and handmade elegance, offering warmth, freedom, and a subtle flair that enhances daily life.

Special Features
- Heart Feature: The gloves feature an adorable heart pattern in an accent color, adding a creative and personalized touch to the design.
- Simple Construction: The gloves are cleverly crafted using a flat rectangular piece of crocheted fabric that is folded and seamed into shape.
- Custom-Fit Design: The tutor emphasizes taking breaks and trying your gloves on as you crochet to ensure a perfect and comfortable fit.
Level of Difficulty
Difficulty Level: Beginner to Intermediate
- The tutorial utilizes simple crochet techniques, such as single crochet, making it accessible to beginners. However, the color-changing for the heart design requires slightly more precision and technique.
- Best suited for crocheters with basic experience; beginners can try the design but may need extra patience during color changes and ribbing.
Tutor’s Suggestions
- Follow Your Own Measurements: While the tutor provides her measurements as guidelines (195mm by 140mm), she strongly advises users to try the gloves on as they work to achieve a perfect fit.
- Take Breaks: Since this project consists of repetitive stitches, taking breaks allows you to avoid mistakes and adjust the fit as needed.
- Experimenting Is Okay: The tutor encourages viewers to tweak parts of the design to suit their own preferences.
- Pay Attention to Color Changes: The heart and color transitions require extra care to keep the design clean and tidy.
Materials Needed
- Yarn: Two colors of yarn (main color and accent color). A wool blend is recommended for warmth and durability.
- Crochet hook: 3.5mm hook.
- Tools:
- Sharp scissors.
- Stitch markers.
- A darning needle.
- Measuring tape.
- Optional Accessories: Safety pins to mark thumb placement and additional accent color for decorative finishing touches.
Step-by-Step Instructions
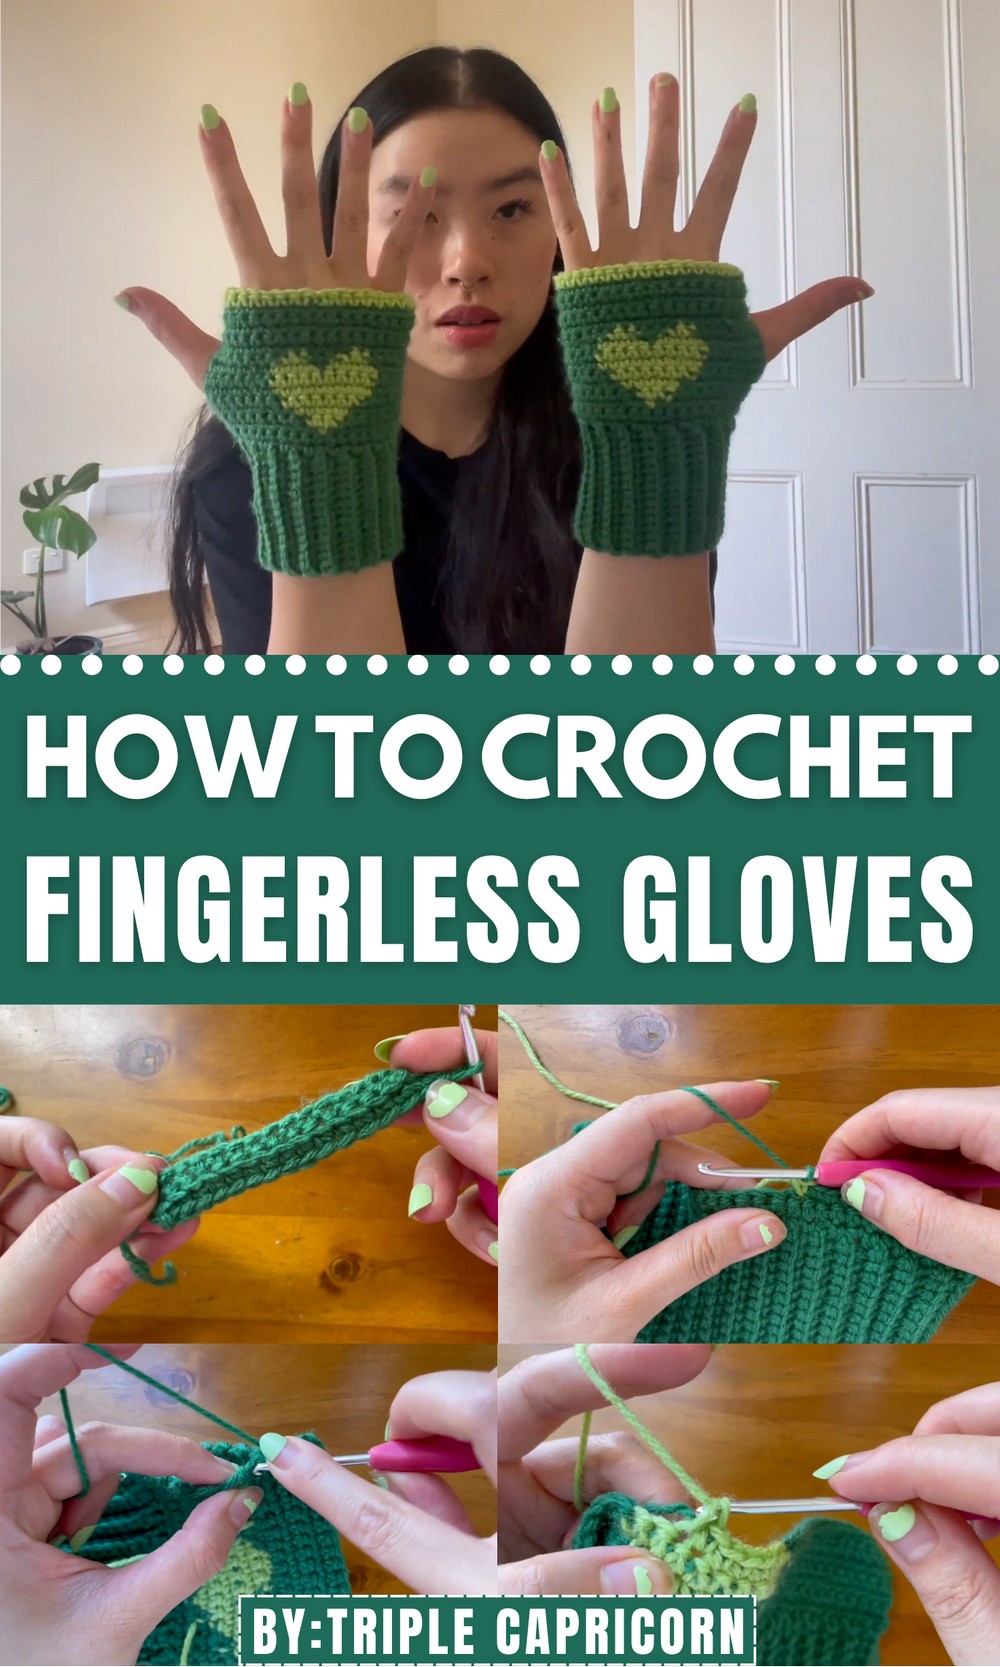
1: Make the Ribbing
- Start by chaining 16 (15 stitches + 1 turning chain). This represents the height of the ribbing.
- Work Single Crochet (SC) across the first row and turn your work.
- For Row 2, start work into the back loop only for each single crochet. This will create the characteristic ribbing pattern.
- Repeat this pattern (working single crochet into the back loop only) for 35 rows to achieve the desired width.
- By Row 2, you’ll notice a ribbed texture forming. Continue this pattern until you’ve completed Row 35.
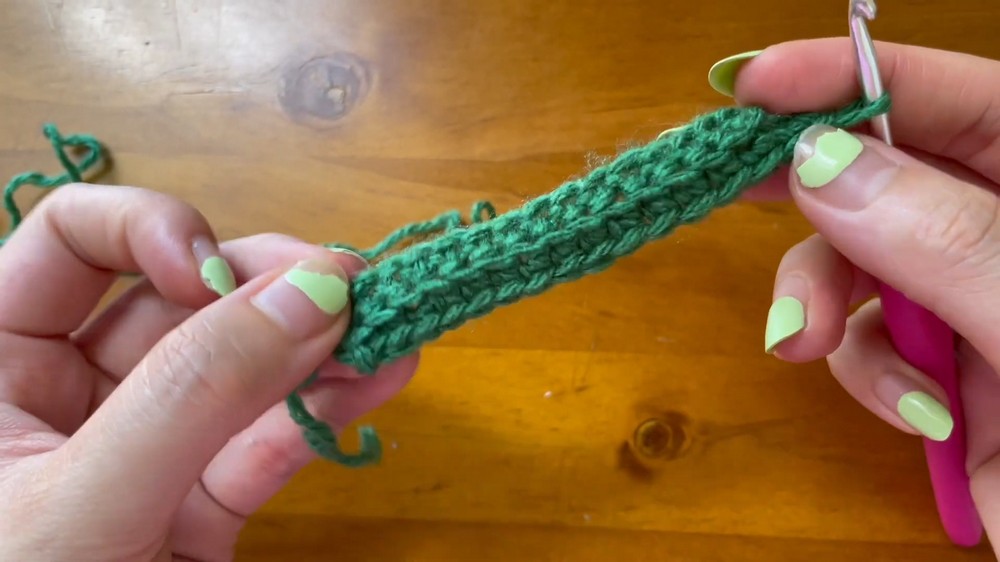
2: Build the Palm of the Glove
- Use the side edges of your ribbing to create stitches for your glove palm. You’ll need to work into 35 stitches along the side edges.
- Identify spaces between each ridge (you’ll find two spaces per row). Insert your hook into these spaces and work single crochet stitches evenly across, making sure to match the number of rows (35) you completed for the ribbing.
- Continue working single crochet stitches for Row 1 and Row 2 of the glove palm.
- Stop once you reach Row 3, where the color changes will begin for the heart design.
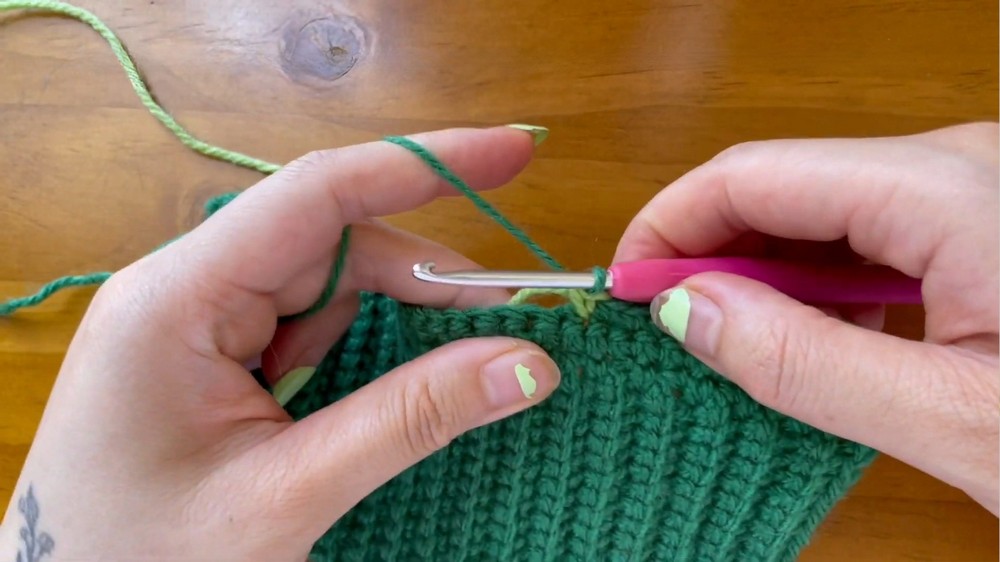
3: Start the Heart Design
- Positioning the Heart: The base of the heart should start at the 12th stitch from the side of the fabric where the seam will be made for the thumb opening. Position the heart slightly off-center to account for the fold around your thumb.
- Row 3: On the 11th stitch, start a color change. Before pulling through the loops with the main color, switch to the accent color by pulling the accent yarn through instead.
- Carry the unrelated color yarn behind your stitches while working the row. For a cleaner transition, carry your yarn for two stitches on either side of the color change before dropping that strand of yarn. Work ahead into row 4.
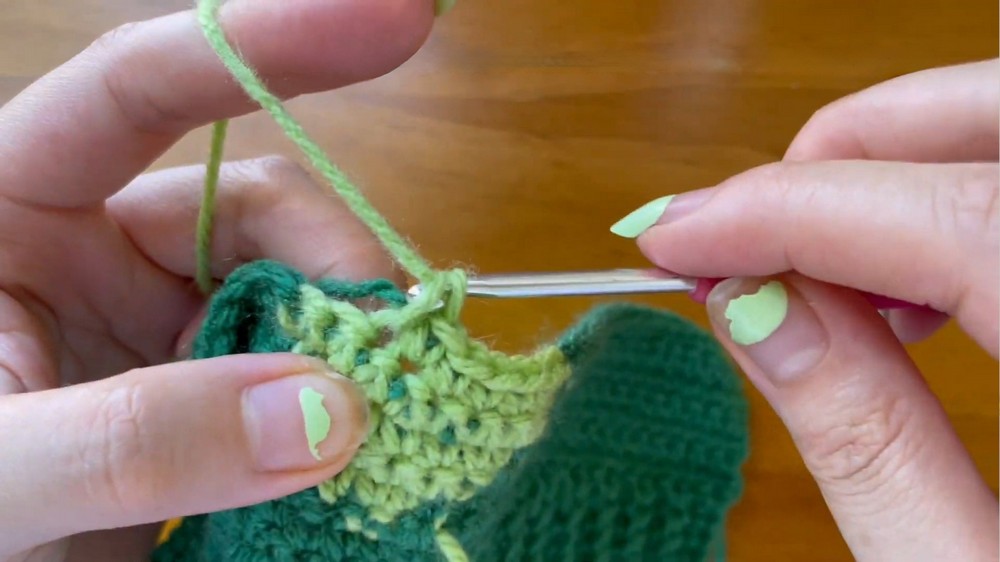
4: Work Up the Heart
- Row by row guidance and color changes:
- Row 4: Switch to the accent color at the 23rd stitch, and work three stitches in the accent color (stitch 23–25).
- Row 5: Switch to the accent color at the 10th stitch, and work five accent-color stitches.
- Row 6: Change at the 21st stitch, working seven stitches in the accent color.
- Row 7: Change at the 8th stitch, working nine accent-color stitches.
- Yarn Under Technique: When close to making the color change (two stitches before), use yarn under instead of yarn over to pull through loops. This results in cleaner color transitions.
Step 5: Finish the Heart and Palm
- Row 8: Switch to the accent color on the 19th stitch and work across nine stitches.
- Row 9 (Heart Peak): Use the accent color for the 8th stitch, carry it across 4 stitches, return to the main color for 1 stitch, then shift back to the accent color for 4 stitches, and finish off the row with the main color.
- Once finished, tie off the accent color and continue working single crochet in the main color for an additional five rows.
6: Seam and Finish
- Once the palm is complete, fold the work in half with the wrong sides facing outward.
- Leave a gap for the thumb:
- Use slip stitches to seam one side of the glove (stitching edges together). For areas that need stretch (like the ribbing), only work into the front and back loops of the edges.
- On the palm, leave thumb space by working four slip stitches at the top of the glove, and then two stitches at the bottom, marking these with safety pins.
7: Add Accent Color
If desired, use the accent color to create a decorative row at the top of the glove with single crochet.
8: Weave in Ends
Secure all your loose yarn ends using a darning needle for a clean and polished finish.
Uses
- Hand Warmers: Perfect for keeping your hands warm while maintaining finger mobility.
- Stylish Accessory: Add a pop of color to your outfit with a cute heart design.
- Great Gift: Customizable gloves are thoughtful and personal gifts for friends and family.
- Outdoor Use: Fingerless gloves are wonderful for activities like texting, knitting outside, or working in cold spaces.
Tutor’s Suggestions
- Check Your Fit: Continuously try the gloves on while crocheting to ensure a comfortable fit.
- Practice Patience with Color Changes: Spend time perfecting the color transitions, as this part is the most detailed in the tutorial.
- Use High-Quality Yarn: Select warm and durable yarns, such as wool blends, especially for cold winter use.
- Don’t Be Afraid to Take Breaks: Crochet can involve trial and error, so don’t hesitate to start over if necessary.
Tip
For smooth color changes, carry your yarn loosely for two stitches on each side of the heart and use the “yarn under” technique. This ensures cleaner transitions without color showing through the wrong side of your work.
Conclusion
This tutorial helps you create cozy, heartwarming Crochet Fingerless Gloves that combine simplicity with style. Whether you’re making them for yourself or as a gift, the project is customizable with color choices and measurements. Perfect for chilly weather, this pattern introduces valuable techniques like ribbing and clean color changes for crocheters aiming to grow their skills.