Stay warm with a Free Crochet Fall Ribbed Sweater Pattern and wear a soft sweater that feels nice in cool weather and looks great for daily outfits.

Snuggle into Autumn with This Free Crochet Fall Ribbed Sweater Pattern
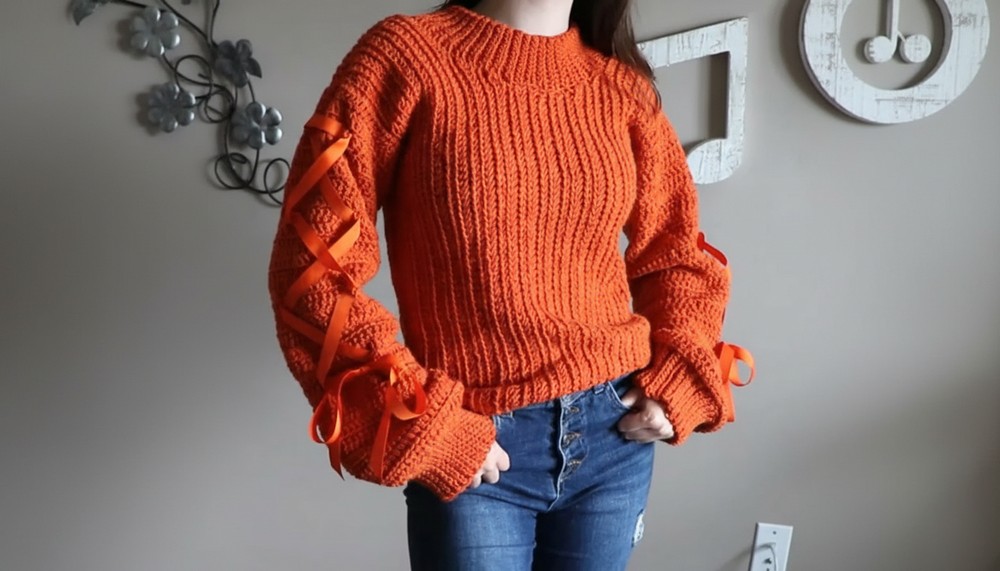
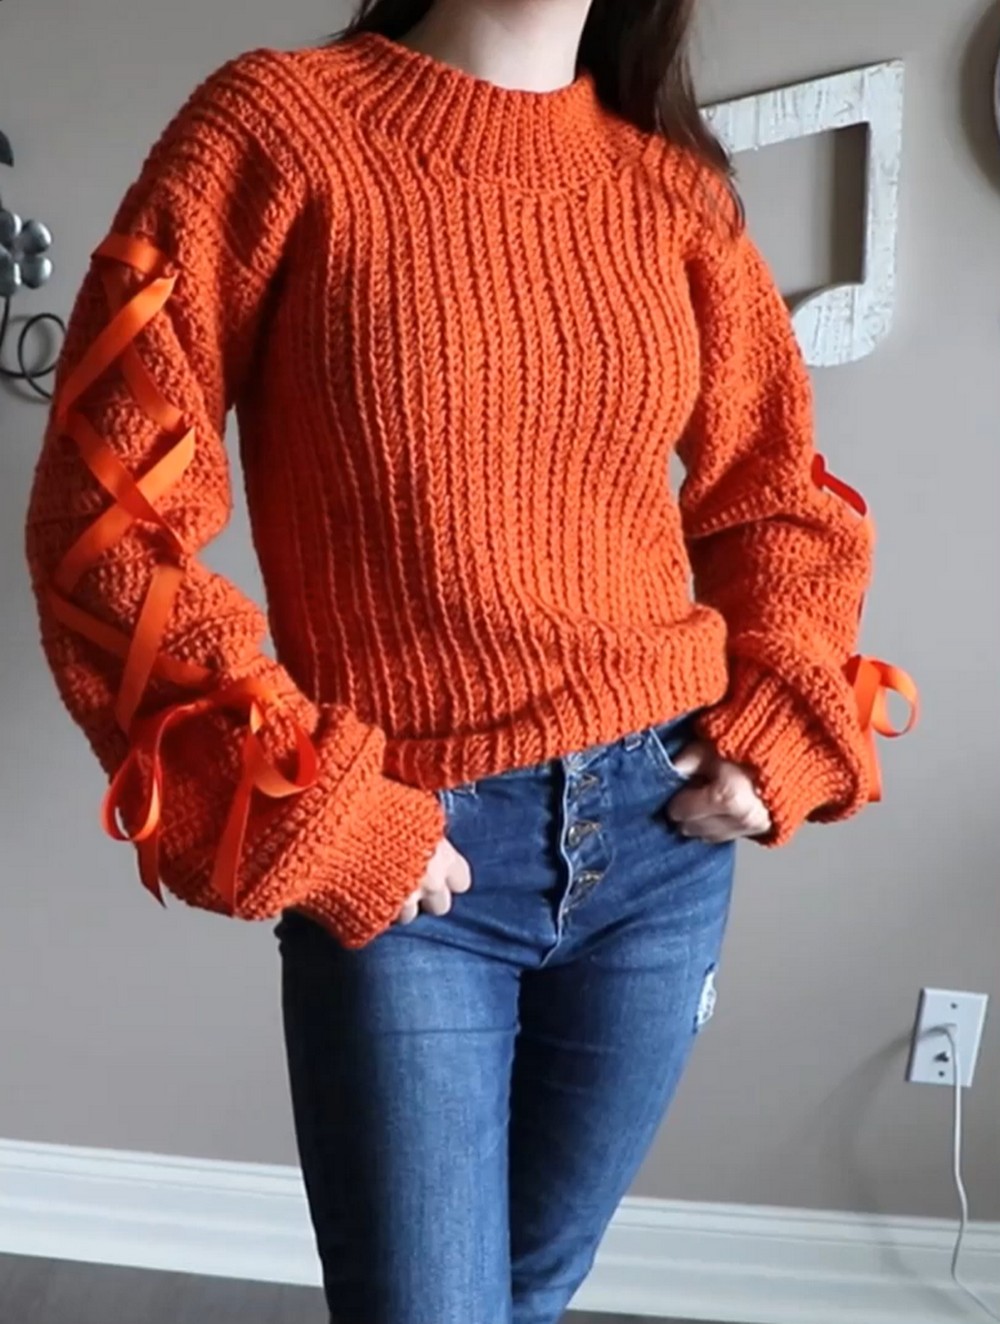
Warm up your fall wardrobe with this stunning Free Crochet Fall Ribbed Sweater Pattern. This cozy and stylish sweater is perfect for chilly days, thanks to its soft ribbed texture that provides comfort and warmth. The design is simple but eye catching, featuring unique details like ribbed sleeves that give it a modern and trendy look.
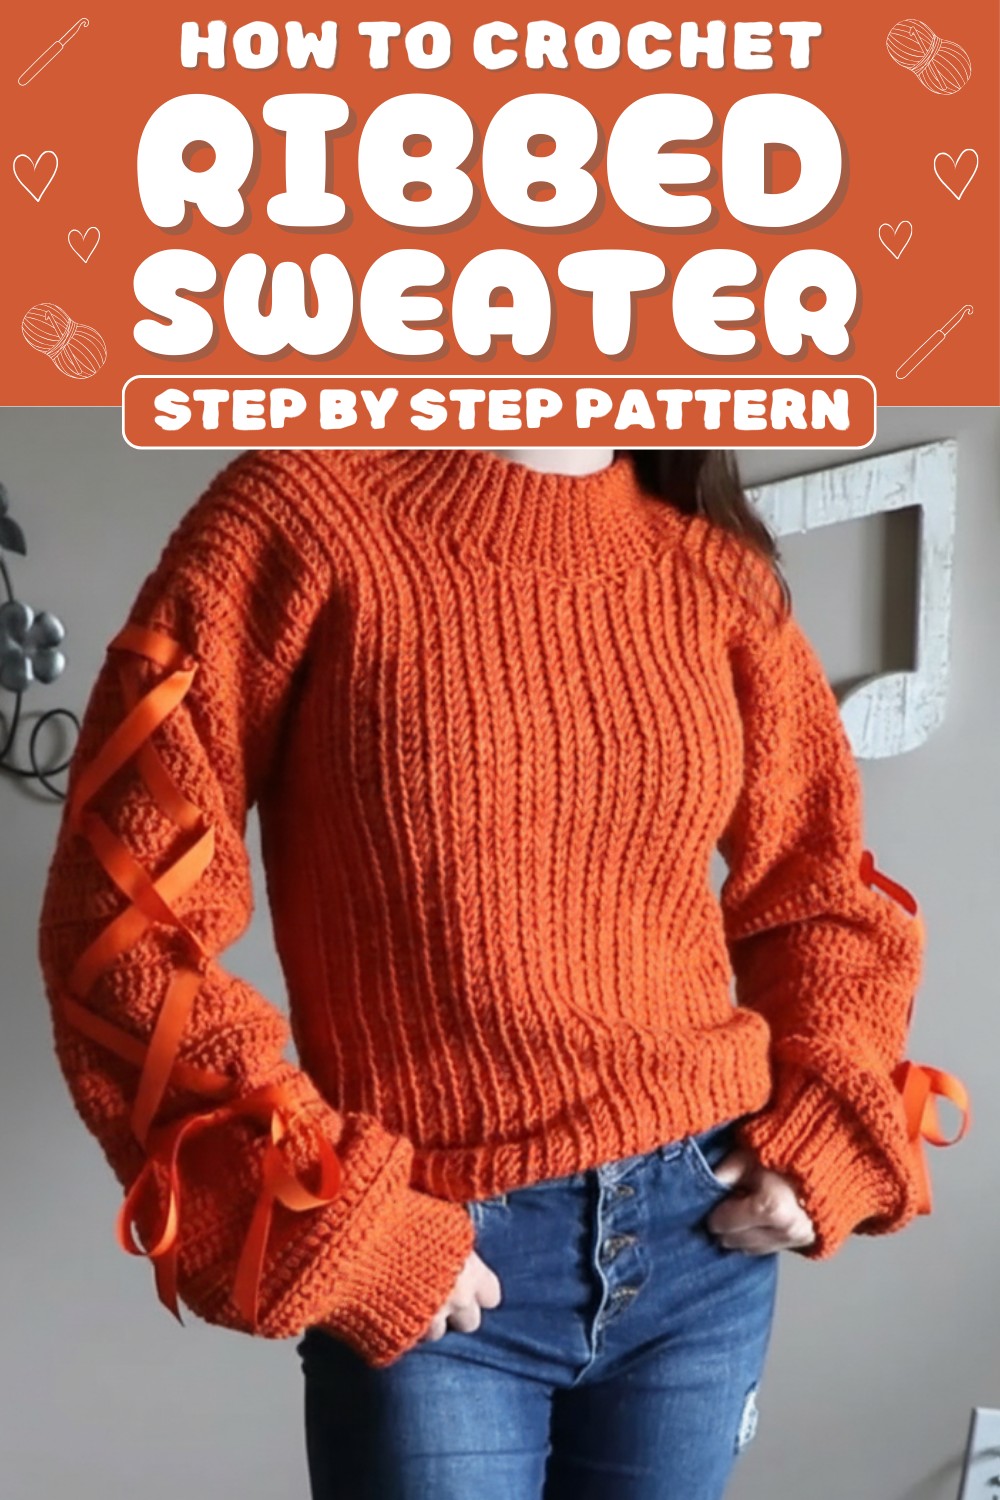
This sweater is great for pairing with jeans, skirts, or leggings, making it perfect for pumpkin patch trips, cozy nights, or family gatherings.
Sung Crochet Fall Ribbed Sweater Pattern
Materials Needed
- Yarn: Choose a soft, medium weight yarn (recommended: worsted or weight 4). Check the video description for brands or options.
- Crochet Hook: Size needed to achieve your gauge (Ann uses a specific hook; typically size G/4.00mm or H/5.00mm will be suitable).
- Ribbon: Optional for sleeve embellishments. Match the ribbon color to your yarn or create contrast.
- Tapestry Needle: For seaming and weaving in ends.
- Measuring Tape: To ensure proper sizing.
- Scissors: For cutting yarn.
Gauge
Achieving gauge is important to ensure the correct finished size of your sweater. The gauge used in the video tutorial is obtaining four half double crochet stitches per inch. Be sure to test your gauge using the recommended hook and yarn.
Finished Sizes
The pattern covers sizes ranging from Extra Small (XS) to 3XL, with the specific number of chains and rows provided for each size directly in the tutorial. For reference, the sweater demonstrated in the video is Size Small.
Special Techniques Used
- Half Double Crochet (hdc): Yarn over, insert the hook, pull up a loop, yarn over, and pull through all three loops on the hook.
- Front Bar Slip Stitch: Insert the hook into the front bar loop of the stitch, yarn over, and pull through directly.
- Ribboning: Weaving the ribbon at regular intervals for decorative sleeve detail.
Pattern Instructions
Step 1: Front and Back Panels
- Chain Base:
- Start with a slip knot, then chain according to your size (e.g., 77 for size Small).

- Start with a slip knot, then chain according to your size (e.g., 77 for size Small).
- Row 1:
- Skip the first chain and start with a half double crochet (hdc) in the second chain. Continue working hdc in each chain across. Chain 1 at the end, turn.
- Row 2:
- Work front bar half double crochet stitches across the row. Chain 1, turn.
- Continue:
- Repeat Row 2 until you have the indicated number of rows for your size (Small: 9 rows). Do not cut the yarn; proceed to neckline.
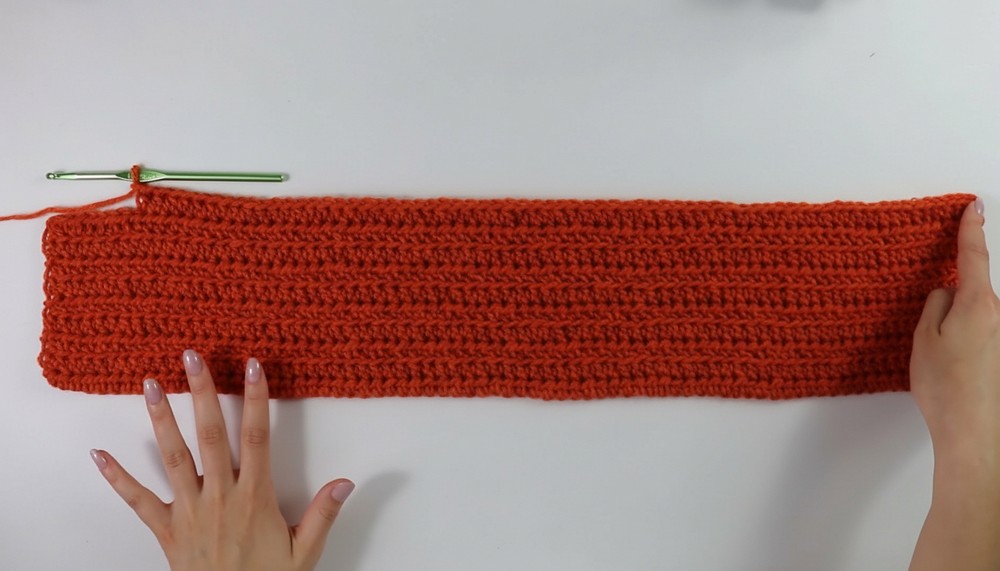
- Repeat Row 2 until you have the indicated number of rows for your size (Small: 9 rows). Do not cut the yarn; proceed to neckline.
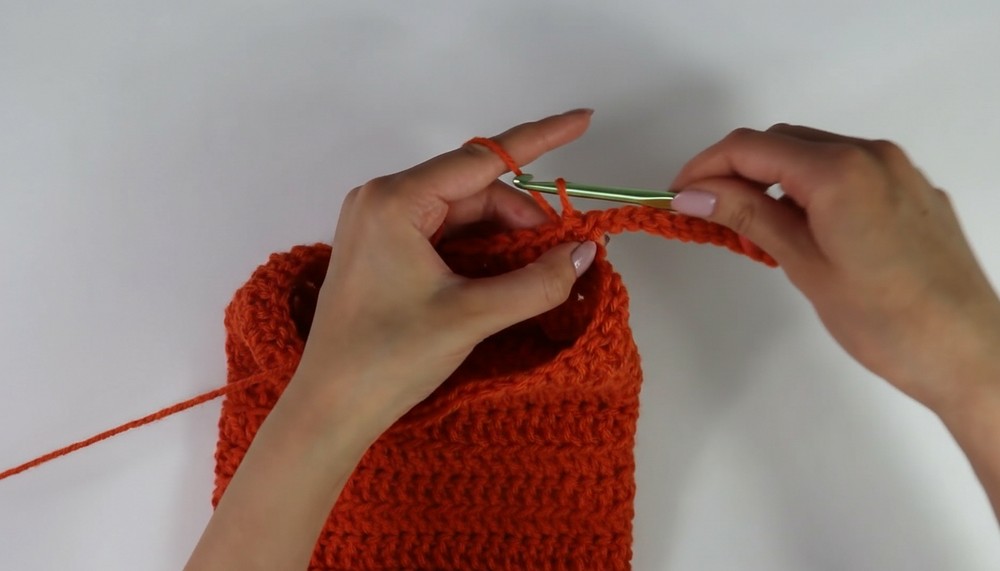
Step 2: Neckline
- On Row 1 of the neckline, work hdc stitches, leaving 8 stitches unworked at the end for shaping.
- For decrease rows:
- Follow instructions for decreasing stitches, ensuring symmetrical shaping by reducing stitches row by row (e.g., leave three stitches, then five stitches).
- Repeat straight hdc rows (Rows 6 to 10) for stabilization.
- Increase rows: Gradually chain additional stitches at the end (e.g., four chains, then nine) to balance the neckline.
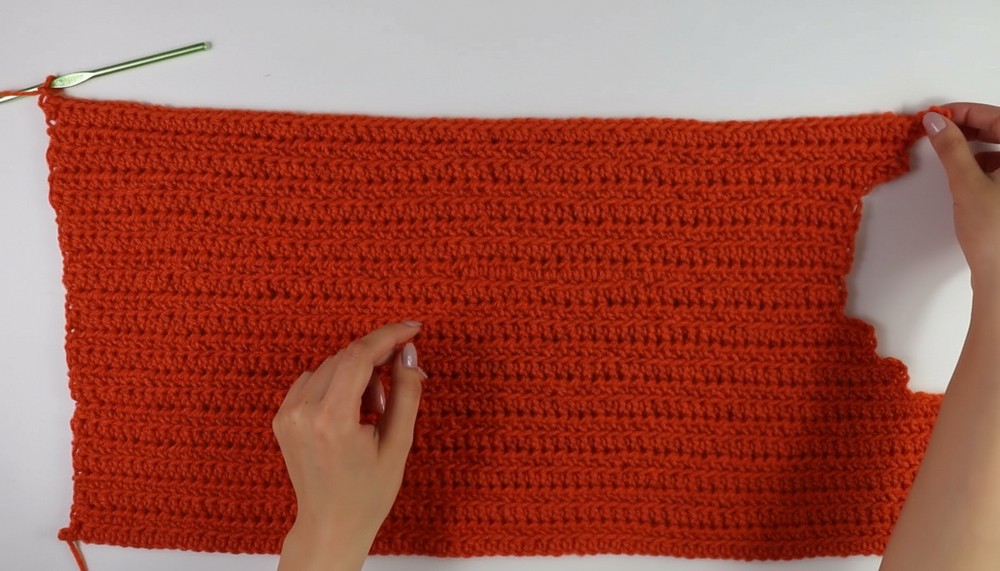
Step 3: Shoulder Strap
- Begin the shoulder strap after completing the neckline.
- Work nine rows of front bar half double crochet as described, attaching chains when needed to extend the strap.
- Repeat the same steps for the second shoulder strap.
Step 4: Seaming
- Using a tapestry needle, whip stitch the panels together on the sides, leaving seven inches from top for sleeve openings.
- Seam together shoulder straps for final assembly.
Step 5: Sleeves
- Chain Base:
- Begin with a chain of 48. Slip stitch into the first chain to join and form a circle.
- Row 1:
- Work double crochet (dc) stitches in each chain around. Slip stitch into the first stitch to join.
- Row 2:
- Work front bar double crochet stitches across. Slip stitch to join.
- Repeat: Continue working rounds of front bar double crochet until you achieve the desired sleeve length (29 rows for Small).
- Cuffs:
- Chain 12 for the cuff base.
- Work back bar slip stitches for rows of the cuff until the sleeve edge is complete.
- Seam the cuff edges neatly.
- Ribboning (Optional):
- Insert ribbons into every 6th row (or as desired) on the sleeve for decorative detail.
Step 6: Collar
- Chain Base:
- Chain 11 stitches for the collar and work rows of back bar slip stitches back and forth.
- Length: Continue working until you have 86 rows to form the length needed for the neckline.
- Attach: Whip stitch the collar evenly around the neckline of the sweater bodice.
Customization Ideas
- Color Variations: Mix different yarn colors for panels, sleeves, or cuffs to create a unique look.
- Ribbon Choices: Use satin or velvet ribbons for an elegant touch.
- Size Adjustments: Increase or decrease stitch count to customize fit based on individual measurements.
- Embroidery: Add small embroidered designs to the panels for personalized decoration.
Tips
- Ensure accurate stitch count to avoid mistakes or uneven alignments.
- Block your sweater (if possible) to even out stitches and edges.
- Use contrasting yarn for visible stitches when seaming.
Conclusion
This sweater is simple yet stylish and perfect for any occasion. With its neat fit, decorative ribbons, and polished finish, it combines functionality and beauty. The pattern is versatile and offers plenty of room for creativity. Be sure to weave in all loose ends securely using a tapestry needle for a final polished look.
Important Final Remarks
With the detailed tutorial linked, you can create a sweater that looks store bought but feels handmade. This project is ideal for intermediate crocheters or beginners looking for a bit of a challenge.