Whip up festive cheer with the Free Crochet Simple Snowman Pattern, creating a charming, quick, and easy decoration for home or gifts.
Bright, cheerful and delightfully simple, this little crochet simple snowman stitches together with charm and ease, all you need is yarn, hook and a dash of holiday spirit. The pattern effortlessly walks you through shaping his round body, attaching the hat, and adding playful googly eyes to bring personality. With his friendly grin and minimal design, he makes an adorable accent that feels handmade and heart‑warming.
Free Crochet Simple Snowman Pattern to Brighten Any Space
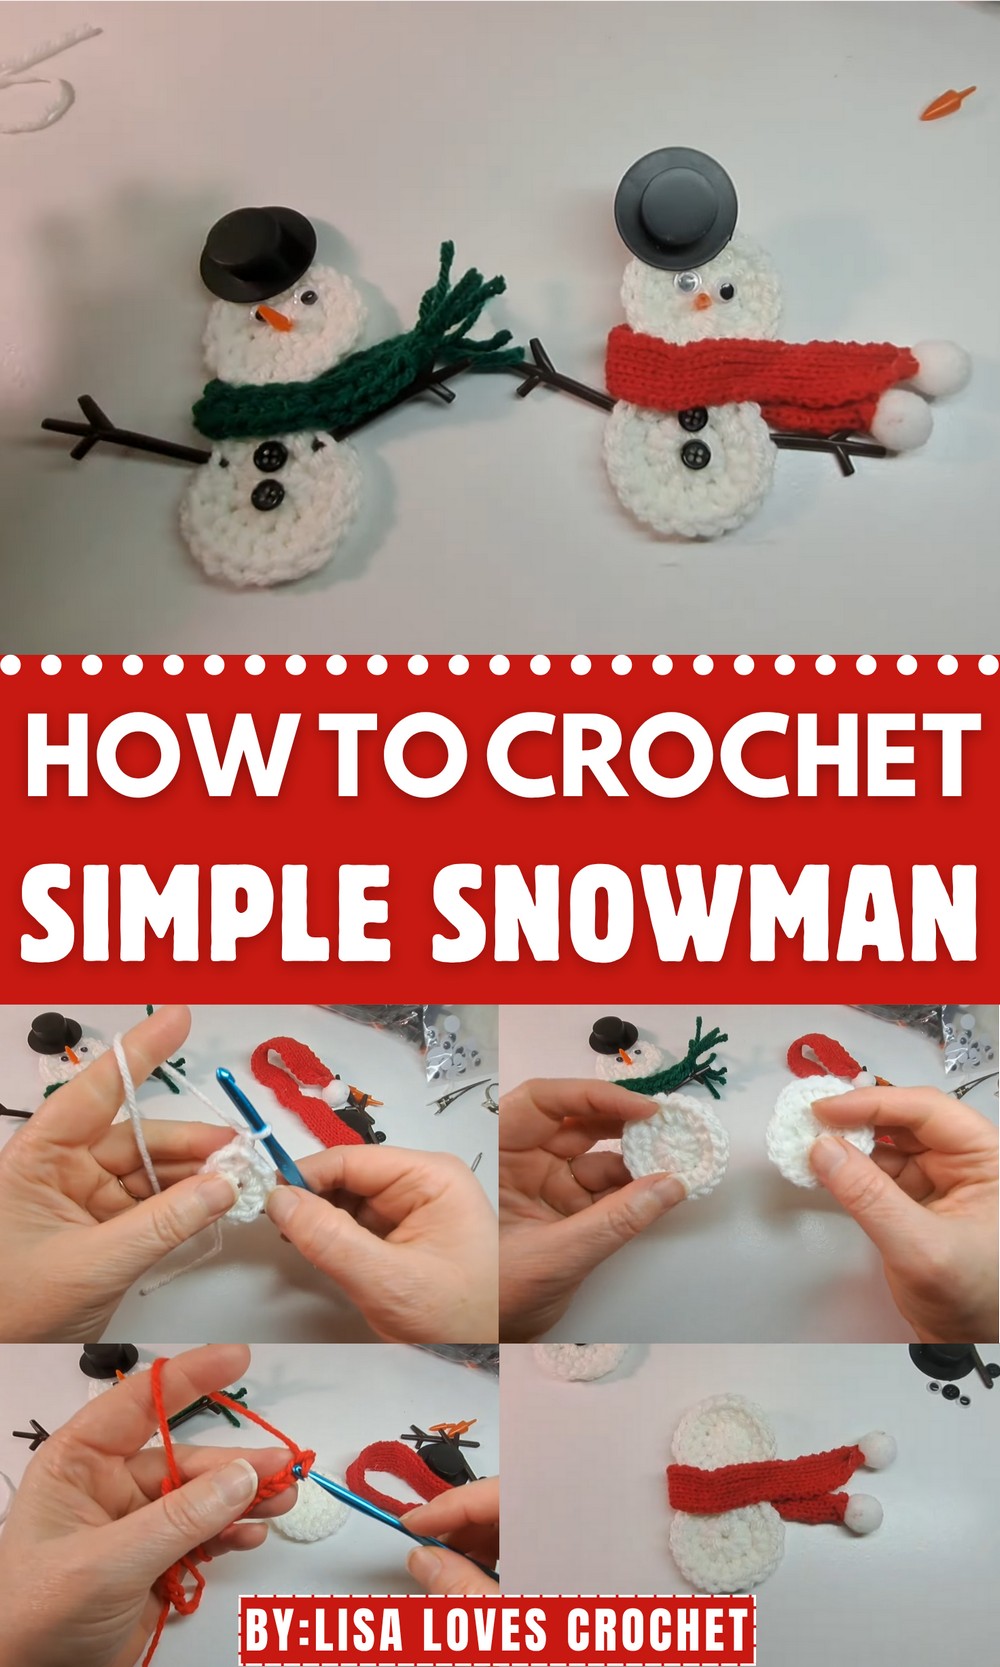
The Free Crochet Simple Snowman Pattern guides you step‑by‑step to create a timeless little character, perfect for quick crocheting sessions. It features a compact size, basic stitches and optional assembly tips that make it accessible even if you’re new to crocheting. Because you only need single‑crochet and simple increases/decreases, the learning curve stays low and the process stays fun. You’ll finish a cute snowman in no time, and use him in multiple ways.
This project offers real benefit: a handmade decoration that doubles as a personalized gift, ornament or pin. He’s lightweight, portable and easy to customize—swap yarn colors, add a scarf or attach a brooch back.
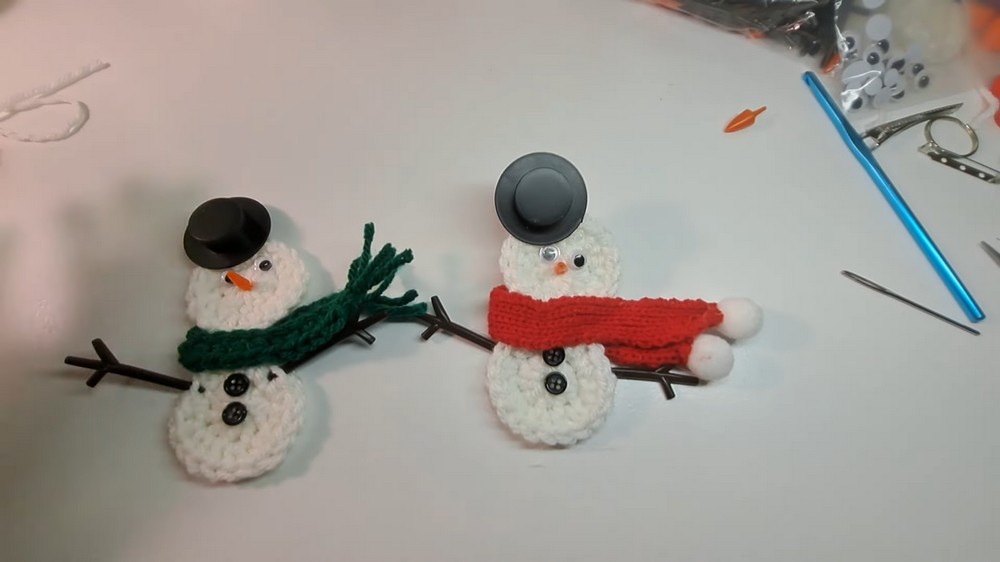
Use him to brighten your tree, deck your shelves or gift to friends and family. The feature‑rich yet straightforward pattern ensures your creation looks polished with little fuss. Whether you’re crafting for the holidays or just want a whimsical companion for your desk, this snowman is versatile, sweet and makes crocheting joyful.
Snowman Pin Free Crochet Pattern
Finished Size
The finished snowman is approximately 3–4 inches tall, depending on yarn weight and tension.
Materials Required
- Yarn:
- White yarn for the snowman (Medium/4-weight acrylic yarn recommended).
- Red (or any color) yarn for the scarf.
- Black yarn for optional mouth or hat.
- Crochet Hook:
- Size H (5mm) crochet hook.
- Safety Supplies:
- Googly eyes (available in snowman-making kits or online).
- Mini accessories from snowman-making kits (e.g., scarves, arms, hats, noses, buttons).
- Hot glue gun (or fabric glue).
- Additional Tools:
- Tapestry needle (for weaving ends).
- Scissors.
- Pins/keychain rings/hair tie bands if customizing the project.
- Optional: Small black buttons for decoration.
Gauge
Gauge is not crucial for this project, but your tension should result in tight stitches to ensure the stuffing and attachments remain secure.
Pattern Instructions
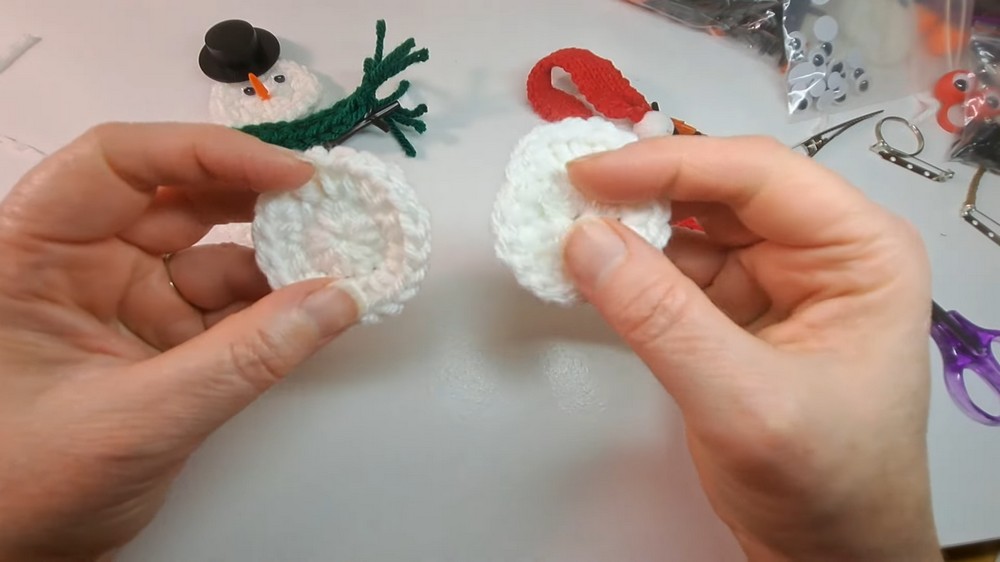
1) Snowman Body (Two Parts)
Part 1: First Snowball
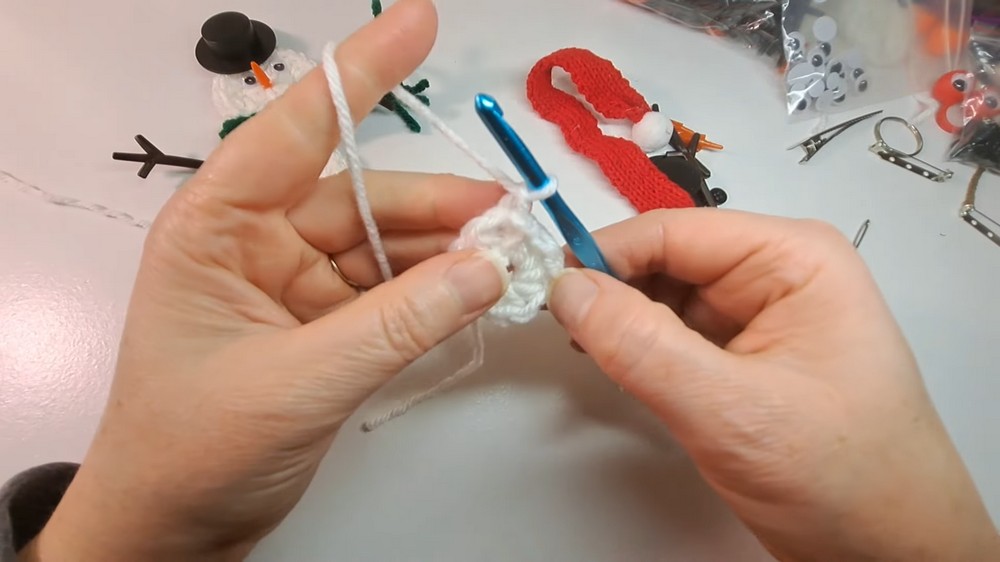
- Create a magic loop using white yarn.
- Round 1:
- Chain 1.
- Work 10 half-double crochets (hdc) into the magic loop.
- Pull the loop closed tightly. Slip stitch to the first hdc to join. (10 stitches).
Round 2: Increase
- Chain 1.
- Work 2 hdc in each stitch around. (20 stitches).
- Slip stitch to the first hdc to close the round.
- Finish off: Cut the yarn, leaving a short tail, pull up a loop, and knot tightly.
- Weave the ends into the stitches to secure.
Part 2: Second Snowball
- Repeat Rounds 1 and 2 to create a second snowball.
- Finish off the second snowball the same way, ensuring both pieces are securely knotted and ends are woven.
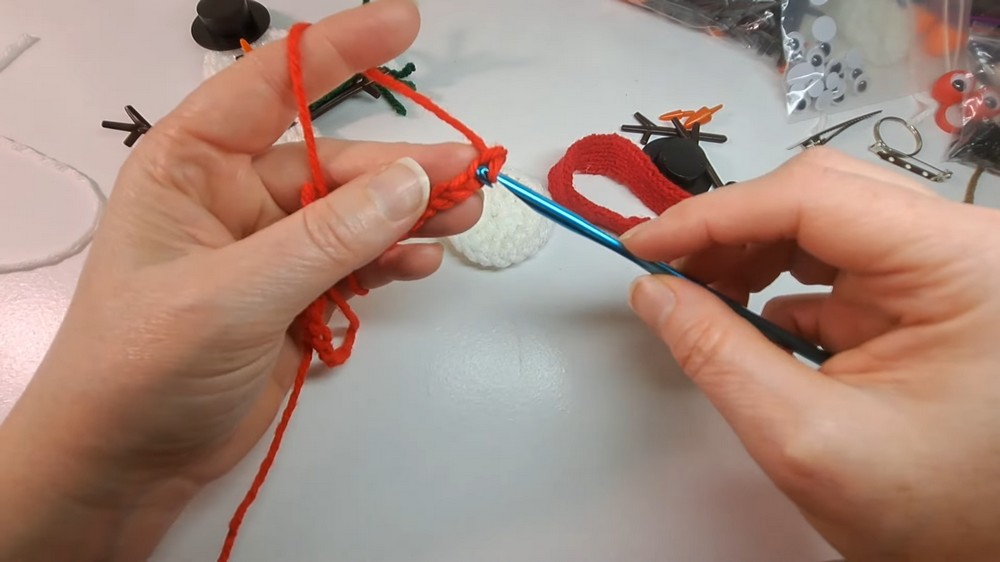
2) Scarf
Step 1: Foundation
- Use red yarn (or the color of your choice) and create a slip knot.
- Chain 21.
Step 2: Crocheting the Scarf
- Starting from the second chain from the hook, work 1 single crochet (sc) in each chain across.
- Finish the row, chain 1, and cut the yarn. Pull up a loop and knot.
Step 3: Tassels
- Cut 3 small strands of yarn (approximately the same length as your crochet hook).
- Using the first strand for one end, insert your crochet hook into the corner of the scarf. Pull up the strand as a loop, and pull the ends through the loop. Tighten to secure the tassel.
- Repeat this process at the other end of the scarf.
3) Assembly of Snowman
Step 1: Attach Snowballs
- Using hot glue, apply a small bead of glue along the center of one snowball (whichever piece you want to use as the base).
- Attach the second snowball on top, pressing gently to secure.
- Allow the glue to dry completely before moving on to the next step.
Step 2: Add Scarf
- Retrieve your scarf and decide how it should wrap around the snowman (crossed at the front or hanging loosely).
- Place a small bead of hot glue along the neck area (intersection of the two snowballs).
- Attach the scarf, securing the glued portion, and fold over the edges as desired. Add extra glue at the backside and ends if needed.
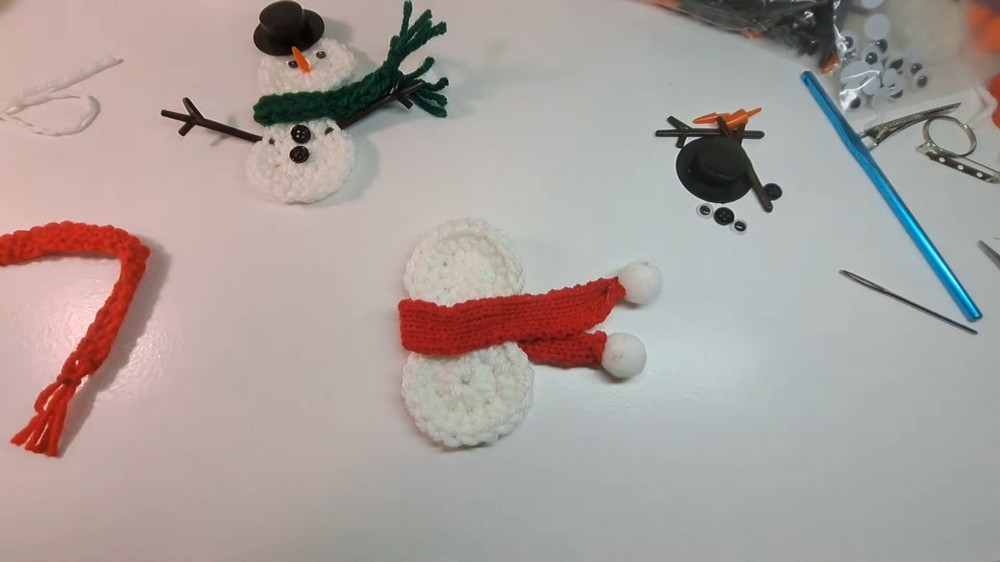
4) Face and Accessories
Eyes:
- Apply a small dot of hot glue where you’d like to place the googly eyes.
- Attach the eyes and press firmly for a few seconds.
Nose:
- Select a small nose (from the snowman-making kit) or crochet one yourself (a small orange triangle).
- Use hot glue to place the nose securely between the eyes. Adjust its position as needed before the glue dries.
Hat:
- If using a hat, decide the placement (e.g., upright or tilted).
- Apply hot glue around the central edge or base of the hat, then press gently onto the top snowball.
Buttons:
- Use small black buttons or other accessories as decorations for the body.
- Apply hot glue at desired button placements below the scarf and secure the buttons.
5) Arms
- If using arms from the snowman-making kit:
- Attach the arms to the snowman using glue or by threading them through the top snowball’s stitches.
- If making arms from yarn:
- Use small strands of brown yarn and attach them similarly with glue or stitching.
6) Adding Hardware
- Pin:
- Test the functionality of your pin before attaching. Open and close it to ensure smooth operation.
- Glue the pin securely onto the backside of the snowman body using hot glue.
- Keychain or Hair Tie:
- Thread a small keyring or hair tie into the stitches of the top snowball.
- Secure the keychain ring or band with glue if needed.
Tips for Customization
- Expressions: Add a stitched smile with black yarn or a crooked grin using felt.
- Colors: Use different yarn colors for the scarf, hat, or body to create themed snowmen (e.g., blue for winter, green for holidays).
- Safety Glue: Always let hot glue cool completely before handling the snowman to ensure accessories stay in place.
Finishing the Pattern
- Check all glued sections for stability.
- Trim any excess yarn or stray hot glue strands.
- Push accessories firmly into place to ensure long-lasting attachment.
Final Words
Congratulations on completing your crochet snowman pin! This charming little snowman is versatile and can be used as a decorative pin, stylish hair tie, keychain, or desk ornament. With easy customization options, you can make multiple unique designs to give as gifts or keep for yourself.
Tips for Maintenance
- Spot Cleaning: If necessary, carefully clean the snowman with a damp cloth, avoiding submerged washing to prevent accessory damage.
- Storage: Store with care in a box or bag to prevent squishing or tangling with other items.
- Durability: Ensure all pieces are securely glued or stitched to prevent movement or loss during usage.