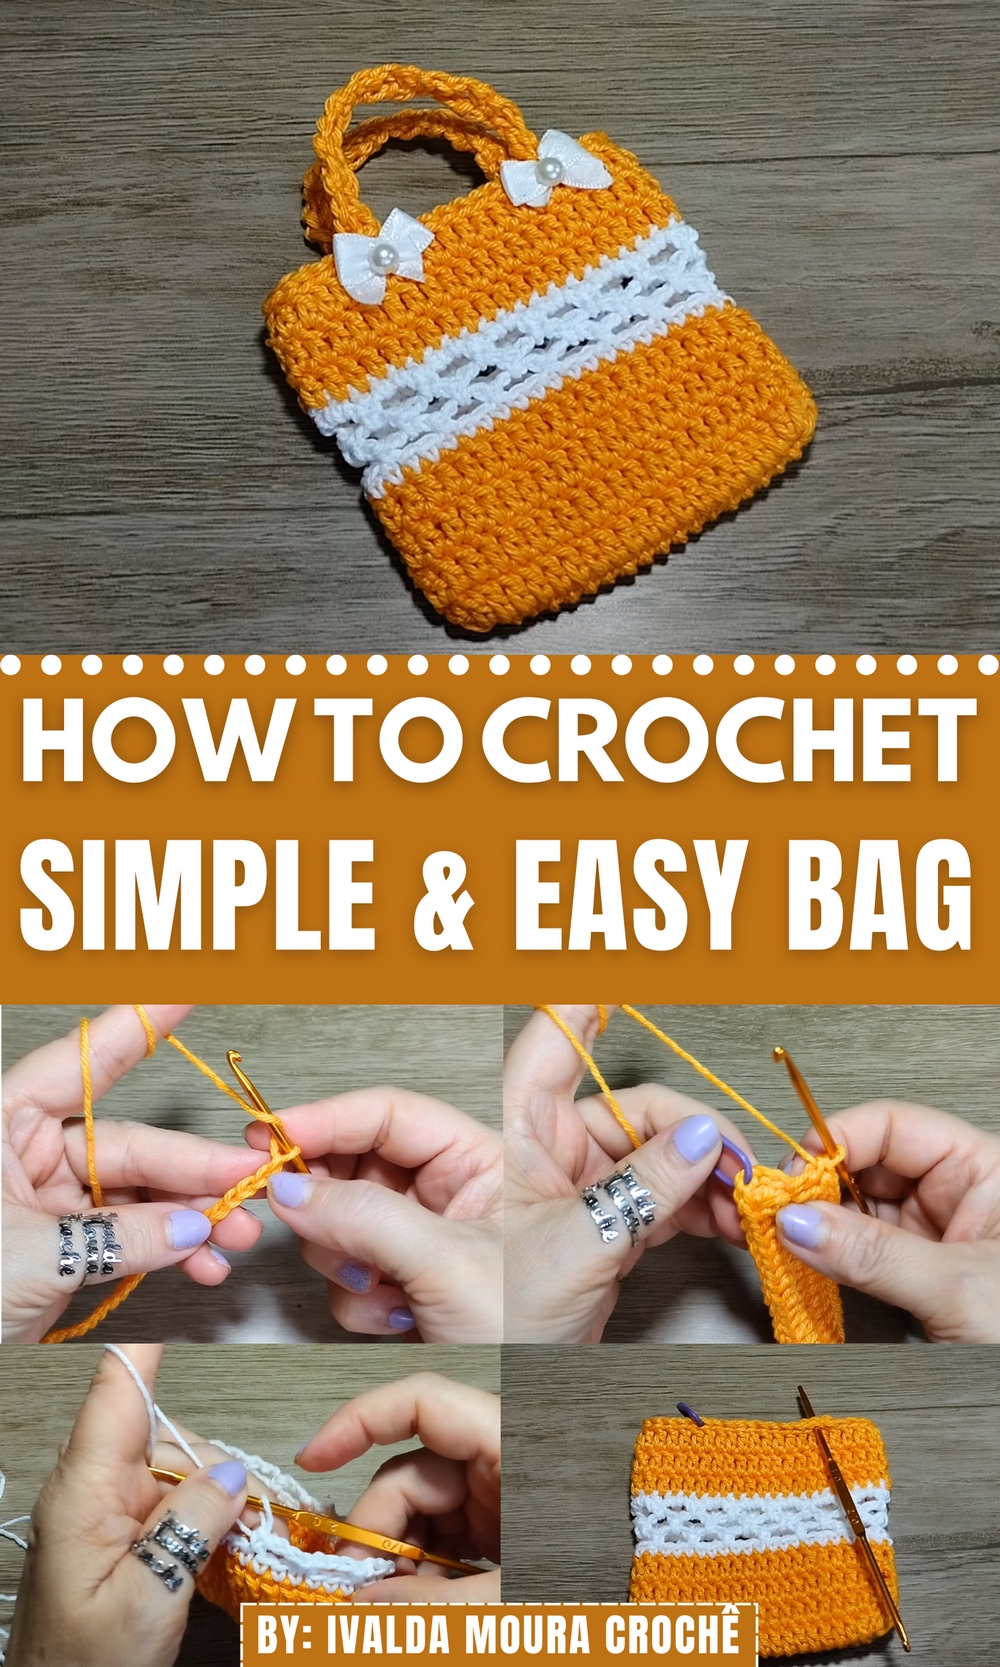
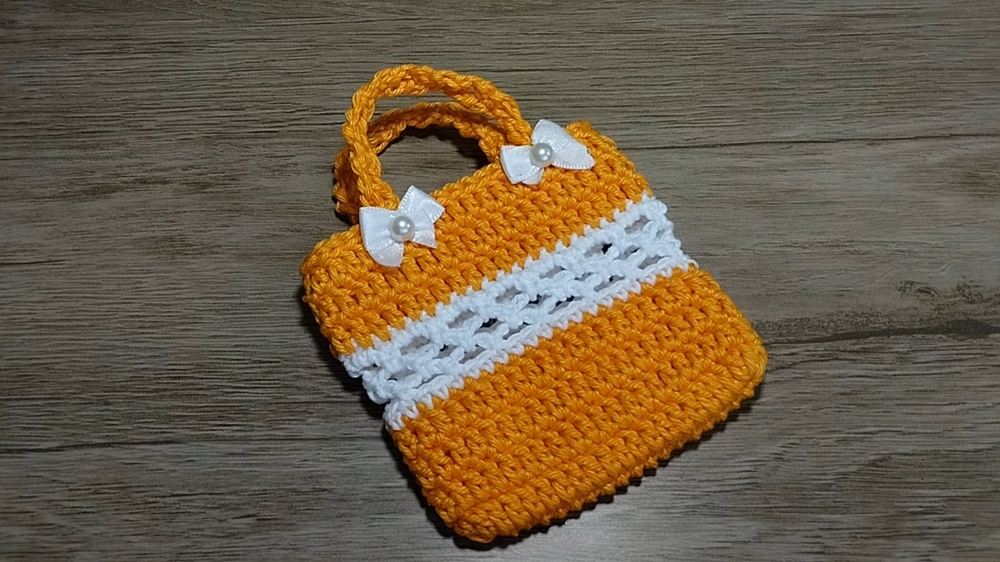
Carry your essentials with ease using this Free Crochet Bag Pattern that combines everyday function, lightweight comfort, and timeless handmade charm.
Market stalls, grocery runs, and everyday errands all have one thing in common, they call for something sturdy, reliable, and stylish to carry what matters. That’s where a handmade crochet bag fits in perfectly. With this free crochet bag pattern, you’ll have a lightweight yet durable companion that can handle daily essentials with ease. Whether you’re packing produce, beach reads, or weekend must-haves, this bag offers both practicality and charm in every loop.
Free and Functional Crochet Bag Pattern That Stretches to Fit More
It’s easy to fold and tuck away when not in use, yet strong enough to hold more than it seems. The airy texture keeps it breathable and flexible, while the straps rest comfortably whether you wear it on your shoulder or carry it in hand. Perfect for everyday use or occasional outings, it adds a subtle personal touch to any routine.
It also makes a thoughtful gift for anyone who values beauty in utility. This is more than just a carryall, it’s a conscious move toward reuse, simplicity, and handmade comfort. Functional, stylish, and endlessly versatile, it brings quiet value into ordinary moments while standing up to life’s little demands, one stitch at a time.
Step-by-Step Instructions
Step 1: Materials Needed
- Duna yarn in the yolk color (#416).
- White amigurumi yarn.
- 2 mm crochet hook.
- Tapestry needle (optional for finishing).
- Satin ribbon bows with half pearls (optional for decoration).
- Glue (“Take 1000” for attaching bows).
- Scissors (for finishing edges).
- Stitch markers for precision.
Step 2: Starting the Base
- Begin with a magic ring or simply a loop. Start by chaining 21 chains.

- Yarn over and count 4 chains from the needle. Insert into the fourth chain and work 1 double crochet (dc) stitch.
- Place a stitch marker on the first double crochet to avoid confusion while closing the round.
- Continue this pattern by working 1 dc in each chain across until the last chain is reached.
Step 3: Creating the Curve
- In the last chain, work 4 double crochet stitches into the same stitch to form the curve.
- Turn the work and continue working double crochets for each stitch along the opposite side.
- Ensure symmetry by mirroring the 17 double crochet stitches on each straight side and 4 double crochets at each curve.
Step 4: Building the Body of the Bag
- Join the round: Finish the curve by slip stitching into the first chain.
- Chain 2 stitches to start lifting the body, ensuring it’s equivalent to a double crochet.
- Continue working double crochet over double crochet for every stitch of the curve and the sides without increasing stitches.
- Gradually, the curved edges will lift, forming the bag’s body.
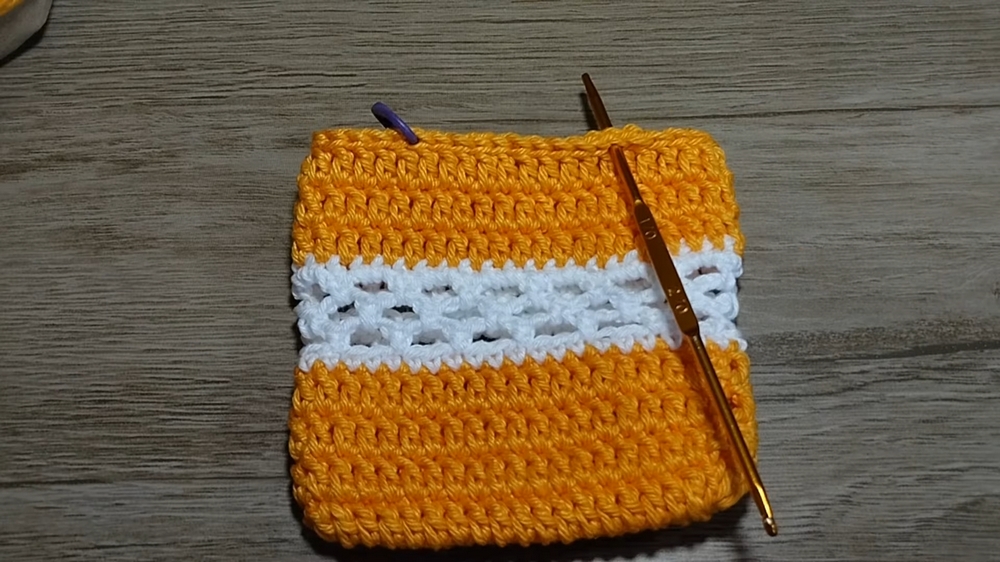
Step 5: Color Transition and Detail Work
- Once the desired height is reached with the yolk-colored yarn, finish off and switch to white amigurumi yarn.
- Begin with a round of single crochet stitches around the bag.
- Then create a decorative pattern of rings: chain 3, skip 2 stitches, and attach to the next with a single crochet. Continue this pattern throughout the round.
- Add 3 rows of decorative rings for detail before finishing with a round of single crochet stitches.

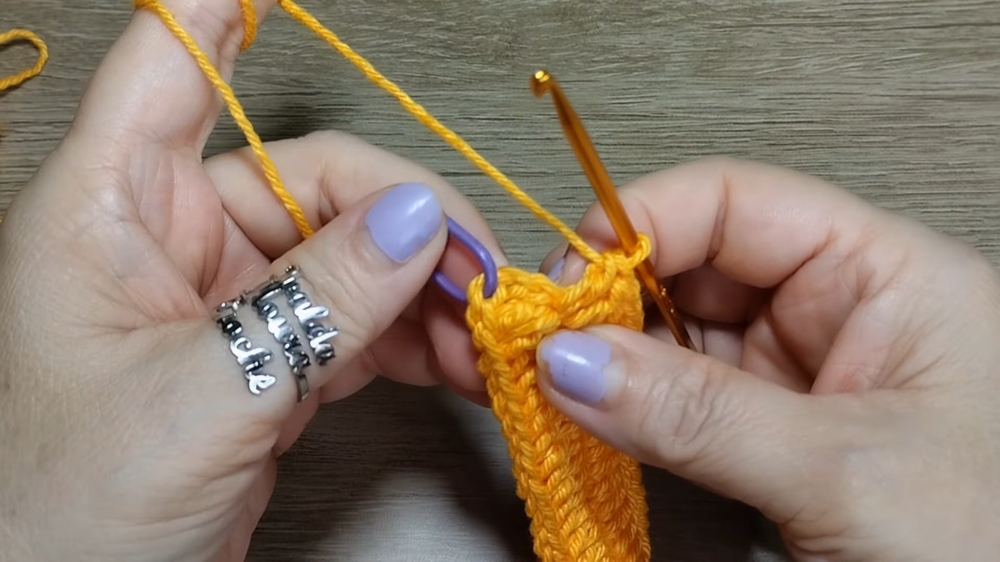
Step 6: Adding the Handles
- Decide handle placement. Skip 5 stitches on each side and mark positions with stitch markers.
- Create blocks of 2 double crochets for the straps:
- Chain 3, work a double crochet in the next stitch, then repeat until the desired strap length is achieved (e.g., 10 rows).
- Attach the straps securely to the bag with the tapestry needle and tie off any loose ends.
Step 7: Finishing Touches
- Add decorations like satin ribbon bows (or crochet bows). Attach with glue to the straps for a refined look.
- Hide loose ends and ensure clean finishes for optimal durability.
Special Features
- Decorative Pattern: The three rows of rings add texture and style to the bag.
- Customizable Size: Adjust the size of the bag by adding or reducing chain stitches in the base.
- Versatile Uses: It can hold various items such as makeup, soap, sweets, or serve as a gift bag.
Difficulty Level
Beginner-friendly – The bag is constructed using basic crochet stitches like single crochet, double crochet, slip stitches, and chains. The video provides clear and detailed explanations for each step.
Tutor’s Suggestions
- Use polypropylene yarn to create a sturdier and larger bag.
- Experiment with different thread thicknesses to adjust size.
- Customize handles and decorations to suit your style.
Uses
- Gift Packaging: Ideal for small items like chocolate or soap.
- Makeup Kit Holder: Suitable for storing lipsticks or compact makeup essentials.
- Small Storage Bag: Perfect for organizing items at home or while traveling.
Conclusion
This crochet bag pattern is a fantastic project for beginners looking to hone their skills and create something functional and beautiful. With its simple design and customizable features, the bag offers endless possibilities for creativity and personalization.
Tip
To make your bag sturdier and more structured, consider adding a lining or using stiffer yarn like polypropylene. This will make it suitable for holding heavier items while retaining its shape.