Enhance your space instantly using this Free Crochet Basket with Lid Pattern that offers a neat, stylish way to store essentials while adding handmade charm.
In homes where every corner tells a story, small storage often holds the most value. A well-placed container doesn’t just organize—it contributes to a room’s calm and character. This is where a basket with a lid becomes more than storage; it becomes part of the setting, quietly efficient while adding charm. A perfect balance of form and function, it provides an elegant way to keep things tidy, whether it’s holding trinkets on a nightstand, organizing keys and mail in the entryway, or keeping yarn tucked neatly in a creative space.
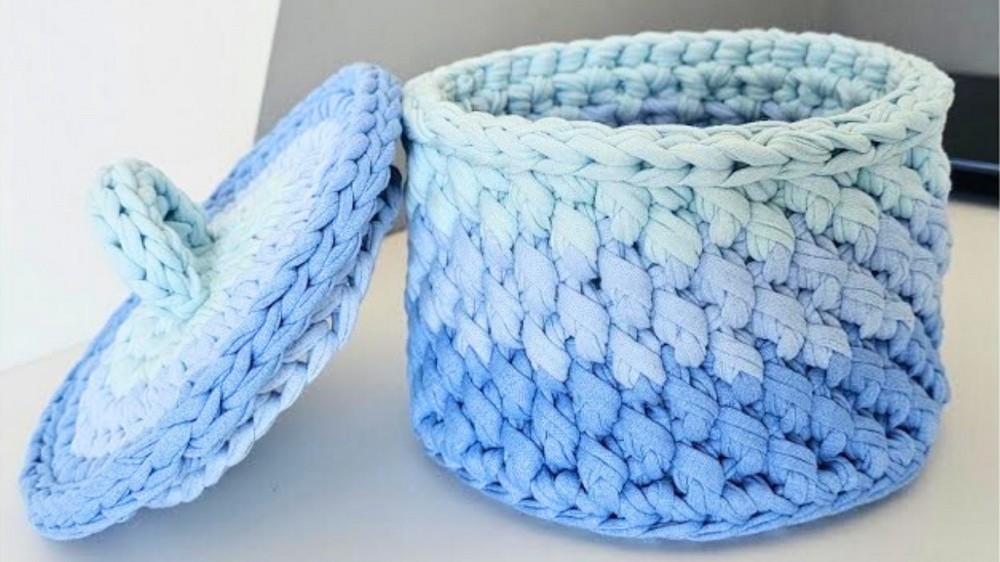
Free Crochet Basket with Lid Pattern for Hidden Storage Perfection

The free crochet basket with lid pattern offers a practical solution for clutter while giving your home a touch of handmade warmth. With its sturdy structure and secure top, it keeps contents hidden and dust-free, making it useful in every room, from the bathroom for cotton pads and soaps to the office for clips and cords.
The lid adds a tailored look that’s rare in soft containers, while the texture enhances both its utility and aesthetic. Whether used as a gift box, a functional decor item, or a stylish organizer, this basket is a thoughtful way to add intention to everyday living. Functional, minimal, and personal, it’s storage that speaks softly but works hard.
Step-by-Step Details
1. Materials Needed
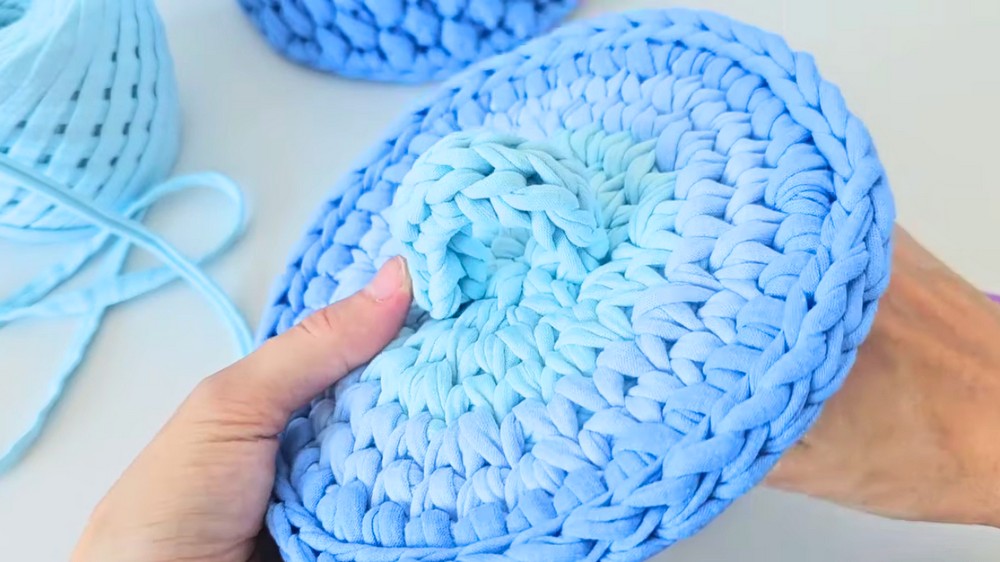
- Yarn: Knitted yarn from the Biscuit Company, recommended thread width is 7mm, which is cut in the face and doesn’t stretch much (resulting in baskets that hold their shape well).
- Hooks:
- Hook No. 5: For tying the wooden base.
- Hook No. 6 (or No. 7): For knitting the walls of the basket.
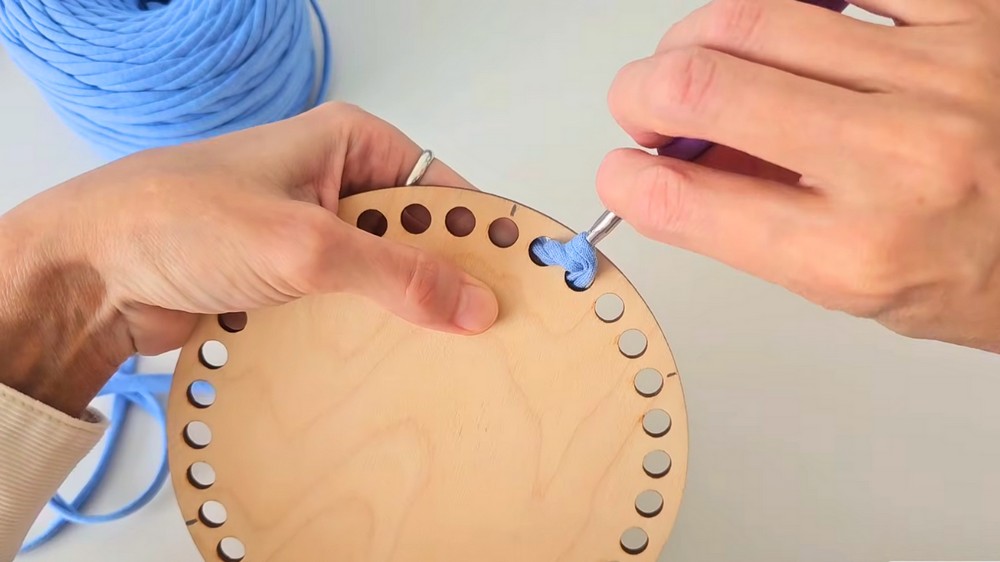
- Wooden Base: 15 cm in diameter with 34 holes (ensure an even number of loops).
- Optional Extras: Polyester cord (alternative yarn option).
2. Special Features
- Seamless Connection: Techniques to hide seams for a polished look.
- Adjustable Sizes: Learn to make adjustments depending on yarn thickness and bottom diameter.
- Multi-Purpose Design: Pattern can be used for various shapes (round, square, etc.).
- Lid Addition: Includes instructions to knit a matching lid in different colors and designs.
3. Step-by-Step Process
Wooden Base
- Mark and Plan Increases: Mark positions for increases (6 increases for 15 cm diameter with 34 holes). Increments can be spaced evenly through holes (e.g., every 5 or 4 holes).
- Starting the Bottom: Tie the bottom with Hook No. 5, ensuring the thread unwinds smoothly to prevent unraveling.
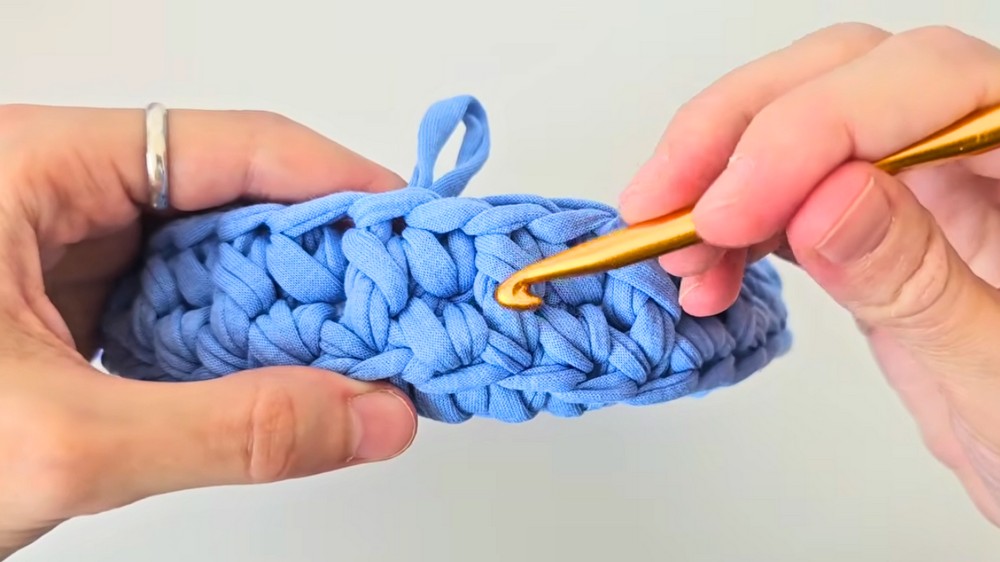
- Create Braid: Knit through all holes to form a tight braid.
- Tie Seamless Connections: Use clever techniques to hide seams so they are invisible.
Walls
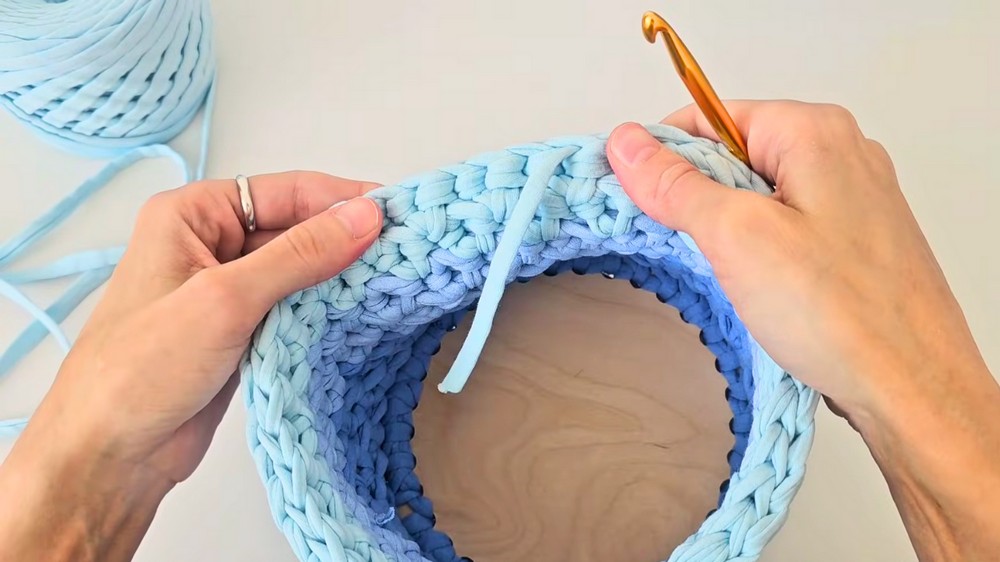
- Switch Hooks: Transition to Hook No. 6 for the walls.
- Form Cone Pattern: Skip one stitch, then insert the hook into the next loop under both legs, creating knobs by stretching and pulling to uniform height for consistency.
- Work Rows: Repeat the cone pattern row by row, adjusting thread tension to avoid large holes between stitches and ensure the basket retains its shape.
Lid
- Start with an Amigurumi Ring: Create a dense base to ensure the lid holds its shape.
- Add Stitches and Increases: Build layers with uniform increases (e.g., 6 increases per row) as the circle expands. Change yarn color if desired for aesthetic variation.
- Edge Binding: Tie connecting loops along the edges to create a clean, braided finish.
- Handle Attachment: Knit a small handle using air loops and attach it securely to the lid.
4. Tutor’s Suggestions
- Thread Tension: Position the thread groove up to keep alignment and prevent unraveling.
- Mark Increases: Use a pencil to mark increase positions for easier navigation as you knit.
- Uniform Shape: Form rows evenly by adjusting with hands as you knit.
- Steam Blocking: For misshapen circles, press under a cotton cloth or steam lightly to reshape.
5. Uses
- Decorative Storage: These baskets are perfect for storing items like craft supplies, accessories, or small snacks.
- Personalized Gifts: With various colors and designs, the baskets can be customized for gifting.
- Multipurpose Shapes: Adapt the cone pattern to fit the shape requirements of your project.
- Lids for Protection: The knitted lid allows for contents to remain protected.
6. Level of Difficulty
- Beginner to Intermediate: While precise techniques are required, Creator clear explanations make the process manageable, even for those unfamiliar with cone patterns or seamless designs.
Useful Tip
When cutting threads for color changes or finishing edges, ensure you hide the tips securely under loops to maintain a clean and polished look.
Conclusion
Through Creator masterclass, you can create a beautiful cone-pattern basket with a seamless lid. This project is ideal for both practical use and decorative purposes, with customizable features suiting various preferences.