Keep little heads cozy and stylish with this Crochet Beanie for Kids Pattern, creating fun and comfy handmade hats for any season.
Keeping children cozy and stylish during chilly days can be both fun and practical. A Free Crochet Beanie for Kids Pattern offers a simple way to create soft, comfortable, and charming hats that are perfect for everyday wear or special outings. These beanies provide warmth while adding a playful touch to a child’s wardrobe, with options to customize colors, textures, and subtle embellishments for a personal flair.
Everyday Crochet Beanie for Kids Pattern for Sweet Memories

Beyond their adorable appearance, these beanies deliver multiple benefits. The soft yarn and snug fit provide comfort without restricting movement, making them ideal for school, outdoor play, or casual walks. Their versatile design ensures they suit a wide range of head sizes, growing with children and offering long-lasting use. Lightweight yet protective, they shield little heads from cold winds while maintaining a stylish and cheerful look.
Materials
- Bulky yarn for the beanie base.
- Medium-weight yarn for pom-poms.
- Crochet hook (recommended sizes: 5.5mm for bulky yarn, 4.0mm for medium-weight yarn), tapestry needle, scissors, and measuring tape.
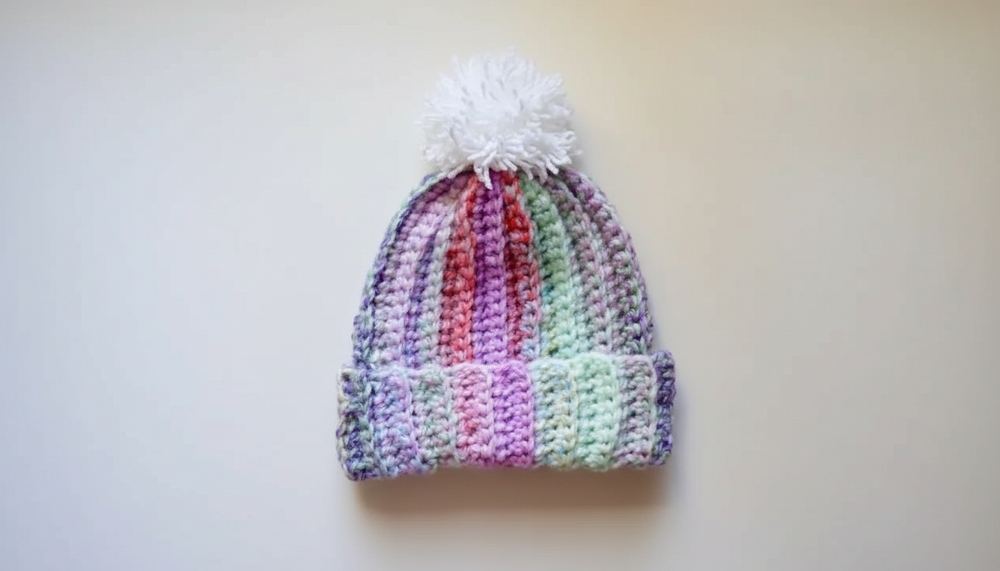
The visual appeal of these beanies comes from their simple, clean lines and carefully formed stitches, giving a polished finish that stands out in photos or casual wear. Perfect for gifting, daily wear, or seasonal updates to a child’s wardrobe, these beanies combine practicality with charm. Their timeless appeal makes them suitable for any season, while the soft texture ensures comfort throughout the day.
Step-by-Step Details
1. Gather Materials
- Bulky Yarn (Number 5 weight) for the beanie. You can substitute with medium-weight yarn if preferred.
- Medium-weight yarn (Number 4 weight) for pom-poms.
- Coordinating crochet hook (sized for your chosen yarn).
- Tapestry needle and scissors.
2. Measure and Chain
- Create a slip knot to begin.
- Chain until you reach your desired length for the beanie’s height. Recommended measurements: 33 chains for bulky yarn (around 11 ¼ inches). For medium-weight yarn, chain 40 stitches.
3. Crochet Base Row
- Begin by working single crochet stitches into the second chain from the hook.

- Insert hook into each chain across the row, yarn over, pull up a loop, yarn over again, and pull through both loops.
- At the last stitch, chain one and turn your work.
4. Back-Loop Single Crochet
- Work into the back loop of each stitch. Instead of inserting your hook under both loops, insert it into the back loop only, creating a ribbed texture.
- Crochet single stitches across the row, chain one, and repeat this pattern for all rows.
- Keep building rows until your rectangular piece measures 13–14 inches wide, depending on the desired fit.

5. Assemble the Beanie
- Once the rectangle is complete, fold it in half lengthwise.
- Use the long tail of yarn and a tapestry needle to whip stitch the edges together. Stitch from top to bottom. The seam should unite both ends evenly.

6. Close the Top of the Beanie
- Using the same yarn, thread through the loose stitches at the top edge of the rectangle.
- Work in and out across the edges, pulling tightly to cinch the top closed.
- For extra security, stitch an X pattern across the opening to ensure no gaps at the top.

7. Add the Pom-Pom
- Wrap medium-weight yarn around your fingers (up to 100 wraps for a dense pom-pom).
- Remove the yarn bundle, tie a tight knot in the middle, and secure with additional yarn.
- Cut all loops on both sides of the bundle to create the pom-pom and trim it evenly.
- Using the pom-pom’s long tails, attach it to the top center of the beanie. Tie securely, hide the tails inside the hat, and trim as needed.
8. Finishing Touches
- Flip the hat to its preferred side (right side out).
- Tuck in any remaining yarn tails within the seams using a tapestry needle.
- Shape and fold the bottom edge for a polished, professional look.
Special Features
- Customizable Sizing: You can adjust the length of the chain and the number of rows to make the beanie fit any head size, child or adult alike.
- Textured Ribbing: The back-loop single crochet technique creates a visually appealing, stretchy ribbed style.
- Quick Project: The tutorial uses bulky yarn, which makes the project fast to complete.
- Pom-Pom Addition: Adding a pom-pom lends a playful and cozy touch to the finished beanie.
Level of Difficulty
The tutorial is suitable for beginners while offering a satisfying challenge for intermediates. Fundamental skills, such as chaining, single crochet stitches, and whip stitching, are easy to grasp, and the clear instructions guide users through every step.
Tutor’s Suggestions
- Sizing Tests: Throughout the tutorial, the instructor recommends testing the rectangle’s fit on the desired head to ensure comfort and proper sizing.
- Customization: You can leave out the flap by shortening your starting chain. Adjust the size based on personal preferences or yarn availability.
- Pom-Pom Variations: Add pom-poms of different sizes or colors for variety and extra creativity.
Uses
- A playful and warm accessory for kids during colder months.
- Makes for a thoughtful handmade gift.
- Can be customized for adults with minor adjustments to size.
Tip
When working the back-loop single crochet rows, periodically stop and pull your work flat to keep the tension uniform. This ensures that the ribbed texture is neat and stretchy without curling, giving the beanie an even, clean finish.
Conclusion
This kid’s beanie pattern is perfect for creating a cozy, stylish hat that’s fun and functional. Through simple techniques such as chaining, single crochet, and whip stitching, you can craft a custom-fit beanie that’s ideal for gifts or winter accessories. The addition of pom-poms makes the project even more adorable.