Start stitching a timeless Crochet One-color Granny Square Pattern and showcase elegant texture, simplicity, and versatility in every handmade creation.
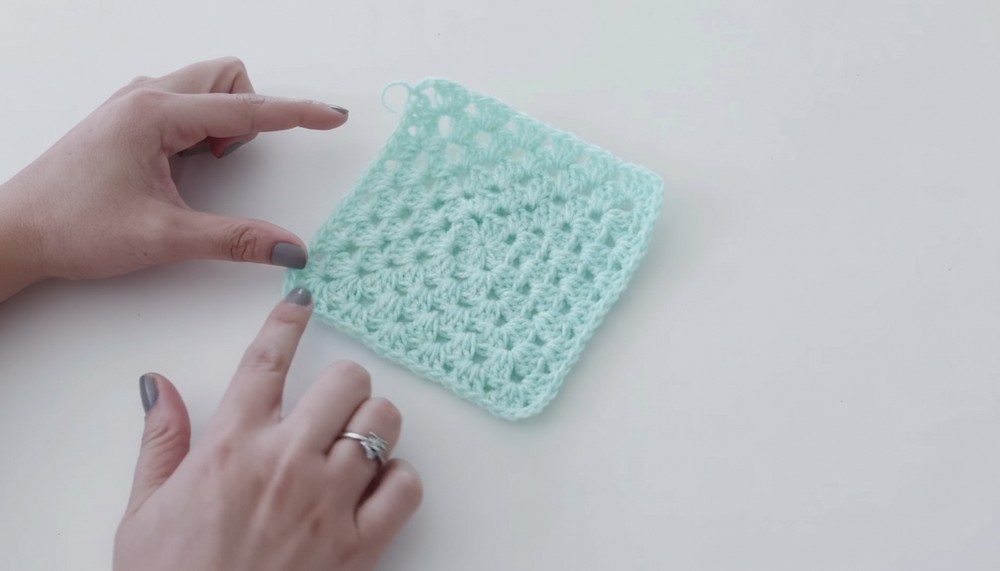
Ever wondered how a simple crochet project can transform into something timeless and elegant? A Free Crochet One-color Granny Square pattern lets you create minimalist, cohesive designs full of charm and versatility. Perfect for blankets, bags, scarves, or even home décor like cushions, this pattern is an excellent choice for beginners learning foundational stitches or experienced crocheters looking for a meditative project.
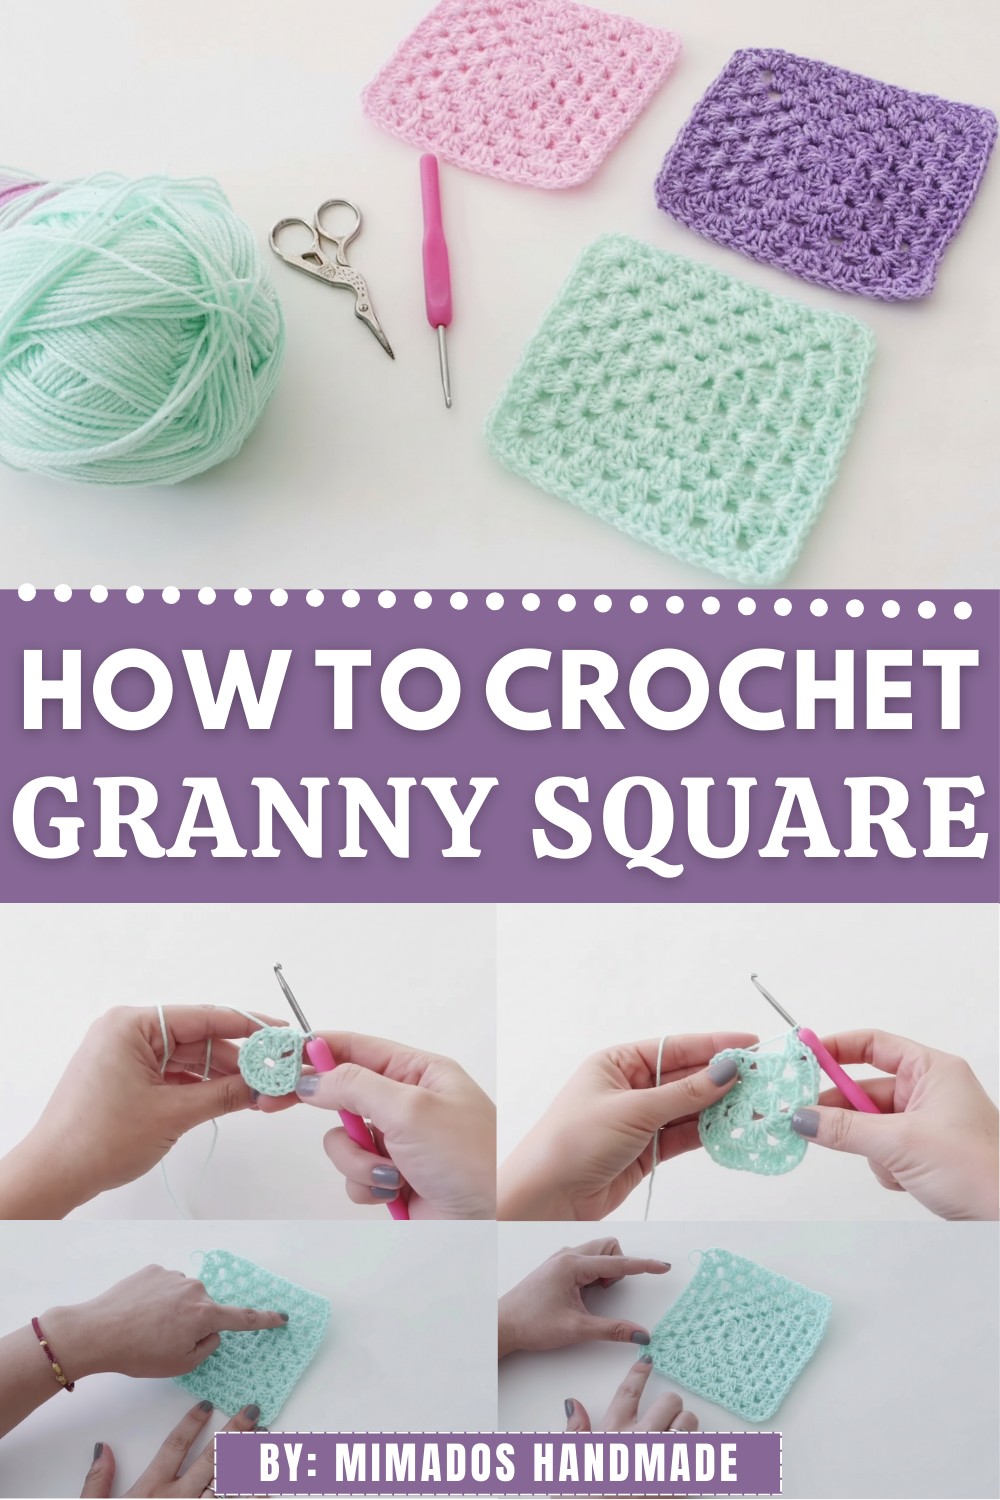
Crochet One-Color Granny Square for Stunning Results
The single-color approach emphasizes texture and detail, allowing you to experiment with different yarn types, from soft cotton for summer throws to chunky wool for cozy winter accents. Beyond its ease and beauty, this pattern offers endless possibilities for joining squares into stunning creations, making it both practical and inspiring for any crochet enthusiast.
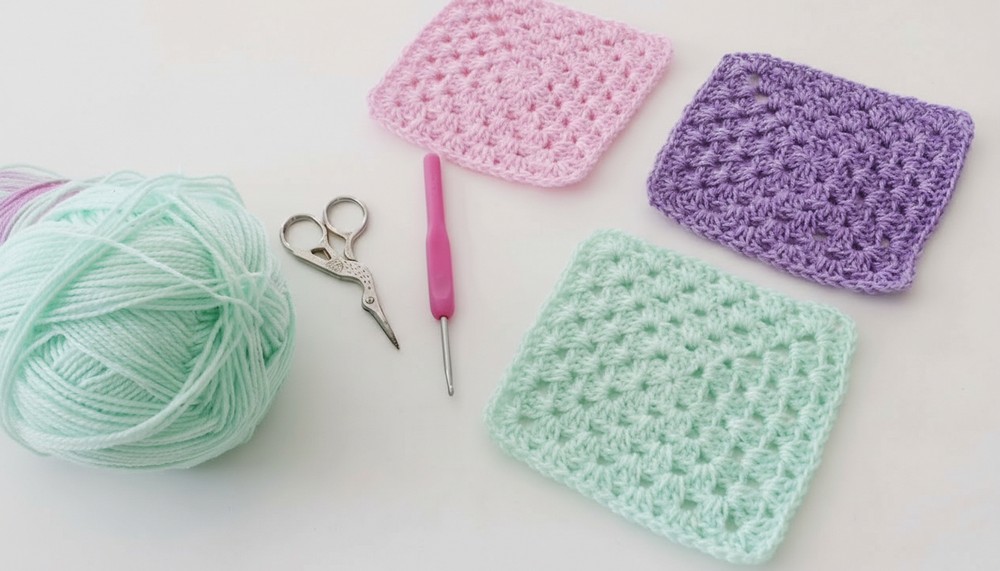
Materials
- Yarn: Any lightweight or baby yarn suitable for 3–3.5mm hooks.
- The pattern uses a single color, but additional colors can be incorporated if desired.
- Yarn label recommendation: “Use 3–3.5mm crochet hooks.”
- Hook: A 3.5mm crochet hook (US size E/4).
- Scissors: For cutting the yarn after finishing or when changing yarn.
- Tapestry Needle (optional): To weave in the ends for a clean finish.
Skill Level
Beginner-Intermediate
This pattern uses basic stitches and repetitive sequences, making it suitable for learners with fundamental crochet experience who want to practice working with corners and expanding shapes.
Key Abbreviations (US Terminology)
- Ch: Chain
- Dc: Double crochet
- Sl st: Slip stitch
- St: Stitch
- Yo: Yarn over
Special Notes
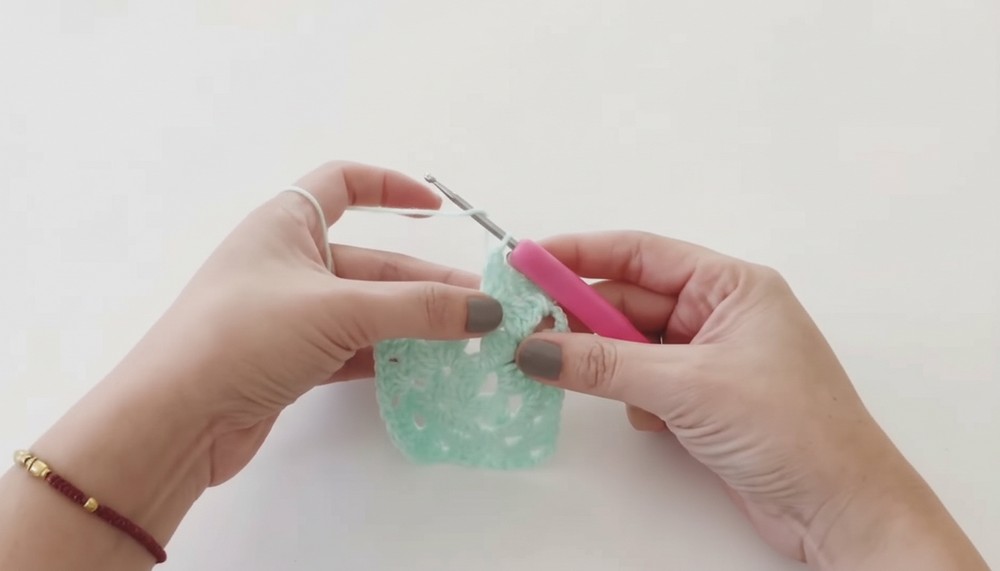
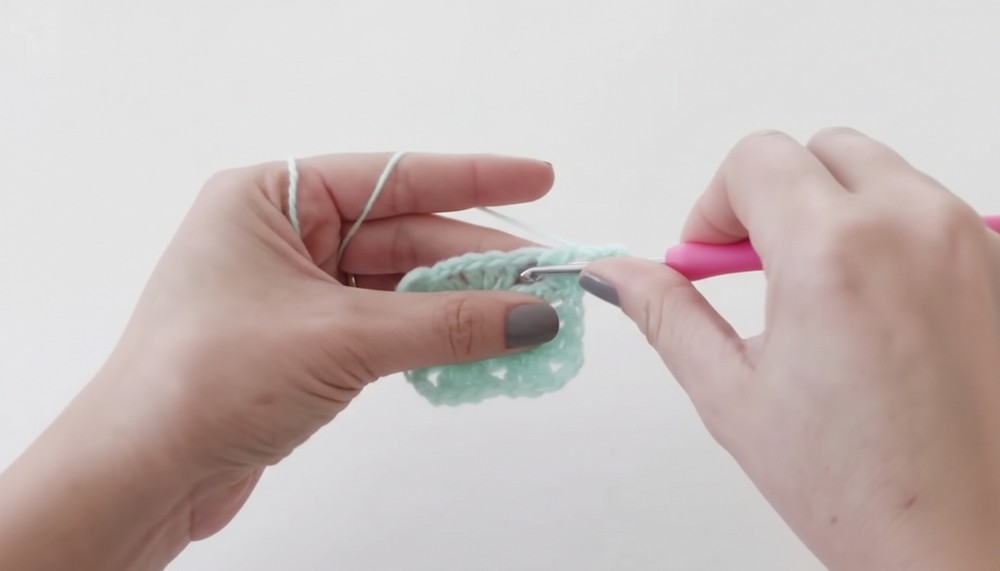
- Corners: Each corner is worked using sets of 3 Dc separated by 2 ch, creating the square’s signature shape.
- Expanding the Pattern: With each round, additional spaces appear along the sides of the square. These should be filled with groups of 3 Dc as the square grows.
- Stitch Placement: Each group of stitches should be worked in a space (not individual stitches), simplifying the process and creating clean lines.
- Customization Options: While this pattern uses a single color, feel free to add different colors at the start of each round for variety.
Pattern Instructions
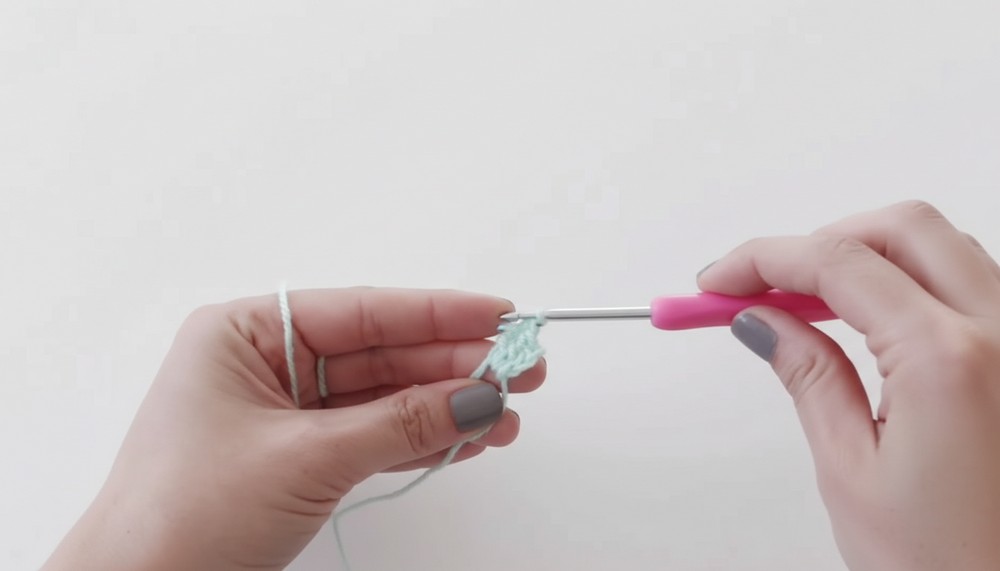
Foundation Round
- Begin with a magic ring: Wrap yarn around your fingers to create a loop. Insert the hook into the center, pull up a loop, and chain 1 to secure the ring.
- Ch 3 (counts as the first Dc).
- Into the ring, work 2 Dc. You now have the first group of 3 Dc.
- Ch 2 (this creates the first corner).
- Work another group of 3 Dc into the ring.
- Repeat: Ch 2, then work 3 Dc into the circle. Do this twice more, for a total of 4 groups of 3 Dc, each separated by 2 ch.
- Pull the yarn tail to tighten the magic ring and close the circle.
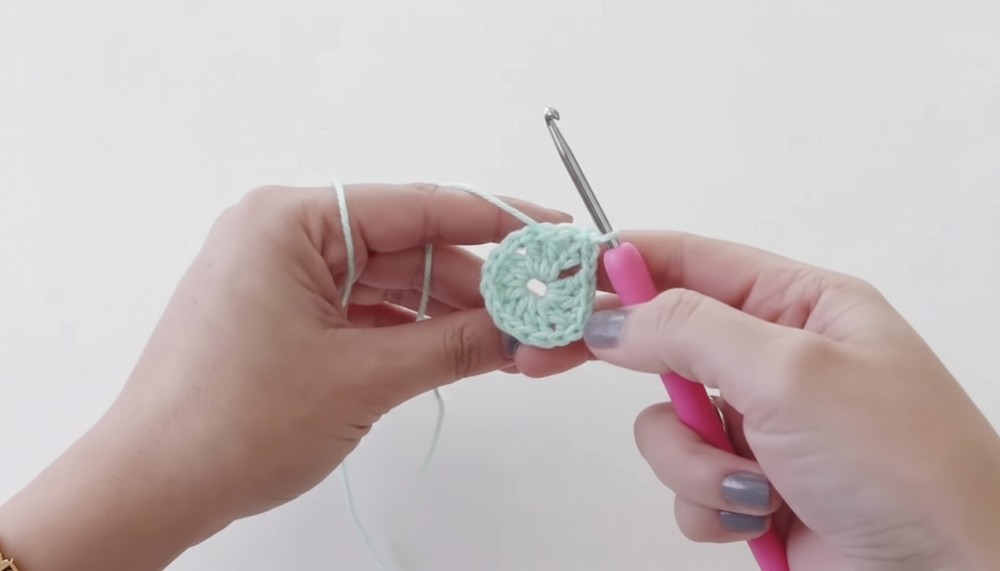
- Join with a Sl st to the top of the starting Ch 3.
- Fasten off the round by pulling the yarn tail tightly if switching colors (optional for single-color designs).
Round 1
- Ch 3 (counts as the first Dc), then 2 Dc into the same space where you joined in the foundation round. This completes the first group of 3 Dc of Round 1.
- Move to the next corner space. In that space, work:
- 3 Dc, Ch 2, 3 Dc.
- This creates a corner with two groups of Dc separated by 2 Ch.

- Repeat across all remaining corners: In each corner space, work 3 Dc, Ch 2, 3 Dc.
- At the final corner: Work 3 Dc and join with a Sl st to the top of your starting chain.
- Your square should now have 4 corners and a defined square shape.
Round 2
- Ch 3 (first Dc). 2 Dc into the same space to complete the first group.
- Move to the new space along the side (formed in the previous round).
- Work 3 Dc into this space.
- For the corner space, work: 3 Dc, Ch 2, 3 Dc.
- Repeat this pattern: Work 3 Dc in each side space, and for each corner space work 3 Dc, Ch 2, 3 Dc.
- Join with a Sl st to the top of the starting Ch 3. The square should now have side spaces formed between the corners.
Round 3
- Ch 3 as your first Dc. 2 Dc into the same space (first group of the new round).
- Work 3 Dc into each side space.
- For each corner space, work 3 Dc, Ch 2, 3 Dc.
- Continue the pattern around the square:
- 3 Dc into each newly formed side space.
- Work 3 Dc, Ch 2, 3 Dc into each corner space.
- 3 Dc into each newly formed side space.
- Join with a Sl st to finish the round.
Subsequent Rounds (Rounds 4 and Beyond)
- Continue expanding the square. For each new round:
- Work 3 Dc groups into each side space.
- At every corner space, work 3 Dc, Ch 2, 3 Dc.
- As the square grows, more side spaces will appear between the corners. Simply fill them with 3 Dc groups.
 The number of stitches increases by 1 group of 3 Dc per side, per round. Keep track of your stitches to ensure symmetry.
- Stop when the square reaches your desired size.
Finishing Off
- To complete the project, fasten off the yarn after the last round with a slip stitch.
- Use a tapestry needle to weave in all loose ends.
- Block your square if needed to ensure it lies flat and holds its form.

Project Variations
- Color Changes:
- For a classic multicolor look, change the yarn color after every round.
- Use gradient or variegated yarn for an ombre effect.
- Size Adjustments:
- Smaller square (e.g., coasters): Complete only 3–4 rounds.
- Larger square (e.g., blankets): Add more rounds to achieve the size you want.
Tips for Success
- Tension: Keep a consistent tension to ensure all sides are equal.
- Count Stitches: Confirm each side has the correct number of groups as you go—this will save you from unraveling later.
- Blocking: For a polished look, block the square by pinning it to shape and lightly steaming or wetting it.
Conclusion
This traditional granny square is a versatile and charming design suited for many projects, from blankets and cushions to bags and coasters. By following this straightforward pattern, you can grow the square to the size you desire and even customize it with colors.