Hook a timeless Crochet Granny Square Pattern that forms colorful classic blocks perfect for blankets bags decor and cozy handmade pieces with lasting charm.
Some crochet projects never go out of style, and the granny square remains a timeless favorite for every yarn lover. A Free Crochet Granny Square pattern is a simple yet eye-catching way to turn a small amount of yarn into a charming and decorative piece. You can use a single square for cute coasters, trendy appliqués, stylish pockets, wall decor, or as a motif for blankets and bags.
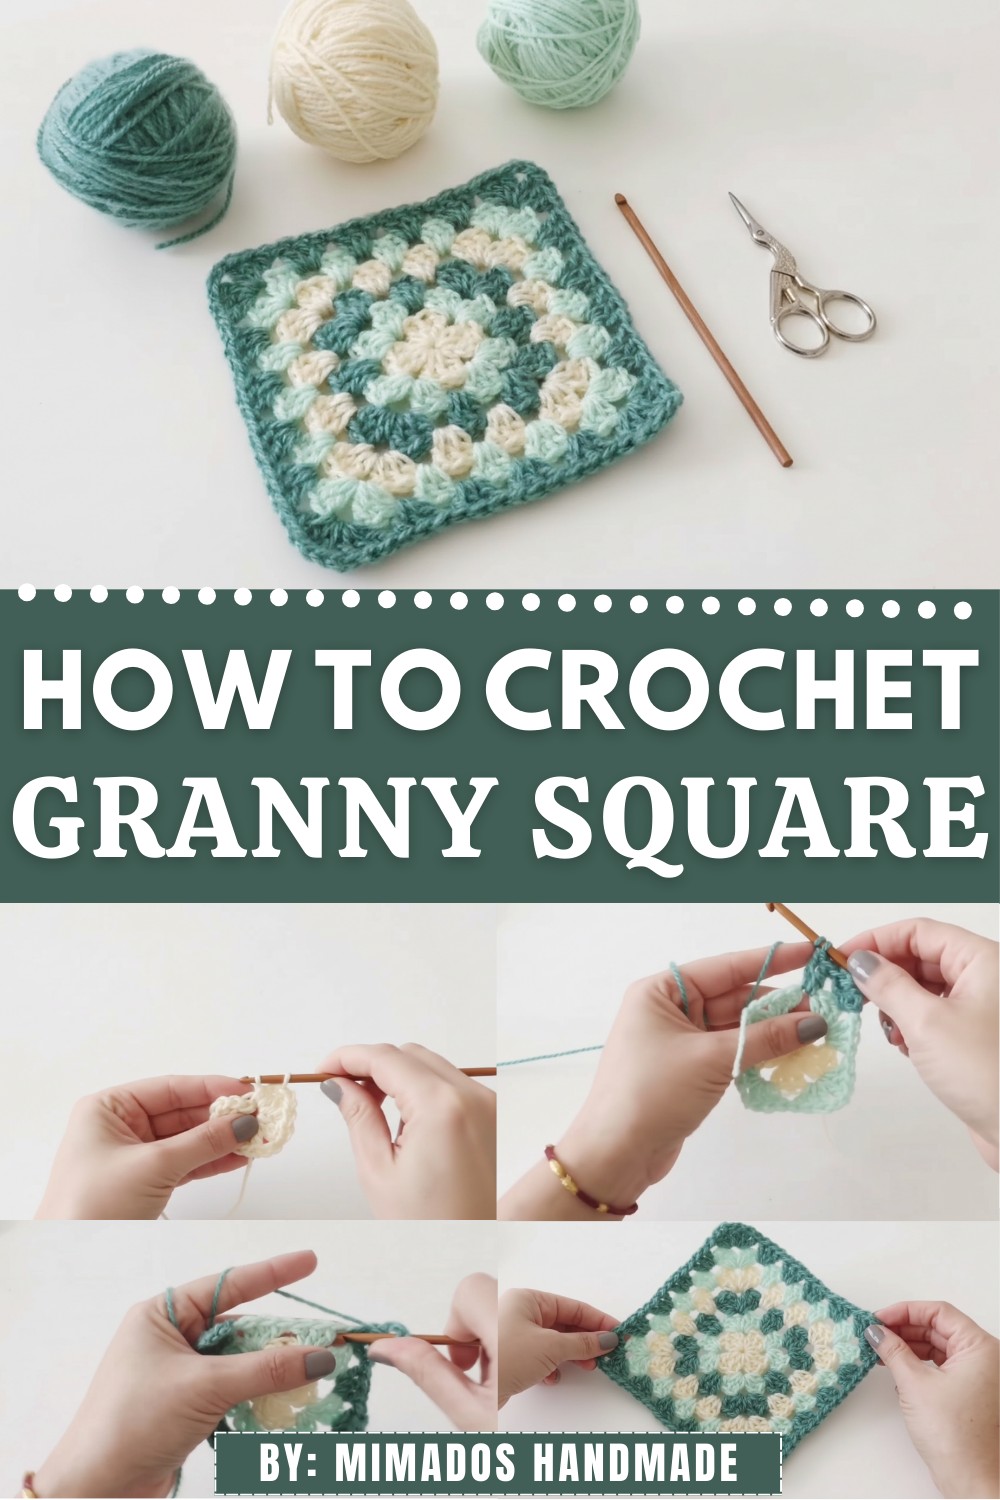
Timeless Crochet Granny Square Pattern for Cozy Creations
It is perfect for practicing basic stitches like double crochet and chain spaces while improving tension and stitch control. The purpose is both creative and practical, offering a versatile foundation that is fun, relaxing, and visually appealing.
Materials
- Yarn: Medium-weight yarn (size 4), in your choice of three colors.
Suggested yarn weights: 4–4.5mm recommended knitting needle or crochet hook size. - Hook: US size G/6 (4mm) crochet hook.
- Scissors: For cutting yarn between color changes.
Skill Level
Intermediate to Advanced
This pattern involves techniques such as working with a magic ring, slip stitches, and changing yarn colors, which require familiarity with crochet stitches and proper yarn tension.
Key Abbreviations
- Ch: Chain
- Dc: Double crochet (equivalent to UK treble crochet)
- Sl st: Slip stitch
- St: Stitch
- Yo: Yarn over
Special Notes
- The magic ring is used to create a tight and seamless center for your square. Familiarity with this technique is recommended.
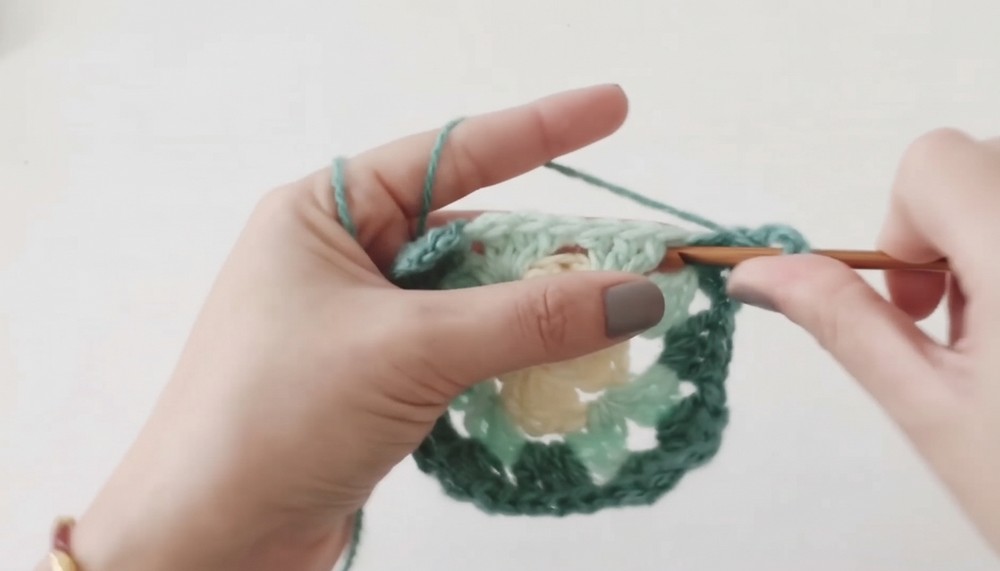
- Always begin and end each round with slip stitches. Cut yarn and securely fasten off before changing color.
- The square will grow larger with each round. For larger projects, such as blankets, increase rounds as needed.
Pattern Instructions
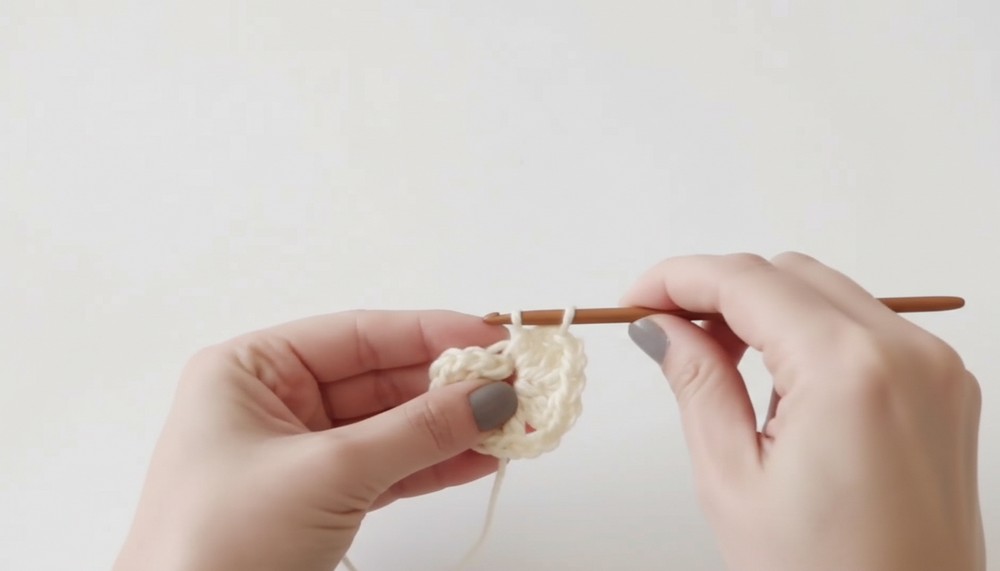
Round 1 – Begin with the Magic Ring
- Create a magic ring: Wrap the yarn around two fingers, using your hook to pull a loop through the circle and chain 1 to secure.
- Ch 3 (counts as the first Dc).
- Work 2 Dc into the ring. You now have the first group of 3 rods (Dc stitches).
- Ch 2 for corner space.
- Work another group of 3 Dc into the ring.
- Ch 2, and repeat another group of 3 Dc.
- Continue with Ch 2 and work one more group of 3 Dc.
- Ch 2, then join to the top of the starting Ch 3 with a Sl st.
- Pull the yarn tail on the ring tightly to close the circle completely. Fasten off.
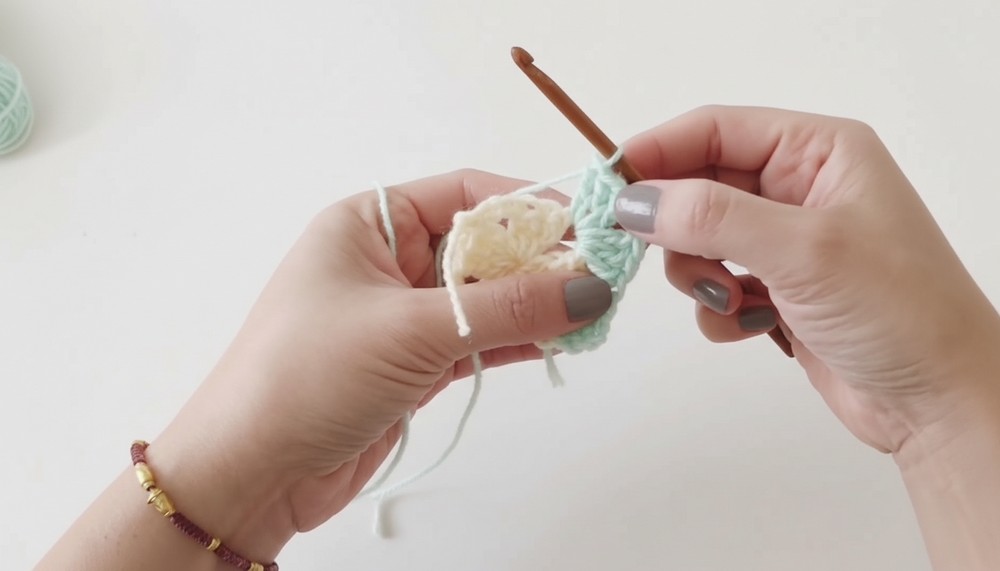
Round 2 – Add Second Color
- Attach new yarn to any corner by tying a knot around your hook or pulling into the loop.
- Secure the yarn and Ch 3 (counts as the first Dc).
- Work 2 Dc into the same corner space. You now have the first group of 3 Dc.
- Ch 2, then work another group of 3 Dc into the same corner space. This completes the first corner.
- In the next corner, work a group of 3 Dc, Ch 2, and another group of 3 Dc in the same space.
- Repeat the same in the remaining corners: 3 Dc, Ch 2, 3 Dc in each corner space.
- At your final corner (the same spot you started in), add a group of 3 Dc and separate by Ch 2. Join with a Sl st to the top of the starting Ch 3.
- Fasten off and cut the yarn.
Round 3 – Add Third Color
- Attach the third color in any corner space and secure. Ch 3 (counts as the first Dc).
- Work 2 Dc in the same corner space.
- Ch 2 and work another 3 Dc group in the same space to form the corner.
- For the next side hole, work 3 Dc into the space (side spaces will only have 1 group of 3 Dc stitches).
- In the next corner, repeat the grouping: 3 Dc, Ch 2, 3 Dc.
- Continue this sequence of side spaces (3 Dc) and corners (3 Dc, Ch 2, 3 Dc) around the square.

- At the final corner where you started, complete the second group by adding 3 Dc and joining with a Sl st to the top of the starting Ch 3.
- Fasten off and cut the yarn.
Rounds 4–6 (and beyond)
- Repeat the process outlined in Round 3, adding side spaces (3 Dc) between the corners.
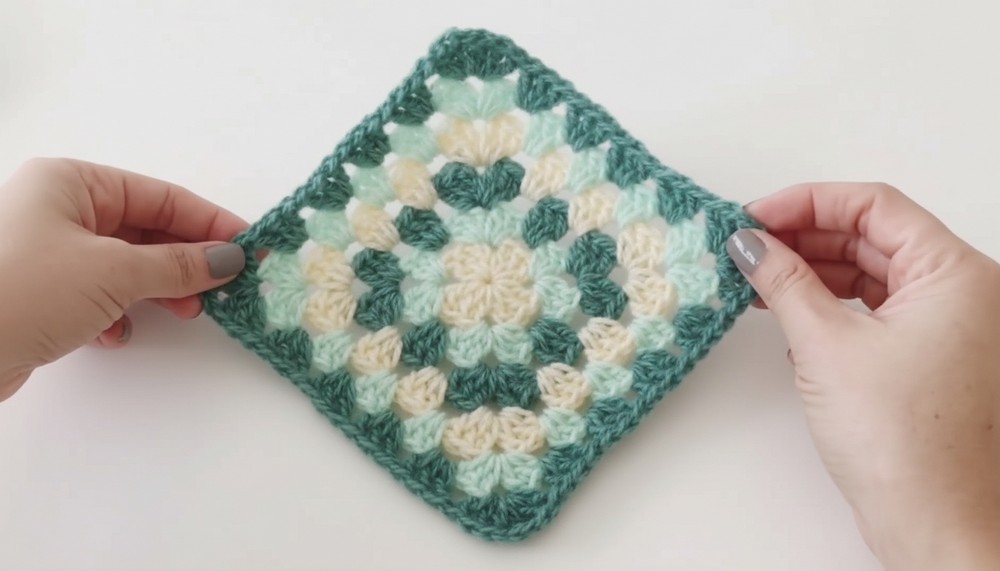
- Each round will add one additional group of 3 Dc to the sides as the square grows larger. Corners always consist of the same grouping: 3 Dc, Ch 2, 3 Dc.
- Continue changing yarn colors every round, if desired, or alternate colors randomly for a striped appearance.
Conclusion
This classic crochet square creates a versatile piece that can be expanded for various projects like cushions, bags, or large blankets. Increase rounds until you achieve your desired size.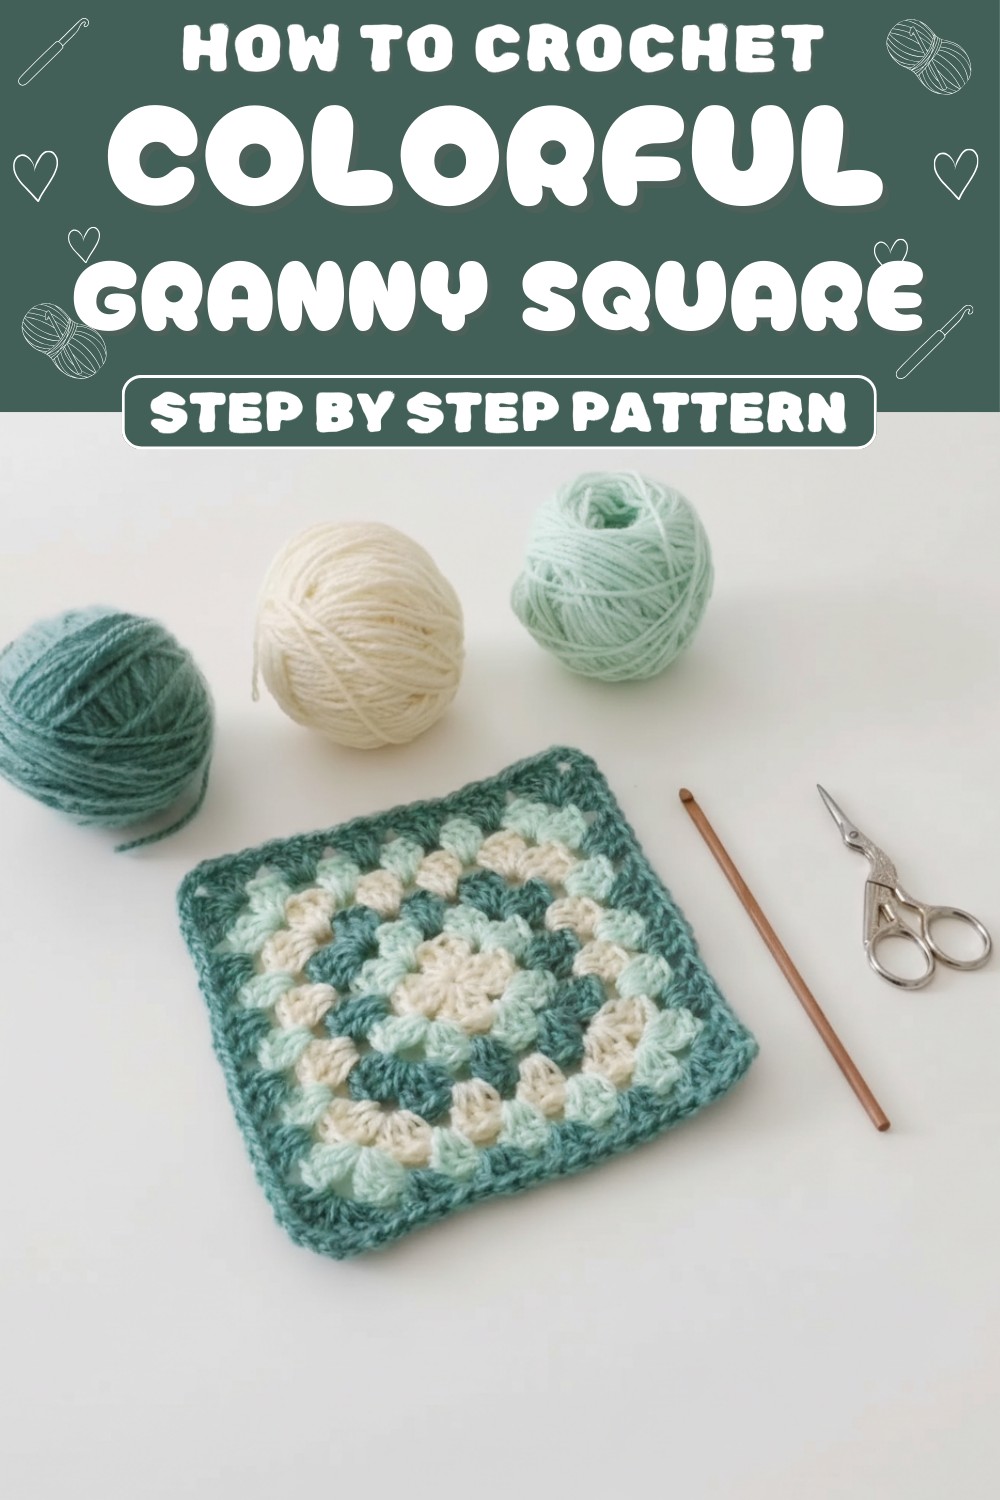
Pattern Correction
If any space feels loose or uneven, ensure your tension is consistent. You can adjust your hook size slightly if your stitches appear too tight or too loose. Blocking might also help maintain shape, especially for larger pieces.
Tips
- Magic Ring Mastery: If you’re not comfortable with the magic ring, you can start with a foundation chain of 4 and join into a loop.
- Color Changes: When changing colors, tie a secure knot and weave in the ends for a cleaner finish.
- Add Stability: For blankets, consider adding a border (e.g., single crochet or picot) to stabilize edges.