Bloom into creativity with this Free Crochet Spring Doily Pattern that adds a delicate floral charm and cheerful seasonal touch to any table décor.
The gentle charm of a handmade doily brings timeless beauty and detail into any home. With soft loops and intricate textures, it gradually takes shape round by round. Each layer adds depth and elegance, building towards a striking piece that’s both graceful and versatile. This spring piece, rich in tradition, is ideal for adorning tables, accenting vases, or being displayed as fine home décor.
Crochet Spring Doily Pattern That Adds Fresh Floral Energy

Carefully following the instructions ensures a smooth and enjoyable experience for those attempting the project, guiding crocheters to a rewarding final result. The process is approachable yet yields a design that feels delicate and ornate, perfect for those seeking a meaningful addition to their space.
Its charm lies not only in its appearance but in its ability to become a thoughtful handmade gift or a cherished keepsake for years to come. Whether for decoration or personal satisfaction, there’s lasting joy in witnessing the beauty unfold with each thoughtful moment spent on this timeless piece.

Materials Needed
- Yarn: Fine (category 2) sport yarn. Leftover yarn is ideal for this project.
- Crochet Hook: A 3.5mm (US E) crochet hook (adjust based on your tension).
- Scissors: For cutting the yarn precisely.
- Tapestry/Darning Needle: To weave in ends.
- Stitch Marker: Optional, but helpful for beginners to keep track of stitches.
The instructor also explains the importance of an adjustable tension and links to related content for further exploration.
Special Features of the Tutorial
- Magic Circle Foundation: The tutorial begins with a durable and neat magic ring technique.
- Seamless Rounds: Each round builds on the previous one with clear instructions, using double crochets, chains, and slip stitches.
- Beginner-Friendly: Techniques like chaining, double crochets, and simple slip stitching are explained step by step.
- Customizable Pattern: You can adjust yarn type, hook size, and even add your own creative flair to adapt the doily to your preferences.
- Personal Touch: The instructor shares a heartfelt story about learning crochet from her grandmother, making the tutorial feel warm and nostalgic.
Step-by-Step Instructions
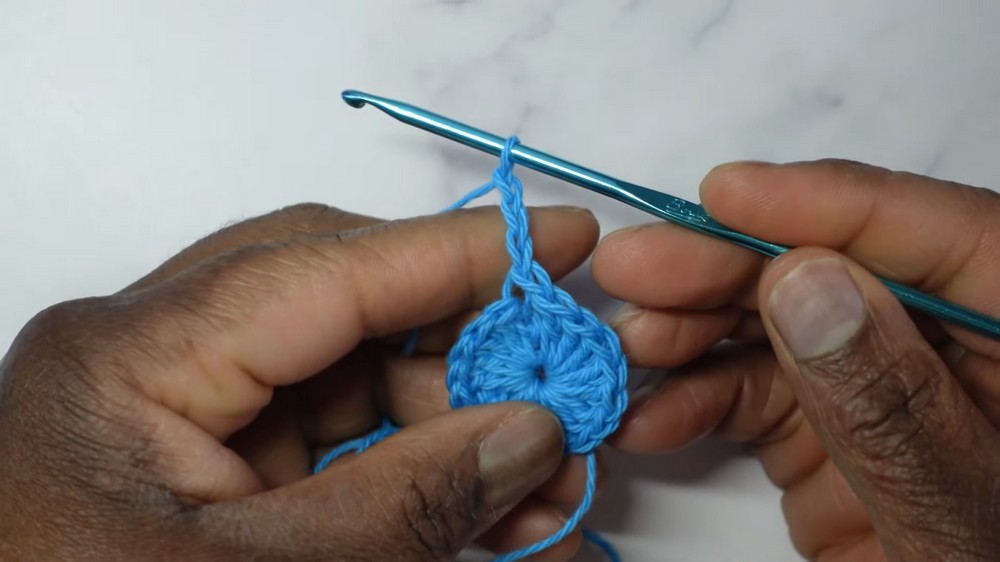
1. Begin with a Magic Ring (Foundation Round)
- Create a magic circle by wrapping the yarn around your fingers. Secure it with your hook to form the ring.
- Ch 3 (counts as your first double crochet), then work 16 double crochets into the magic ring.
- Use a stitch marker to mark the top of your beginning chain. Slip stitch to the top of the first chain to close the round. Pull the tail to tighten the ring.
2. Second Round: Building Spaces
- Ch 3 (counts as first double crochet), then Ch 1 (creates a chain space).
- Work 1 double crochet in the next stitch, then Ch 1. Repeat this around.
- When you reach the end of the round, slip stitch into the third chain of the starting chain.
3. Third Round: Growing the Gaps
- Ch 3 (counts as first double crochet), then Ch 2 (chain space).
- Work 1 double crochet in the next double crochet, then Ch 2. Continue working this pattern, creating chain-2 spaces between each double crochet.
4. Fourth Round: Creating Group Clusters
- Slip stitch into the chain-2 space. Ch 3 (counts as first double crochet).
- Work 3 double crochets into the same chain space. This creates a group of 4 double crochets in each chain-2 space.
- Move directly into the next chain-2 space and repeat, working 4 double crochets in each space.
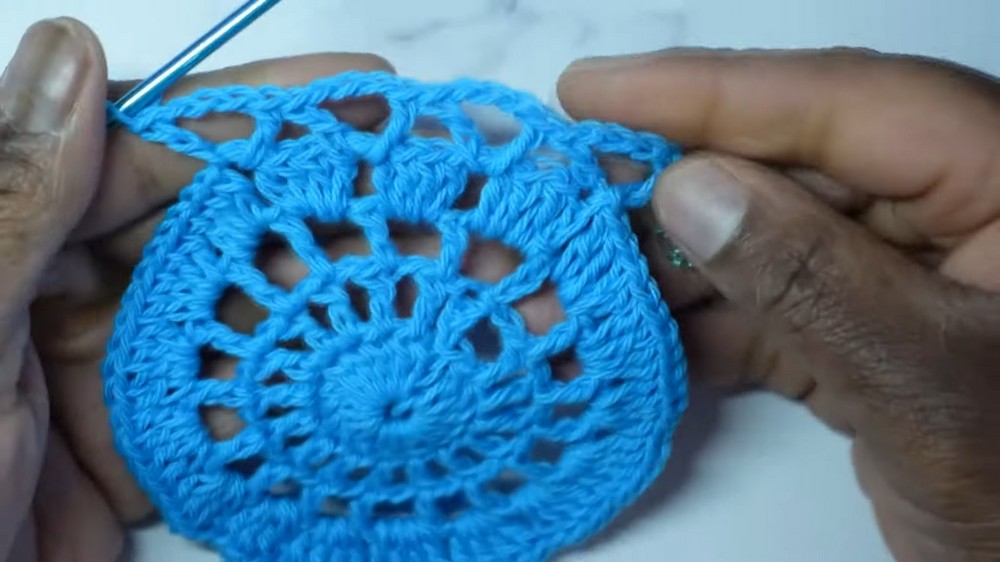
5. Fifth Round: Decorative Peaks Begin
- Ch 6: The first 3 chains count as a double crochet, and the next 3 form a chain space.
- Work 1 double crochet into the top of the previous group’s fourth stitch.
- Find the next gap between clusters and work the same pattern: double crochet, Ch 3, double crochet.
6. Sixth Round: Scalloped Edges
- In each chain-3 space, work 5 half double crochets.
- Slip stitch into the space between clusters to form the arches.
- Continue creating scalloped edges around the doily by working half double crochets in chain spaces, then slip stitching to secure the arches.
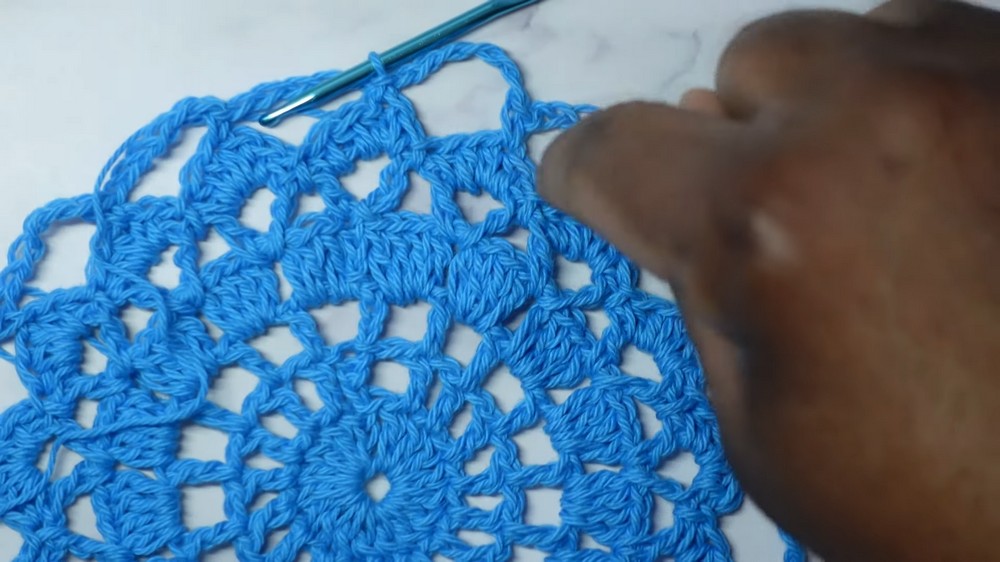
7. Seventh Round: Final Touches
- For the final decorative round, work 8 single crochets into each scalloped edge.
- Use the waistcoat stitch (optional) to give the single crochets a polished look.
- Slip stitch to the beginning of the round and fasten off your yarn.
Tutor’s Suggestions
- For Beginners: Use a stitch marker for better accuracy, especially when starting new rounds.
- Tension Control: The instructor cautions against crocheting too tightly, as it may distort the doily’s shape.
- Customization: Try different yarn weights, colors, or even metallic threads to achieve unique aesthetics.
Uses of the Doily
- Table Decorations: Use as coasters, placemats, or centerpieces.
- Home Decor: Frame it as wall art or layer it for a vintage vibe.
- Gift Idea: Handmade doilies make thoughtful and timeless gifts for any occasion.
- Skill Practice: Great for mastering fundamental crochet techniques like chaining, double crochet, and magic rings.
Conclusion
With its nostalgic appeal and straightforward steps, this crochet doily project is a gratifying choice for crafters of all levels. Perfect for using up leftover yarn and adding a touch of elegance to your space, it combines simplicity with charm. Whether you’re honing your skills or revisiting fond memories, this tutorial offers a creative outlet that is as meaningful as it is beautiful.
Final Tip
To keep your doily looking pristine and flat, consider blocking it after completing the project. Soak your doily lightly, reshape it, and let it dry flat to enhance the design’s symmetry and definition.