Bring joy to your crocheting time with this Free Crochet Bunny Amigurumi Pattern and make a soft, cuddly bunny that’s loved by all.

Cute Free Crochet Bunny Pattern for Keepsakes
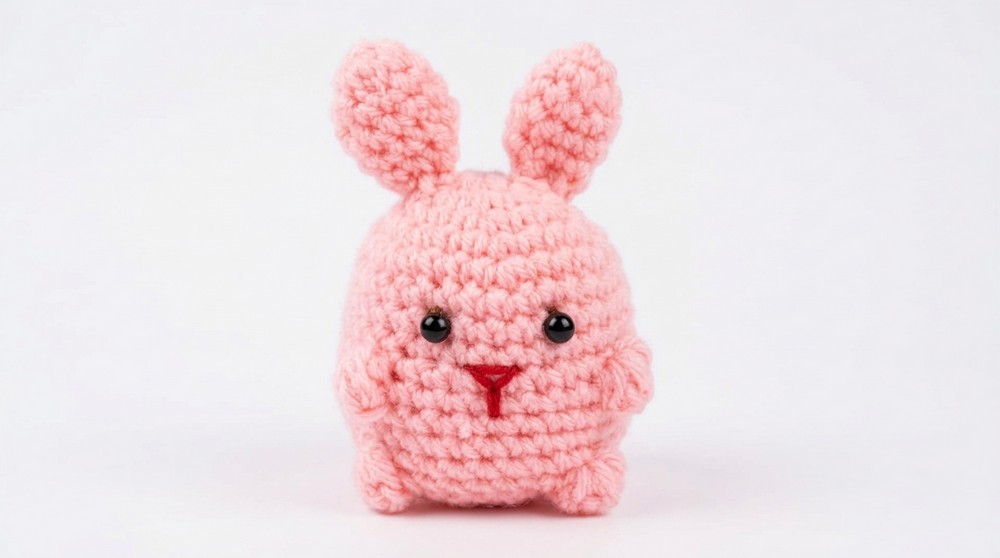
Start an exciting new hobby and create your own adorable little buddy with this Free Crochet Bunny Amigurumi Pattern. This soft, squishy bunny is as bright and cheerful as a blooming flower in a sunny garden, thanks to its lovely pink color.
Its charm lies in its perfectly round body, long floppy ears, and an irresistibly cute face with tiny black eyes and a sweet little mouth that can make anyone smile. Whether you use it as a lucky charm on your desk, a special gift for a loved one, or a cute playmate, its charm will win hearts instantly. 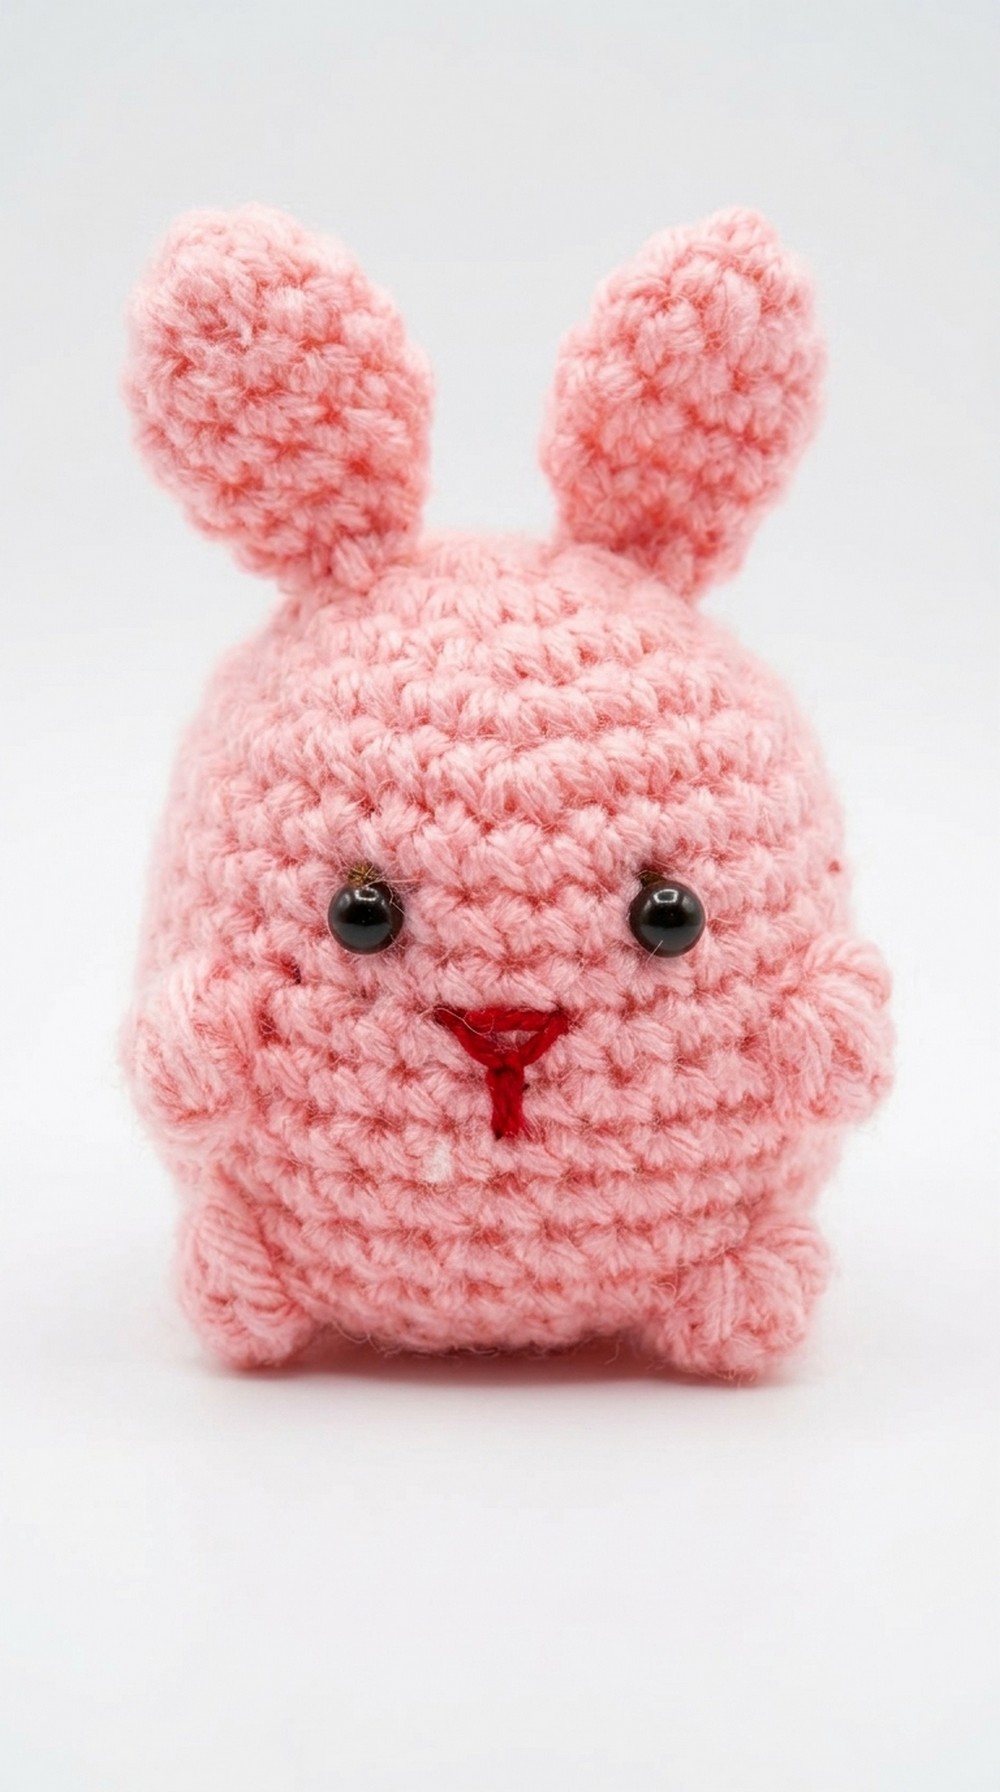
Best of all, the simple steps mean even beginners can finish this delightful bunny in just twenty minutes. Show off your creativity and enjoy the joy of making something so cute and lovable.
Crochet Bunny Pattern
Materials Required:
- Yarn: 4 ply fluffy wool in pink (or any color of your choice).
- Crochet Hook: Size 3.5 mm.
- Scissors: To trim excess yarn.
- Fiber Cotton: For stuffing.
- Black Beads: For the eyes (optional; black thread can also be used to embroider eyes).
- Needle and Thread: For sewing and finishing.
- Stitch Marker: Optional, for counting stitches.
Steps to Create Your Bunny Toy
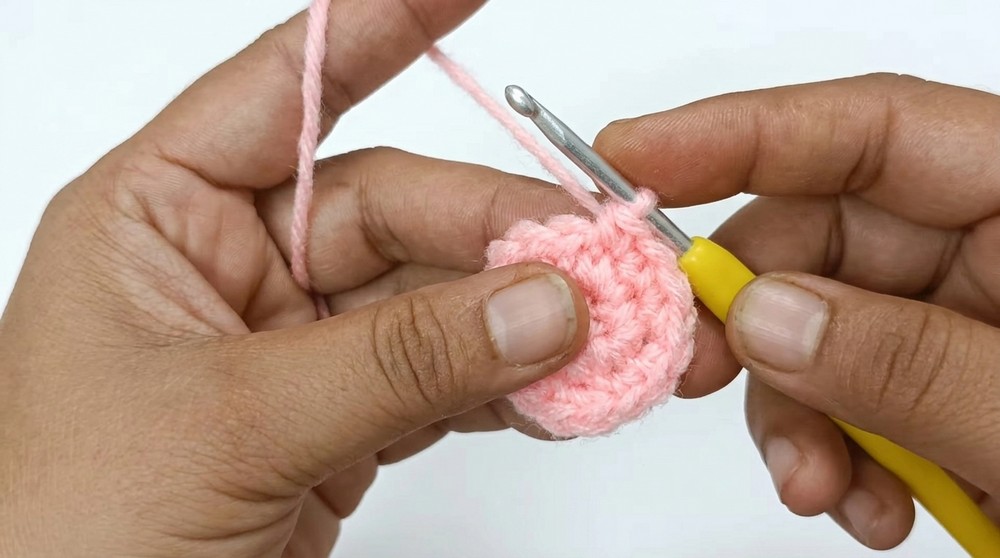
Step 1: Starting the Base
- Begin by creating a magic ring: Hold the yarn in a circular shape and pull the thread through the loop to form a center ring.
- Inside the ring, crochet six single crochets (SC).
- Pull the thread tight to close the magic ring.
Step 2: Expanding the Base
- In the next round, insert your hook into the first chain and crochet two single crochets in each stitch around. You should have 12 SC in total for this round.
- Use a stitch marker or count carefully to keep track of rounds and stitches.
Step 3: Continuing to Increase
- For the third round: Follow the pattern of one SC in the first stitch, two SC in the next stitch, and repeat six times. This will give a total of 18 SC.
- For the fourth round: Crochet one SC in two consecutive stitches, two SC in the third stitch, and repeat six times. This increases the count to 24 SC.
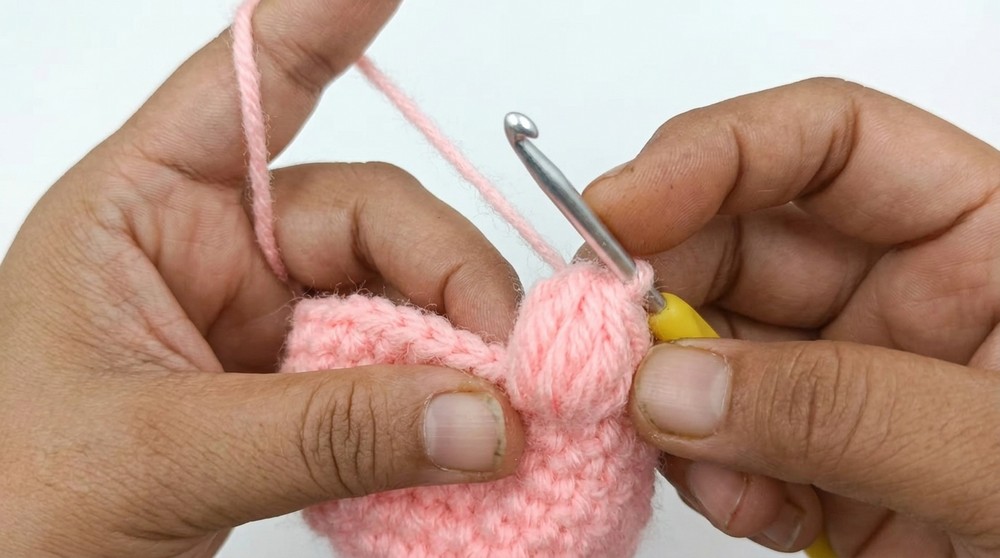
Step 4: Formulating the Body
- Continue expanding: Crochet three SC followed by two SC in the same stitch, and repeat to make 30 SC. Complete this round.
- For the next four rounds, simply crochet 30 single crochets evenly without any increases.
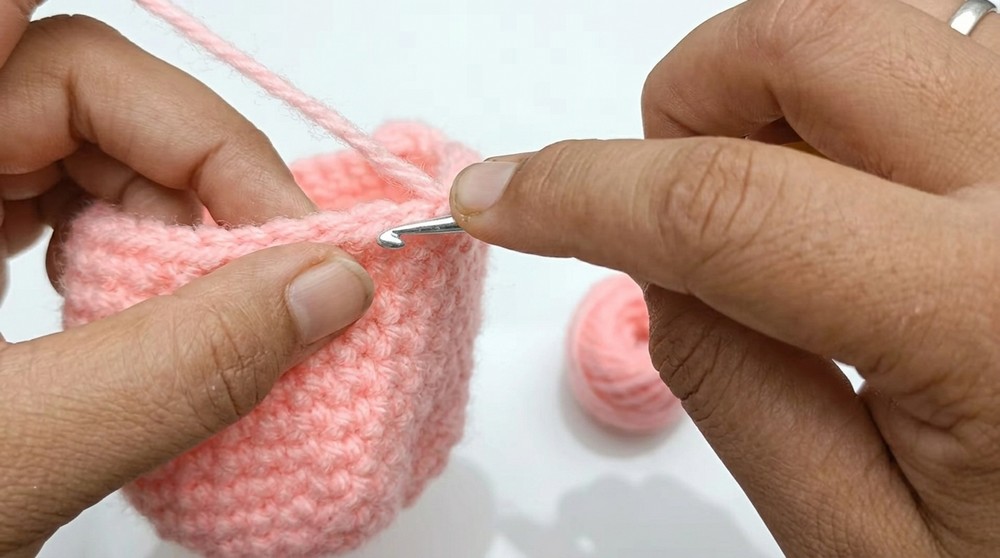
Step 5: Shaping the Bunny’s Body
- Begin decreasing: Crochet seven SC, then two SC together (decrease). Repeat this pattern around the row.
- In the next row: Crochet six SC, followed by two SC together, and repeat. Gradually reduce as you shape the upper portion.
Step 6: Closing the Body
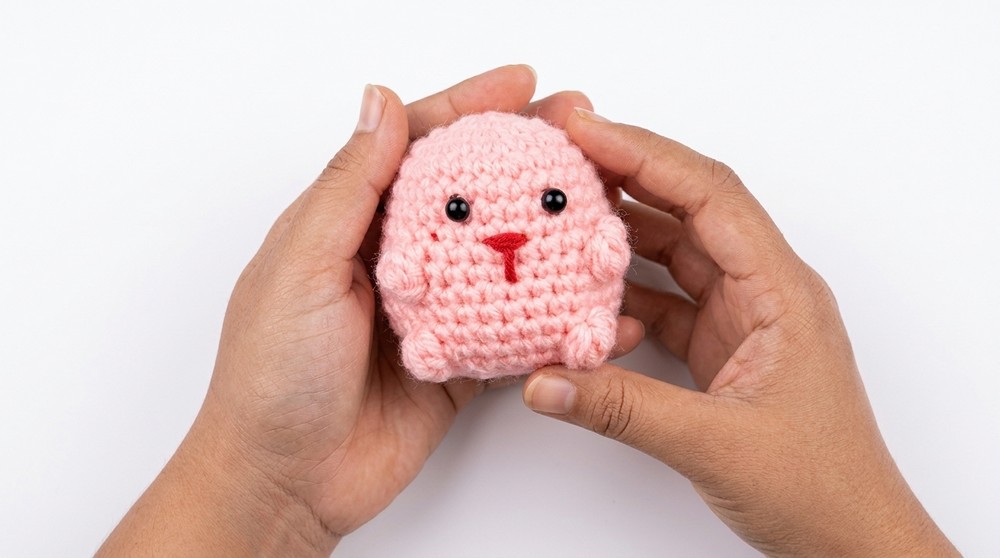
- When you reach 12 SC in total, stuff the bunny tightly with fiber cotton for a fluffy look.
- Use a needle and thread to sew the opening shut neatly.
Step 7: Adding Details
Eyes:
- Place the eyes symmetrically using black beads or embroidery thread. Keep 4 single crochets of gap between the eyes to ensure proper placement.
Mouth:
- Choose the row underneath the eyes to create the bunny’s mouth. Use embroidery thread and follow the instructions for creating:
- Pull the thread long and loop it back multiple times to form a curved smile.
Step 8: Making the Ears
- Start with a magic ring: Crochet six SC in the ring and pull tight.
- In the first round, crochet two SC followed by a single SC alternately three times to make nine SC. Complete two more rounds with nine SC in each round.
- Decrease: Crochet one SC followed by two SC together alternately, until the ear narrows down.
- Fold the ear in half and sew the edges together.
Repeat the process to create the second ear and attach both ears symmetrically to the bunny’s head with a needle and thread.
Finishing Touches
- Check all joints and secure them properly to ensure durability. Trim any loose threads and clean up edges for a polished look.
Final Words on the Project
This bunny toy is not only adorable but also versatile—perfect as a gift, a decorative item, or a plush toy for children. The compact design makes it quick and enjoyable to crochet, even for beginners.
Tips to Maintain the Pattern and Bunny Toy
- Stitch Counting: Always keep track of stitches and rows to avoid mistakes. A stitch marker can be helpful.
- Stuffing Quality: Use fiber cotton generously for a fluffy finish. Ensure proper stuffing before closing the bunny’s body.
- Cleaning: Hand wash the bunny with mild soap to maintain its shape and fluffiness.
- Customization: Experiment with different colors, sizes, and facial details (e.g., nose embroidery or blush accents).