Adorn your little one with this free crochet baby headband pattern, offering both charm and comfort in a simple, beginner-friendly project.
Free Crochet Baby Headband Pattern for Adorable Looks
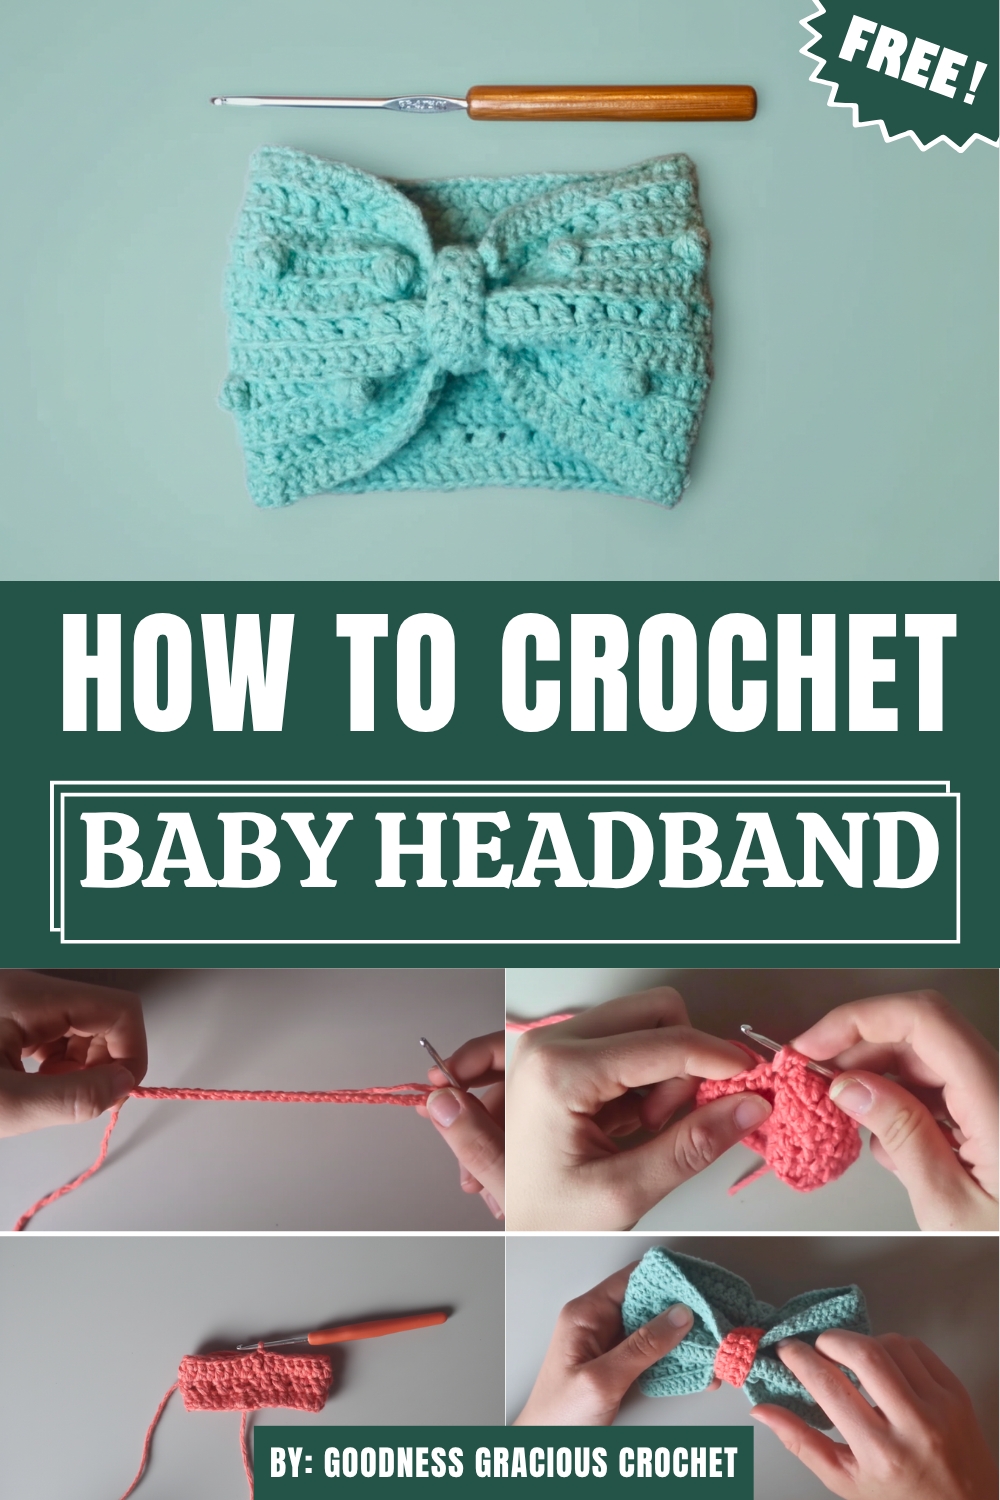
Soft, stylish, and perfect for any season, this crochet design creates an adorable accessory for little ones while remaining practical and fun to make. The headband features beautiful textures thanks to the combination of double crochets, crossed double crochets, and a charming bobble stitch that adds a unique decorative element.
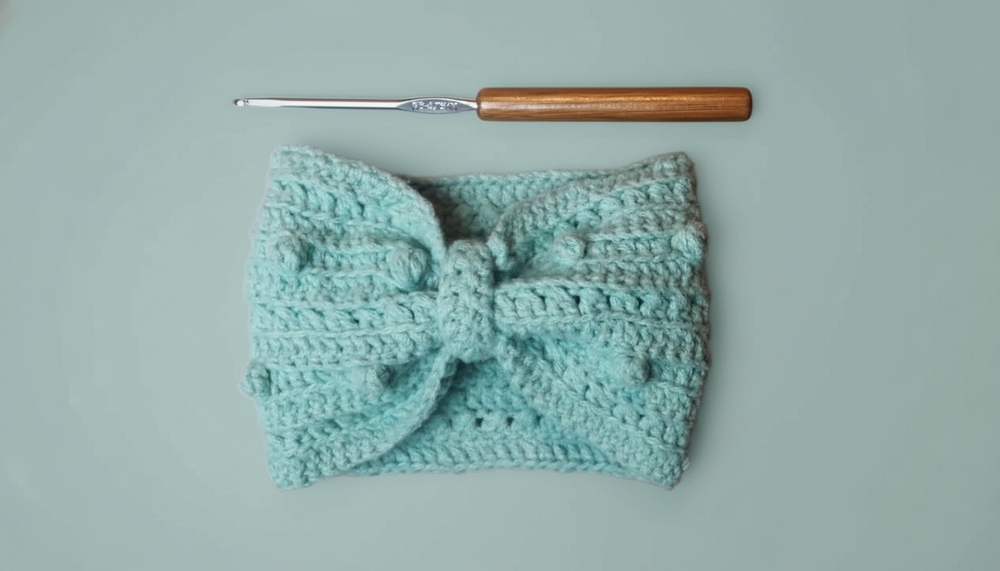
Crochet Headband Pattern with Double Crochet and Bobble Stitch
Materials You’ll Need
- Yarn: A lightweight or DK yarn is recommended (adjust as needed for size).
- Hook Size: 3 mm crochet hook (or size appropriate for your yarn type).
- Scissors: For cutting yarn after completing sections.
- Tapestry Needle: For weaving in ends.
Gauge
Creating a gauge swatch is essential when adapting the design for different sizes:
- 4 inches x 4 inches = X rows of double crochet by X stitches. (This will depend on your yarn and hook choice; adjust your foundation chain and rows accordingly if needed).
Finished Size
- Baby: Approximately 14-15 inches in circumference.
- Toddler: Approximately 16-17 inches in circumference.
- Adult: Approximately 20-22 inches in circumference.
Special Techniques
- Chainless Double Crochet (Optional): Creates a clean edge without starting chains.
- Bobble Stitch: Adds texture and style. Worked by partially completing 5 double crochets in the same stitch, then pulling through all loops together.
Pattern Instructions
Foundation Chain
- Begin with a loop on your hook.
- Chain the desired number to match the head circumference:
- Baby: Approx. 68 chains
- Toddler: Approx. 76–80 chains
- Adult: Approx. 96–100 chains
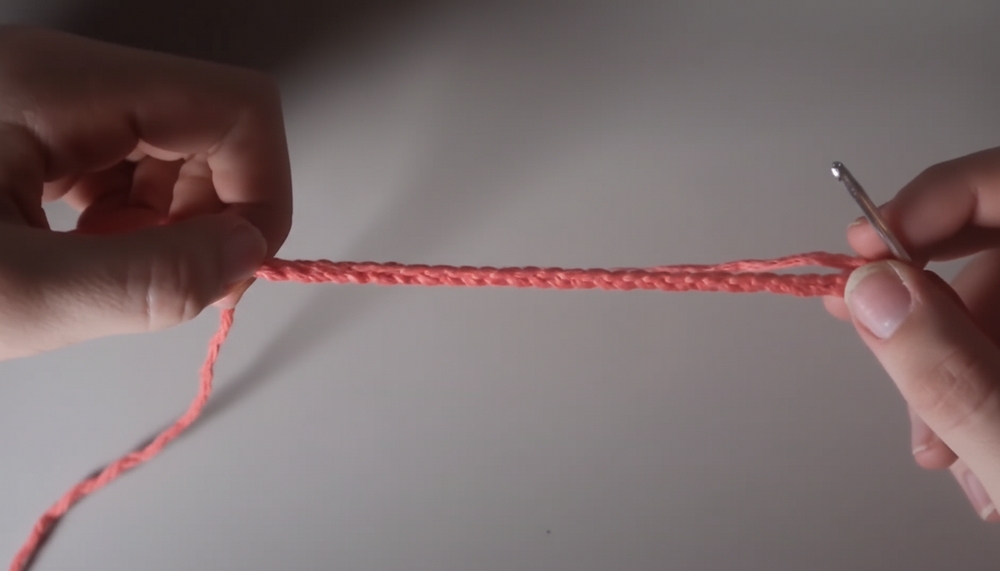
- Connect the foundation chain into a circle by inserting the hook into the first chain and slip stitching through it. Ensure there is no twisting of the chain.
Row 1: Double Crochets
- Option 1: Chain 2 to act as the first double crochet.
Option 2 (Recommended): Use the chainless double crochet method for a neater finish. - Double crochet into each stitch around. Slip stitch into the top of the first double crochet to join.
Row 2: Crossed Double Crochet Pattern
- Chain 2 (or start with a chainless double crochet).
- Skip the next stitch and place a double crochet in the following stitch.
- Yarn over, then go back to the skipped stitch, and place a double crochet into it (this creates the crossed pattern).
- Repeat steps 2–3 around the row. Slip stitch to the top of the first double crochet to join.
Row 3: Plain Double Crochet
- Chain 2 (or create a chainless double crochet).
- Place one double crochet in each stitch around.
- Slip stitch to join.
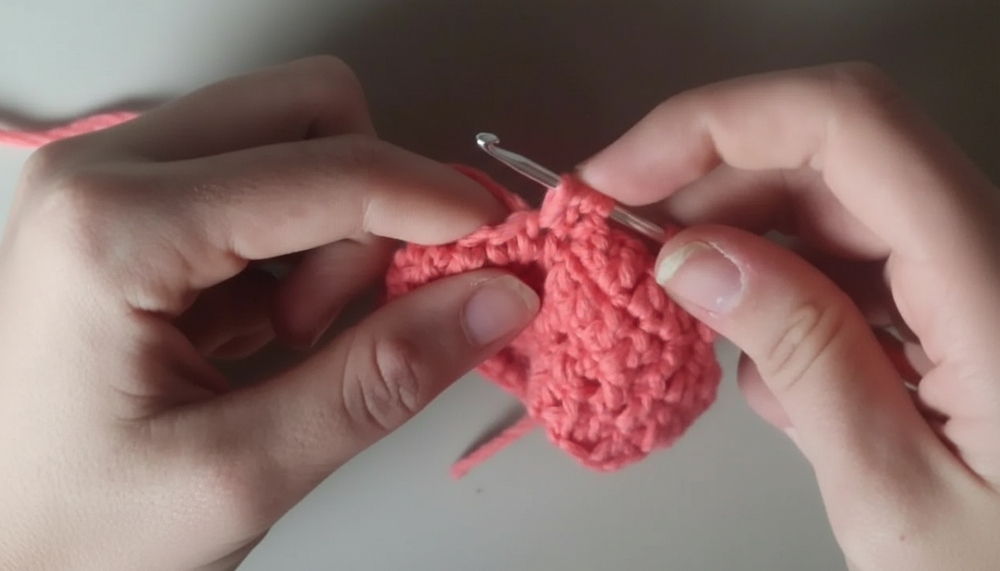
Row 4: Bobble Stitch Row
- Begin with a chainless double crochet or chain 2.
- Double crochet into the next 5 stitches.
- Into the 6th stitch, create a slip stitch.
- In the next stitch, work a bobble stitch as follows:
- Yarn over, insert your hook, yarn over, and pull through a loop.
- Yarn over, pull through the first two loops. Repeat this 5 times until 6 loops are on your hook.
- Yarn over and pull through all 6 loops.
- Slip stitch into the subsequent stitch to secure the bobble.
- Repeat: 5 double crochets, 1 slip stitch, followed by a bobble stitch.
- Continue this pattern around the row. Slip stitch to join.
Repeat Rounds
- Alternate rows as follows:
- Row 1: Double crochet.
- Row 2: Crossed double crochet.
- Row 3: Double crochet.
- Row 4: Bobble stitch row.
- Repeat the pattern sequence until the headband reaches your desired width.
Final Row: Adjusting for Finishing
- End with a plain double crochet row to ensure uniformity in texture.
- Cut the yarn and weave in all ends securely using a tapestry needle.
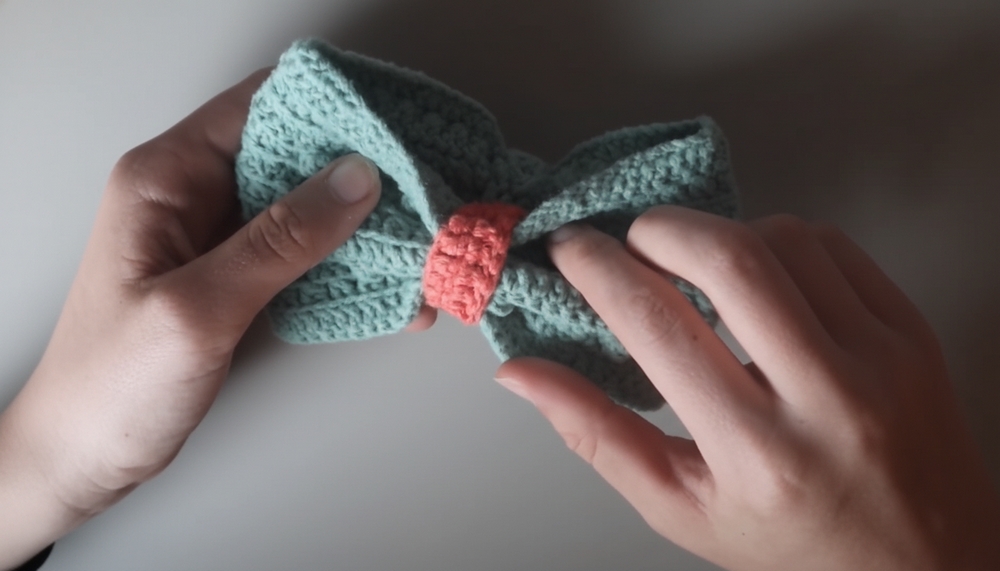
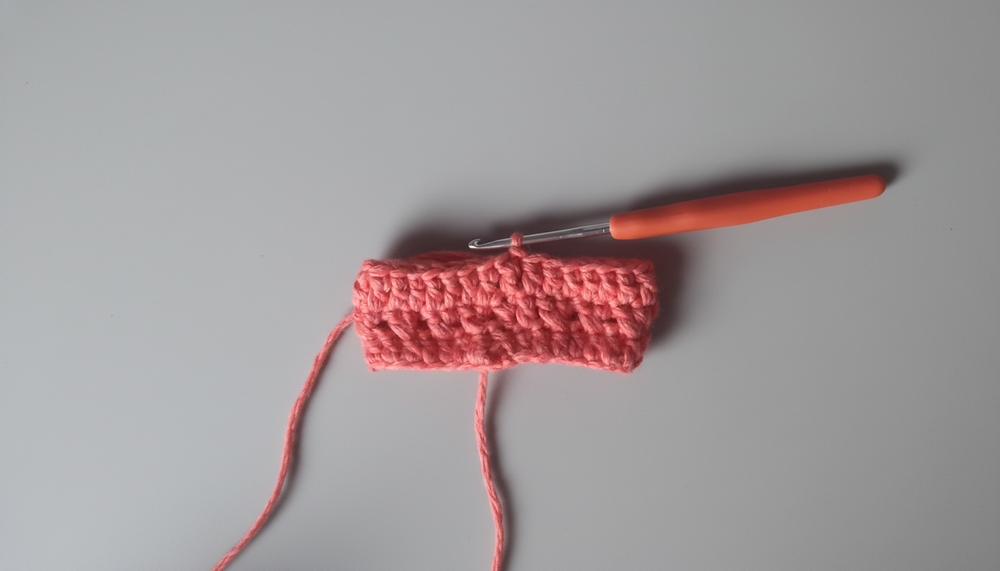
Adding the Center Knot (Optional Bow Effect)
- Foundation Chain for the Knot: Create a chain approximately 2–3 inches long (or long enough to wrap around the folded headband center).
- Work 2 rows of double crochet into this chain.
- Wrap the piece around the folded area of the headband to create the bow knot effect.
- Using your yarn tail, secure the wrapped section by sewing it together on the underside of the headband. Ensure it is tight enough to hold the fabric in place but not overly bulky.
Customization Ideas
- Color Changes: Add stripes by changing yarn colors between rows.
- Textures: Replace the crossed double crochet rows with puff stitches or other textured stitches for variety.
- Embellishments: Attach small buttons, beads, or decorative flowers to enhance the design.
Tips for Crocheting Success
- Always check your tension and ensure consistency, especially when working with crossed or bobble stitches.
- Measure the circumference of the wearer’s head and adjust the foundation chain or rows to ensure a snug yet comfortable fit.
- Use stitch markers to keep track of rows or specific stitches (especially for bobble placement).
Conclusion
This delightful headband design blends functionality with aesthetics. The combination of double crochets, crossed double crochet, and bobble stitches adds rich texture and flair to the piece. Whether crafted for a baby, toddler, or yourself, this pattern is versatile, customizable, and perfect for gifting or personal use.
Final Look
The finished headband boasts a stylish and cozy design, with its beautifully textured rows and a decorative center knot (optional). It’s perfect for keeping ears warm or adding a charming accessory to any outfit.