Brighten your spring outfits with this Free Crochet Headband for Spring Pattern that’s comfortable, stylish, and perfect for everyday wear.
A soft, stylish headband is the perfect accessory to brighten up your spring wardrobe, offering both comfort and a fresh, trendy look. The Free Crochet Headband For Spring Pattern gives you a simple way to create a headband that sits beautifully on hair, adds a touch of springtime charm, and complements light outfits effortlessly.
Chic Crochet Headband for Spring Pattern You’ll Adore
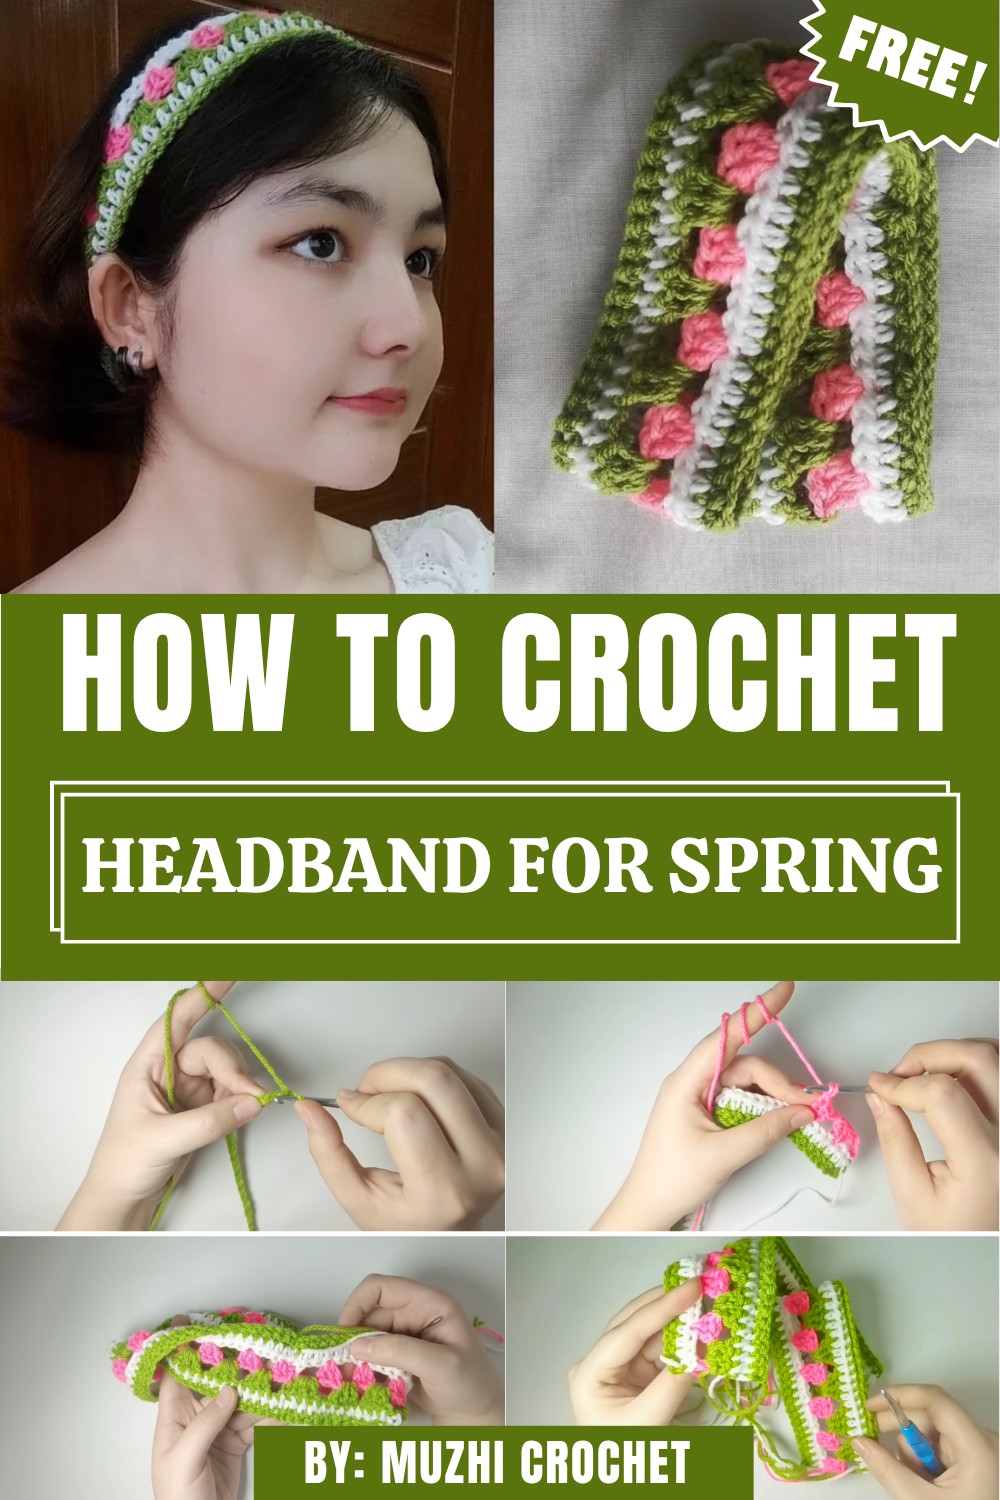
This headband is ideal for spring days or transitional weather, it keeps hair in place while adding a subtle, elegant accessory to your look. Its lightweight construction makes it comfortable for long wear, and the simple, clean design pairs well with casual dresses, boho outfits, or everyday wear.
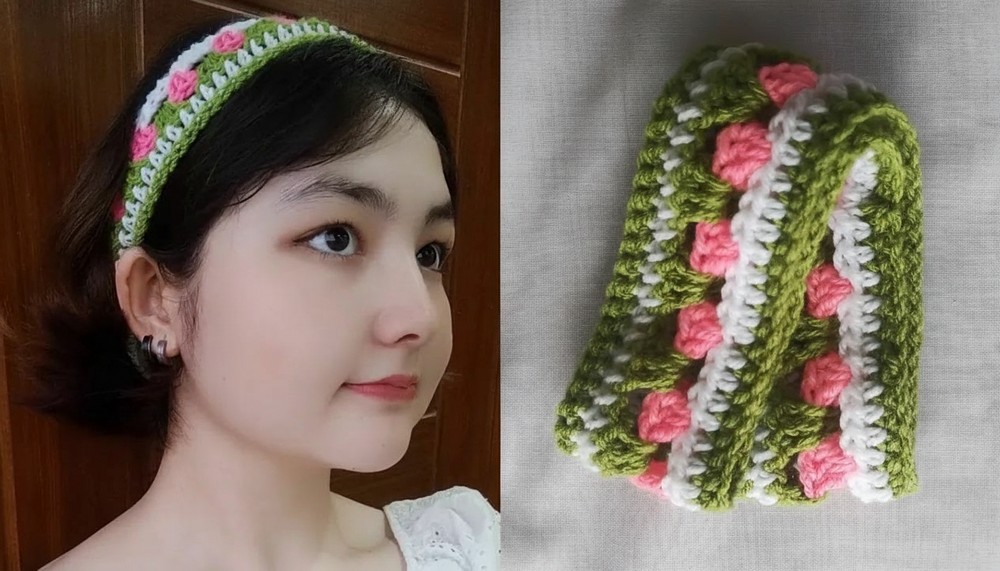
Whether made in soft pastels or brighter shades, the finished piece gives a fresh, feminine aesthetic. With this pattern, you’ll enjoy a practical, beautiful headband that blends function and style with ease.
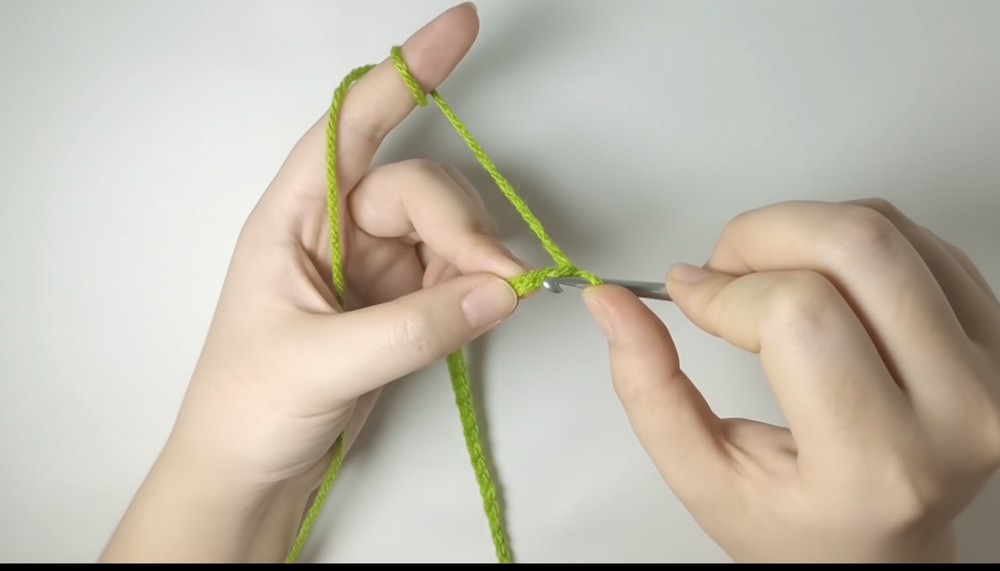
You start by making a foundation chain — this sets the length to fit comfortably around your head.
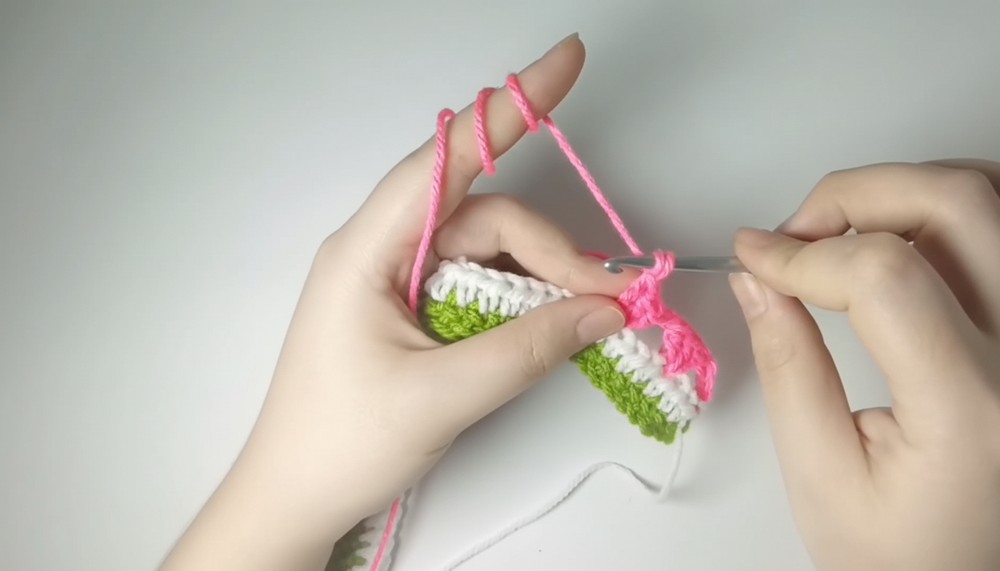
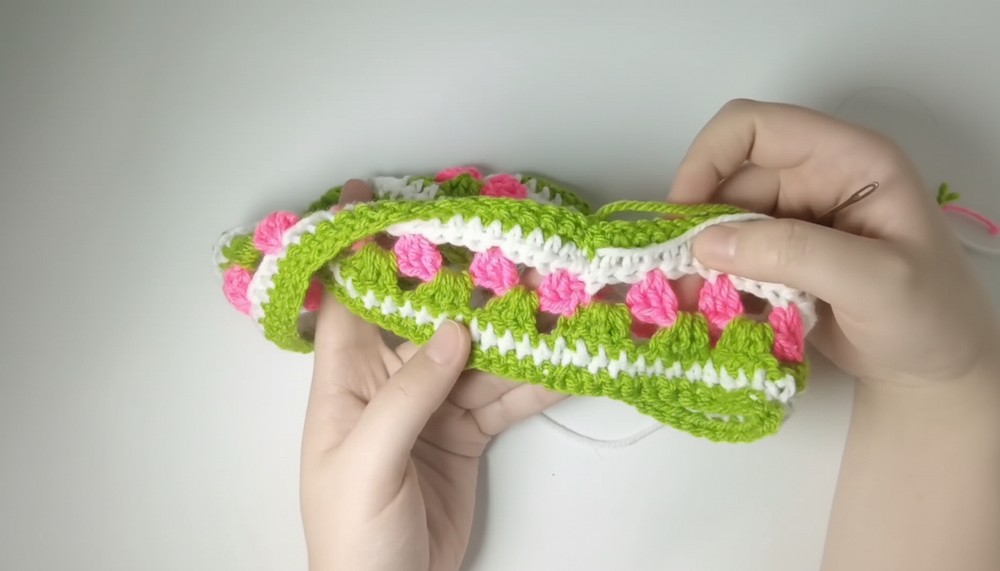
In the middle section you work rows (or rounds) of basic stitches — often single crochet or half‑double crochet — building up the band until it reaches the width you want.
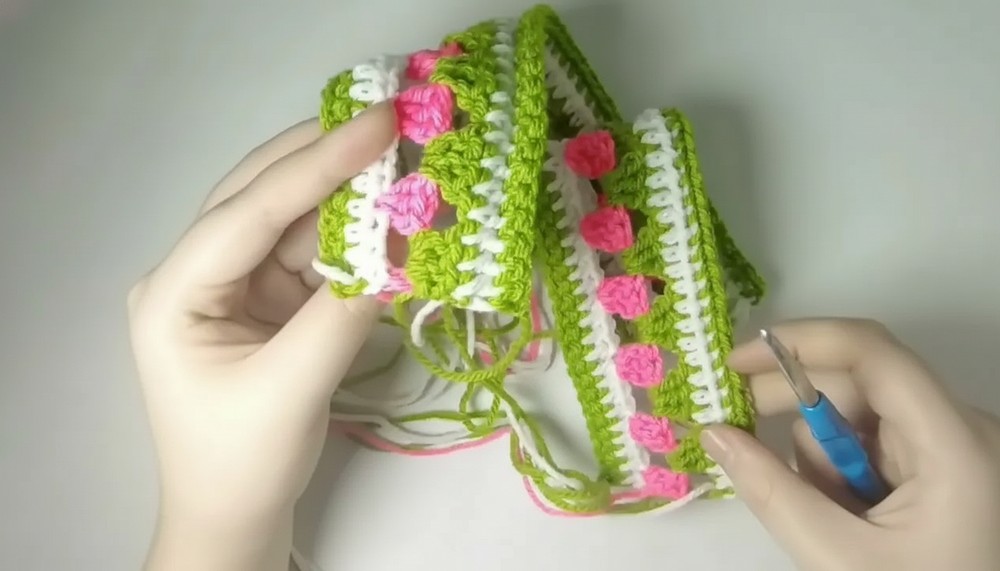
As you progress, stitch tension and consistency shape the headband to be snug but stretch‑friendly. Toward the end you finish off with a neat border or edge, join the ends (sometimes with a slip stitch or seam), and weave in any loose ends to give the headband a polished, durable finish.
Some Importent Points:
Materials and Uses
You need approximately 5 grams each of three colors: white, pink, and green yarn. The tutor uses 8-ply or double knit yarn, but you can choose any yarn weight you prefer. You also require a 4 mm crochet hook, a darning needle, and scissors. You create a versatile accessory ideal for spring. This project allows you to practice basic stitches and color changes. You can also customize the size by chaining more in the beginning to make a bigger headband.1
Level of Difficulty
The creator specifically designed this project as an Easy, Beginner-Friendly Tutorial.
Tutor’s Suggestions
-
Adjusting Size: If you want a bigger headband, you should chain more than the initial 80 chains in the foundation row.
-
Changing Color: You perform the color change in the last step of the last stitch of the row. For example, when switching from green to white, you go through the stitch, pull up a loop, and then yarn over and pull through the remaining loops with the new white yarn.
-
Joining Seams: You use the yarn tails from each corresponding row to sew the ends together. This technique makes the seam look seamless, as if you crocheted the rows together.
Conclusion
You complete your crocheting, resulting in a beautiful and colorful six-row headband. You expertly join the ends, creating an invisible and seamless finish.
Final Tip
When you fasten off a color, you must leave a long tail (about 6-8 inches).5 You use this specific tail later with a darning needle to sew the two ends of that corresponding color row together, which ensures a perfectly matched and inconspicuous seam.