Give your keys a pretty look with this free crochet tulip keychain pattern that helps you make a small and lovely flower accessory.

Hook Into Fun With This Free Crochet Tulip Keychain Pattern
A tulip keychain made with crochet is a little wonder you can carry around every day. This Free Crochet Tulip Keychain Pattern helps you make a tiny, colorful flower that looks soft, cheerful, and full of life. The tulip’s bright petals and neat stem make it a perfect match for your keys, backpacks, or even a gift to brighten someone’s day. Its lovely design adds a charming and personal touch wherever you use it.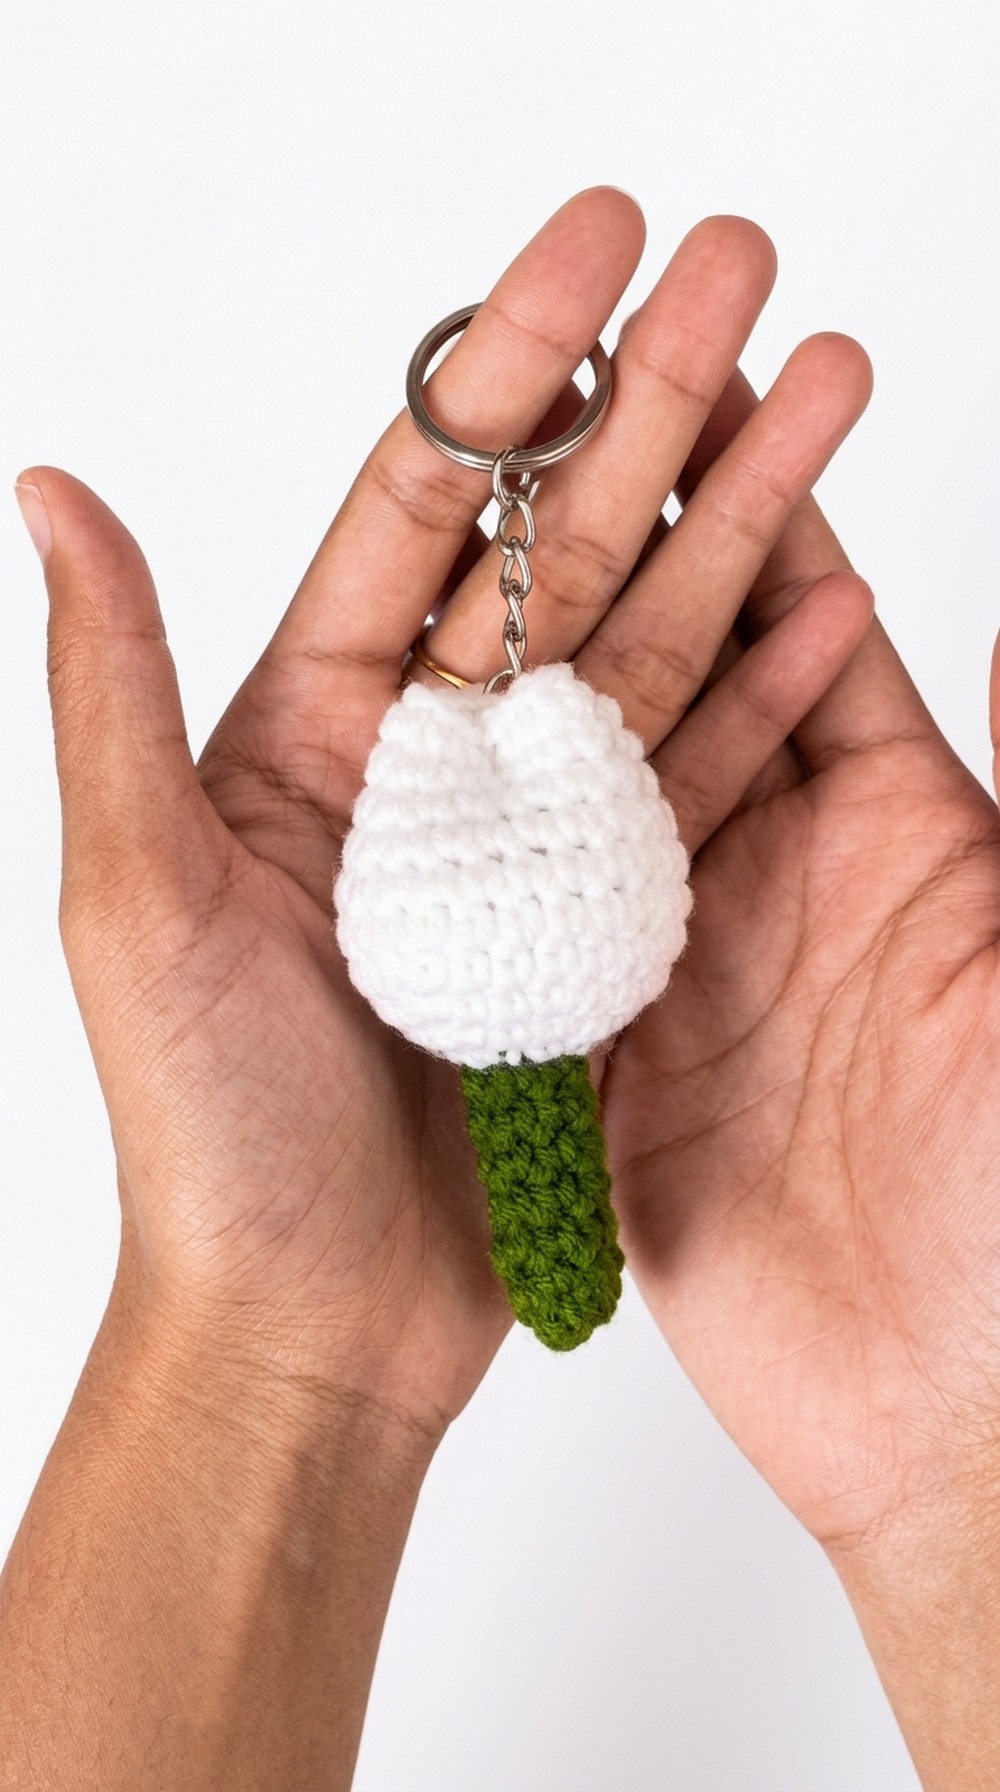 This crochet tulip is both simple and fun to make, even for beginners. Whether you want to add a floral vibe to your accessories or surprise someone with a heartwarming handmade gift, this tulip keychain is a wonderful choice to make something beautiful and meaningful.
Charming Crochet Tulip Keychain Pattern
Materials Required
- Yarn:
- Milk Cotton Yarn, 4 ply (Required colors: green for the stem and any chosen color for the tulip bulb – white, yellow, pink, or lilac).
- Crochet Hook:
- Size 2.75mm crochet hook.
- Stitch Marker:
- Used to mark your first stitch for accuracy.
- Plastic Needle:
- For sewing and finishing parts together.
- Fiberfill Stuffing:
- Used to stuff the tulip bulb.
- Keychain Rings and Jump Rings:
- For attaching the tulip to the keychain.
Abbreviations
- CH: Chain
- SC: Single Crochet
- SS: Slip Stitch
- INC: Increase (2 SC in one stitch)
Pattern: Part 1 Stem (Green Yarn)
- Magic Ring Setup:
- Create a magic ring and crochet 6 SC into the ring. Pull the yarn tail to close the ring tightly.
- Row 1:
- Place your stitch marker in the first SC from the magic ring.
- Work 1 SC into each stitch (no increase). A total of 6 SC for the row.
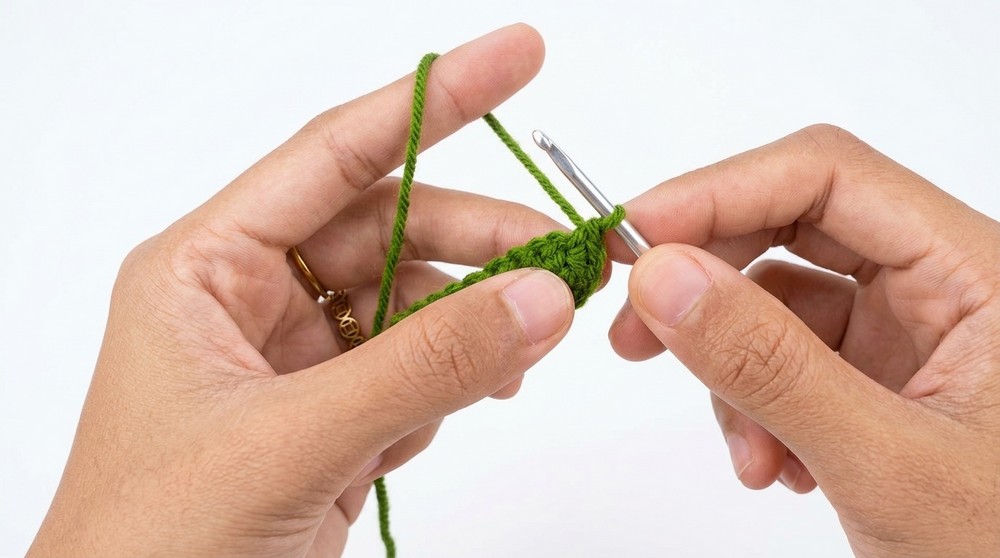
- Rows 2–7:
- Repeat the same process (1 SC in each stitch).
- Ensure your rows remain straight by starting each new row where you previously slip stitched.
- Finishing the Stem:
- After completing 7 rows, slip stitch into the first SC to close.
- Chain 1, leave a long tail, and cut the yarn. The tail will be used for attaching the stem to the bulb later.
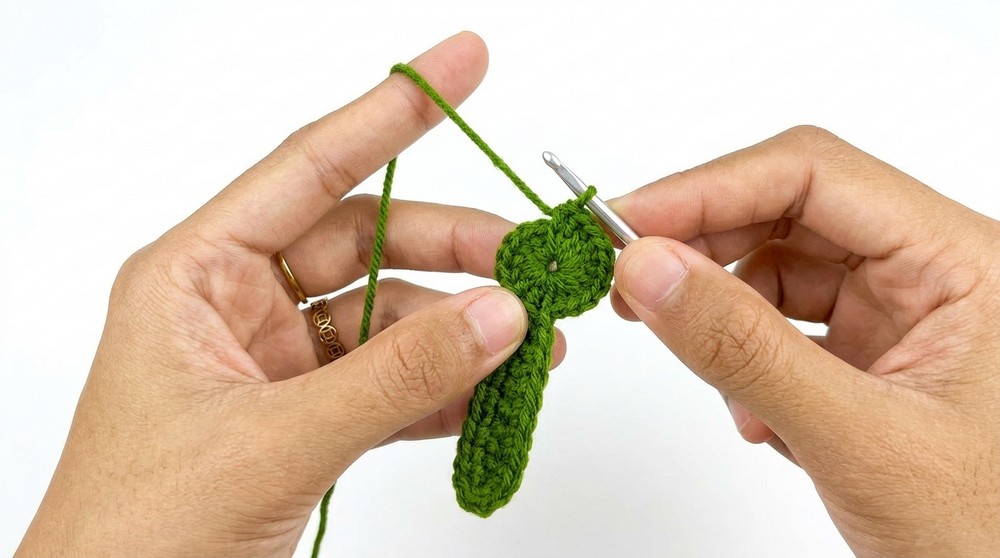
Pattern: Part 2 Tulip Bulb (Your Chosen Color)
- Joining the Yarn:
- Insert your hook into the top of the finished stem where you slip stitched.
- Join your chosen color yarn, chain 1, and prepare for the bulb section.
- Base of the Bulb (Row 1):
- Work into the front loops only (FLO) of the topmost row of the stem.
- Crochet 2 SC in each stitch (INC around) to create a total of 12 SC.
- Row 2:
- Follow the pattern: 1 SC, INC (repeat around).
- This will give you a total of 18 SC in this row.
- Row 3 (Last Row with Increases):
- Adjust the pattern to: 1 SC, 1 SC, INC (repeat around).
- You should have 24 SC by the end of this row.
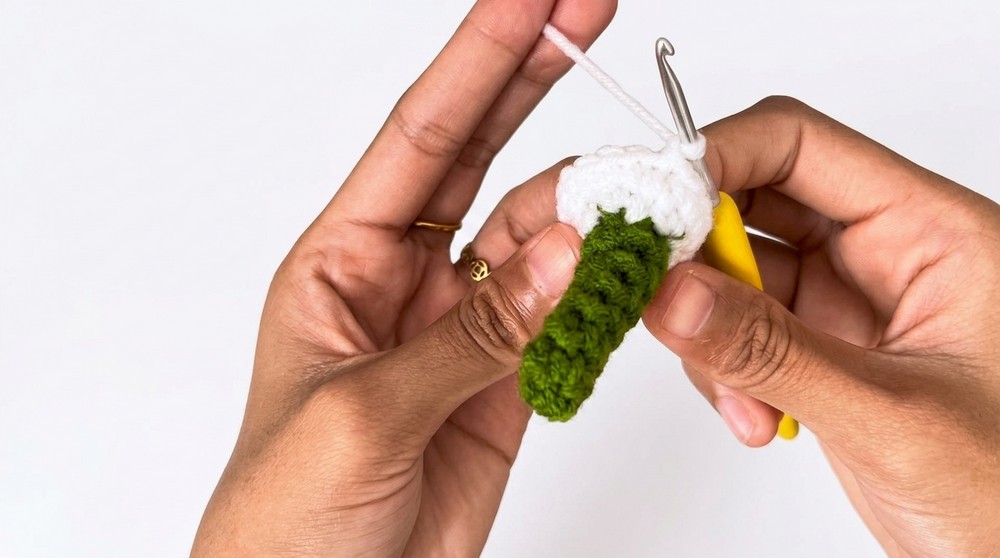
- Rows 4–10:
- Work 1 SC into each stitch around (no increases). This step forms the bulb’s even and round middle section.
- Stuffing the Bulb:
- After completing Row 10, insert a reasonable amount of fiberfill stuffing into the bulb. Avoid overstuffing to maintain a smooth top.
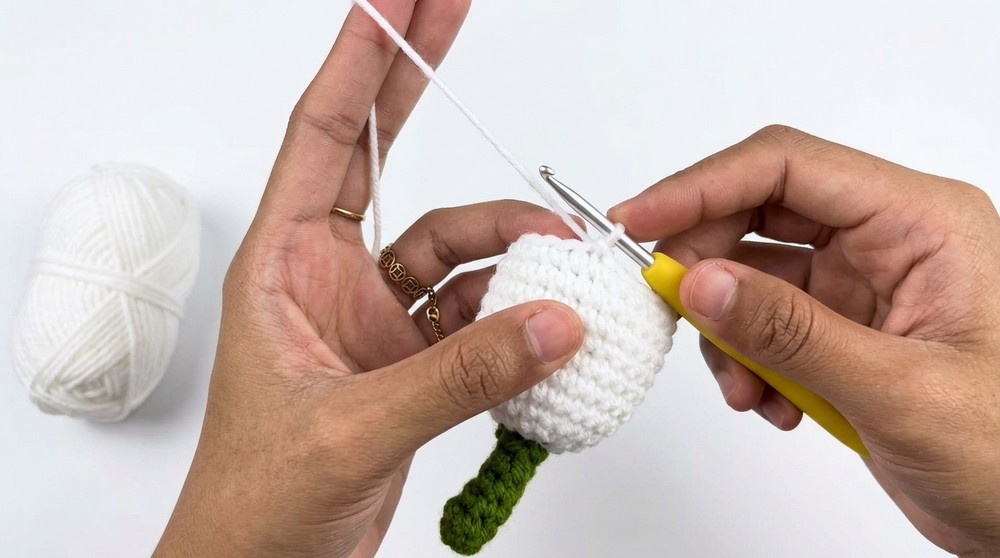
- Closing the Bulb:
- After stuffing, chain 1 and cut the yarn, leaving a long tail for sewing.
- Use the plastic needle to sew the top of the bulb closed.
- Weave through the topmost row, pull tightly, and secure the yarn by knotting it.
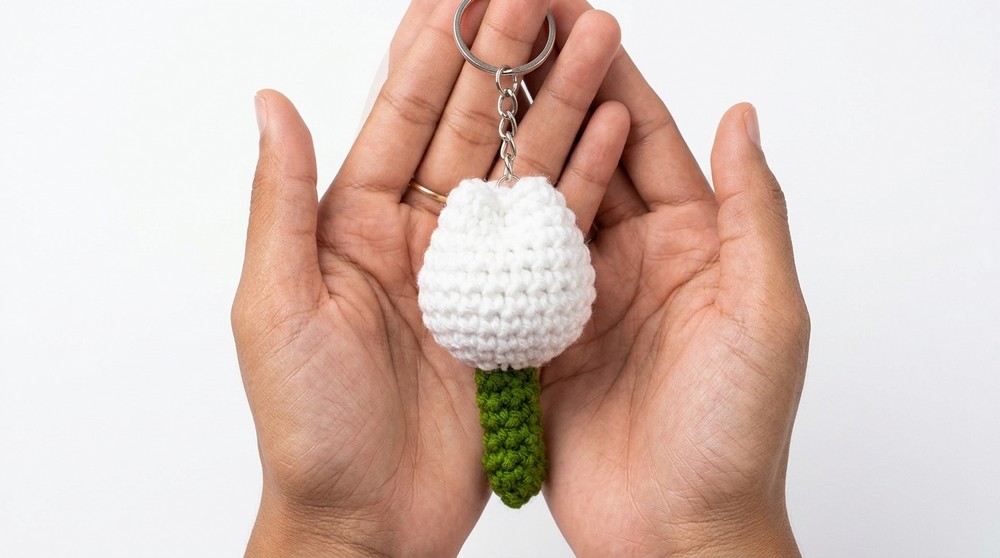
Finishing the Tulip Keychain
- Attaching the Stem and Bulb:
- Use the yarn tails left from the stem and bulb to sew them together securely.
- Ensure the bulb is centered on the stem before knotting the yarn.
- Adding Keychain Hardware:
- Use a jump ring to attach the finished tulip to the keychain ring.
- Optionally, sew or press the jump ring to secure.
Final Words
Congratulations, You’ve now completed your crochet tulip keychain. This project is great for beginners looking to practice their magic ring, single crochet, and increase skills. It also makes a thoughtful handmade gift or a beautiful addition to your accessories.
Tips to Maintain the Pattern and Keychain
- Care Instructions:
- If the yarn becomes dirty, gently hand wash the tulip keychain with cold water and mild soap. Air dry to prevent distortion.
- Fiberfill Placement:
- Ensure the bulb is stuffed evenly to maintain shape over time. Avoid overstuffing to keep it neat.
- Secure Attachments:
- Double check your keychain attachments (jump ring and hardware) to ensure durability during regular use.