Bring style to every outing with this Free crochet backpack Pattern that’s chic, durable, and perfect for everyday use.
A thoughtfully made backpack adds both convenience and style to everyday routines, offering a polished way to carry essentials while still looking refined and modern. Its structured shape, comfortable wear, and visually pleasing form make it a practical choice for daily commutes, casual outings, or weekend plans. When following a Crochet backpack Pattern, you can achieve a piece that feels current, functional, and beautifully balanced.
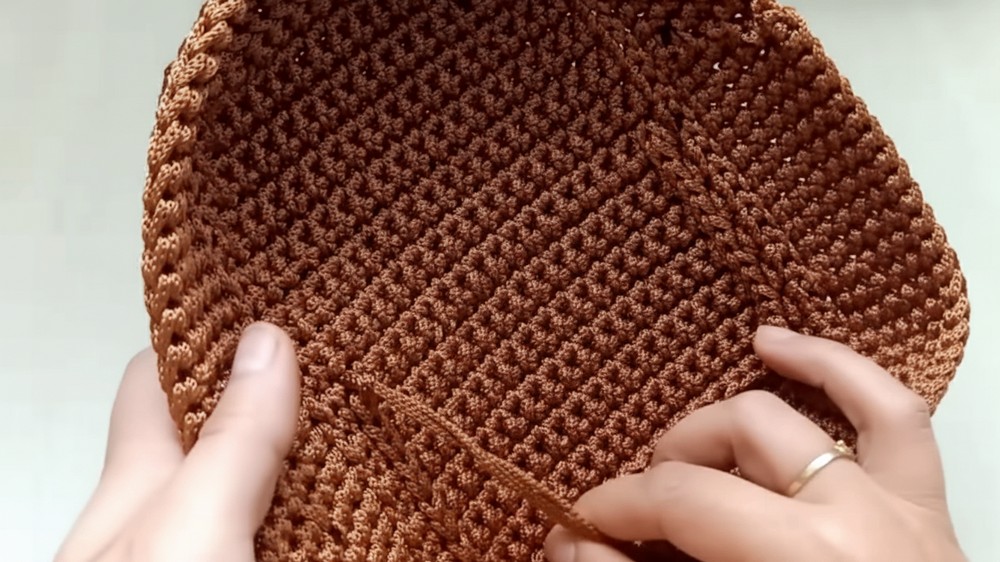
Minimal Crochet Backpack Pattern With Big Style Impact
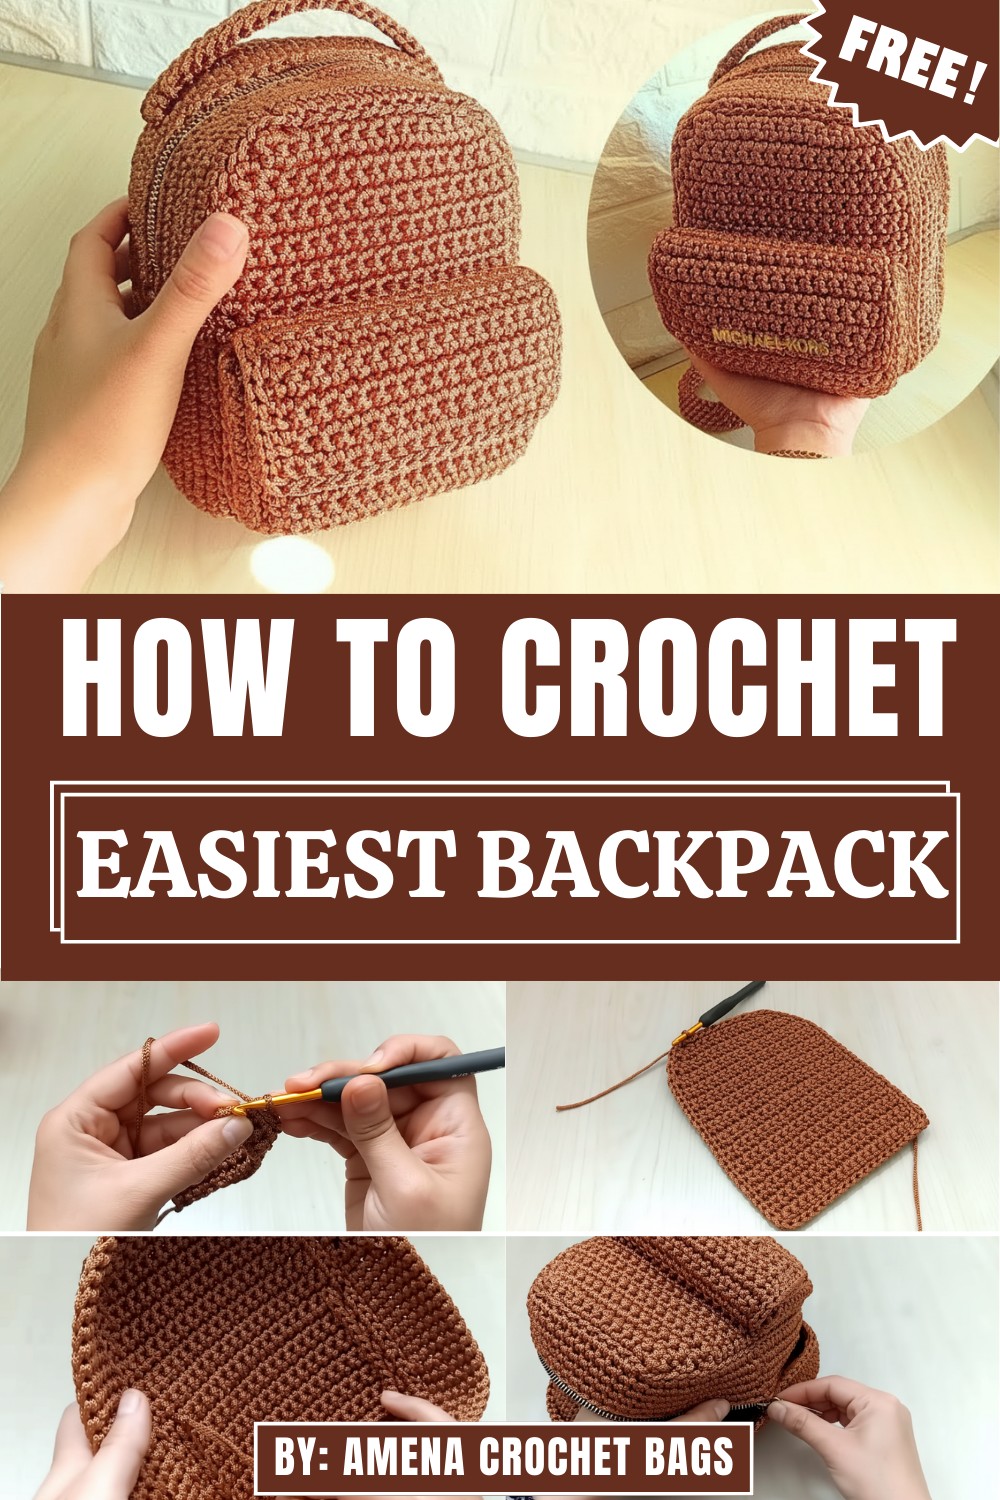
This style stands out for its clean lines, roomy interior, and the soft yet durable texture that gives it a luxurious feel. The pattern often highlights subtle details—smooth finishes, adjustable straps, and a secure closure—allowing the bag to complement everything from relaxed attire to more dressed-up looks. Its versatility keeps it relevant in present trends, where simple elegance and useful design are highly appreciated.
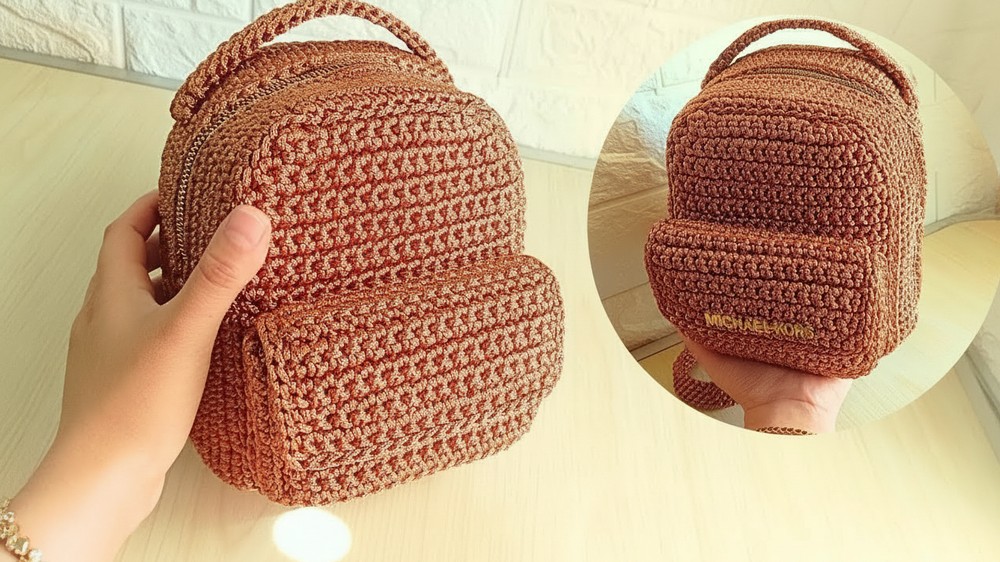
Beyond appearance, the backpack offers comfort and ease, distributing weight naturally across the shoulders while keeping belongings neatly organized. It’s ideal for carrying daily items such as a tablet, water bottle, makeup pouch, or personal accessories without feeling bulky. With its blend of beauty and practicality, this pattern remains an appealing option for anyone wanting a stylish addition to their collection that fits effortlessly into modern life.
Step-by-Step Details
Step 1: Prepare Materials
- Use 3mm polyester macramé thread for durability and aesthetic appeal.
- Grab a 5mm crochet hook for consistent stitches and smooth handling.
- Optional materials include a zipper, lining fabric, and metal rings for straps.
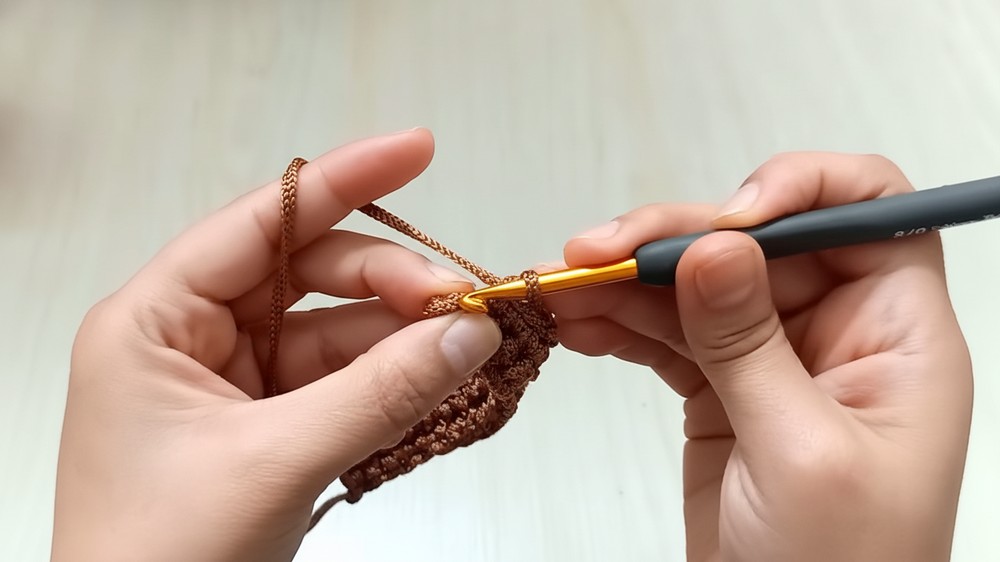
Step 2: Start the Base
- Make a starting knot and crochet 21 chains (or adjust the width to fit your preferred bag size).
- Work single crochet stitches in the back loop starting from the second chain, totaling 20 stitches.
- Begin the second row by chaining 1 as the first stitch and crocheting the second stitch onward. Avoid working into the first stitch of each row, as the chain counts as the first stitch.
- Continue this process for 22 rows. Ensure that at the end of each row, you make a single crochet into the chain you began with for a neat finish.
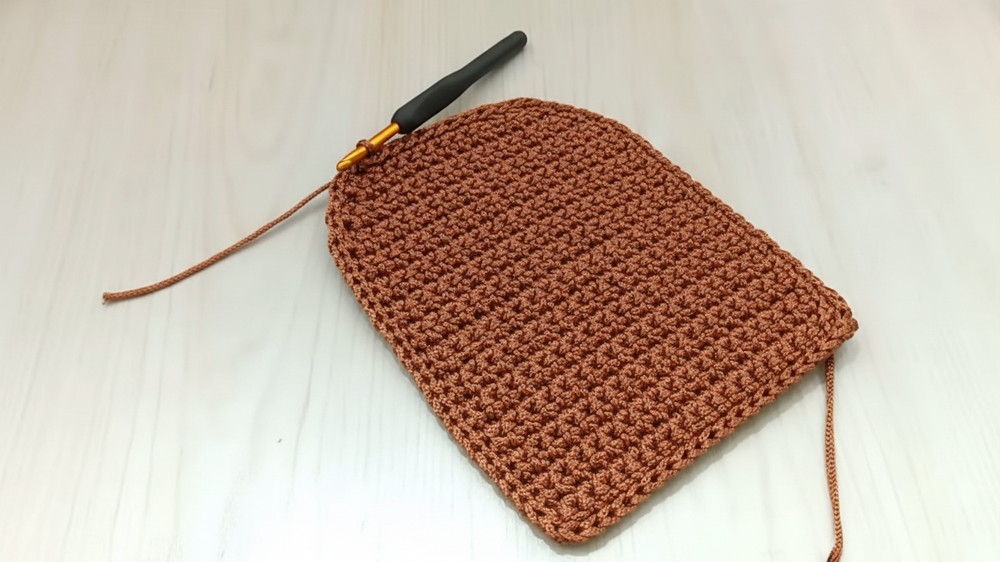
3: Create Decrements
- Row 23: Start decrements to shape and reduce the base. Make 1 stitch over 2 stitches throughout the row, decreasing by 2 stitches.
- Row 24: Complete this row with 18 stitches.
- Row 25: Make decrements on both sides, with 1 stitch over the first two and last two stitches, leaving 16 stitches.
- Row 26: This row maintains 16 stitches, with no increases or decreases.
- Row 27: Begin and end the row with decrements, leaving 14 stitches.
- Final Row: Perform double decrements, reducing 4 stitches, to leave 10 stitches.
4: Add Slip Stitches
- Chain 1 and work slip stitches around the piece to create a clean edge. On the sides, insert one stitch per row of the base.
- Move side to side without chaining at the corners to maintain shape and keep edges smooth.
- After completing the cycle, cut the thread.
5: Build the Body
- Attach the thread to the 16th row approximately and chain 1.
- Make single crochet stitches in the back loop of the slip-stitch row to build the bag body.
- Complete this cycle without adding or decreasing stitches. Close the round in the chain where you started.
- Continue for 5 rows, leaving space for the zipper to be added.
6: Create and Attach Pocket
- Crochet a pocket piece that is 18 stitches wide and 12 rows high. Finish with slip stitches on three sides, leaving the last row open.
- Make another identical piece for the second pocket.
- Attach the pocket to the bag base by counting 14 rows from the base and start slip stitching the pocket in place. Ensure the pocket cover aligns neatly, with the slip stitch row facing outward.
7: Sew Fabric Lining
- Cut lining fabric to match the dimensions of the backpack base (e.g., 28 cm x 25 cm).
- Cut 3 cm x 3 cm squares from fabric corners, which help create clean seams. Sew these parts together to form the lining shape.
- Sew the zipper to the lining before installing both into the backpack.
8: Add Straps and Rings
- Attach three metal rings to the back for shoulder straps.
- Crochet or sew a small hand strap to the top of the backpack using the same macramé thread or another sturdy material.
- Secure straps and ensure the stitches are tight to prevent wear and tear.
9: Assemble and Finish
- Align and attach the two backpack pieces together. The tutorial recommends using stitch-in-front-of-stitch sewing for a neat and durable finish.
- Insert the thread ends under the stitches to keep everything tidy.
- Take measurements throughout and adjust if necessary to ensure proper fitting of the lining, zipper, and straps.

Special Features
- Customizable Design: Adjust the size, pocket placement, or add decorative elements like beads.
- Clean and Durable Edges: The slip stitches ensure smooth trims and sturdy finishing.
- Functional Compartments: The added zippered pocket and lining make the backpack practical for everyday use.
- Versatile Uses: Great for casual outings, carrying essentials, or as a thoughtful handmade gift.
Level of Difficulty
This project is moderately difficult, ideal for those familiar with basic and advanced crochet techniques like single crochet, slip stitches, and decrements. Beginners can complete it with patience, while intermediates will find it a fun challenge.
Tutor’s Suggestions
- Pay Attention to Decreases: Follow the decrement instructions carefully to achieve the perfect backpack shape.
- Measure Fabric and Thread Accurately: Match the lining dimensions and thread measurement to avoid errors when assembling the final piece.
- Test the Zipper: Ensure the zipper fits snugly on the lining and the backpack before sewing it on permanently.
- Use Markers for Stitching Clarity: Mark stitches during big sections (e.g., slip stitching the pocket) to avoid losing place.
Uses and Materials
Uses:
- An everyday backpack for casual outings.
- Stylish handmade gifts for loved ones.
- A personalized bag that showcases your crochet skills.
Materials:
- 3mm polyester macramé thread (durable and elegant).
- 5mm crochet hook.
- Metal rings and zippers (for added functionality).
- Fabric for lining (cut and sewn per tutorial instructions).
Tip
When attaching the lining, sew the zipper first to avoid misalignment. Double-check dimensions and stitching to prevent wrinkling or pulling when the lining is installed.
Conclusion
This video tutorial is an excellent guide for anyone looking to create a chic, functional backpack. With clear instructions and room for creative customization, it’s a perfect project for intermediate crocheters seeking a rewarding challenge. The end result is not only practical but also a handmade statement piece that elevates your crochet game.