Make a unique crochet Apple AirPods case pattern that’s functional, protective, and stylish, perfect for keeping your earbuds safe and secure.
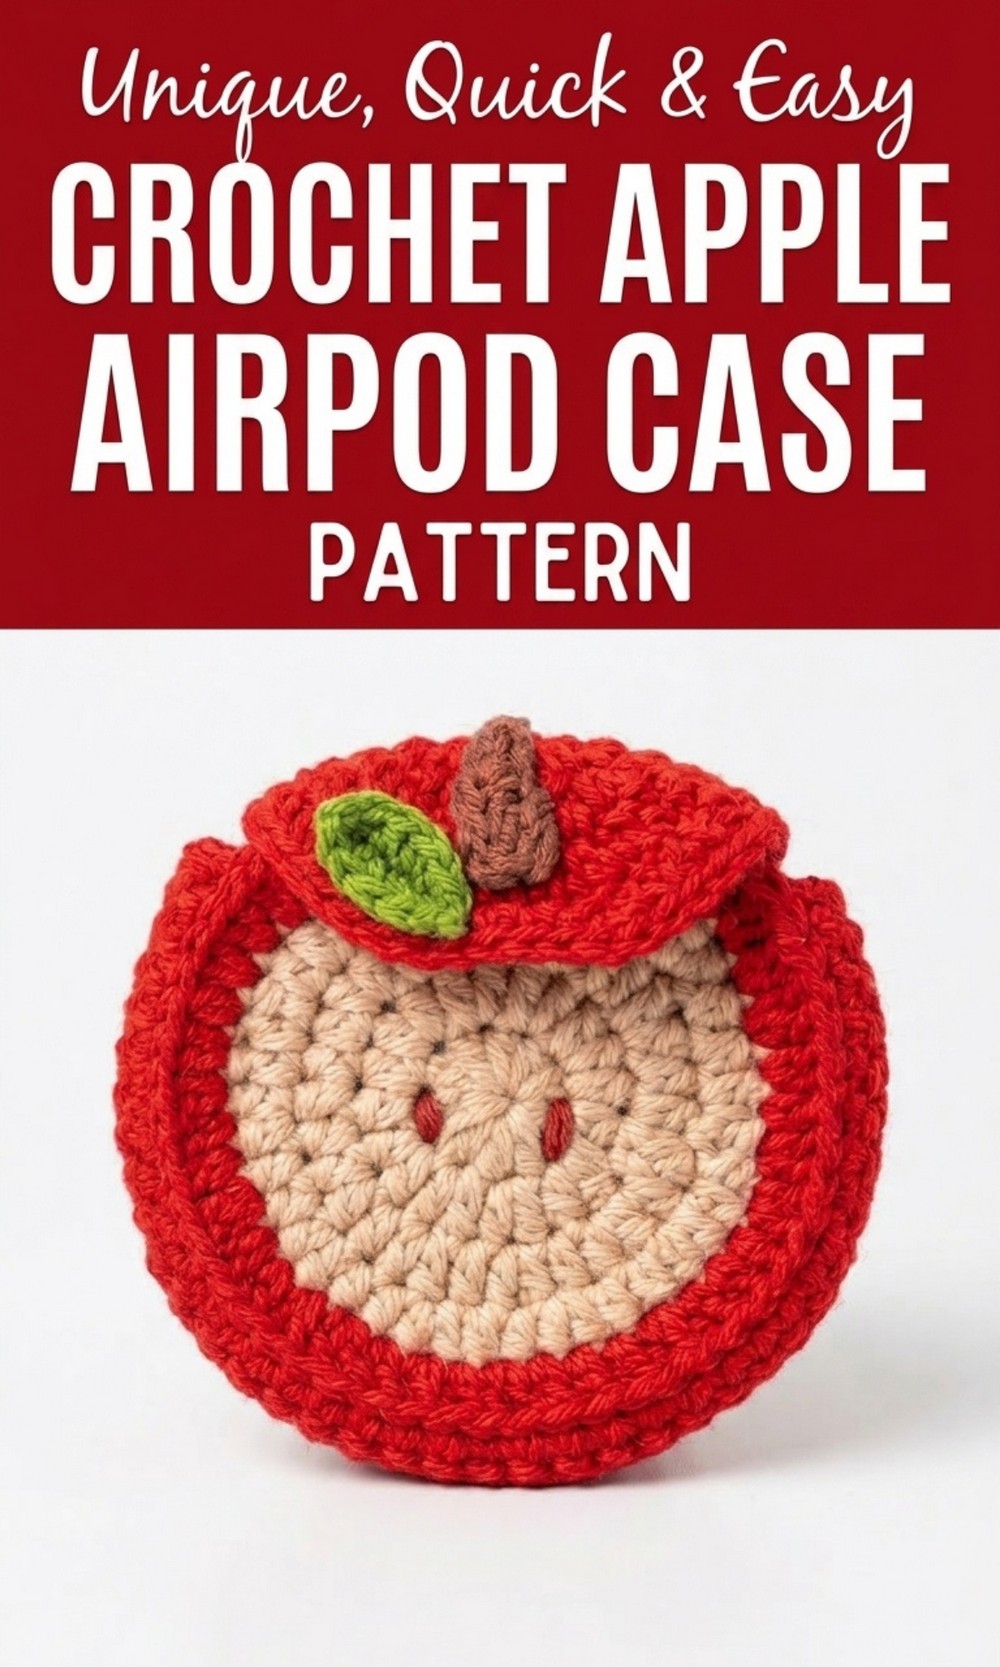
Fun Crochet AirPods Case pattern perfect for storage use
Keep your favorite music safe and stylish with this adorable Free Crochet Apple AirPods Case Pattern that’s as functional as it is charming. Imagine your earbuds wrapped in a soft, cozy jacket that not only keeps scratches and dirt away but also looks absolutely delightful. With its bright, cheerful colors and smooth yarn texture, this case feels amazing to hold and adds a pop of fun to your day.
The clever design features a tiny charging hole at the bottom, so you don’t even have to take the case off to power up. Its thick, sturdy stitches work like a soft cushion to protect your AirPods if they slip or fall. 
Whether you want to match it to your outfits or gift it to someone special, this crochet case is a perfect choice. It’s super easy to make, even for beginners, and finishing this quick and fun project is a great way to show off your creativity while keeping your AirPods safe and stylish.
Crochet Apple AirPods Case Pattern
Necessary Materials
- Yarn:
- 4 different colors of yarn (Butter yarn and Summer yarn are used in the tutorial).
- Suggested: Cotton or acrylic yarn in 4 ply or medium weight category.
- Hook:
- Crochet hook size 2.5 mm.
- Additional Tools:
- Tapestry needle (for sewing and weaving in ends).
- Pair of scissors.
- Optional: High quality glue (if you prefer attaching details without sewing).
- Extras (Customizations):
- Small buttons for closures (optional).
- Stitch marker (optional for beginners to track the beginning of each round).
Gauge
- 10 hdc stitches x 10 rows = 2 inches square using 2.5 mm hook and Butter/Summer yarn.
- Ensure you have consistent tension throughout the project. Adjust the hook size accordingly if your stitches are too loose or tight.
Finished Size
- Approximately 4.5 cm x 6 cm (adjustable for different AirPod models by following tips in the customization section below).
Pattern at a Glance
- Skill Level: Beginner
- Techniques Used:
- Magic Ring
- Half Double Crochet (hdc)
- Slip Stitch (sl st)
- Single Crochet (sc)
- Increasing and Decreasing stitches
- Back Loop Only (for certain sections)
- Finishing techniques using tapestry needles.
Pattern Instructions
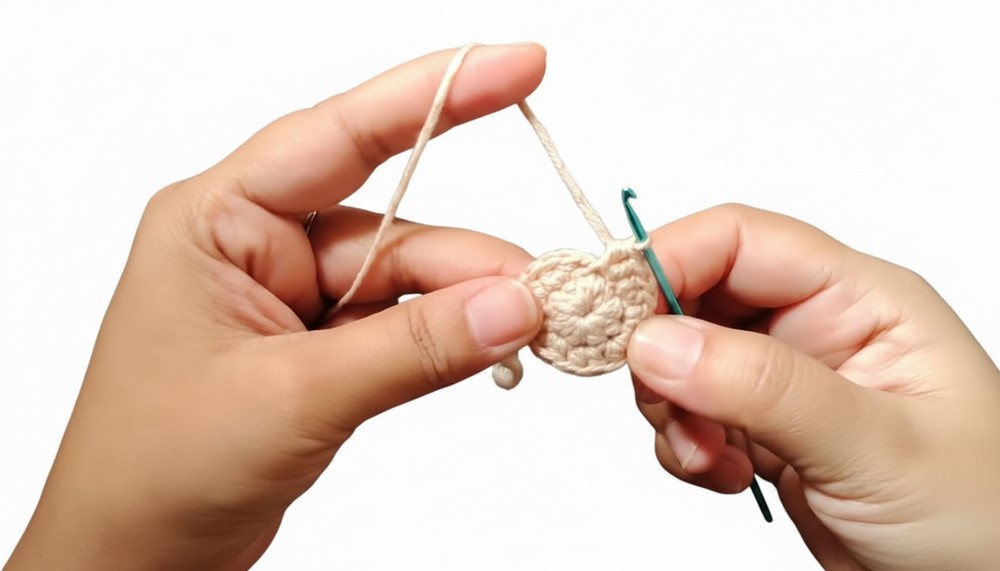
1. Base of the Cover (Flat Circular Base)
- Round 1 (Magic Ring):
- Create a magic ring.
- Chain 1 (does not count as a stitch).
- Work 10 hdc into the magic ring.
- Pull the yarn tail to close the ring tightly.
- Slip stitch into the first hdc to join the round.
- (Total: 10 hdc)
- Round 2:
- Chain 1 (does not count as a stitch).
- Work 2 hdc into each stitch around.
- Slip stitch into the first hdc to join.
- (Total: 20 hdc)
- Round 3:
- Chain 1.
- Work 1 hdc into the first stitch, and 2 hdc into the next stitch (increase).
- (Pattern: hdc, increase) Repeat around.
- Slip stitch into the first hdc.
- (Total: 30 hdc)
- Round 4:
- Chain 1.
- Work 1 hdc each into the first 2 stitches, and 2 hdc into the third stitch (increase).
- (Pattern: hdc, hdc, increase) Repeat around.
- Join the round with a slip stitch.
- (Total: 40 hdc)
- Round 5 (Final Round of Base):
- Chain 1.
- Work 1 hdc each into the first 3 stitches, and 2 hdc into the fourth stitch (increase).
- (Pattern: hdc, hdc, hdc, increase) Repeat around.
- Join the round with a slip stitch.
- (Total: 50 hdc)
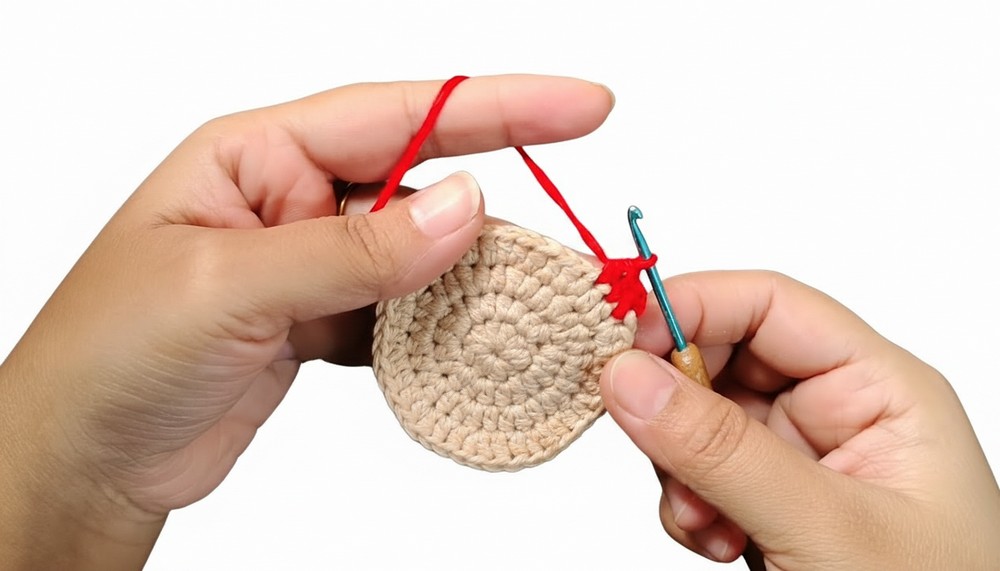
2. Wall of the Cover
- Round 6 (Back Loop Only):
- Chain 1.
- Work 1 sc into back loop only of each stitch from the previous round.
- (Total: 50 sc)
- Turn your work after completing the round.
- Round 7–9:
- Chain 1.
- Work 1 sc into the entire stitch (both loops) in every stitch around.
- (Total for each round: 50 sc) Turn your work after each round.
3. Front Flap
- Foundation Row:
- Attach the yarn on one edge of the wall’s top edge using a slip knot.
- Chain 1 and work 12 sc across one section (mark these stitches).
- (Total: 12 sc)
- Rows 2–5:
- Chain 1, turn.
- Work 1 sc into each stitch across (12 sc per row).
- Row 6 (Start Decreasing):
- Chain 1, turn.
- Decrease (sc2tog) in the first 2 stitches, then sc across until the last 2 stitches.
- Decrease (sc2tog) in the last 2 stitches.
- (Total: 10 sc)
- Row 7:
- Repeat Row 6.
- (Total: 8 sc)
- Row 8:
- Chain 1, turn.
- Decrease in the first 2 stitches, sc across, and decrease in the last 2 stitches. (Total: 6 sc)

- Row 9 (Final Row):
- Chain 1, turn.
- Work sc2tog three times across. (Total: 3 sc)
- Finishing:
- Fasten off, weave in ends with a tapestry needle.
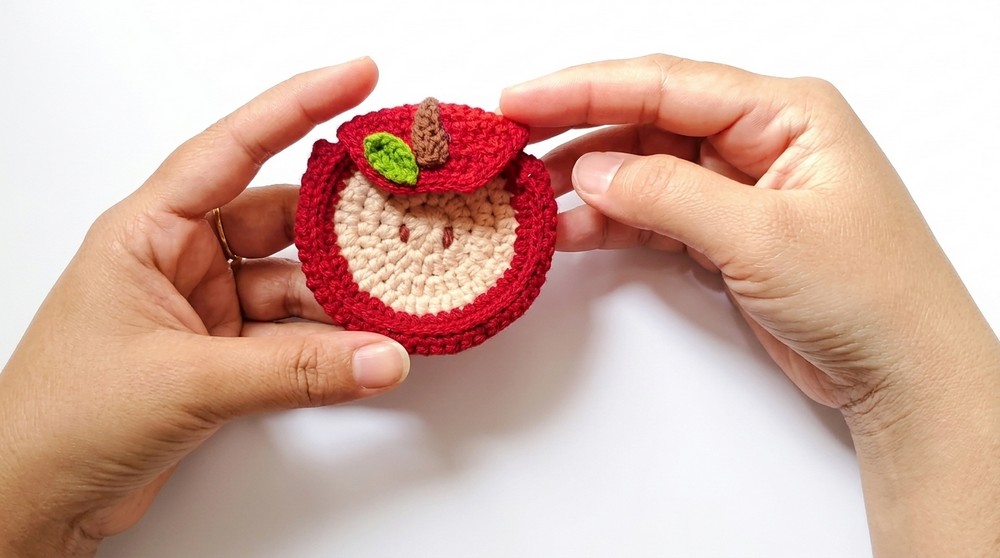
4. Assembly
- Joining Two Circles:
- Place two circular base pieces together, ensuring the stitches align.
- Work slip stitches through the back loop of the front circle and the back loop of the back circle.
- Continue slip stitching around until the two pieces are fully joined.

- Adding Details (Optional):
- Use buttons or decorative elements to secure the flap.
- For easier access, a snap button or Velcro can also be sewn on the flap.
Special Techniques
- Magic Ring: Helps create a tight, seamless foundation.
- Back Loop Only: Adds texture and definition to transitions.
- Increasing and Decreasing: Necessary for shaping the piece.
- Slip Stitch Join: Creates a neat and flat join between two pieces.
Customization Ideas
- Change the Yarn Color: Alternate colors in rounds to create stripes or patterns.
- Add Texture: Use post stitches or puff stitches in the main body for texture.
- Personalized Details: Sew on initials, motifs, or other decorative elements.
Conclusion
This AirPod cover crochet project is perfect for beginners looking for a fun, portable project. The final product is cute, functional, and can be customized with colors, buttons, and textures to fit your preferences. The step by step approach ensures ease in following, and the addition of finishing techniques (like hiding loose ends) provides a polished look.
Important Remarks
- Ensure consistent tension throughout the project to maintain the shape of the cover.
- Use a smaller hook size for finer details or when sewing parts of the AirPod cover.
- Clean finish and proper assembly add finesse to the final product, so do not rush the stitching process.
Enjoy crocheting your AirPod cover, and feel free to experiment with designs to make it uniquely yours.