Experience the cozy charm of the herringbone crochet pattern and add rich texture to your projects with this simple yet stylish design perfect for all levels.
This pattern creates a lovely textured look that feels both cozy and stylish. With its unique zigzag lines, it adds a special touch to any project, making things more interesting and eye-catching. The herringbone stitch gives a rich, woven appearance that looks like it took a lot of work, but it’s actually quite easy to learn. You can use this pattern to make warm scarves, soft blankets, or even decorative cushions that bring warmth and charm to your home.

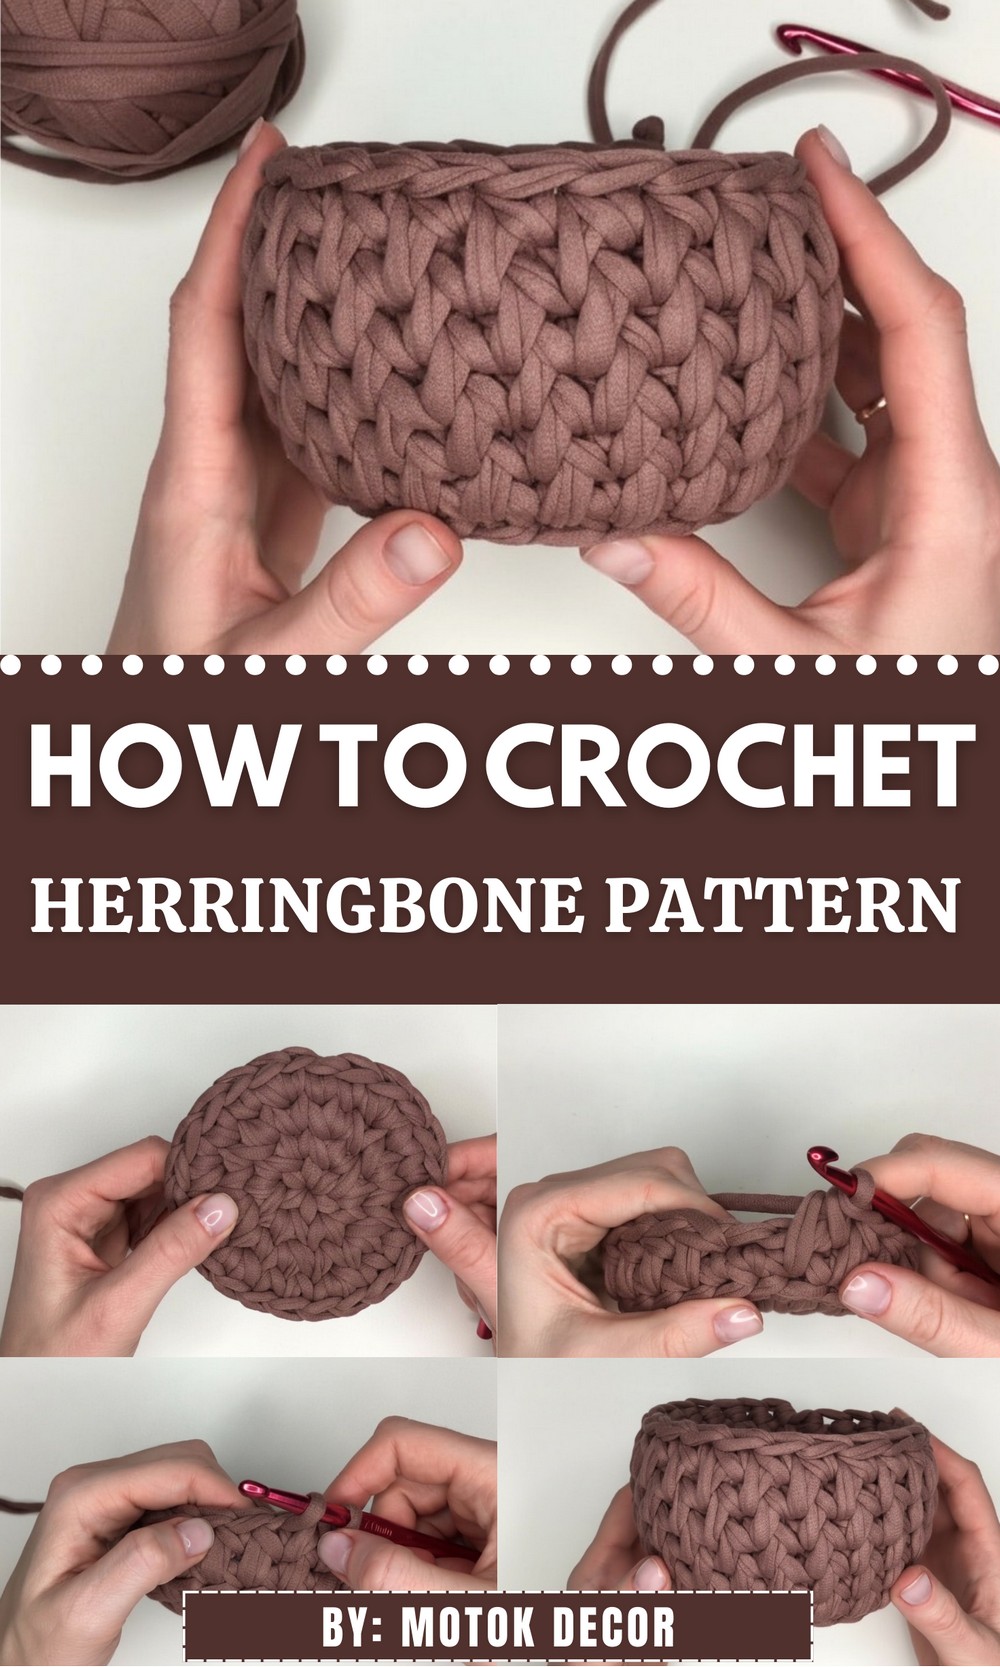
Warm Herringbone Crochet Pattern to Brighten Cold Days
Its neat, angled rows create a beautiful design that stands out, whether in bright colors or soft, natural shades. Because of its thickness and texture, items made with this stitch feel extra comfortable and snug. Whether you’re a beginner or just want to try something new, this pattern is perfect for adding a touch of elegance and comfort to your handmade creations. It’s a wonderful way to bring beauty and warmth together in your work.
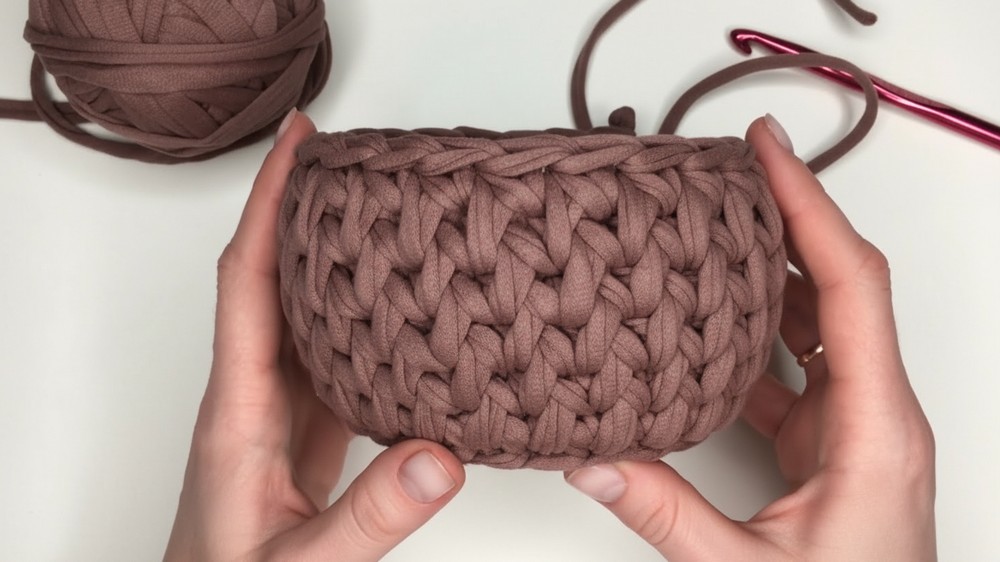
Herringbone Crochet Pattern for Basket Edge
Special Features:
- Dense, stable fabric ideal for basket edges or structural crochet
- Alternating long and short stitch technique creates a braided/herringbone effect
- Worked along “lying pigtails” providing a unique texture
- Perfect for both yarn and polyester cord
- Works well with hook size 7 for standard thickness materials
Difficulty Level:
Intermediate — requires attention to stitch placement and technique for long vs short stitches, working under specific loops (braids).
Materials Needed:
- Polyester cord or yarn (thickness approx. 7-9 mm)
- Crochet hook size 7
- Scissors
- Tapestry needle (for weaving ends)
Pattern Instructions
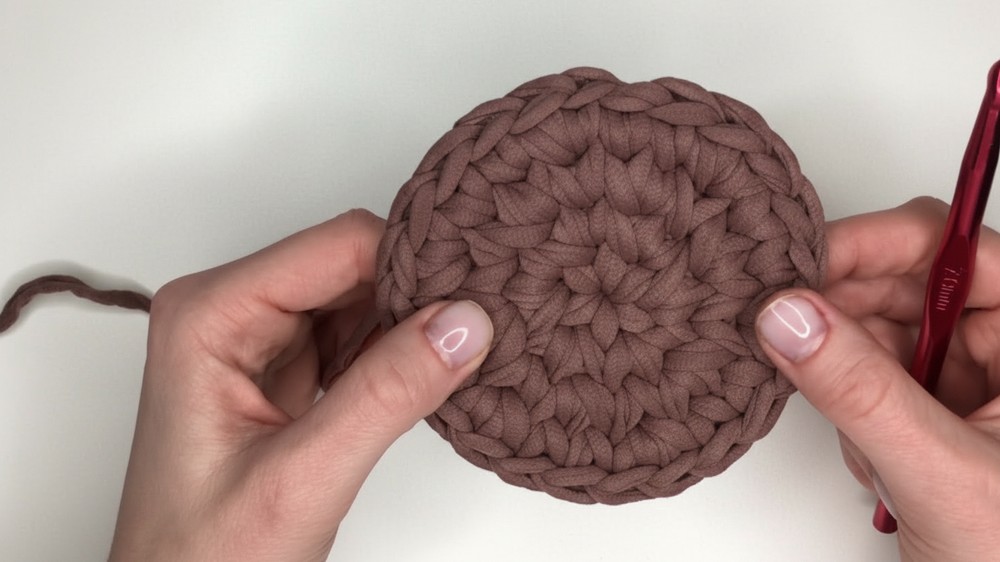
Row 1: Foundation Row with Single Crochet (sc)
- Prepare foundation: Work base stitches or join to form your basket wall area.
- Single crochet along “distant bows” (lying pigtails):
- Insert hook under farthest braid loop (jumpers).
- Yarn over, pull through, and complete single crochet (sc).
- Continue working single crochet into each distant braid looping under “jumpers” along the edge.
- This creates a dense row anchoring the pattern base.
- At row end:
- Work the final sc into the last braid loop to secure.
- Row shaping:
- As you crochet, use your hand to gently shape the edge so stitches stand perpendicular, forming the basket’s wall.
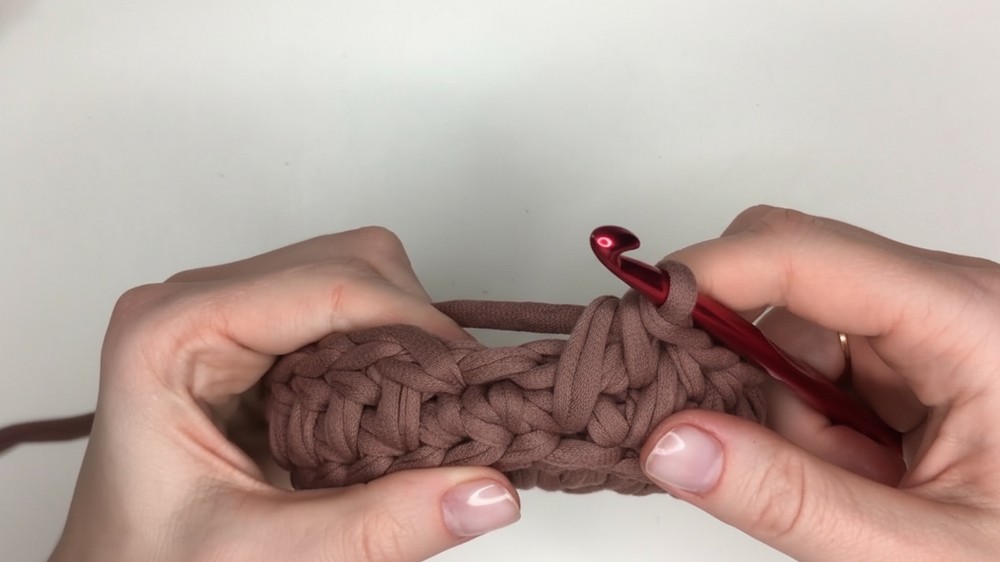
Row 2: Begin Herringbone Pattern with Alternating Long and Short Stitches
- Joining the row:
- Pull a loop from the seam side under the first lying pigtail (first crochet stitch of the previous row).
- Insert hook under the loop and pull through to form a large loop.
- Tighten the loop but leave it loose enough to prevent it from slipping back.

- Alternate stitches along the edge:
- Short stitch: Insert hook through the short loop pulled out from previous row, yarn over, pull up a loop, then yarn over and pull through all loops on hook (single crochet style).
- Long stitch: Insert hook at the base of basket wall (bottom of the previous row’s stitch), yarn over, pull up a loop (making a tall loop), yarn over, and pull through all loops on hook (this forms the longer stitch hiding the short stitch).
- Repeat:
- Continue alternating short stitch under previous loop and long stitch at the base of the basket along the entire row.
- You will create a braided or herringbone textured effect with visible alternating short and long stitches.
- End row:
- Finish with the last short stitch under the final loop to complete the row.
- Finish with the last short stitch under the final loop to complete the row.
Row 3 and Beyond: Continue Pattern
- Repeat Row 2 instructions, maintaining alternating short and long stitches:
- Each row you pull loops under the stitches of previous rows accordingly.
- The pattern builds a sturdy textured band that looks like interwoven braids.
- Key steps each row:
- Always pull the loop under the appropriate “lying pigtail” from the previous row.
- Alternate stitch length: short stitch hides under the long stitch of the last row; long stitch goes into the base of stitches.
- Keep consistent tension for neat pattern definition.
Tutor’s Suggestions:
- Use a hook that matches your cord or yarn thickness to maintain consistent tension.
- Shape the basket edge as you crochet by gently pressing upward for neatness.
- Pull loops firmly but not too tight to avoid distorting stitch heights.
- Perfect for basket edges, bags, or any project needing a decorative sturdy trim.
Uses:
- Basket edges with decorative, strong edging
- Handmade bags or accessories with textured borders
- Any crochet project where a firm yet beautiful stitch pattern is desired
Pro Tip:
When pulling your loops under the lying pigtails, keep your hook insertion steady and consistent. This will ensure even loop sizes and a beautifully textured braid. Also, regularly check tension and adjust to keep stitches uniform, especially with varying cord thickness.
Conclusion:
This herringbone crochet pattern produces a striking alternating stitch texture ideal for durable and elegant basket edges or trims. Follow the step-by-step guide and enjoy creating your own beautiful handcrafted items.