Glow up your wardrobe with this Free Crochet Crop Top Pattern, that’s perfect for stitching a trendy, comfy top that adds handmade flair to sunny days.
On a warm sunny day, wearing something light and comfortable can make the whole day feel more pleasant. The Free Crochet Crop Top Pattern offers a simple way to make a stylish handmade top that feels soft and breathable. This crop top usually has a neat shape that fits gently around the body and gives a relaxed, modern look. The crochet texture adds a beautiful handmade touch that makes the top stand out from regular clothing.
Cute Free Crochet Crop Top Pattern for Stylish Clothing
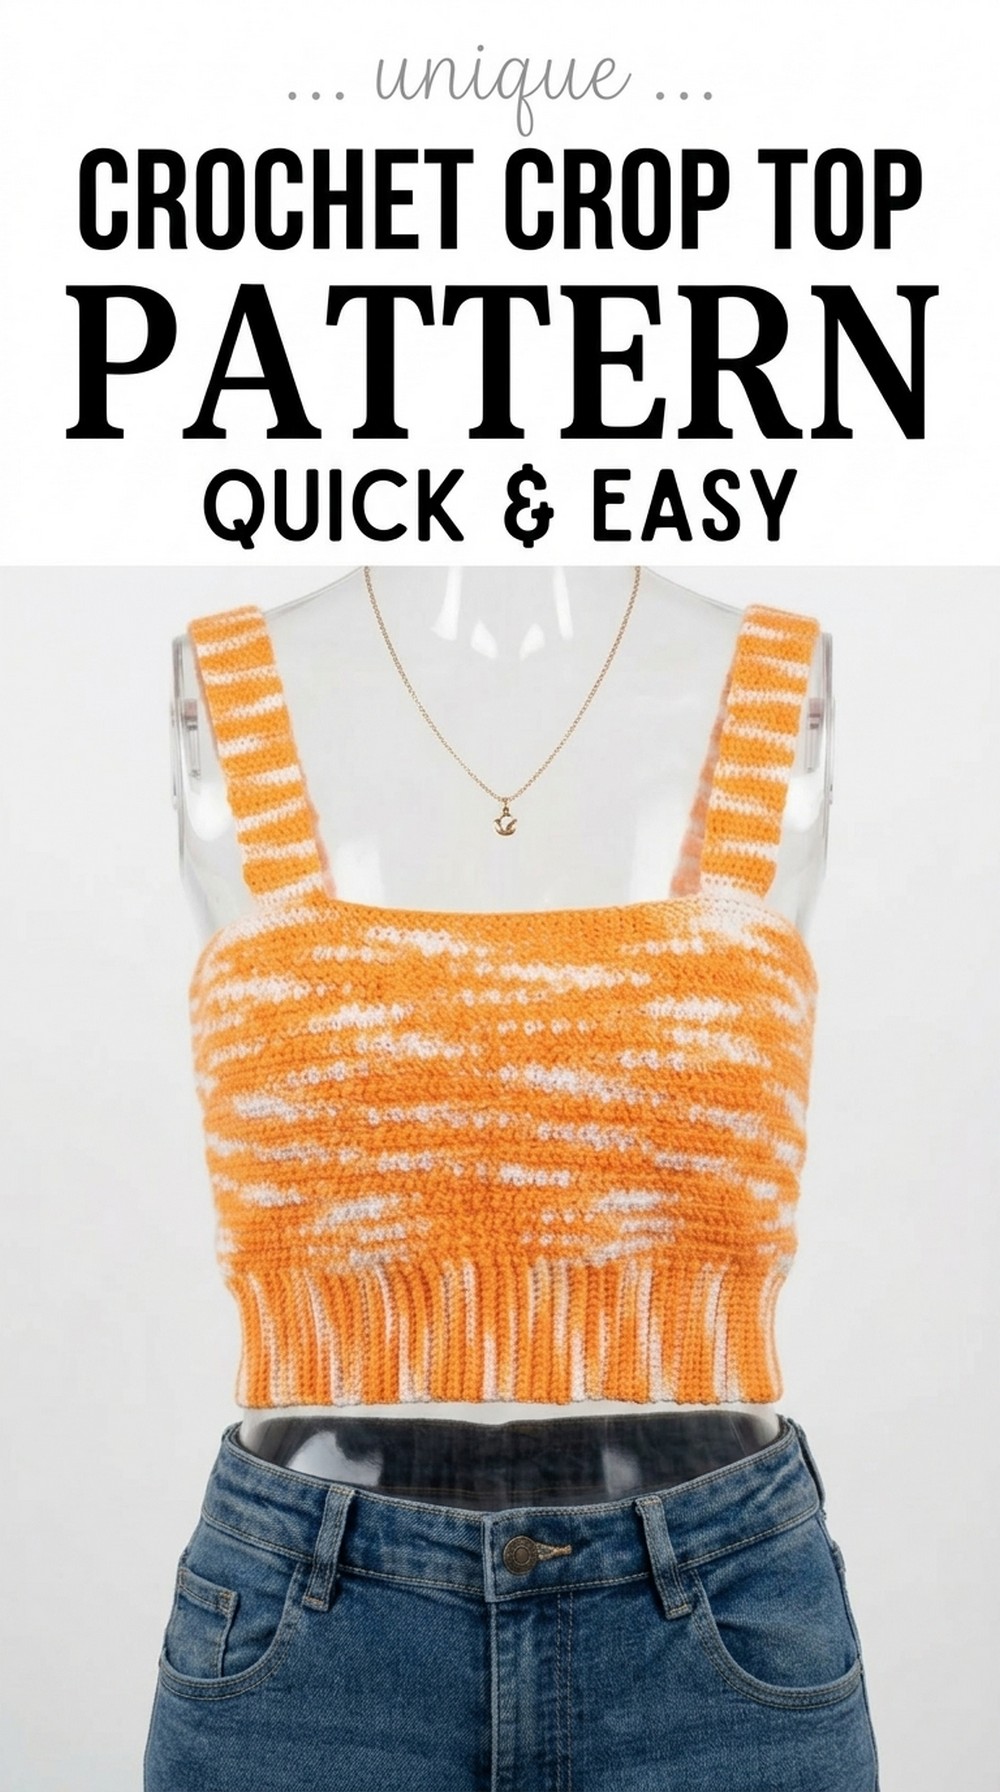
It can be worn with jeans, skirts, or shorts, making it perfect for casual outings, summer walks, or relaxing at home. The pattern often uses easy stitches that guide each step clearly, so even beginners can try making it without feeling confused. Different yarn colors can change the look and style of the top, making each piece feel special. In the end, this crochet crop top shows the beauty of handmade fashion while also being useful and comfortable.

Perfect Crochet Crop Top Pattern
Skill Level
Intermediate – Suitable for those familiar with basic stitches (single crochet, double crochet) and working in rows.
Finished Size
- Height of Top: Approximately 24 cm (adjustable).
- Ribbing Width: Customizable (172 rows for example size, adjustable to fit waist circumference).
Materials Needed
- Yarn:
- Multicolor, 100% cotton yarn.
- Recommended: Yarn suitable for use with a 3 mm crochet hook.
- Hook: 3 mm crochet hook (size can be adjusted for thicker/thinner yarn).
- Tools:
- Stitch markers: Useful for tracking rows, stitches, and strap placement.
- Tapestry needle: For weaving in loose threads and assembling the straps.
- Scissors: For cutting yarn.
Gauge
Gauge is not specifically required for this project because the pattern is customizable based on personal measurements.
Key Abbreviations
- ch – Chain
- sc – Single Crochet
- dc – Double Crochet
- sl st – Slip Stitch
- st – Stitch(es)
- BLO – Back Loop Only
Special Notes
- Customizable Size:
- Adjust the number of rows for the ribbing based on your waist circumference.
- Add/remove rows for the top length and strap width/length.
- Strap Placement: Straps can be positioned to match your comfort and style (shoulders, racerback style).
- Tension Consistency: Ensure consistent tension when working ribbing for a polished look.
Pattern Instructions
Step 1: Ribbing Around the Waist
- Foundation:
- Create a slipknot and leave a 3–4″ yarn tail.
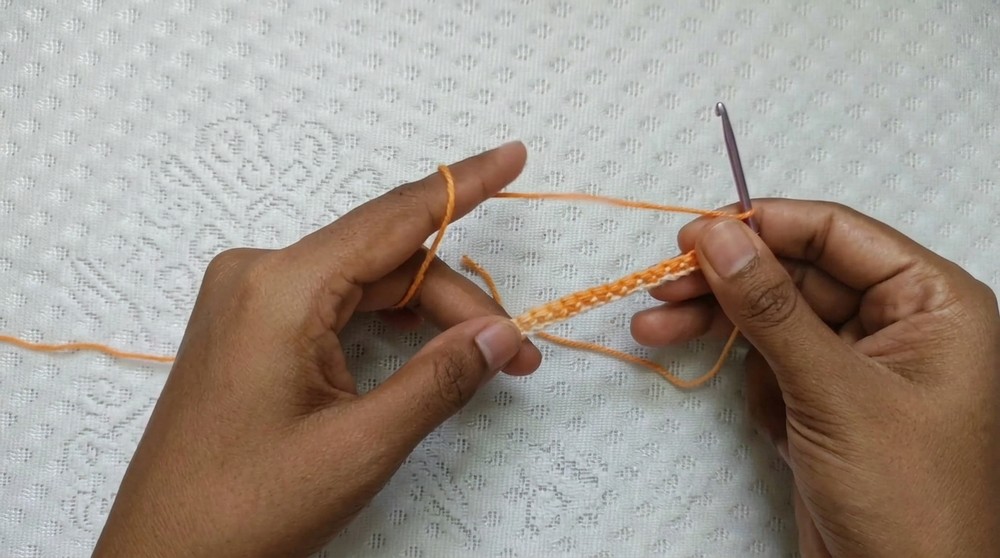
- Ch 18 (or adjust for desired height; taller ribbing requires more chains).
- This row determines the height of the waist ribbing.
- Create a slipknot and leave a 3–4″ yarn tail.
- Row 1:
- Skip the first chain.
- Sc in the second chain from the hook, and in each remaining chain (17 sc total).
- Ch 1, turn your work.
- Row 2:
- Begin BLO sc:
- Insert the hook into the back loop (not the full “v” stitch).
- Yarn over, pull through the back loop, yarn over again, and pull through both loops.
- Work BLO sc in every stitch across the row (17 sc total).
- Ch 1, turn your work.
- Begin BLO sc:
- Rows 3–172:
- Repeat Row 2 until you have completed 172 rows (or adjust based on your waist circumference).
- Check the ribbing by wrapping it around your waist; add or remove rows as needed.
- Joining Ends:
- Fold the ribbing in half with the wrong sides together.
- Sl st into each stitch across to connect both ends.
- This forms the ribbed waist portion of the top.

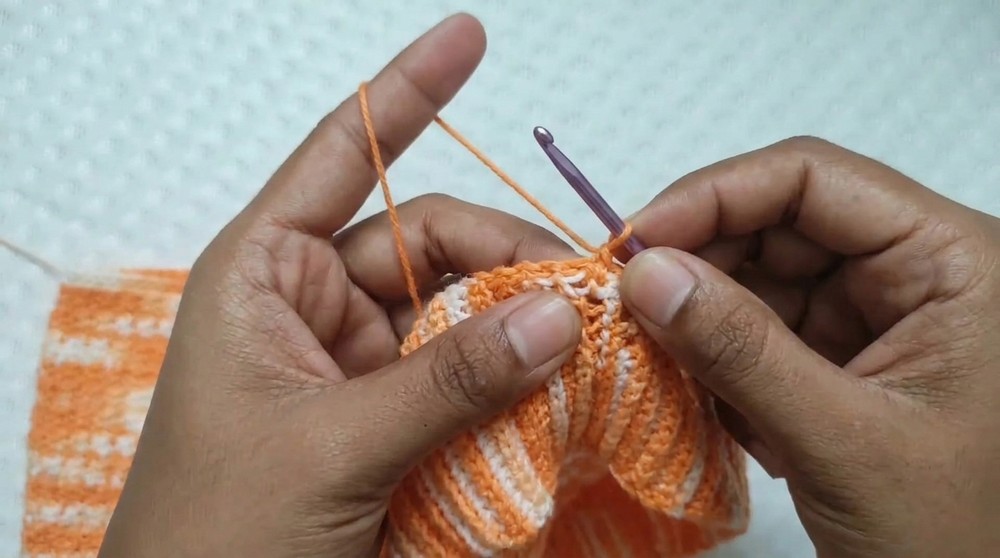
Step 2: Textured Body
- Foundation Row for Body (Single and Double Crochet Alternating Pattern):
- Once the ribbing is joined, ch 1.
- Observe the rows: The ribbing consists of alternating “ribbed rows” and “gaps.”
- Pattern Row:
- In the gap: Work a dc.
- In the ribbed row: Work an sc.
- Alternate dc and sc across, ending the row with an sc in the ribbed row.
- Ch 1, turn your work.
- Subsequent Rows:
- For the next row:
- Work sc into the dc of the previous row.
- Work dc into the sc of the previous row.
- Continue alternating stitches as established.
- For the next row:
- Length of Body:
- Working the alternating stitch pattern, complete 30 rows (or adjust the number of rows based on your chest size).
- You may use stitch markers to consistently track rows.
Step 3: Transition Rows
- Back Loop Sc Section:
- After completing the textured body, crochet 4 rows of BLO sc to create a smooth edge.
- Ch 1, turn after each row.
- Length Adjustments:
- If the top length is insufficient, add more rows in the middle or increase rows in the BLO sc section.
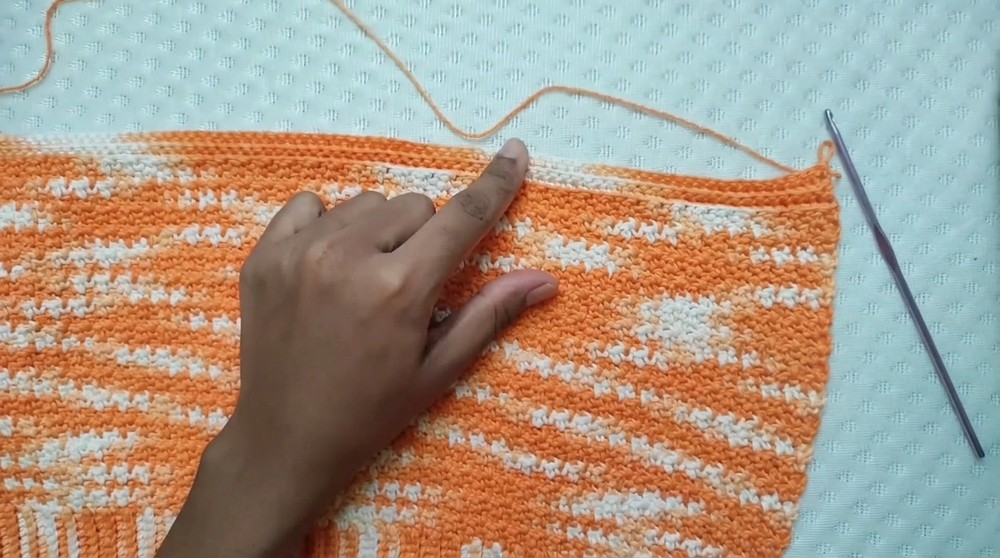
- If the top length is insufficient, add more rows in the middle or increase rows in the BLO sc section.
Step 4: Straps
- Create Straps:
- Make a slipknot, then ch 9 (adjust for desired width).
- Row 1: Start with sc in the second chain from the hook, and sc in each chain (8 sc total).
- Ch 1, turn your work.
- Repeat Sc Rows:
- Crochet sc in each stitch across.
- Ch 1, turn after every row.
- Continue until the strap reaches 32–35 cm (or preferred length).
- Positioning Straps:
- Use stitch markers to mark strap placement.
- Recommended: Place straps 22 stitches from the edge for a standard fit.
- Join Straps to Top:
- Work sl st across the marked stitches to attach the straps securely to the body of the top.
Step 5: Finishing
- Weave Ends:
- Thread remaining yarn tails onto a tapestry needle.
- Randomly sew thread into stitches, ensuring reinforcement.
- Pull the yarn snugly and trim any excess thread.
- Check Fit:
- Try on the top and ensure proper placement of straps, length adjustments, and secure finishes.
- Add embellishments (beads or stitch details) if desired.
Conclusion
Congratulations! You’ve successfully created a chic ribbed waist multicolor crochet top with versatile features. This wearable and elegant design is perfect to pair with casual or semi-formal outfits.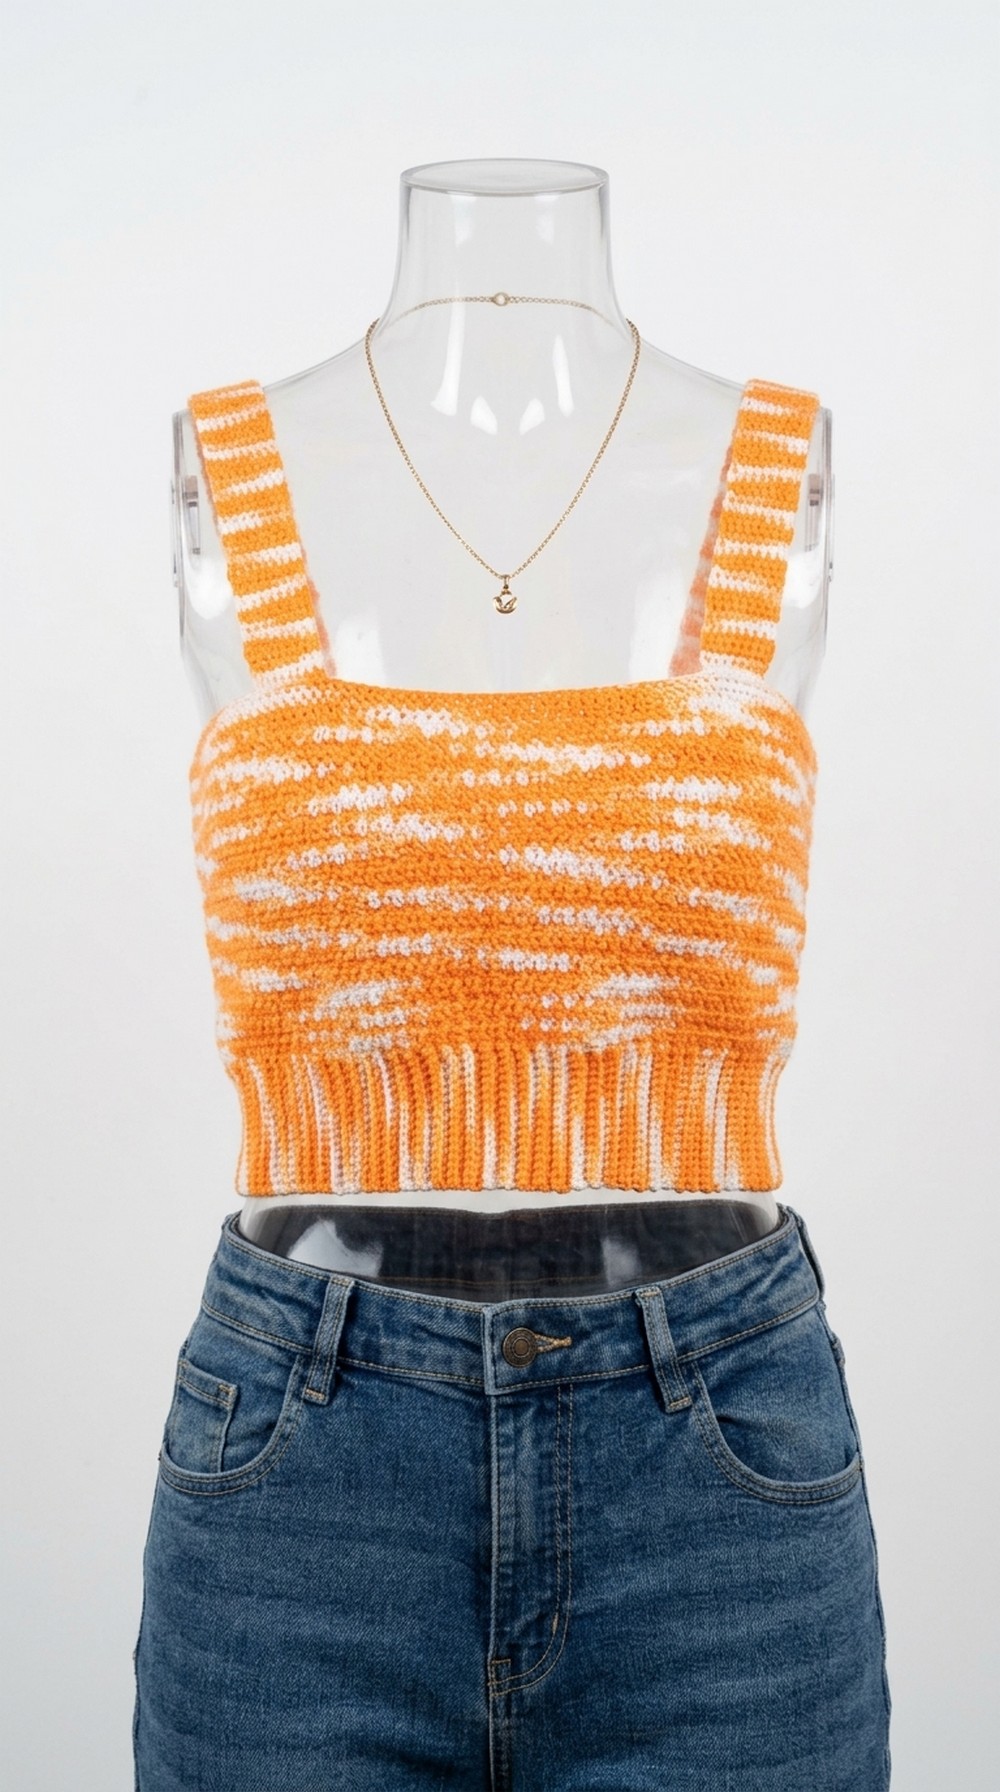
Tips for Success
- Count Stitches Consistently: Especially for the first few pattern rows to avoid losing or missing stitches.
- Custom Fit Adjustments:
- Experiment with strap placement and lengths.
- Ensure ribbing fits snugly around your waist to create a flattering silhouette.
- Experiment with Yarn: Try different yarn textures or colors for a unique appearance.
Pattern Corrections
- Ensure alternating dc/sc stitches align by checking the first stitch of each new row.
- If gaps or uneven ends appear, recount stitches per row to identify missed stitches.