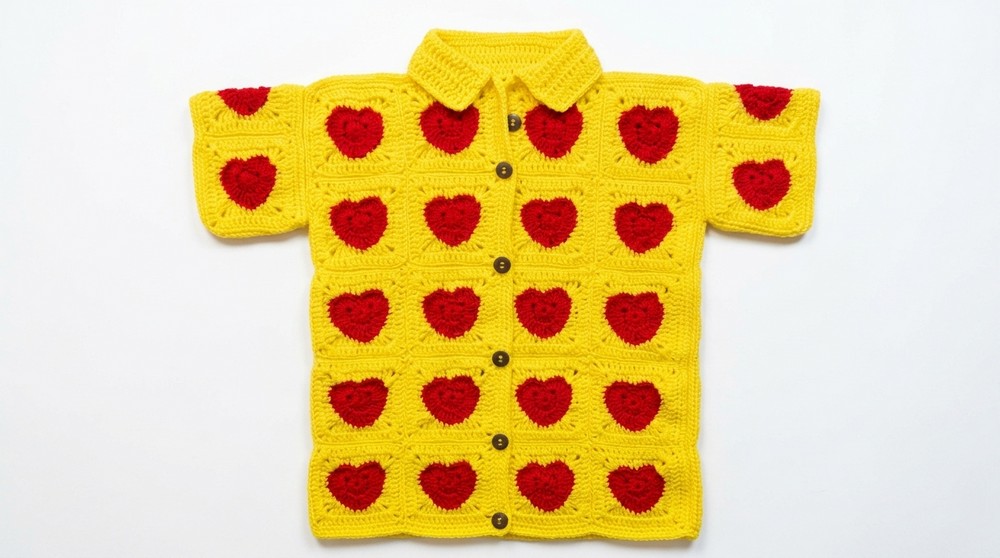
Stitch a chic crochet granny heart polo shirt using this beginner friendly pattern full of vibrant designs and timeless elegance.
Brighten Your Wardrobe with a Free Crochet Granny Heart Polo Shirt Pattern
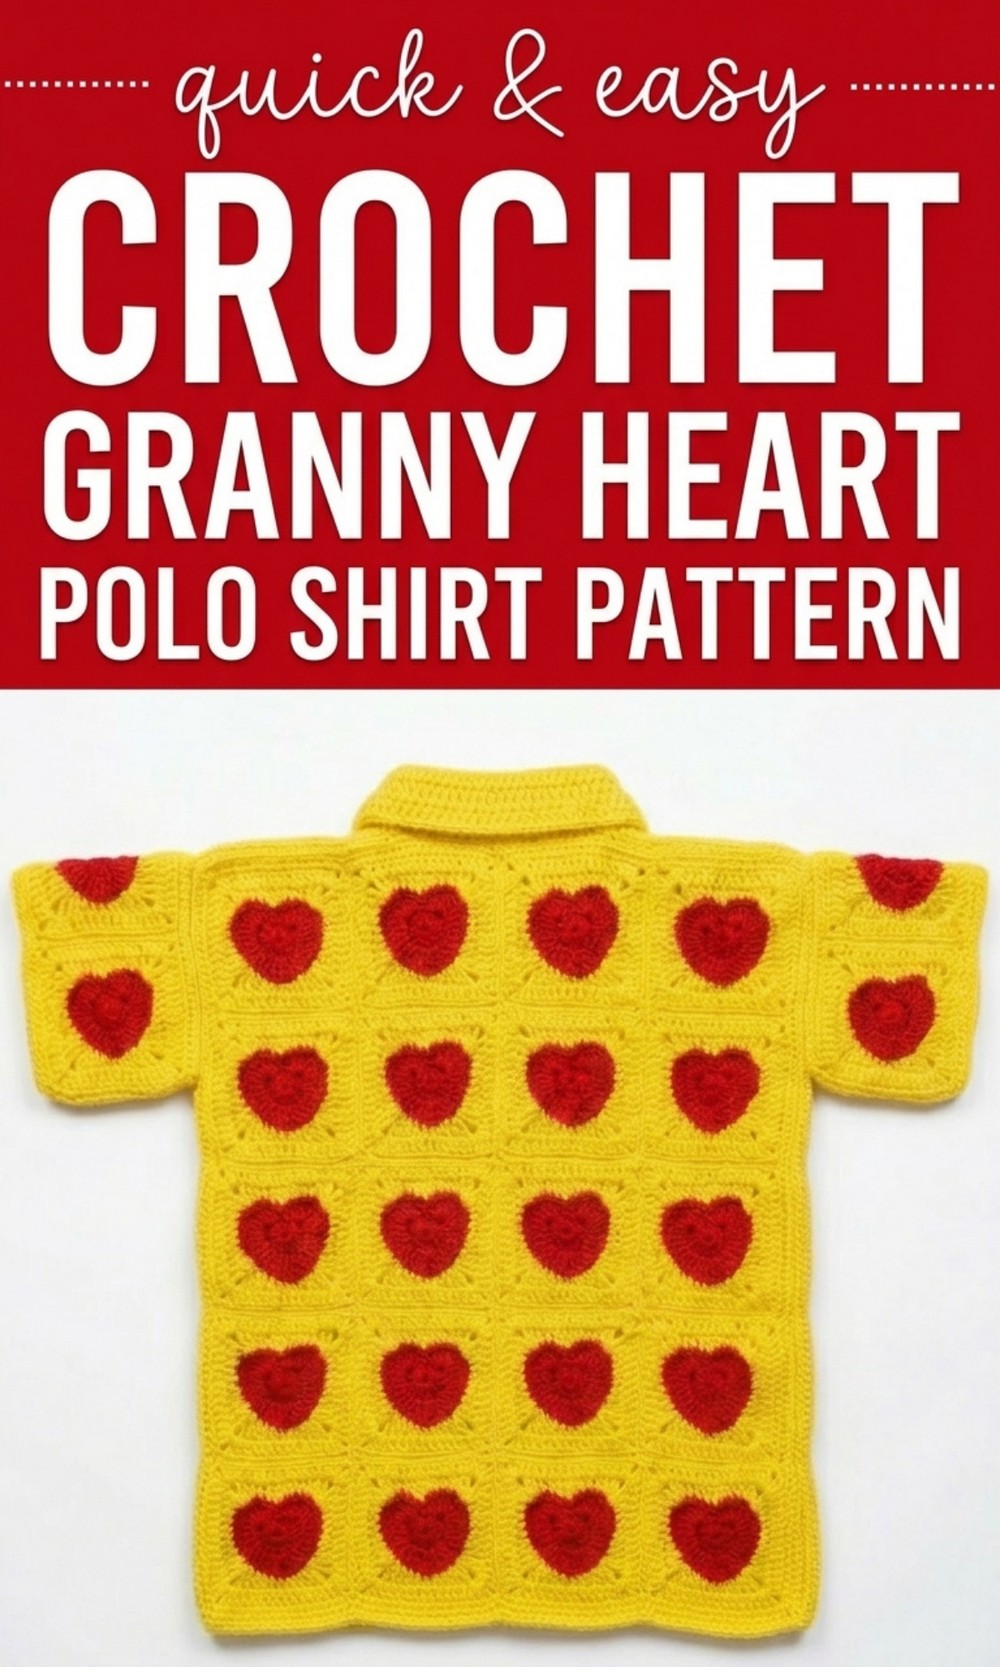
This design features colorful granny squares with charming heart patterns that make the shirt look bright and cheerful. It is lightweight, comfortable to wear, and fits perfectly for children aged 3 to 4 years. Made using red and yellow yarn (or any colors of your choice), this polo shirt is ideal for special occasions like Christmas or for daily use.
The pattern offers clear instructions that guide you step by step, making it achievable for anyone. The elegant design stands out with its unique heart details and neat finishing, giving it a timeless and stylish appearance. 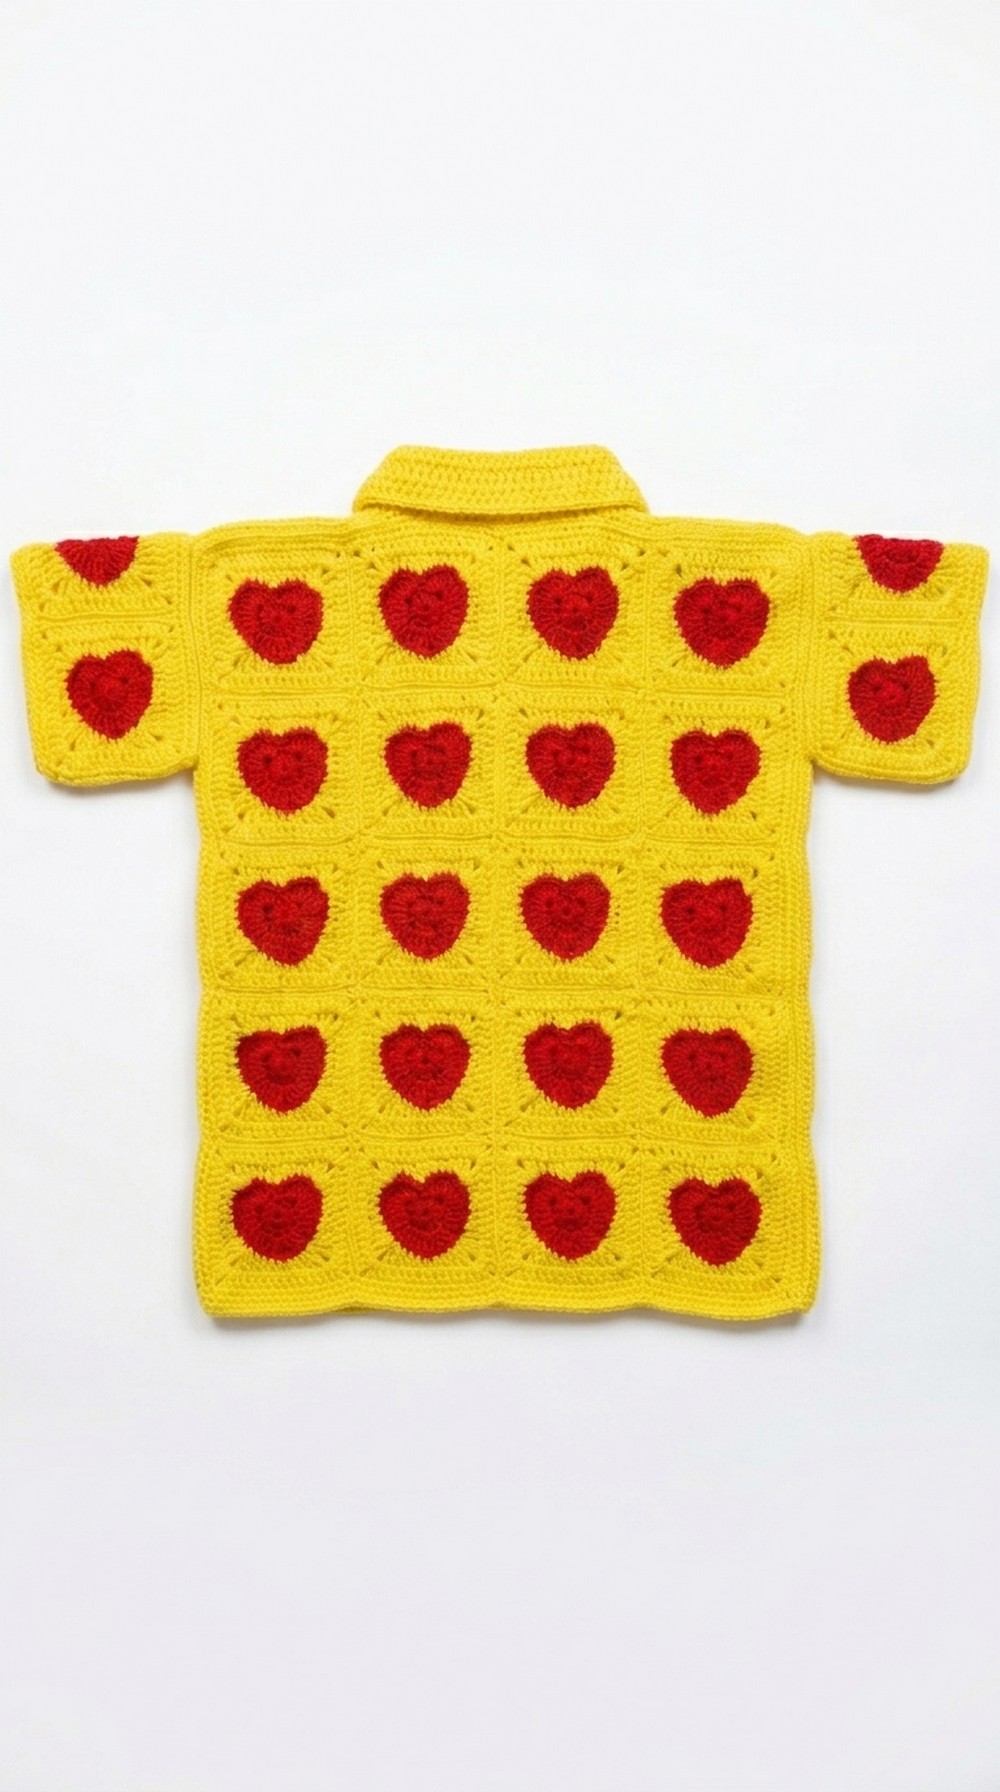 This Crochet Granny Heart Polo Shirt is not just beautiful but also functional, with buttons and a collar for added style. It’s a perfect gift or a fun clothing project to showcase your creativity.
Crochet Granny Heart Polo Shirt Pattern
Materials Needed
- Yarn: Two colors (e.g., yellow and red). Choose any yarn of your choice.
- Crochet Hook: Size 2.5 mm.
- Measuring Tape: For accurate dimensions.
- Stitch Markers: To mark key positions.
- Scissors: For cutting the yarn.
- Darning Needle: For weaving in ends.
- Buttons: Number matching your buttonholes.
Gauge
- Each granny square measures approximately 8 cm by 8 cm.
- To check your gauge, crochet one granny square and measure. Adjust your hook size if needed to match the dimensions.
Finished Size
- The shirt fits children aged 3 to 4 years. For customized sizing (length and width), adjust the number of granny squares accordingly.
Special Techniques
- Basic Granny Square: If you are unfamiliar with making granny squares, watch the earlier video (linked in the description) that shows how to create the square used in this shirt.
- Slip Stitch Join: Used for connecting panels.
- Buttonhole Creation: Instructions provided to suit your button size.
Pattern Instructions
Step 1: Prepare Granny Squares
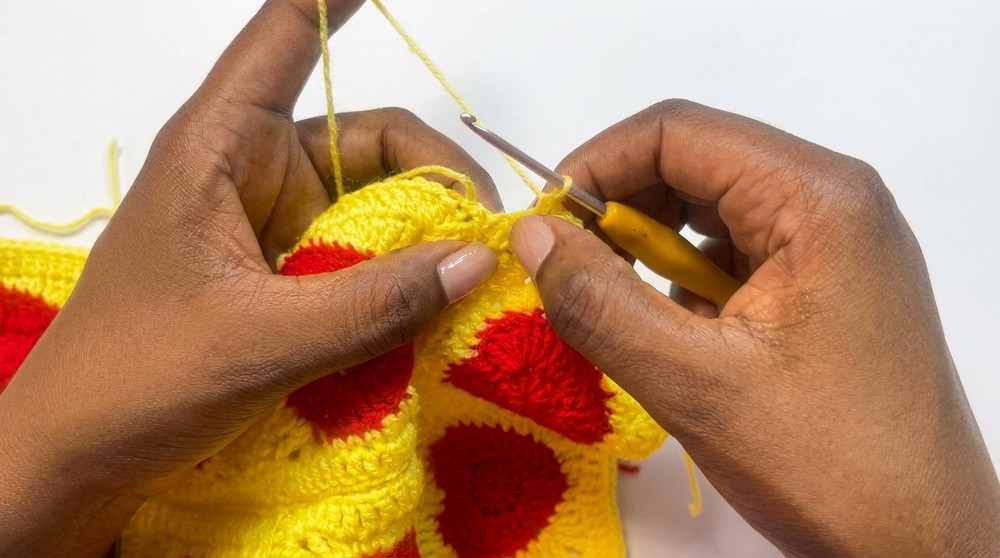
Make 41 granny squares, each measuring 8 cm. If you are unfamiliar with granny squares, reference the earlier tutorial mentioned in the video. Ensure consistent tension and size.
Step 2: Assembling Front and Back Panels
- Use 2 squares for the front and 2 squares for the back.
- Place the squares with the right sides facing each other. The pattern’s heart shape must point upward.
- Locate the 2 chains in each corner of the square when joining. Work only in the outside loops:
- Insert your hook into the first chain from the front square and then into the corresponding chain of the back square.
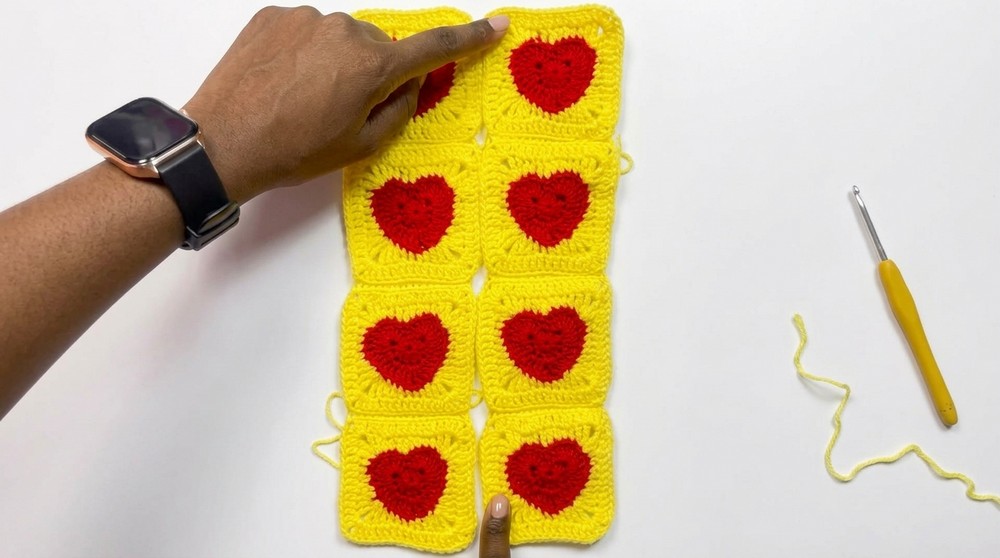
- Perform a slip stitch to join. Repeat for the entire edge.
- Insert your hook into the first chain from the front square and then into the corresponding chain of the back square.
- Continue adding squares row by row following the required dimensions.

Step 3: Sleeves
- Three granny squares are used for each sleeve.
- Connect them similarly using the slip stitch method.
- Add two rounds of single crochets around the sleeve edges for a neat finish.
Step 4: Joining Sleeves
- Lay the completed front and back pieces flat.
- Position the sleeves on top, aligning the middle of the sleeve with the shoulder seam.
- Use the slip stitch technique to attach the sleeves.
- Ensure all hearts face the correct upward direction before fastening the yarn.
Step 5: Joining Side Seams
- Fold the panels and sleeves to shape the shirt.
- Begin slip stitching under the sleeve and down the sides of the shirt.
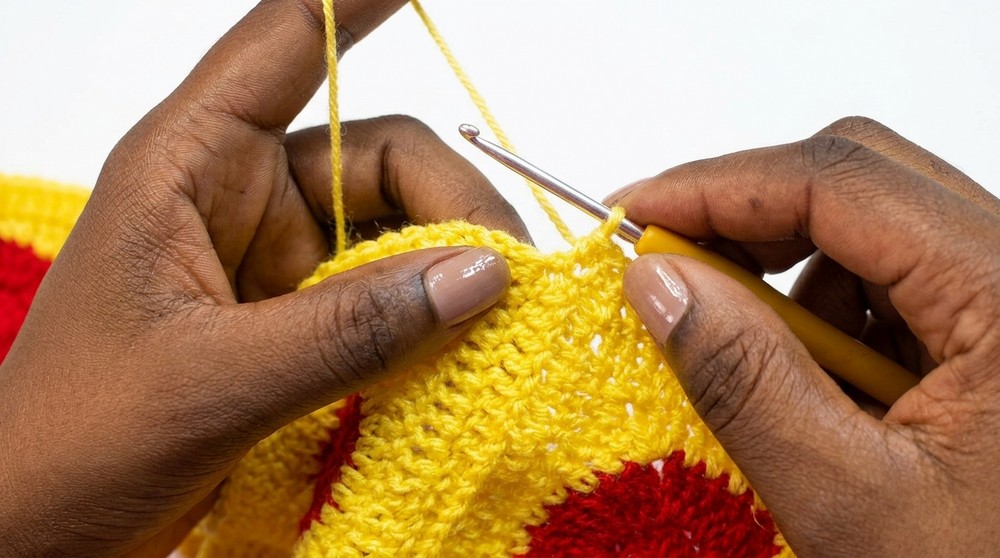
Step 6: Adding a Collar
- Count and mark 7 stitches on both sides of the neckline.
- Attach your yarn and chain 3 to begin the row, representing the first double crochet.
- Work double crochets around the neckline:
- In the first row, make an increase in the corner stitches (i.e., 2 double crochets in the same stitch).
- Continue for four rounds, increasing in each corner.
- Stop increasing in the 5th round for a smoother edge.
- The color rounds should total 6 cm when finished.
- Fasten off and weave in ends.
Step 7: Buttonholes
- Work a row of single crochets along the button panel.
- In the second row, create buttonholes:
- Chain 2 and skip a stitch where you want your buttonhole. Continue single crochets in other stitches.
- Ensure buttonholes align with buttons.
Step 8: Finishing Touches
- Sew buttons onto the opposite panel using a tapestry needle and yarn.
- Add any decorative touches or lining if needed.
- Weave in all loose ends to give the shirt a polished finish.
Tips for Customization
- Color Combinations: Experiment with different colors to suit personal preferences.
- Sizing Adjustments: Add or subtract granny squares to change the width or length of the shirt.
- Decorative Edging: Add a picot or scalloped edging for an elegant touch.
- Seasonal Theming: Use Christmas colored yarns or pastel shades for spring themed clothing.
Conclusion
This granny square baby shirt is a perfect blend of tradition and creativity. Its customizable design allows you to craft a unique, thoughtful gift for a child or a stylish addition to their wardrobe. Simple techniques like slip stitch joining and buttonholes make it suitable for beginners while still offering room for personal creativity. Complete your matching set with the upcoming tutorial on crocheting shorts for the shirt.